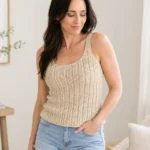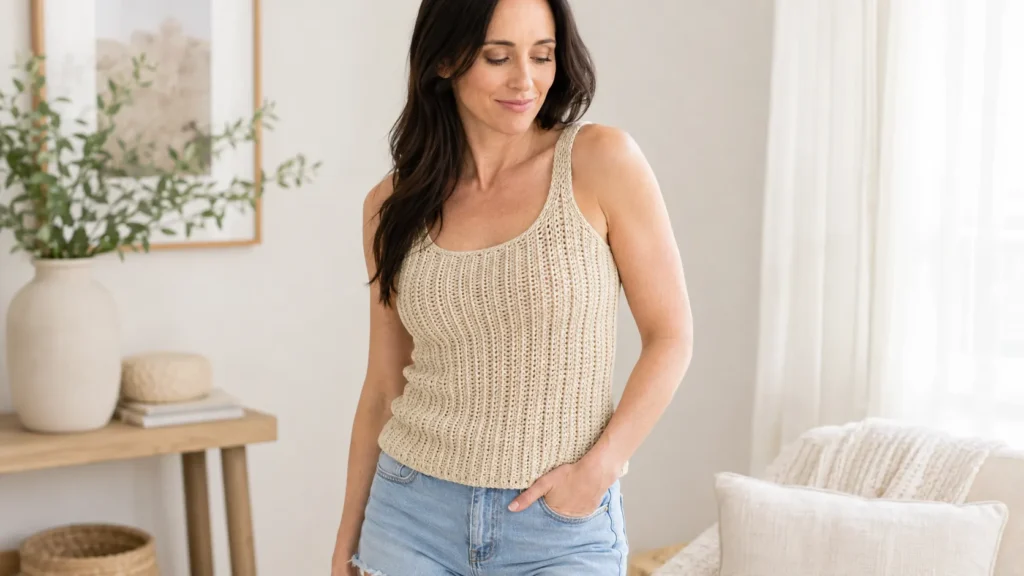
A crochet summer top is one of the best first wearables because the shape can be very simple while the result still feels useful, pretty, and handmade. Instead of jumping into complicated sleeve shaping or fitted sweater math, this beginner-friendly version uses a rectangle-style construction: crochet one long body piece, seam it into a tube, add straps, and finish the edges.
The reference tutorial selected for this article uses a simple tank top “recipe” and includes photo progress shots showing the rectangle, tube construction, straps, strap edging, and final finishing. This new article does not copy that pattern. It uses the same beginner teaching concept as visual inspiration, but the wording, structure, sizing guidance, image prompts, and summer cotton styling are original.
This tutorial is ideal if you already know how to chain, work half double crochet, single crochet, and slip stitch. You will learn how to turn simple rows into a wearable crochet summer top with wide straps and a clean handmade finish.
What You’ll Learn
- How to choose yarn for a breathable crochet summer top.
- How to make a simple rectangle body piece.
- How to check the rectangle width before seaming.
- How to seam the rectangle into a tube.
- How to add chain straps.
- How to widen straps with single crochet.
- How to finish the top edge with slip stitches.
- How to add a simple bottom hem.
- How to customize the length, fit, strap width, and edging.
Materials You’ll Need
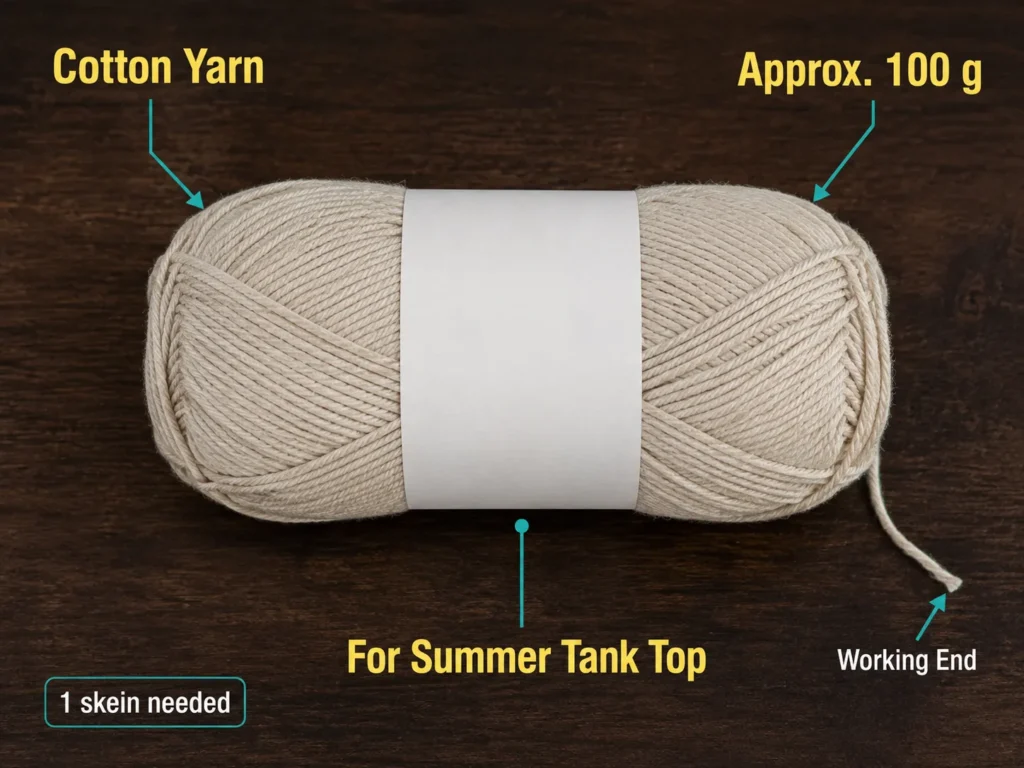
For a true summer version, choose a soft cotton, cotton-bamboo, or cotton-blend yarn. The selected reference source used a light #3 yarn and a 5.0 mm crochet hook, and it also notes that the design could work in a nice light cotton. The Craft Yarn Council’s yarn weight system is useful for checking yarn thickness when substituting yarn.
You will need:
- DK/lightweight cotton or cotton-blend yarn.
- 4.5 mm–5.0 mm crochet hook.
- Scissors.
- Yarn needle or tapestry needle.
- Stitch markers.
- Measuring tape.
- Blocking mat or clean towel.
- Rust-proof pins, optional.
- A notebook or row counter.
Crochet Abbreviations Used
This tutorial uses US crochet terms.
- ch = chain
- sc = single crochet
- hdc = half double crochet
- dc = double crochet
- sl st = slip stitch
- st/sts = stitch/stitches
- rep = repeat
- FLO = front loop only
US and UK crochet terms can differ; for example, the Craft Yarn Council lists US single crochet as UK double crochet, and US double crochet as UK treble crochet.
Before You Start
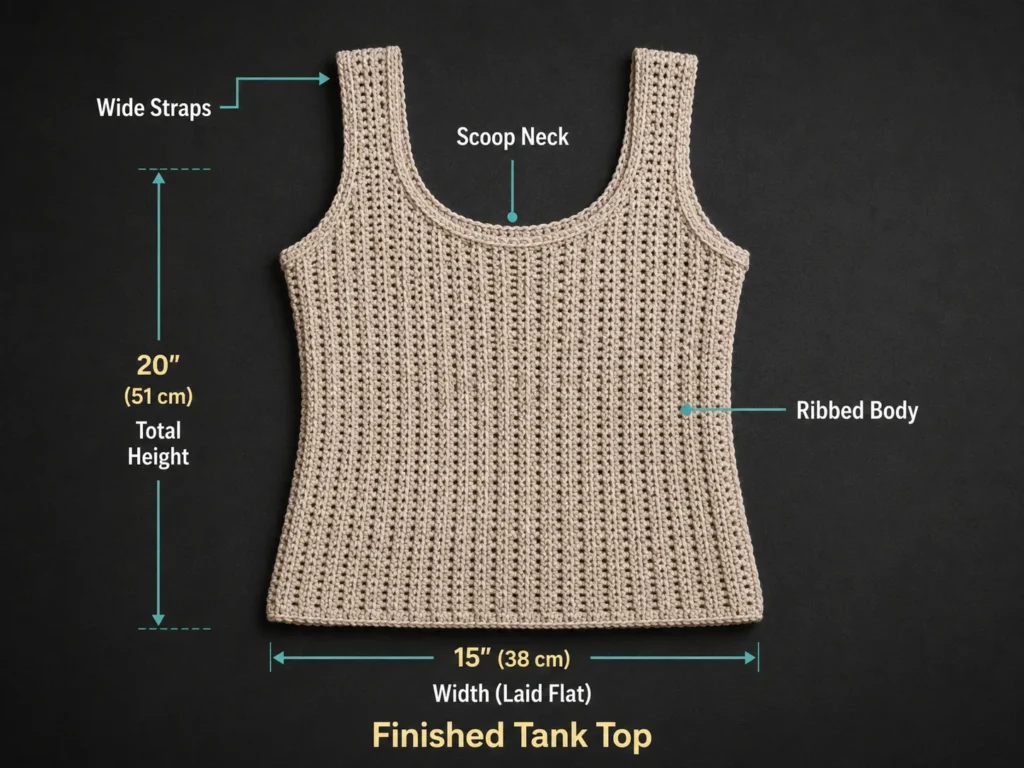
This summer top is made to fit your body rather than locked into one exact size chart. The body begins as one long rectangle. The starting chain controls the length of your top, while the number of rows controls the width around your body.
Before starting the actual top, make a small practice swatch. Lion Brand’s gauge guidance recommends making a swatch in the stitch pattern of the project and measuring stitches and rows over a given area. Gauge is especially helpful for wearables because a small difference in tension can become a big difference across the body.
For a beginner-friendly summer top, aim for fabric that is firm enough for coverage but not so tight that it feels stiff. Cotton yarn does not always bounce back like wool, so relaxed tension and a comfortable fit matter.
Step-by-Step Crochet Tutorial
Step 1: Make the Foundation Chain
Start with a foundation chain that equals the length you want your top to be from the upper chest area to the lower hem. For a cropped summer top, make a shorter chain. For a full-length tank, make a longer chain.
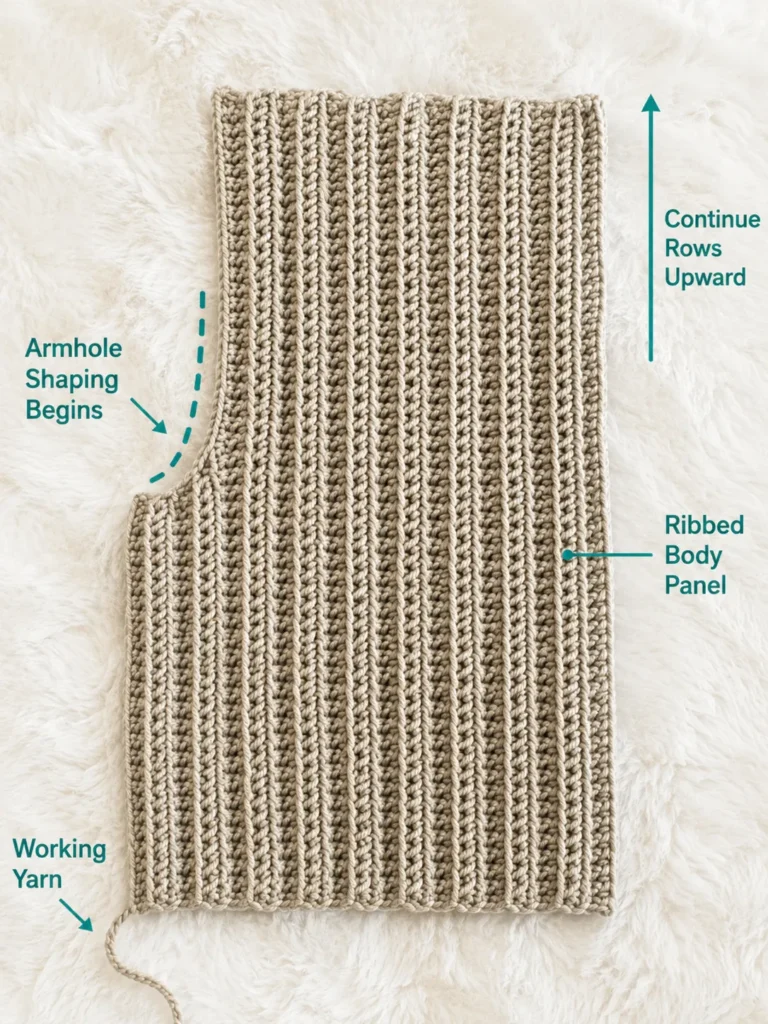
Work the first row in half double crochet. Then turn and continue with half double crochet through the front loop only. Working into one loop creates the ribbed texture that gives this simple top more visual interest.
Beginner tip: Keep the foundation chain loose. A tight starting chain can make one edge shorter than the rest of the rectangle.
Common mistake to avoid: Do not confuse top length with top width. In this construction, the chain is the length of the top, not the circumference.
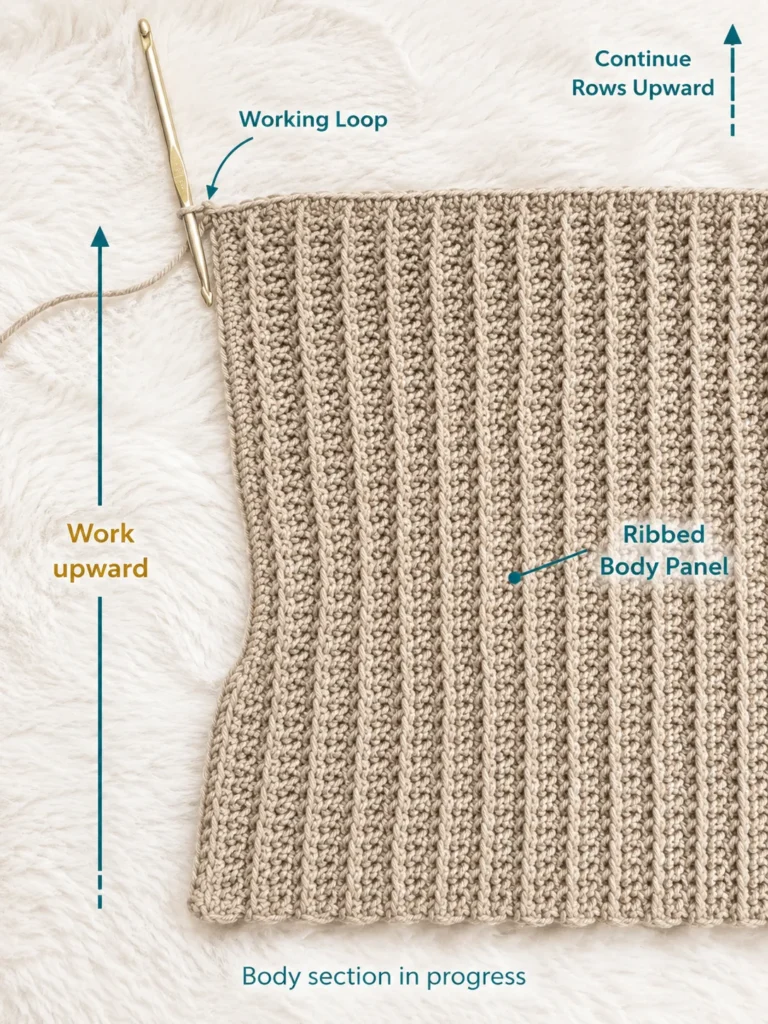
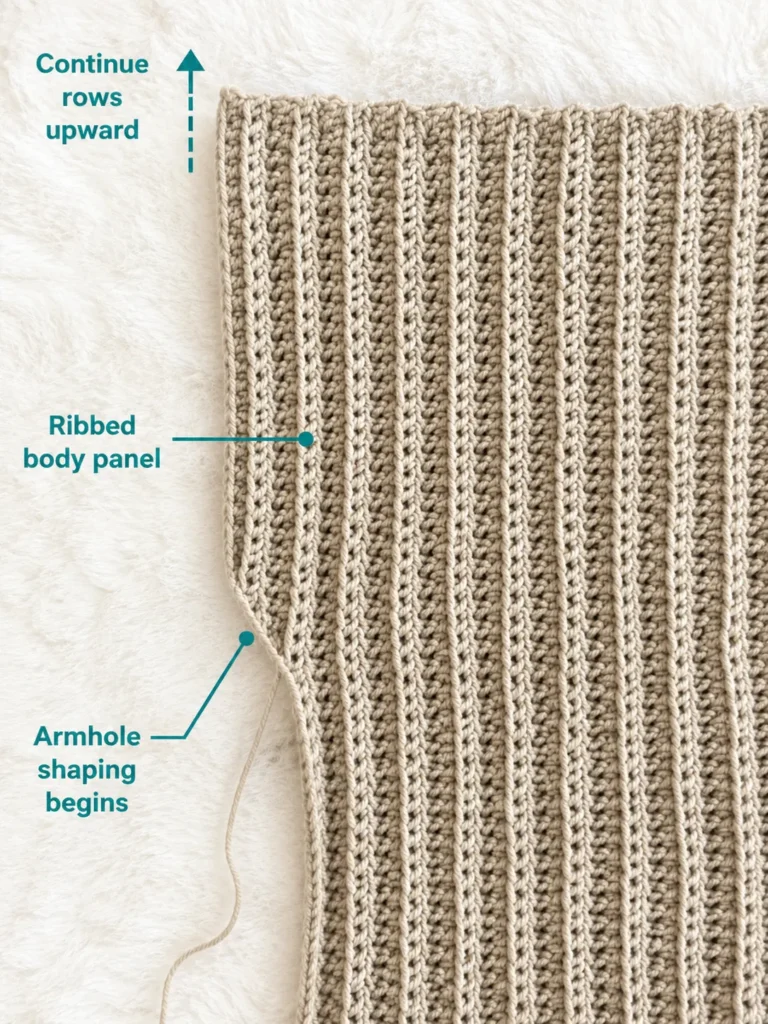
Step 2: Crochet the Long Rectangle
Continue working rows until the rectangle wraps around your body with the amount of ease you want. Hold the rectangle around your bust area as you go. It should meet comfortably at the back without stretching too hard.
If you want a fitted tank, stop when the rectangle meets snugly. If you want a relaxed summer fit, add extra rows before seaming.
Beginner tip: Count your rows or mark every tenth row with a stitch marker. This makes it easier to repeat the project later.
Common mistake to avoid: Do not stretch the rectangle aggressively when checking fit. Let the fabric sit naturally.
Step 3: Check the Fit Before Seaming
Before fastening off or seaming, wrap the rectangle around your body. The top edge should sit where you want the neckline to begin. The lower edge should land where you want the hem.
Check three areas:
- Does it cover the bust comfortably?
- Does it feel too tight under the arms?
- Is the length right after adding a bottom edge?
If the rectangle is too narrow, add more rows. If it is too wide, remove a few rows before seaming.
Beginner tip: Wear the bra or underlayer you plan to wear with the top while checking fit.
Common mistake to avoid: Do not skip the fitting stage. This is the easiest moment to adjust the size.
Step 4: Seam the Rectangle Into a Tube
Fold the rectangle so the two short ends meet. Use a yarn needle and matching yarn to seam the ends together. This creates a tube shape, like a simple strapless top before the straps are added.
The selected source also uses this tube-style construction after the rectangle is complete. Keep your seam neat but not too tight.
Beginner tip: Match row ends carefully so the ribbed lines stay straight across the seam.
Common mistake to avoid: A tight seam can create puckering. Use relaxed, even stitches.
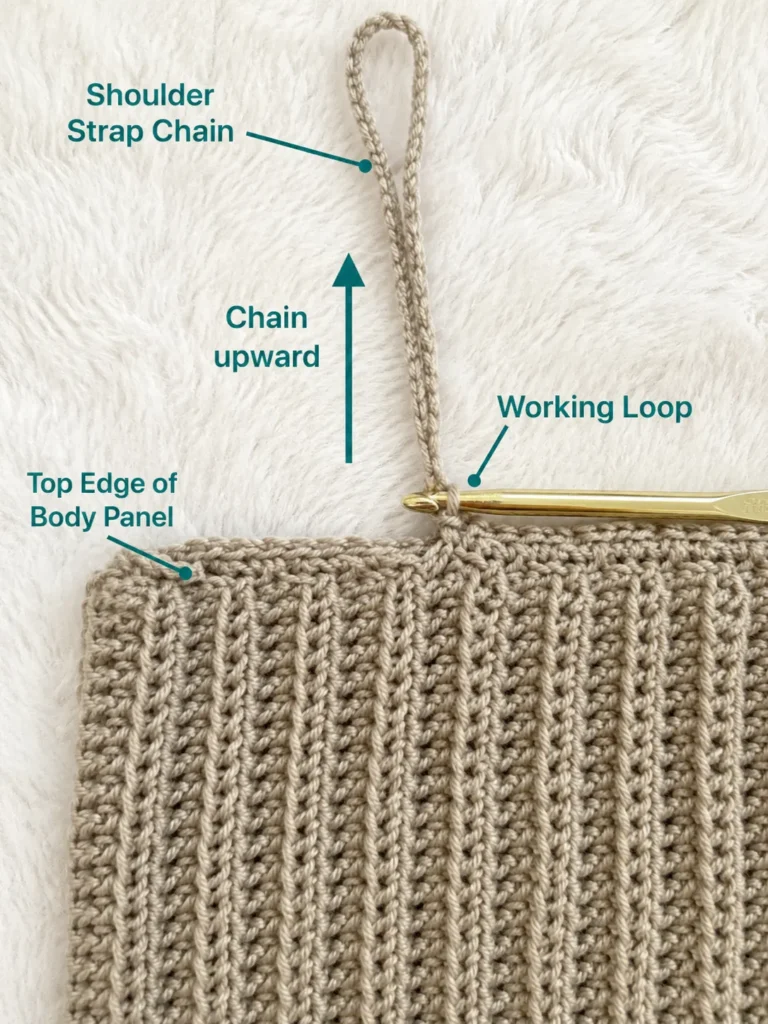
Step 5: Add the First Strap Chain
Put the tube on carefully or lay it flat and mark the front and back strap positions. Join yarn at the front upper edge, chain long enough to reach the back, and attach the chain to the back edge with a slip stitch.
Repeat this on the other side after you are happy with the strap length.
Beginner tip: Use stitch markers or safety pins to test strap placement before making it permanent.
Common mistake to avoid: Straps that are too long will make the top sit too low. Straps that are too short will pull the top upward.
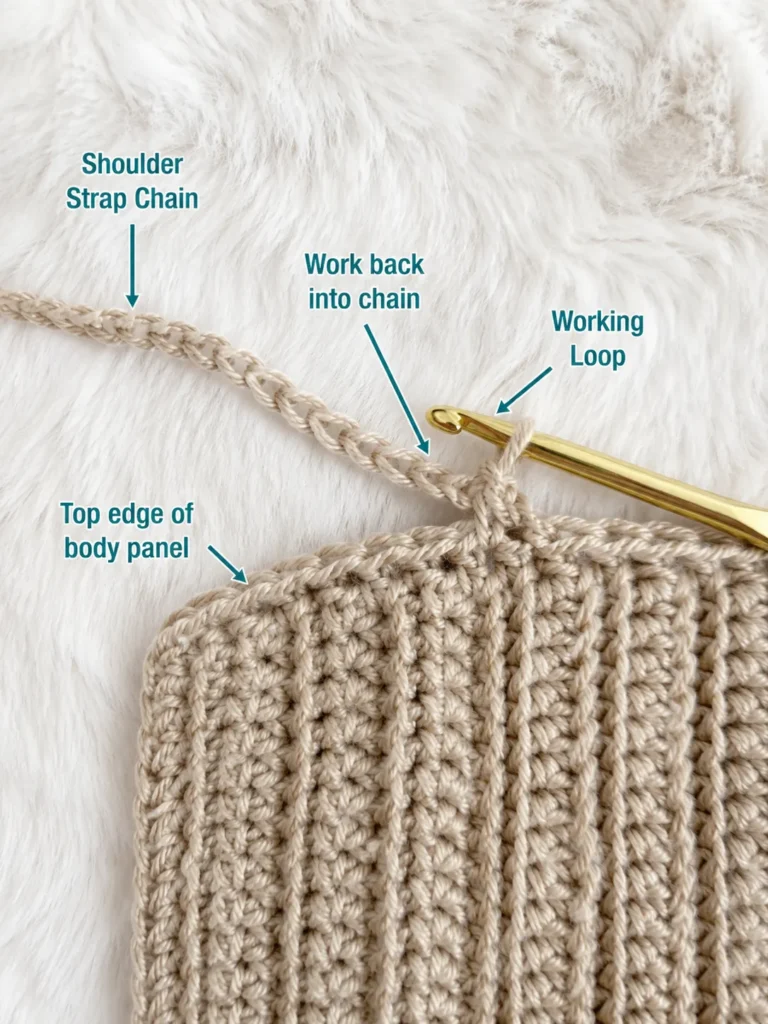
Step 6: Widen the Strap With Single Crochet
A plain chain strap is usually too thin for a comfortable summer top. Work single crochet stitches around the chain and along the top edge. Continue around as needed until the strap feels wide enough.
Wide straps are more comfortable and make the top easier to wear with regular undergarments.
Beginner tip: Work evenly around the chain so the strap does not twist.
Common mistake to avoid: Too many stitches around the strap can make it ripple. Too few can make it pull tight.
Step 7: Finish the Top Edge With Slip Stitch
After the straps are wide enough, add a clean slip stitch round along the top edge. This gives the edge a firmer, polished finish and helps the neckline look less raw.
Work slowly and keep the slip stitches loose. Slip stitch edging can easily become too tight if you pull hard.
Beginner tip: If the top edge starts shrinking inward, your slip stitches are too tight.
Common mistake to avoid: Do not skip stitches randomly around curves or straps. Keep the spacing smooth.
Step 8: Add a Simple Bottom Edging
Join yarn at the center back or side seam near the lower edge. Work one round of double crochet or single crochet evenly around the bottom. A double crochet border adds a little length and a soft finish. A single crochet border gives a firmer, simpler edge.
Try the top on before deciding whether to add more rounds.
Beginner tip: If the hem curls, add a simple single crochet round and block lightly.
Common mistake to avoid: Do not add too many stitches around the hem, or it may flare.
Pattern Notes or Stitch Notes
The main body is a rectangle, so the construction is forgiving. The foundation chain determines the top length, while the number of rows determines the body width.
Use the same stitch count across every row to keep the rectangle straight. If the sides lean inward, you may be skipping the last stitch. If the rectangle widens, you may be adding extra stitches into the turning chain.
For the ribbed look, work half double crochet through the front loop only. If you prefer a smoother fabric, work regular half double crochet instead.
For the top edge, single crochet adds structure. Slip stitch gives a polished finish but should stay loose enough to avoid pulling.
For sizing, check fit before seaming and again before finishing the straps. Crochet wearables are much easier to adjust before all ends are woven in.
Common Beginner Mistakes
- Making the foundation chain too tight: Use a larger hook for the chain if needed.
- Forgetting that the chain is the length: In this construction, rows build the width around the body.
- Not checking fit before seaming: The rectangle stage is the easiest time to adjust.
- Uneven seaming: Match row ends carefully before sewing.
- Straps too long: Pin them first and try the top on.
- Slip stitch edge too tight: Keep slip stitches relaxed.
- Skipping blocking: Blocking helps stitches settle and improves shape and drape. The Craft Yarn Council explains blocking as a way to help stitches settle and create the shape and drape you want.
How to Customize This Crochet Project
You can make this project cropped, waist-length, or full length by changing the starting chain. For a beachy summer look, keep it cropped and pair it with high-waisted shorts. For more coverage, make the starting chain longer.
You can change the yarn too. Cotton gives a crisp summer feel. Cotton-bamboo adds drape. A cotton-acrylic blend may feel lighter and slightly stretchier.
For color, try oatmeal, cream, sage, sky blue, soft peach, white, sand, or light lilac. Solid colors show off the ribbed texture best.
For strap options, make the straps wider with extra rounds of single crochet, or make them thinner for a camisole look. For more support, keep them wide.
For edging, choose a plain single crochet hem, double crochet hem, or tiny picot edge. Beginners should start with single crochet or double crochet before trying decorative edging.
Finishing Instructions
Fasten off and leave tails long enough to weave in securely. Use a yarn needle to weave each end through nearby stitches. Change direction once or twice so the ends stay hidden.
Lay the top flat and smooth the straps, side seam, neckline, and hem. If your yarn label allows, lightly block the top on a clean towel or blocking mat. Avoid stretching cotton too aggressively because it can grow when wet.
Quick Printable-Style Summary
- Skill level: Beginner to advanced beginner
- Project type: Crochet summer tank top
- Construction: One rectangle seamed into a tube, straps added afterward
- Yarn: DK/lightweight cotton or cotton-blend yarn
- Hook: 4.5 mm–5.0 mm
- Main stitches: Chain, half double crochet, half double crochet front loop only, single crochet, slip stitch, double crochet
- Starting method: Foundation chain equals top length
- Repeat: Work hdc FLO rows until rectangle fits around body
- Finishing: Seam into tube, add straps, work edging, weave ends, block lightly
FAQ
Is this crochet summer top good for beginners?
Yes. This is a strong beginner wearable because the main body is a rectangle. The shaping comes from seaming and straps rather than complicated increases or decreases.
What yarn should I use for a crochet summer top?
Use cotton, cotton-bamboo, or a soft cotton-blend yarn. These fibers are usually more comfortable for warm-weather garments than heavy wool.
Can I make this top without a gauge swatch?
You can, but a swatch is recommended. Gauge affects the size of wearables, especially when the whole top depends on a rectangle fitting around your body.
How do I make the top longer?
Make a longer starting chain. In this construction, the foundation chain controls the vertical length of the top.
How do I make the top wider?
Add more rows before seaming the rectangle into a tube. The row count controls the body width.
Can I make the straps wider?
Yes. Work extra rounds of single crochet around each strap until the strap feels comfortable.
Why is my top edge pulling inward?
Your edging is probably too tight. Use looser slip stitches or switch to single crochet for a softer edge.
Conclusion
A crochet summer top does not need to be complicated. With one rectangle, simple seaming, wide straps, and clean edging, you can make a wearable handmade top that feels approachable even as a beginner. Once you understand this construction, you can adjust the length, width, straps, color, and hem to create several different summer tops from the same basic idea.