A camera strap is one of those everyday accessories that you probably use without thinking much about it. But if you enjoy crochet, it is also a lovely place to add a little handmade personality.
This easy crochet camera strap pattern turns a plain camera strap into something softer-looking, more colorful, and completely personal. Instead of making a strap that depends entirely on crochet stitches to hold your camera, we’ll create a decorative sleeve that fits neatly over the wide section of your existing strap.
That’s particularly helpful if you’re new to crochet. You can concentrate on learning to make an even rectangle, keeping your stitch count consistent, and sewing a tidy seam without worrying about constructing weight-bearing hardware.
We’ll use smooth cotton yarn, a basic single crochet stitch, and a simple repeating pattern. No complicated shaping, granny squares, or advanced techniques are needed.
By the end, you’ll have a handmade camera accessory that you can customize with different colors, borders, and textures.
What You’ll Learn
In this beginner-friendly tutorial, you’ll learn how to:
- Measure your camera strap and calculate the right crochet width.
- Make an even foundation chain and work single crochet rows.
- Keep your stitches straight without accidentally increasing or decreasing.
- Create a long rectangular fabric strip that wraps around a camera strap.
- Check the fit, sew a neat back seam, and weave in the yarn ends.
- Customize the finished cover with colors, edging, and simple decorative details.
The best part is that you only need to become comfortable with one main stitch: single crochet.
Materials You’ll Need
Skill level: Confident beginner • Main stitch: Single crochet • Suggested hook: 4.0 mm
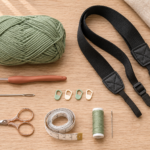
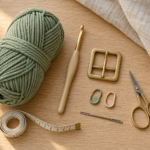
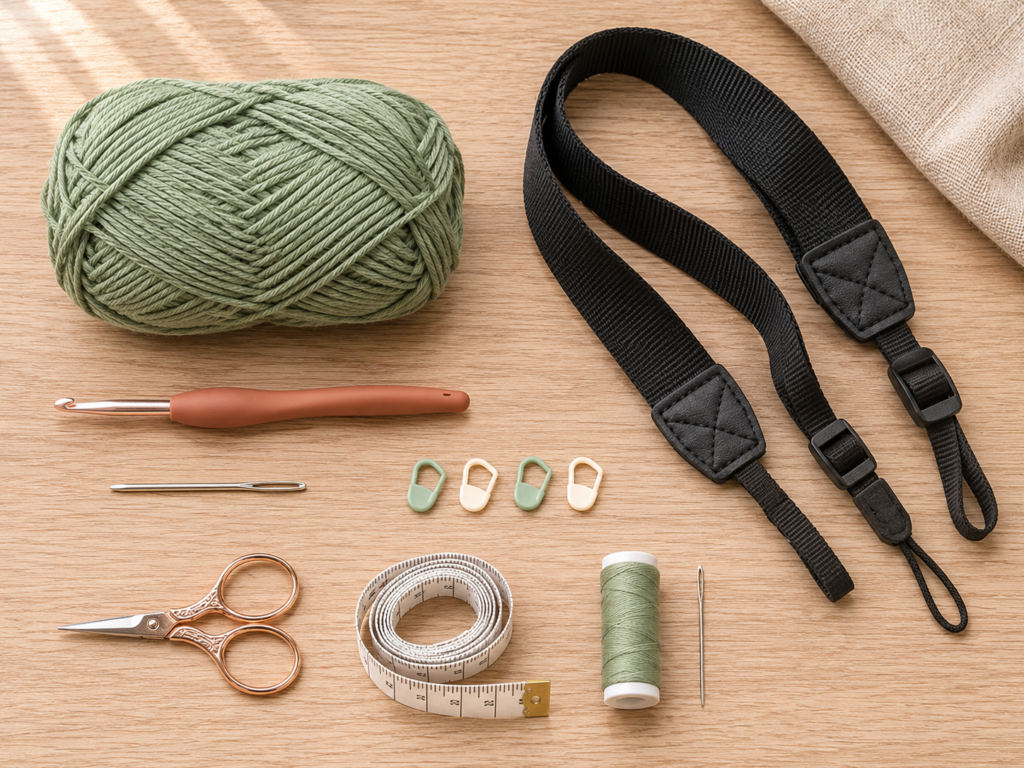
For this project, gather the following supplies:
| Material | Details |
|---|---|
| Cotton yarn | Approximately 80–130 yards (73–119 m) of medium-weight #4 cotton; amount varies with strap length and gauge |
| Crochet hook | 4.0 mm (US G/6) |
| Existing camera strap | A sound, properly fitted manufacturer-approved camera strap with intact connectors |
| Yarn needle | Blunt-tip needle suitable for weaving and seaming |
| Scissors | Small embroidery or craft scissors |
| Stitch markers | Two removable markers |
| Measuring tape | Flexible sewing measuring tape |
| Sewing clips | Optional, to hold the crochet sleeve in place |
| Cotton sewing thread | Optional, for non-load-bearing decorative securing stitches |
Cotton is a practical choice because it produces clearly defined stitches and has less spring than many wool or acrylic yarns. It also feels comfortable against clothing.
Look for smooth cotton rather than highly textured or fluffy yarn. A consistent yarn surface makes it easier to count your stitches and produce a tidy finish.
If you’re choosing between two yarns, work a small swatch with both. The yarn that produces a flexible but reasonably firm fabric is usually the better choice.
Consistency note: Use the original source’s materials-stage reference, but photograph the new dusty sage cotton and existing-strap supplies described above.
Midjourney prompt: Image 1, complete materials flat lay prompt in the Image Plan.
Alt text: Materials for a beginner crochet camera strap cover using cotton yarn and an existing camera strap.
Suggested image file name: crochet-camera-strap-pattern-materials.jpg
Crochet Abbreviations Used
This pattern uses US crochet terminology.
| Abbreviation | Meaning |
|---|---|
| ch | Chain |
| sc | Single crochet |
| sl st | Slip stitch |
| st / sts | Stitch / stitches |
| rep | Repeat |
| RS | Right side |
| WS | Wrong side |
US and UK crochet terms
If you learned to crochet using UK terminology, remember that a US single crochet is called a UK double crochet.
US single crochet (sc) = UK double crochet (dc).
The chain stitch and slip stitch are named the same way in both systems.
All row instructions in this article use US terms consistently.
Before You Start
A few measurements will save you a surprising amount of unraveling later.
1. Measure the padded section of your camera strap
Lay your existing strap flat and measure the broad portion that you want to cover.
Avoid measuring the narrow connector sections unless you specifically intend to cover them. Leave adjustment sliders, quick-release mechanisms, and camera attachment points unobstructed.
For an example, imagine your existing strap has a padded section measuring:
- 65 cm (25.6 inches) long
- 4 cm (1.6 inches) wide
Your crochet sleeve must be long enough to cover the 65 cm section and wide enough to wrap around the padded fabric.
2. Calculate the crochet rectangle width
A sleeve needs to cover both the front and back of the strap, plus its thickness and enough room to sew the two long edges together.
For our example, a fabric strip measuring approximately 9 cm wide is a reasonable starting point for a 4 cm strap.
You can calculate a starting width with:
Crochet width ≈ 2 × strap width + thickness allowance + seam allowance
For a 4 cm strap with a relatively thin padded section, that might mean approximately 9–10 cm of crochet fabric.
The exact measurement depends on the thickness of your strap and the fabric created by your hook and yarn. Test the fit before crocheting the entire length.
3. Make a small gauge swatch
Make a swatch approximately 10 cm wide and 10 cm tall using single crochet.
Measure how many stitches fit across 10 cm and how many rows fit into 10 cm.
For example, if your gauge is:
- 20 single crochet stitches = 10 cm
- 22 rows = 10 cm
Then 18 stitches would measure approximately 9 cm, and 143 rows would measure approximately 65 cm.
These are illustration measurements, not guaranteed results. Your tension and yarn may produce a different gauge.
4. Understand the stitch count
If you begin with chain 19 and work one single crochet into the second chain from your hook, then continue across, you will have 18 single crochet stitches.
Every row afterward must also contain 18 single crochet stitches.
Place stitch markers into the first and last stitch of a few early rows if you’re having trouble identifying the edges.
5. Avoid an overly tight fabric
You want the sleeve to sit smoothly around the strap without gathering it.
A very tight fabric can pull against the padding, while an overly loose fabric may twist or bunch up.
Your aim is a soft rectangle with moderate drape and enough stability to retain its shape.
Step-by-Step Crochet Camera Strap Tutorial
We’re going to crochet one long rectangle using single crochet, fit it around the existing camera strap, and finish the cover with a simple seam.
The example pattern begins with 18 single crochet stitches per row. Adjust this number after making your gauge swatch if your camera strap requires a different width.
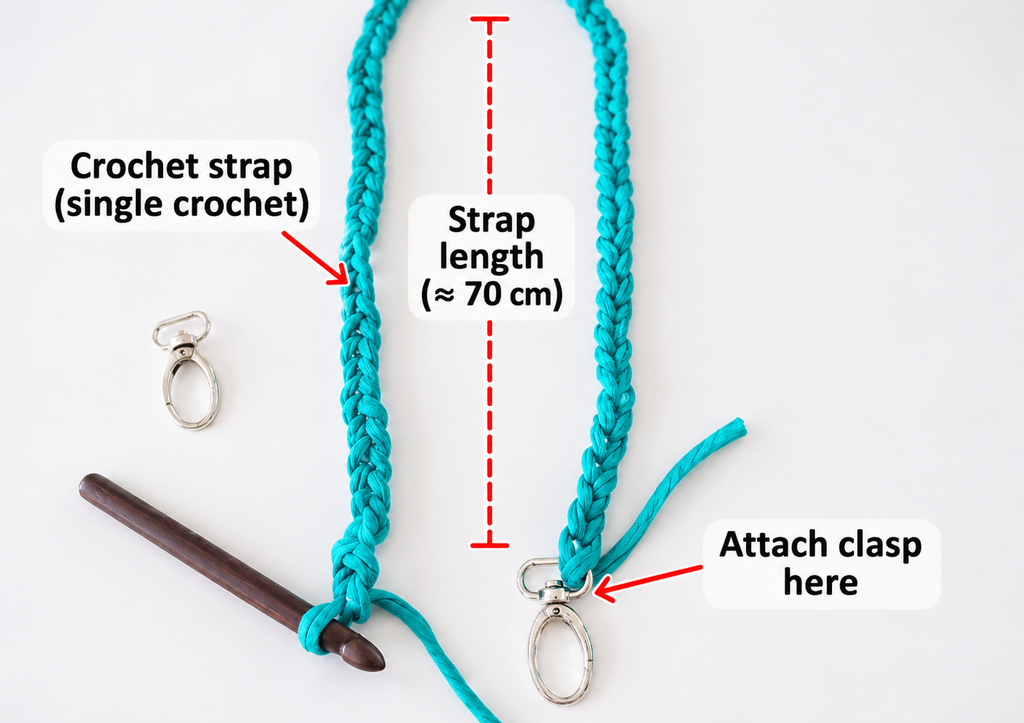
Step 1: Make the Foundation Chain
Start by making a slip knot and placing it onto your 4.0 mm crochet hook.
Hold the working yarn comfortably in your non-dominant hand and make a foundation chain.
For the example:
Foundation: Ch 19.
Try to keep your chains evenly sized. The hook should move through each loop without forcing it.
When your foundation chain is complete, lay it flat on the table.
You should be able to see the small V shapes running along the front of the chain.
Do not pull the chain tightly to make it look straight. A foundation chain that has been stretched during measurement may produce a narrower first row.
Beginner tip: If your chains are consistently tighter than your normal stitches, try a 4.5 mm hook for the foundation chain, then return to 4.0 mm for the rest of the project.
Common mistake to avoid: Counting the loop already sitting on your crochet hook as a chain stitch. That working loop is not included in the chain count.
Step 2: Crochet the First Row
Now turn the foundation chain into a strip of fabric.
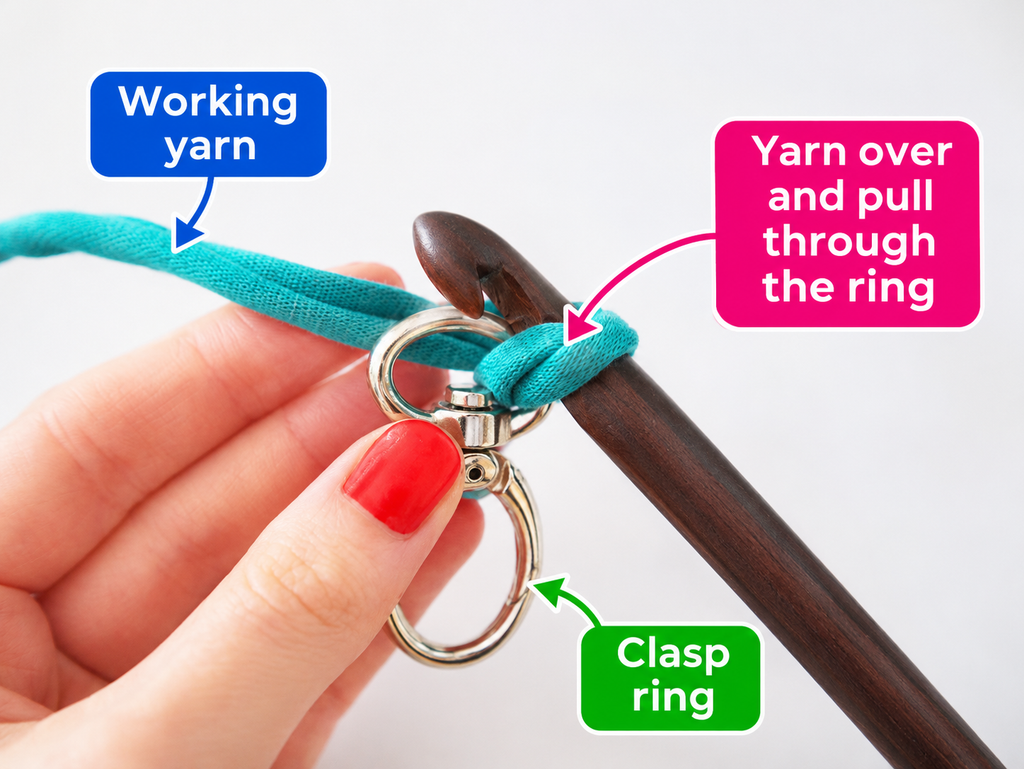
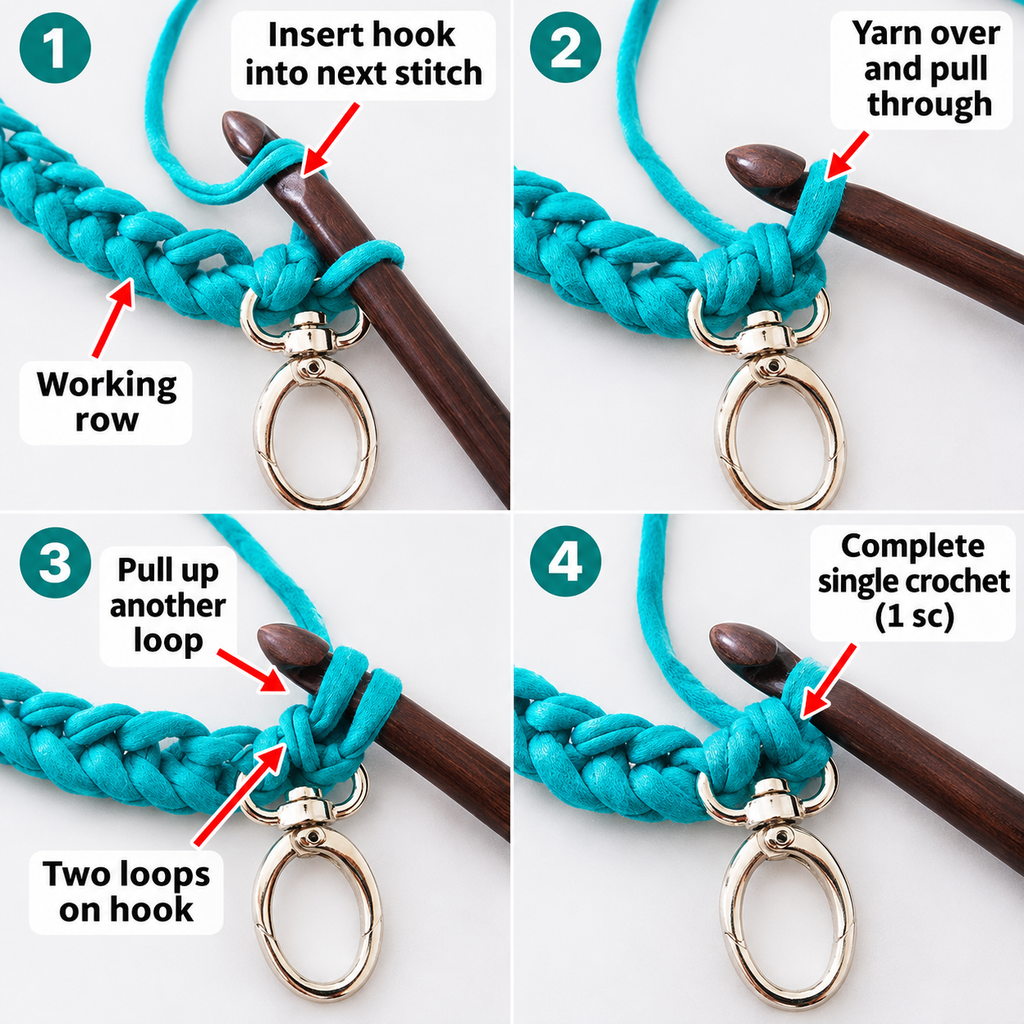
Insert your hook into the second chain from the hook.
Yarn over and pull up a loop. You should now have two loops on the hook.
Yarn over again and pull through both loops.
You’ve completed your first single crochet.
Continue making one single crochet into each remaining foundation chain until you reach the end.
Row 1: Sc in the second ch from the hook and in each ch across. (18 sc)
Count the stitches once before moving on.
If you count only 17, inspect the last chain because it is easy to miss.
If you count 19, you may have accidentally worked into the first chain immediately beside the hook or placed two stitches into one chain.
Beginner tip: Look at the top of every finished single crochet stitch. You should see a small V-shaped pair of loops.
Common mistake to avoid: Crocheting into only a loose strand of the chain by accident. Make sure your hook is inserted through the intended chain loop consistently.
Step 3: Turn and Work the Second Row
Once you’ve completed the first row, make one chain stitch.
Turn your work so the opposite side faces you.
The turning chain provides enough height to begin the next row. For this pattern, the turning chain does not count as a stitch.
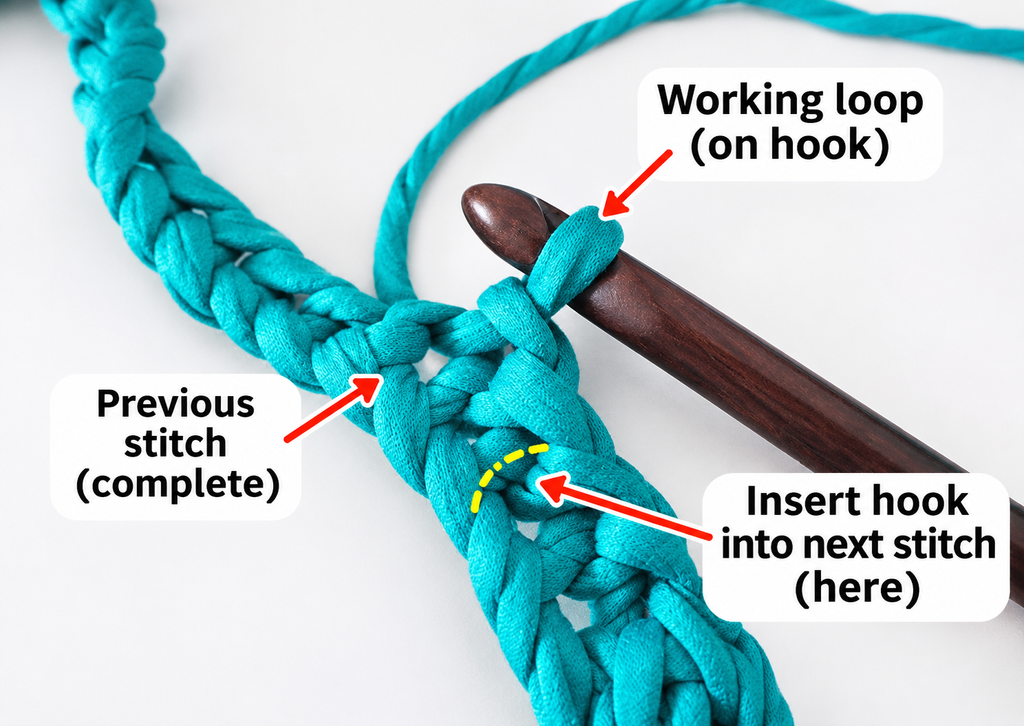
Insert the hook under both top loops of the first single crochet stitch.
Make one single crochet.
Continue across the entire row, making one single crochet in every stitch.
Row 2: Ch 1, turn, sc in each st across. (18 sc)
This second row establishes the texture that you’ll repeat throughout the strap cover.
Turn the fabric over and examine the surface. You should see tidy horizontal rows of compact stitches.
Single crochet is particularly useful for this project because it creates a relatively dense fabric without large decorative holes.
Beginner tip: When working the last stitch, look for the final V at the edge rather than inserting your hook into the turning chain.
Common mistake to avoid: Accidentally working the first stitch twice. This creates an increase and gradually makes your rectangle wider.
Step 4: Continue the Rectangle
Now comes the relaxing part.
Continue repeating Row 2, working one single crochet into every stitch until the rectangle reaches the desired length.
Rows 3 onward: Ch 1, turn, sc in each st across. (18 sc)
Continue for as many rows as needed to match the padded part of your camera strap.
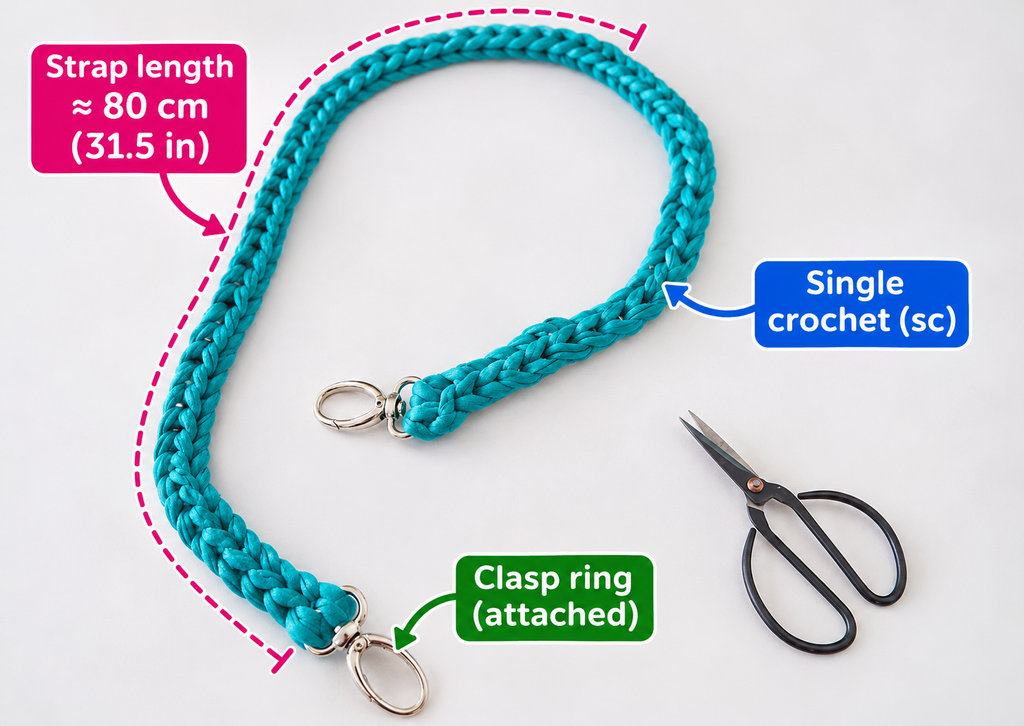
For our example, the target length is approximately 65 cm.
Using the illustrative gauge of 22 rows per 10 cm, you would expect approximately 143 rows in total. Your actual row count may be higher or lower.
Measure the work every 10–15 rows instead of relying on a row number alone.
You might notice the rectangle curling slightly at the sides during the first few rows. A small amount of curling is common, particularly with tighter cotton stitches.
Lay the fabric flat with your hands occasionally, but don’t stretch it aggressively.
If the edges begin to pull inward noticeably, check your stitch count.
For example, if you started with 18 stitches and now have 16, you’ve probably missed one of the edge stitches while turning.
A stitch marker can prevent this problem. Move the marker into the first or last stitch of the most recent row as you work.
Beginner tip: Take a short break every few rows. Consistent tension is easier to maintain when your hands aren’t tired.
Common mistake to avoid: Pulling the working yarn tighter whenever you begin a new row. That can create a narrower edge even when your stitch count stays correct.
Step 5: Check the Length and Width
Once your crochet rectangle is close to the measured length, lay it flat beside your original camera strap.
Do not stretch either item.
The crochet strip should approximately match the broad section you want to cover.
If the strip is too short, crochet a few additional rows.
If it extends over adjustment hardware or narrow connecting sections, remove a few rows until the fit is correct.
Next, test the width.
Place the strap along the center of the crochet strip and bring the long edges together around the back.
The crochet should wrap comfortably around the strap, with the two edges meeting for sewing.
If you need to pull hard to make the edges touch, the strip is too narrow.
If there is a large amount of extra fabric at the back, it’s probably too wide.
It’s much easier to correct an incorrect width early in the project, so try this folding test after the first several rows rather than waiting until the rectangle is complete.
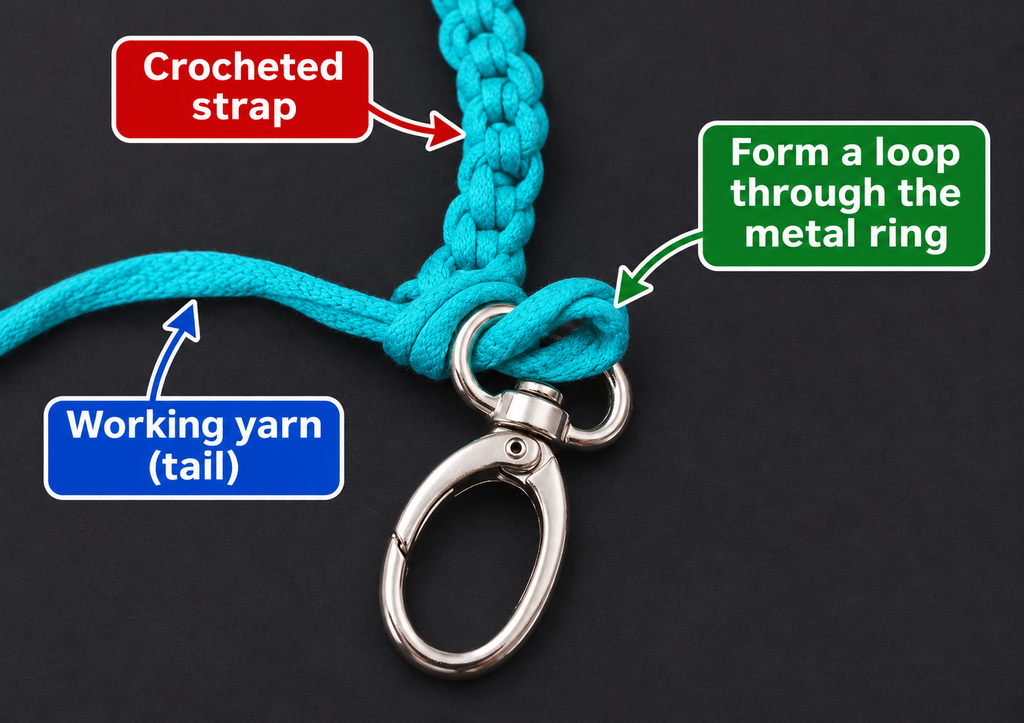
When you’re satisfied with the length, fasten off by cutting the yarn, leaving a tail approximately 15–20 cm long.
Pull the yarn tail through the final loop.
Beginner tip: Use your original strap as the sizing template rather than relying on measurements from a different camera model.
Common mistake to avoid: Assuming every camera strap has the same width. DSLR, mirrorless, compact, and aftermarket straps can differ considerably.
Step 6: Fold the Crochet Cover Around the Strap
Lay the completed crochet rectangle with your preferred visible side facing down.
Position the broad padded part of the original camera strap in the center.
Fold one long edge over the strap, followed by the opposite edge.
Bring the edges together at the back.
Work slowly from one end to the other, making sure the fabric doesn’t twist.
You want the seam to follow a straight line along the underside of the strap.
Use removable sewing clips to hold the edges together while you check the fit.
If you want a removable sleeve, leave both short ends open so the original strap can pass through. Whether the finished sleeve can slide off without unfastening hardware depends on the shape of your strap.
Do not force the crochet fabric over buckles or connectors that might damage the stitches or compromise the camera strap.
If necessary, place the crochet fabric around the broad section and join the long edges while the strap is already inside.
Beginner tip: Align the short ends first, then work toward the middle. This helps keep the fabric centered.
Common mistake to avoid: Sewing the cover so tightly that the original strap wrinkles or bends. The cover should follow the strap’s natural shape.
Step 7: Sew the Long Back Seam
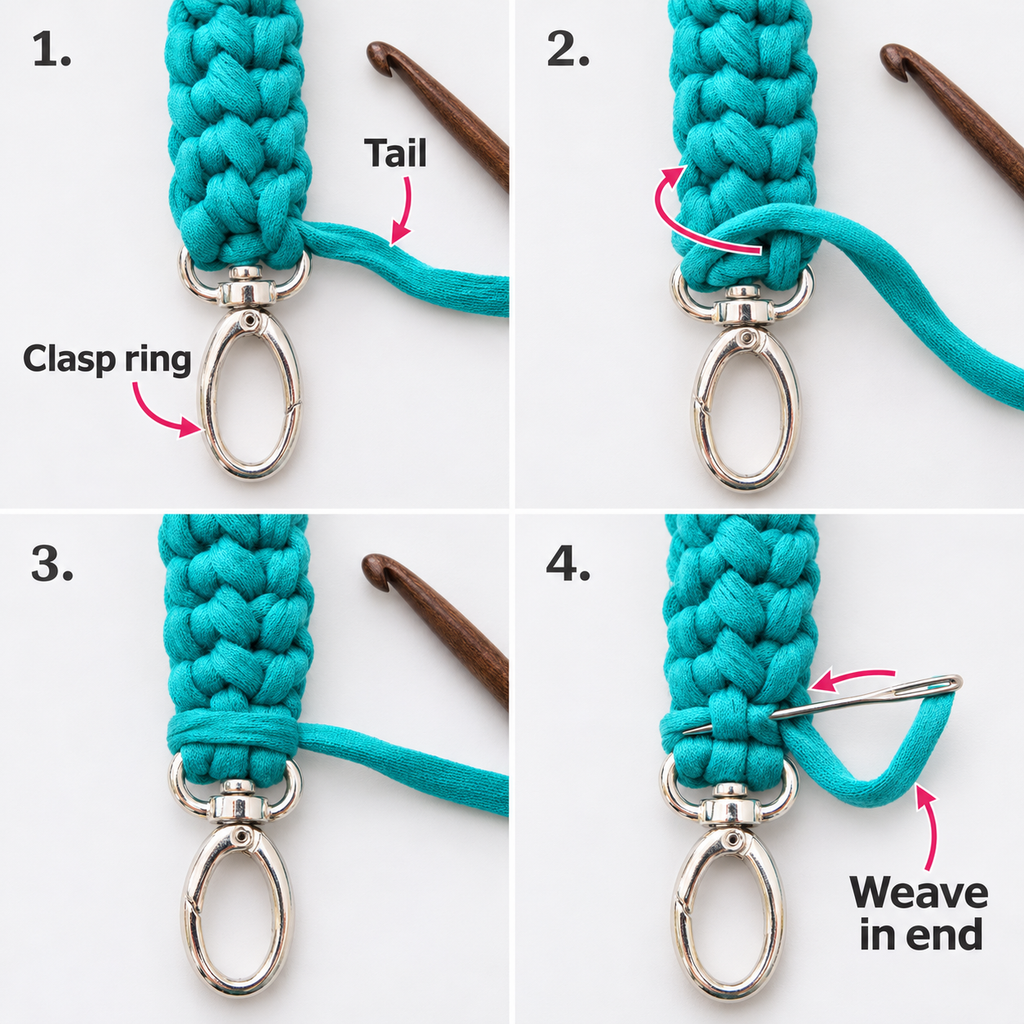
Thread your yarn needle with a length of matching cotton yarn.
Begin near one end of the sleeve.
Insert the needle through the edge loops of both crochet sides and pull the yarn through gently.
Continue along the seam using a simple whipstitch.
Keep your stitches fairly small and even.
Your goal is to bring the two crocheted edges together without creating a thick, uncomfortable ridge.
After every few centimeters, check that the cover remains centered.
If one side begins to bunch up, loosen the most recent stitches and realign the edges.
As you work, keep the original camera strap flat inside the sleeve.
You are sewing the crochet edges to each other, not relying on the crochet seam to hold the camera’s weight.
Once you reach the end, secure the sewing yarn through several nearby crochet stitches and weave the tail into the fabric.
Keep the narrow camera connector sections and any adjustment hardware exposed.
Beginner tip: Use yarn in the same shade as the crochet fabric so the seam blends into the texture.
Common mistake to avoid: Pulling the whipstitches too tightly. This creates a ridge and can make the sleeve uncomfortable against your neck.
Step 8: Finish and Inspect the Camera Strap
With the back seam complete, lay the camera strap flat on the table.
Smooth the crochet cover gently from the center toward the ends.
Check that the sleeve doesn’t twist and that the seams lie neatly along the underside.
You can leave the short ends open, which makes cleaning or replacing the crochet cover easier.
If the sleeve shifts excessively, a few removable, non-structural securing stitches through the sleeve and an appropriate outer fabric layer may help, but only where the strap manufacturer permits it. Do not pierce the load-bearing webbing, alter reinforced seams, or modify the connectors.
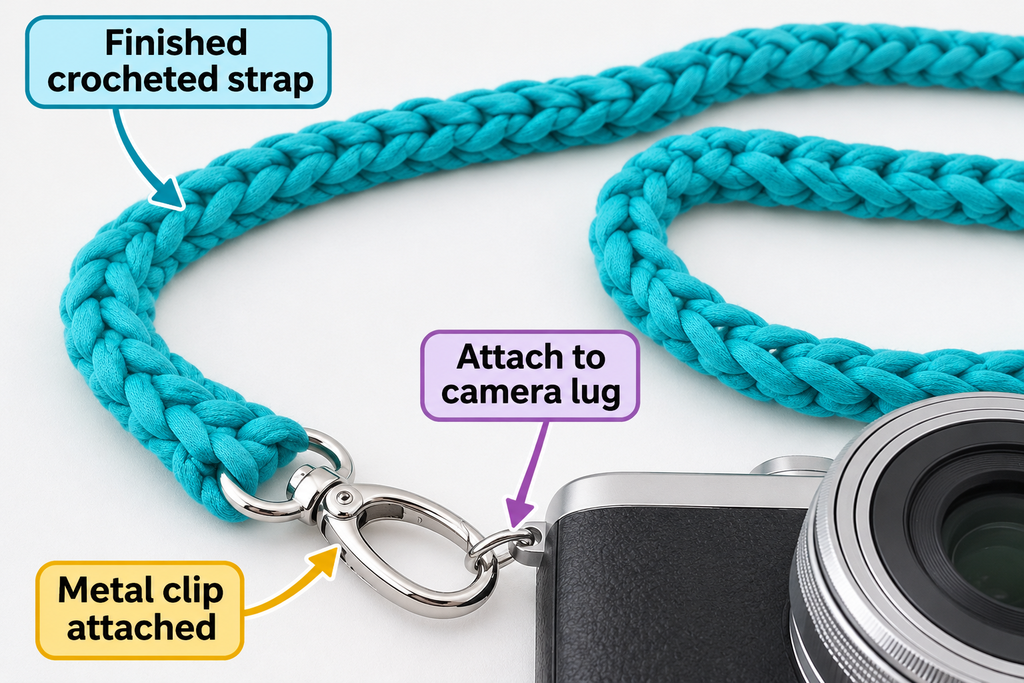
Inspect the original strap’s connection points and verify that they remain fully exposed and operational.
Finally, connect your camera using the manufacturer’s attachment method and inspect everything while the camera is resting on a secure surface.
Do not use the crochet fabric as a substitute for a properly rated strap or secure connector.
Your handmade camera strap cover is now finished.
Beginner tip: Take a photograph of the finished sleeve from the front and back. It makes it much easier to recognize what worked well if you make a second one.
Common mistake to avoid: Covering the adjustment sliders or camera attachment loops with crochet. Those components must remain accessible and able to function correctly.
Crochet Camera Strap Pattern Notes
Turning chain rules
At the end of every row, chain one before turning.
This turning chain does not count as a stitch.
Always place your first single crochet into the first actual stitch of the previous row.
Stitch counts
The example pattern maintains 18 single crochet stitches in every row.
If you need a different width, change the foundation chain according to your gauge swatch.
For instance, if you want 20 single crochet stitches across, begin with chain 21.
Repeat pattern
After completing Row 1, simply repeat Row 2 until your crochet fabric reaches the target length.
There is no shaping or increase required.
Right side and wrong side
Standard single crochet produces a similar appearance on both sides.
Choose the side you prefer as the visible front of your sleeve, then position the long seam on the underside.
Size adjustments
To make a wider sleeve, increase the number of stitches in each row.
To make a longer sleeve, work more rows.
If the camera strap has thick padding, add enough width to accommodate that thickness without stretching the crochet fabric.
Do not assume you can correct a significantly incorrect width by stretching the finished work.
Common Beginner Mistakes and How to Fix Them
| Common mistake | What happens | Simple fix |
|---|---|---|
| Missing the final stitch | The rectangle becomes narrower | Mark the first and last stitches of each row |
| Adding an extra edge stitch | The rectangle widens gradually | Remember that ch 1 does not count as a stitch |
| Using very tight tension | The fabric curls or feels rigid | Relax the working yarn or try a slightly larger hook |
| Choosing stretchy yarn | The sleeve may sag or shift | Use smooth cotton and test the fabric’s stability |
| Skipping the fit test | The cover may be too narrow or too wide | Wrap the first few rows around the strap before continuing |
| Pulling the seam tightly | The sleeve twists or puckers | Use small, relaxed whipstitches |
| Covering strap hardware | Adjustments and connections become difficult | Leave buckles, reinforced ends, and connectors exposed |
A useful habit is to stop every ten rows and check three things: the stitch count, the width, and the appearance of the side edges.
Catching a mistake early saves time and helps the finished sleeve look more professional.
How to Customize This Crochet Camera Strap Pattern
One of the nicest things about such a simple pattern is how easily you can personalize it.
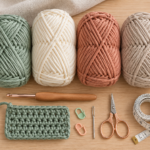
Try different cotton colors
Dusty sage looks subtle and natural, especially when paired with a black camera.
Other pretty combinations include warm cream, muted terracotta, soft mustard, pale blue, and oatmeal beige.
For a modern two-tone design, use one color for most of the rectangle and a second color for a few rows near each end.
Add simple stripes
Instead of changing the stitch pattern, change the yarn color every 8–12 rows.
This creates a striped effect without adding any complicated crochet techniques.
For a more delicate look, try a single contrast row after every six rows of the main color.
Weave the ends securely so no loose strands rub against the original camera strap.
Make the sleeve wider
If your camera has a particularly wide padded strap, adjust the foundation chain based on the actual measurements.
A wider sleeve can give you more room for decorative stitching or small embroidered accents.
However, avoid oversized bulky fabric that might interfere with how the original strap rests on your shoulders.
Experiment with texture
Once you’re comfortable with the basic version, consider making a small swatch in moss stitch or half double crochet.
Moss stitch creates a subtle woven texture, while half double crochet produces taller rows and may work up faster.
Just remember that a different stitch changes the gauge, so the foundation chain and row count must be recalculated.
Add a decorative edge
A narrow slip stitch border can create a neat decorative finish along the short ends of the crochet rectangle before assembly.
Choose a soft, flexible edge rather than a stiff or bulky one.
The finished sleeve should still sit naturally over the strap without creating pressure points.
Make a personalized gift
A handmade camera strap cover is a thoughtful gift for someone who enjoys photography, journaling, traveling, or documenting family celebrations.
Choose a color that suits their favorite camera bag or outfit.
You can even include a small matching crochet accessory, such as a lens cloth pouch or a simple drawstring bag. Keep the camera’s required load-bearing equipment separate from decorative crochet work.
Finishing Instructions
Finishing is what makes a simple crochet project feel carefully made.
Start by inspecting the entire sleeve for loose stitches or unsecured yarn tails.
Thread any remaining tails into your yarn needle and weave them through the reverse side of the crochet fabric, changing direction once or twice for a secure finish.
Avoid leaving short tails that could work loose after washing.
If the sleeve feels slightly uneven, remove it from the camera strap, if possible, and gently shape the crocheted fabric by hand.
You can lightly dampen the cotton sleeve and lay it flat to dry, following the yarn label’s care instructions.
Avoid aggressive stretching or blocking that changes the measurements.
Never soak the camera, camera connectors, padded strap components, or electronic equipment.
For routine cleaning, brush away dust or gently spot-clean the removable crochet sleeve.
If the sleeve can be removed completely, hand washing may be suitable for the yarn, but always follow the manufacturer’s care recommendations.
Allow the fabric to dry thoroughly before refitting.
Finally, inspect the original camera strap for any signs of wear. The decorative cover must never conceal fraying, damaged stitching, cracked buckles, or weakened attachment points.
Quick Printable-Style Pattern Summary
Easy Crochet Camera Strap Sleeve Copy
Skill: Confident beginner
Materials: Cotton #4 yarn, 4.0 mm hook, existing intact camera strap, needle, scissors, measuring tape.
Stitches: Chain and single crochet.
Starting chain: Ch 19.
Row 1: Sc in second ch from hook and across. (18 sc)
Row 2: Ch 1, turn, sc in each st. (18 sc)
Repeat: Row 2 until the fabric matches the measured padded strap length.
Finishing: Fasten off, wrap the fabric around the existing strap, whipstitch the long crochet edges together, and weave in all ends.
Safety: The original camera strap and its properly fitted connectors remain responsible for supporting the camera.
Crochet Camera Strap Pattern FAQ
1. Is a crochet camera strap easy for beginners?
Yes, particularly when you use a simple single crochet rectangle to cover an existing strap. The main skills are making a foundation chain, working regular rows, counting stitches, and sewing a basic seam.
If you can already make a small single crochet dishcloth, you probably have the crochet skills needed for this project.
2. What is the best yarn for a crochet camera strap?
Smooth cotton yarn is a useful choice for a decorative camera strap cover because it has clearly defined stitches and a pleasant handmade texture.
Medium-weight #4 cotton works well for beginners, although lighter cotton yarn may produce a thinner sleeve.
For a load-bearing camera strap, yarn alone should not be assumed to provide an adequate safety margin. This tutorial preserves the existing strap as the structural component.
3. How long should a crochet camera strap be?
For this sleeve pattern, the finished length should match the broad section of your existing camera strap rather than a universal measurement.
For example, if the padded section is 65 cm long, aim for approximately that length in the finished crochet rectangle.
A separate adjustable camera strap may be much longer overall because of its narrow connecting sections.
4. Can I make a crochet camera strap without sewing?
You can create some decorative crochet coverings with minimal sewing or joining, but a fitted sleeve generally needs a reliable way to close around the original strap.
For this version, a simple whipstitched seam is recommended because it keeps the edges neatly together and is straightforward for beginners.
If removability matters, use a construction that can be safely opened without affecting the factory strap.
5. Can I use acrylic yarn instead of cotton?
Acrylic can be used for a decorative cover, but its drape and stretch vary depending on the yarn.
Some acrylic yarns are soft and springy, while others make a firmer fabric.
Work a swatch, measure it, and check how well it maintains its shape.
Avoid relying on any yarn as the sole support for expensive camera equipment.
6. How do I stop the crochet camera strap from curling?
First, make sure your stitch count stays consistent.
Then check your tension. Pulling stitches too tightly can make a narrow fabric curl or pucker.
If necessary, try a slightly larger hook.
A small amount of curling often settles when the fabric is fitted around the strap, but strong curling usually means something needs to be adjusted.
7. Is a handmade crochet camera strap safe for a DSLR or mirrorless camera?
A crocheted sleeve fitted over an undamaged, properly attached manufacturer-approved strap is a safer design choice than relying on an untested yarn-only strap.
Keep the original connectors, adjustment hardware, and load-bearing webbing intact. Do not attach the camera to decorative crochet stitches, and inspect the underlying strap regularly.
No crochet tutorial can guarantee a camera attachment’s safety without knowing the equipment, load, and hardware specifications.
Conclusion
Making a crochet camera strap cover is a lovely way to turn an everyday photography accessory into something personal.
You don’t need an advanced stitch pattern or expensive craft supplies. A smooth cotton yarn, a comfortable hook, and a little patience are enough to create a beautiful handmade sleeve.
Start with a simple solid color, take your time keeping the sides straight, and measure the fabric as you work. Once you’ve finished one, it’s easy to imagine a second version with stripes, a contrasting border, or a different cotton texture.
Save this crochet camera strap pattern to your favorite crochet Pinterest board so you can find it again whenever you’re ready for another small handmade accessory.