There is something particularly satisfying about making a crochet project you can actually wear the same day. A handmade belt is small enough to finish without committing to weeks of stitching, yet useful enough to become part of your everyday wardrobe.
If you have been looking for an easy crochet belt pattern that doesn’t require complicated stitch combinations or difficult shaping, this project is a lovely place to start. We’re going to make a narrow cotton belt using simple single crochet stitches, then finish it with a buckle and a matching crocheted keeper.
The finished belt works beautifully with linen dresses, loose shirts, summer skirts, and high-waisted trousers. You can make it in a quiet neutral shade for everyday wear or choose a brighter color to give a simple outfit a handmade accent.
I particularly like this type of project for beginners because you can see your progress immediately. Every completed row makes the belt a little longer, and the stitches become more consistent as you work.
In this step-by-step tutorial, you’ll learn how to start your belt, crochet a firm and even strap, adjust its length, add optional fastening openings, attach a buckle, and finish everything neatly.
The best part? You only need a few basic supplies and a little patience.
What You’ll Learn
By the end of this tutorial, you’ll know how to:
- Crochet a narrow belt strap using basic single crochet stitches.
- Keep your stitch count consistent and your edges straight.
- Measure a belt so it fits comfortably over clothing.
- Add simple adjustable openings for a prong buckle.
- Attach buckle hardware securely without twisting the strap.
- Make a small crocheted keeper to hold the loose end.
- Finish, shape, and care for your handmade accessory.
This is a beginner-level accessory project, although knowing how to make a chain and single crochet stitch will help you work more confidently.
Crochet Belt Pattern at a Glance
| Detail | Pattern specification |
|---|---|
| Project | Narrow adjustable crochet belt with buckle |
| Difficulty | Confident beginner |
| Estimated time | 3–5 hours |
| Yarn | DK (#3) smooth cotton |
| Hook | 4 mm |
| Sample color | Dusty sage green |
| Main stitch | Single crochet |
| Strap width | Approximately 2.5–3 cm (1–1¼ inches), depending on gauge |
| Strap length | Made to measure |
| Construction | Rows worked across the short width |
| Hardware | Center-bar prong buckle |
The design is intentionally simple. Rather than using a complicated textured stitch, we’ll make a compact strip of single crochet fabric.
A closely worked single crochet stitch gives the belt a tidy surface and helps it retain its shape. Cotton is a particularly good choice because it usually has less stretch than many other yarn fibers.
This is a decorative clothing accessory, not a load-bearing strap. Its suitability for keeping trousers securely fastened will depend on your yarn, gauge, hardware, and sewing strength.
Materials You’ll Need
For one adult-sized belt, gather the following supplies.
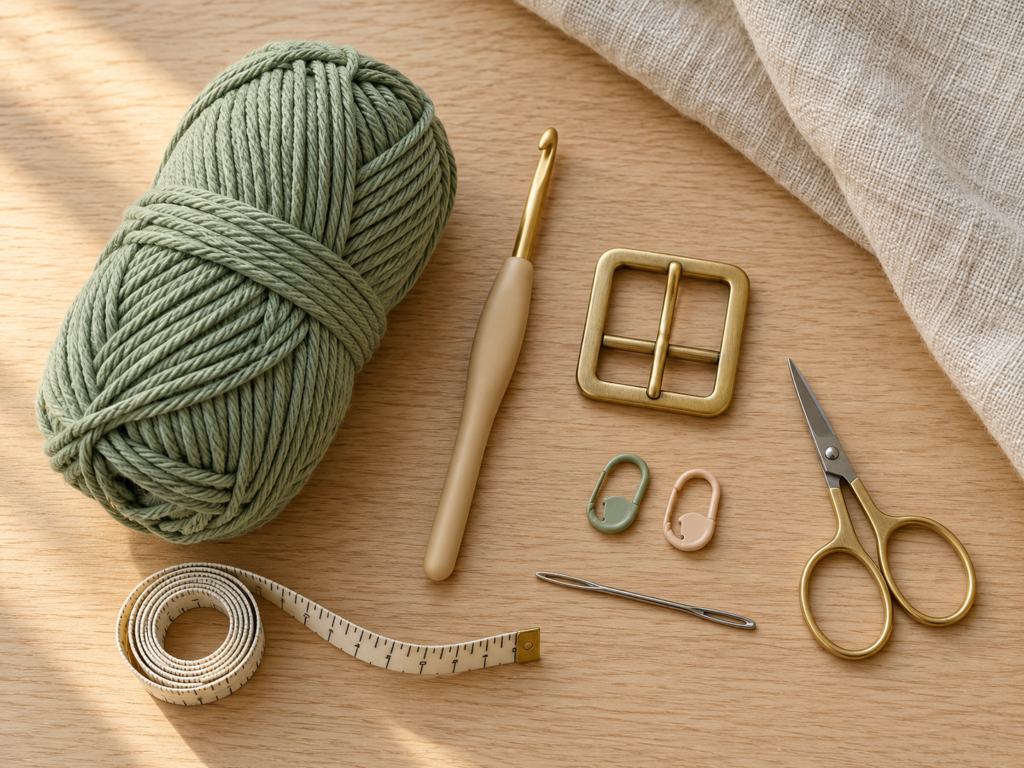
Yarn: Approximately 80–120 yards (73–110 meters) of smooth DK-weight cotton yarn is a practical starting allowance. Your actual usage depends on the width, length, and density of your crochet fabric.
Choose a cotton yarn with a smooth surface and relatively firm twist. It will be easier to see your stitches, and the fabric should look neater than it would with a very fuzzy or loosely spun yarn.
Crochet hook: A 4 mm ergonomic crochet hook works well as a starting size for many DK cotton yarns. If your stitches seem too loose, experiment with a 3.5 mm hook.
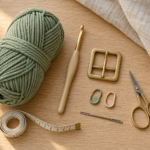
Buckle: Choose a sturdy center-bar prong buckle with an inside opening slightly wider than your finished belt. For a belt about 3 cm wide, an appropriately sized 30–35 mm opening may work, depending on its actual inside dimensions.
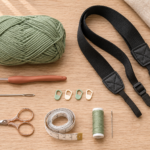
You’ll also need scissors, a blunt tapestry needle, a flexible measuring tape, and two removable stitch markers. A second needle or sewing clips can help hold the folded buckle attachment in place.
Optional additions include a small amount of matching sewing thread for reinforcement and a blocking mat.
Avoid a buckle with sharp or rough edges, which can damage your cotton stitches over time.
Crochet Abbreviations Used
This tutorial uses US crochet terminology.
| Abbreviation | US meaning | UK equivalent |
|---|---|---|
| ch | Chain | Chain |
| sc | Single crochet | Double crochet (dc) |
| sl st | Slip stitch | Slip stitch (ss) |
| st / sts | Stitch / stitches | Stitch / stitches |
| rep | Repeat | Repeat |
| RS | Right side | Right side |
| WS | Wrong side | Wrong side |
The most important difference is that US single crochet is called double crochet in UK terminology.
If you regularly follow UK patterns, remember this conversion before starting. Working US double crochet instead of US single crochet would make a much taller, looser belt fabric.
For standardized stitch terminology, the Craft Yarn Council’s crochet abbreviation guide is a useful reference.

Welcome to the Craft Yarn Council
Before You Start
Choose the Right Belt Width
A narrow belt is easier for beginners because there are fewer stitches to count in every row.
Our sample starts with 10 chains, which creates a first row of 9 single crochet stitches. Depending on your yarn and tension, that can produce a fabric approximately 2.5–3 cm wide.
Before committing to the entire belt, crochet a few centimeters and check the width against your buckle. The strap should pass through the hardware without bunching or folding lengthwise.
If your strap is too wide, remove a stitch from the starting chain. If it is too narrow, add one or two.
Understand Gauge and Tension
Gauge is the number of stitches and rows you crochet within a certain measurement.
For this belt, exact gauge is less important than achieving a firm texture and appropriate width. However, you should measure your own fabric before deciding how many rows are needed.
Make a small test piece using the same yarn and hook. Check whether the stitches look compact, the fabric bends without feeling excessively stiff, and the edges remain relatively straight.
Try pulling the sample gently lengthwise. If it stretches significantly under light tension, using a smaller hook may improve its stability.
Measure Your Waist Correctly
Measure around the area where you intend to wear the belt.
A belt worn at the natural waist will need a different length from one worn low on the hips. Measuring over a thick dress or cardigan can also change the required length.
For this design, a helpful starting calculation is:
Desired crochet strap length = wearing circumference + 15–20 cm adjustment allowance + approximately 2 cm buckle-fold allowance.
For example, if your waist measures 80 cm over clothing, you could aim for a crocheted strap approximately 97–102 cm long before folding the buckle end.
This is an initial planning estimate rather than a universal fit rule. Check the belt on your body before fastening off.
How to Count Your Stitches
Each regular row in our sample contains exactly nine single crochet stitches.
The chain used to turn your work does not count as a stitch.
When counting, look for the small V shapes running along the top of your row. Count each V once.
Use a stitch marker to identify an edge if you regularly miss the final stitch. Losing even one stitch per row can make a narrow strap noticeably uneven.
How to Prevent Curling
Some curling is normal when you first crochet a narrow strip.
Firm cotton stitches can pull the fabric inward, especially if the foundation chain is tighter than the rows above it.
Try keeping the foundation chain slightly relaxed while working the actual stitches evenly. Avoid tightening every loop aggressively.
If the fabric begins twisting severely, check whether the stitch count has changed. Minor curling can usually be improved with gentle shaping after finishing, but missing stitches should be corrected rather than blocked into place.
Step-by-Step Crochet Belt Tutorial
We’re making the belt from one long strip worked in short rows. This method allows you to adjust the length without calculating hundreds of foundation chains.
The sample uses nine single crochet stitches per full row.
Step 1: Make Your Foundation Chain
Start by making a slip knot and placing it on your 4 mm crochet hook.
Hold the working yarn comfortably in your non-dominant hand. Yarn over and pull the yarn through the loop already on your hook to make your first chain.
Continue until you have 10 chains.
Don’t count the slip knot itself or the loop currently resting on your hook. You want ten completed chain stitches.
Take a moment to examine your foundation chain. The front should look like a series of small V shapes.
If the chain seems extremely tight or difficult to insert your hook into, pull it out and try again with more relaxed tension.
Beginner tip: Make the foundation chain with a 4.5 mm hook and switch to 4 mm for the first row if your starting chains are consistently too tight.
Common mistake to avoid: Crocheting an extra chain because the loop on the hook is mistakenly counted as a completed stitch.
Step 2: Crochet the First Row
Now we’re going to turn that foundation chain into the first solid row of fabric.
Insert your hook into the second chain from the hook.
Yarn over and pull up a loop. You should now have two loops on your hook.
Yarn over again and pull through both loops.
You’ve made one single crochet stitch.
Continue by inserting your hook into the next chain and making another single crochet. Repeat until you reach the end.
You should have 9 single crochet stitches.
Lay the first row flat and count the top V shapes. This simple habit helps prevent uneven edges later.
The first row may look a little twisted or narrow. That’s normal, especially with cotton yarn. It becomes easier to judge the actual belt width after several rows.
Beginner tip: Keep your hook close to the fabric instead of pulling each stitch upward. Your stitches will look more consistent.
Common mistake to avoid: Skipping the final foundation chain, which leaves your first row one stitch short.
Step 3: Turn and Crochet Even Rows
Once your first row is finished, chain one and turn your work.
Insert your hook into the first single crochet stitch. Make one single crochet, working under both loops at the top of the stitch.
Continue across the row, making one single crochet in every stitch.
You should finish with nine stitches again.
Chain one, turn, and repeat.
The pattern for your main strap is simple:
Regular row: Ch 1, turn, sc in each of the 9 sts across.
Repeat this row until your belt reaches the desired length, apart from the optional fastening-opening rows described in Step 5.
This repetition is the foundation of the entire project.
After about ten or twelve rows, your belt should begin looking like a narrow strip of fabric.
Pause occasionally and examine both long edges. They should look reasonably straight and parallel.
Beginner tip: Count your stitches every few rows instead of waiting until you notice an obvious difference in width.
Common mistake to avoid: Crocheting into the turning chain and accidentally increasing your stitch count from nine to ten.
Step 4: Continue Crocheting and Measure the Length
Keep working your nine-stitch rows until the belt begins to reach a useful length.
This is a good stage to check your tension.
Place the crochet strip on a flat surface and gently smooth it with your hands. Don’t stretch it hard while measuring.
Lay your measuring tape beside the strap, starting from the foundation edge.
Check the width in a few places. If the strip becomes wider or narrower halfway through, inspect your stitch count before going further.
You can also make a quick note of how many rows you’ve completed in ten centimeters. This helps you estimate the remaining crochet time without constantly measuring the whole strap.
For example, if your fabric has 30 rows per 10 cm, a 100 cm strap would need approximately 300 rows.
That’s only an example: your actual row gauge may be quite different.
Beginner tip: Record your hook size and row gauge in a notebook. If you make another belt later, you’ll have a useful starting point.
Common mistake to avoid: Measuring the belt while pulling it tight, which can cause the finished accessory to be shorter than expected when worn normally.
Step 5: Add Optional Adjustable Fastening Openings
This step is optional, but useful if you want a prong buckle with several fastening positions.
The openings should be placed near the free end of the belt, away from the end that will be folded around the buckle.
Continue working regular rows until you reach the section where you want the adjustment openings to begin.
For the sample nine-stitch belt, make an eyelet row like this:
Eyelet row: Ch 1, turn. Sc in each of the first 4 sts, ch 1, skip the next st, then sc in each of the remaining 4 sts.
You now have four single crochets, one chain space, and four single crochets.
The chain space forms the small opening.
For the next row, ch 1 and turn. Work one single crochet into each of the first four stitches, one single crochet into the chain space, and one single crochet in each of the final four stitches.
Your regular nine-stitch count is restored.
To add more fastening positions, work several regular rows before making another eyelet row. Approximately 2–3 cm between openings can be a useful starting distance.
Use the same spacing for each new opening and measure along the completed fabric, not an estimated number of rows.
Make two or three test openings in a swatch first. If your buckle prong is too thick to pass through a chain-one opening without damaging the fabric, you’ll need a different fastening method or a carefully tested larger opening.
Do not force a thick prong through the stitches.
Beginner tip: Insert a removable marker into every new eyelet so it remains easy to locate after several rows.
Common mistake to avoid: Forgetting to skip the middle stitch when creating the chain space, which results in an increase rather than a clean opening.
Step 6: Complete the Belt Strap
After making your final adjustment opening, return to regular single crochet rows.
Keep working until you have enough length beyond the final opening for the free end to sit neatly beneath the keeper.
A tail of approximately 5–8 cm beyond the furthest fastening opening is a useful starting point, although you can make it longer if you prefer.
Before cutting the yarn, lay the strap completely flat.
Check the following:
- The width remains consistent from end to end.
- The edges are straight enough to pass smoothly through the buckle.
- All fastening openings are positioned along the center.
- The belt reaches comfortably around your intended wearing position.
- You have allowed enough length for the buckle attachment fold.
Wrap the unfinished strip around your waist to confirm its length.
If the strap seems too long, it’s easier to remove several rows now than to alter the finished accessory later.
Once satisfied, cut the working yarn, leaving a tail long enough to weave in securely.
Yarn over and draw the cut end through the final loop to fasten off.
Beginner tip: Test the belt over the clothing you plan to wear with it, not only over a thin shirt.
Common mistake to avoid: Finishing the strap before checking the buckle allowance, which can leave the belt shorter than planned.
Step 7: Attach the Brass Belt Buckle
With the main strap completed, it’s time to add the hardware.
Place your buckle on the table with the front facing upward.
Identify the center bar — the part intended to anchor the strap. For a prong buckle, the prong must be able to swing freely after attachment.
Thread the plain end of the belt around the center bar. Fold approximately 2 cm of fabric back against the underside of the strap.
Check the hardware orientation carefully before sewing. The decorative face of the buckle and the visible face of the crochet belt should both point outward when worn.
If the buckle design requires space for a hinged prong at the fold, position the fabric so that the prong isn’t trapped.
Hold the folded fabric in place using a stitch marker or sewing clip.
Thread a tapestry needle with a length of the same cotton yarn.
Sew the folded end to the underside of the belt using small, firm stitches. Work through the existing crochet fabric rather than stretching the yarn into large loops.
Make several passes across the attachment area.
The fold should lie flat, and the buckle should not slide sideways.
Finish by weaving the sewing yarn through several stitches on the underside before trimming.
Test the attachment with a gentle, controlled pull. If the fold begins separating or the yarn stretches excessively, reinforce the attachment before wearing.
Beginner tip: Sew across two or more rows rather than relying on one line of stitching to hold the buckle.
Common mistake to avoid: Sewing the prong into a fixed position. It needs enough movement to engage the fastening openings.
Step 8: Inspect the Single Crochet Texture
Before adding the keeper, take a close look at the finished fabric.
This may feel like a small step, but it’s a useful habit whenever you’re making wearable crochet accessories.
Hold the belt under good natural light. Notice how the single crochet stitches form compact little rows across the width of the strap.
Each row should have a similar height and should sit close to the rows before and after it.
A little variation is perfectly normal in handmade crochet. However, large gaps, skipped stitches, or noticeably loose sections can affect how the belt wears.
Examine the edges with your fingers. If you find a loose yarn end, weave it in. If you notice a damaged stitch, repair it before the belt is placed under tension.
Check the adjustment openings as well.
They should be easy to identify and large enough for the buckle prong to pass through without tearing the surrounding fabric.
Beginner tip: Photograph a small section of your stitches close up. Looking at the picture can sometimes make uneven tension easier to spot.
Common mistake to avoid: Trying to pull one loose stitch tight by tugging aggressively on the finished fabric. This can distort neighboring stitches.
Step 9: Crochet a Matching Belt Keeper
A belt keeper is the small loop that holds the free end of the strap neatly against the rest of the belt.
Without it, the loose end may stick outward or twist while you move.
To make the keeper, use the same dusty sage cotton yarn and 4 mm hook.
Start with a slip knot and chain 5.
Work one single crochet into the second chain from the hook and each remaining chain.
You should have 4 single crochet stitches.
Chain one, turn, and work one single crochet into each stitch across.
Continue making these four-stitch rows until the little strip is long enough to wrap comfortably around the main belt strap with both ends meeting on the underside.
The keeper should not be so tight that the free end cannot slide through it.
Before fastening off, wrap the strip around the belt to test the fit. It should allow enough room for the thickness of both the main strap and the overlapping loose end.
Once the fit is correct, cut your yarn, leaving a generous tail for sewing.
Beginner tip: Test the keeper around two overlapping layers of belt fabric, not just one layer.
Common mistake to avoid: Crocheting a keeper that fits the empty belt perfectly but becomes too tight once the loose end is threaded through it.
Step 10: Sew the Keeper into Place
Position the keeper around the main strap, close to the buckle attachment.
Bring its two short ends together underneath the belt.
Using your yarn needle and the remaining yarn tail, sew the ends securely together.
Keep your stitches small and tidy.
Make sure the keeper is not accidentally sewn completely through the main belt if you want it to remain movable.
For a fixed keeper, you can add a couple of small securing stitches through the underside of the belt, but first confirm that this position allows the free end to pass through comfortably.
Fasten off the sewing yarn and weave in the remaining tails.
Thread the loose end of the belt through the buckle and then beneath the keeper.
Try wearing the belt for a few minutes.
If it feels uncomfortable or twists when you bend, check the buckle orientation, keeper position, and strap tension.
Beginner tip: Leave the keeper movable until you are happy with its position. You can secure it afterward if necessary.
Common mistake to avoid: Attaching the keeper too close to the buckle, leaving no room for the free end to pass smoothly through.
Step 11: Try On Your Finished Crochet Belt
Your handmade accessory is almost ready to wear.
Wrap it around your waist or over the dress you want to style.
Pass the free end through the buckle and engage the prong in the opening that gives you a comfortable fit.
Slide the remaining length beneath the crocheted keeper.
The belt should sit flat without twisting or bunching.
If you notice that the strap is pulling at an angle, adjust the fold near the buckle or check whether the keeper has been sewn unevenly.
You can wear the belt centered at the front or slightly to one side, depending on your outfit.
The dusty sage color looks especially attractive with cream linen, natural cotton, tan, oatmeal, and muted terracotta.
If you’re gifting this belt, you could wrap it loosely in tissue paper and include a little care card with the yarn fiber and washing instructions.
Crochet Belt Pattern Notes
Turning Chain Rules
In this pattern, the chain-one turning chain does not count as a stitch.
Every regular row has nine single crochet stitches. After the turning chain, your first single crochet goes into the first actual stitch of the previous row.
At the opposite edge, make sure you work into the final stitch rather than into the turning chain.
Stitch Count and Repeat
For the sample width:
- Foundation: Ch 10.
- Row 1: Sc into the second chain from the hook and each chain across — 9 sc.
- Regular rows: Ch 1, turn, sc in each stitch — 9 sc.
- Optional eyelet row: Ch 1, turn, 4 sc, ch 1, skip 1 st, 4 sc.
- Row following eyelet: Ch 1, turn, 4 sc, 1 sc in ch-1 space, 4 sc — 9 sc.
- Keeper: Ch 5, work 4 sc per row until long enough to fit around the overlapping belt layers.
Repeat regular rows to reach the length you need.
Unlike a fitted sweater or other shaped garment, this belt doesn’t require a specific row count. Its length is based on your personal measurement.
Right Side and Wrong Side
Basic single crochet fabric has a slightly different appearance on each side.
You may notice that one surface looks marginally smoother or more even.
Choose the side you prefer as the visible side of the belt.
There’s no need to change your crochet technique, but remember which surface faces outward when attaching the buckle.
Adjusting Belt Size
For a narrower belt, begin with fewer chains. For a wider belt, begin with more.
A wider belt may need a slightly larger buckle, and you may need to experiment with the position of the fastening openings.
When changing the number of stitches, place the fastening opening as close to the center of the row as possible.
For a short belt, simply work fewer rows. For a longer belt, continue the same row repeat.
Common Beginner Mistakes and How to Fix Them
Even an easy crochet belt can develop small problems. Fortunately, most are straightforward to correct.
1. The Belt Gets Wider or Narrower
Problem: The strap changes width as you crochet.
This usually happens when you accidentally skip the last stitch or add an extra stitch into the turning chain.
Fix: Count all nine stitches at the end of every row until you’re comfortable recognizing the edge stitches. Use markers if necessary.
2. The Edges Look Uneven
Problem: One edge appears bumpy while the other looks straight.
This can happen when your turning-chain tension changes or you work into different loops accidentally.
Fix: Make your turning chain at a consistent height. Work regular stitches through both top loops and keep your tension relaxed and even.
3. The Belt Curls or Twists
Problem: The strap does not lie flat.
A foundation chain that is too tight can pull on the edge. Uneven stitch counts may also create distortion.
Fix: Try a slightly larger hook for the foundation chain. Check the stitch count and let the fabric rest flat before deciding whether blocking is needed.
4. The Fabric Feels Too Stretchy
Problem: The finished belt lengthens noticeably when you pull it.
Some yarns have more elasticity than others, and loose stitches create an especially flexible fabric.
Fix: Use firmly twisted cotton and a smaller hook. If you need a very secure functional belt, consider an internal nonstretch backing compatible with the hardware.
5. The Buckle Feels Loose
Problem: The hardware moves or the folded fabric begins separating.
The sewing stitches may be too sparse or the attachment area too short.
Fix: Reinforce the fold with more small stitches, using durable matching thread if appropriate. Check that the buckle’s center bar is suitable for a fabric strap.
6. The Keeper Is Too Tight
Problem: The loose belt end is difficult to slide beneath the keeper.
This often happens when you measure the keeper around just one layer of belt fabric.
Fix: Open the keeper seam and add more crochet rows. Measure around two overlapping layers before sewing it closed again.
7. The Fastening Openings Stretch
Problem: The eyelets grow larger after several wears.
Repeated pressure from a buckle prong can gradually distort loosely crocheted openings.
Fix: Make a test swatch before finishing the belt. Reinforce the eyelet edges with matching thread where needed, or use a hardware system that doesn’t place concentrated pressure on individual yarn loops.
How to Customize This Crochet Belt Pattern
One of the nicest things about making your own crochet accessories is that you can adjust the design to suit your wardrobe.
Try Different Yarn Colors
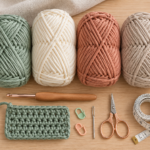
Dusty sage is a soft and versatile option, but there are plenty of other beautiful choices.
Warm cream looks lovely for a summer belt, especially with linen clothing. Terracotta creates a warmer bohemian effect. Chocolate brown works well with jeans and autumn dresses, while charcoal or black makes a more understated everyday accessory.
If you’d like to experiment with color blocking, work one section in your main color and another section in a complementary shade.
You can also make a striped belt by changing yarn color after a chosen number of rows. Just keep every color change neat and weave in the ends securely.
Make a Wider Statement Belt
If you want a belt that stands out more, increase the starting chain.
For example, you might begin with 14 chains rather than 10 and work 13 single crochet stitches across each row.
Measure the resulting fabric carefully and choose hardware that accommodates the new width.
A wider belt may feel firmer and show more of your crochet texture, making it attractive for oversized shirts or loose summer dresses.
Remember to move your eyelet position so it remains centered.
Add a Simple Decorative Edge
For a slightly more finished appearance, you can add a narrow slip-stitch edging along the long sides.
Work carefully and avoid adding excessive stitches around the edges, which could cause waviness.
An edging in the same yarn color gives a subtle look, while a contrasting cream border can create a decorative outline.
Because the strap must pass through the buckle, avoid a bulky border near the hardware.
Experiment With Texture
Single crochet is an excellent choice for a first belt because it’s compact and easy to count.
Once you’re comfortable with the construction, you could explore working in the back loop only to create subtle ridges.
Be aware that changing the stitch placement can affect stretch, thickness, and the way the belt behaves under tension.
Make a sample first rather than substituting a different stitch halfway through the finished strap.
Turn It Into a Handmade Gift
A crochet belt is a thoughtful gift for someone who enjoys simple handmade clothing accessories.
Choose a versatile yarn color, add a buckle that matches the recipient’s style, and measure carefully.
You could also make a matching crochet headband, wristlet, or small bag using the same cotton yarn.
For a coordinated handmade collection, using the same stitch texture and color palette across the projects will help everything feel intentional.
Finishing Instructions, Blocking, and Care
When you’ve finished assembling the belt, check every loose end.
Thread each tail through a tapestry needle and weave it through several nearby stitches on the underside of the fabric.
Change direction once or twice to make the finish more secure. Avoid tying large, visible knots because they can create uncomfortable lumps.
Trim the yarn only after it has been woven in securely.
Should You Block a Crochet Belt?
Blocking isn’t always necessary, but it can help a slightly uneven cotton belt lie flatter.
Check your yarn label first.
If the fiber allows it, lightly dampen the crochet fabric with cool water. Gently smooth the strap into shape on a clean towel or blocking surface.
Don’t stretch it aggressively.
Allow the belt to air-dry completely before wearing or storing it. Keep metal hardware as dry as practical, particularly if the finish may tarnish.
Blocking may improve the appearance of the stitches, but it cannot repair an incorrect stitch count or an insecure buckle attachment.
How to Wash a Handmade Crochet Belt
Cotton can often tolerate gentle washing, but the buckle and any reinforcing materials matter just as much as the yarn.
For a completed belt with attached metal hardware, spot cleaning is usually a practical choice.
Use a soft cloth with a little mild detergent and water, then gently remove the detergent with a damp cloth.
Avoid twisting or wringing the belt. Lay it flat to dry away from strong direct heat.
Store the belt loosely rolled rather than sharply folded to reduce creasing.
Quick Printable-Style Crochet Belt Pattern Summary
Easy Crochet Belt — Quick Reference Copy pattern
Skill: Confident beginner · Hook: 4 mm · DK cotton yarn
Foundation: Ch 10.
Row 1: Sc in second chain from hook, sc across. (9 sc)
Regular repeat: Ch 1, turn, sc across. (9 sc)
Optional eyelet: Ch 1, turn, sc 4, ch 1, skip 1, sc 4.
Following row: Ch 1, turn, sc 4, sc in chain space, sc 4.
Keeper: Ch 5, sc 4 across, repeat rows until long enough to wrap around the overlapping belt fabric.
Finishing: Fasten off, attach buckle securely, sew keeper, weave in ends, and shape gently.
Sizing: Wearing circumference + adjustment allowance + buckle-fold allowance; test against the body before finishing.
Frequently Asked Questions About Crochet Belt Patterns
1. Can beginners really crochet a belt?
Yes. A basic single-crochet belt is a manageable project for a beginner who knows how to chain, turn, and work single crochet stitches.
The main challenge is keeping the same number of stitches across every row. Once you’ve mastered that, making the strap is simply a matter of repeating the same technique.
The buckle attachment takes a little extra patience, but it doesn’t require complicated crochet skills.
2. What is the best yarn for a crochet belt?
Smooth cotton is one of the most practical choices for a beginner belt.
It makes the stitches easy to see and can create relatively firm fabric when worked at a dense gauge.
DK-weight cotton works well for a narrow accessory. For a thicker, more structured belt, you may prefer a firmer cotton cord, although you’ll need to change the hook size and test the resulting fabric.
Avoid choosing yarn solely for softness. A belt also needs enough structure to remain useful when worn.
3. How long should I make my crochet belt?
Measure the part of your waist or hips where you plan to wear it.
Add enough length for adjustment, the buckle attachment, and a short free end that can sit beneath the keeper.
For this tutorial, approximately 15–20 cm of adjustment allowance plus about 2 cm for the buckle fold provides a useful starting estimate.
Always test the length before fastening off.
4. Can I make a crochet belt without a buckle?
Absolutely.
A tie-style belt can be made by crocheting a long strip and leaving the ends free to knot around your waist.
For a tie belt, you may want to make the strip longer than a buckle belt so there’s enough fabric to form a secure knot or bow.
You can also create narrow ties at both ends, giving the accessory a softer, more flexible appearance.
5. Why is my crochet belt curling?
Curling can happen because of tight foundation chains, uneven tension, or an inconsistent stitch count.
Try relaxing the foundation chain, keeping the rows even, and using a slightly larger hook if the fabric feels excessively stiff.
Gentle blocking may help smooth minor curling, but severe distortion usually needs a stitch-level correction.
6. How can I make my crochet belt stronger?
Choose a firm, smooth yarn, work at a reasonably tight gauge, and reinforce any areas that will experience concentrated tension.
Pay particular attention to the buckle attachment and fastening openings.
For a belt intended for substantial everyday use, a nonstretch fabric backing or reinforced fastening system can improve durability.
A purely decorative crocheted belt may not provide the same support as a structured woven or leather belt.
7. Can I sell handmade belts made from this tutorial?
You can use the original instructional pattern provided here as a starting point for creating your own handmade belts.
If you plan to sell finished accessories, use photographs of your own products, check the suitability and durability of your materials, and make sure your buckle and finished item meet any applicable product requirements.
Do not reuse another designer’s photographs without the necessary permission.
Conclusion
A handmade crochet belt is a lovely reminder that useful accessories don’t have to be complicated.
With a little cotton yarn, a crochet hook, and some patience, you can turn simple single crochet stitches into something attractive and practical.
The best approach is to work slowly at first, count your stitches, and check your measurements as you go. You’ll soon find your rhythm, and the rows will become easier and more consistent.
Once you’ve made your first belt, experiment with another width or color. You might find yourself making several to match different outfits.
Save this easy crochet belt pattern to your favorite crochet board so you can return to the instructions whenever you’re ready for your next handmade accessory.