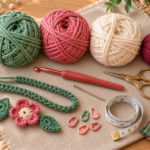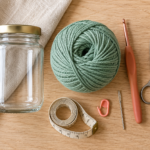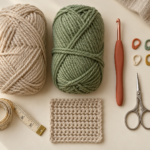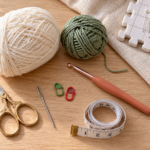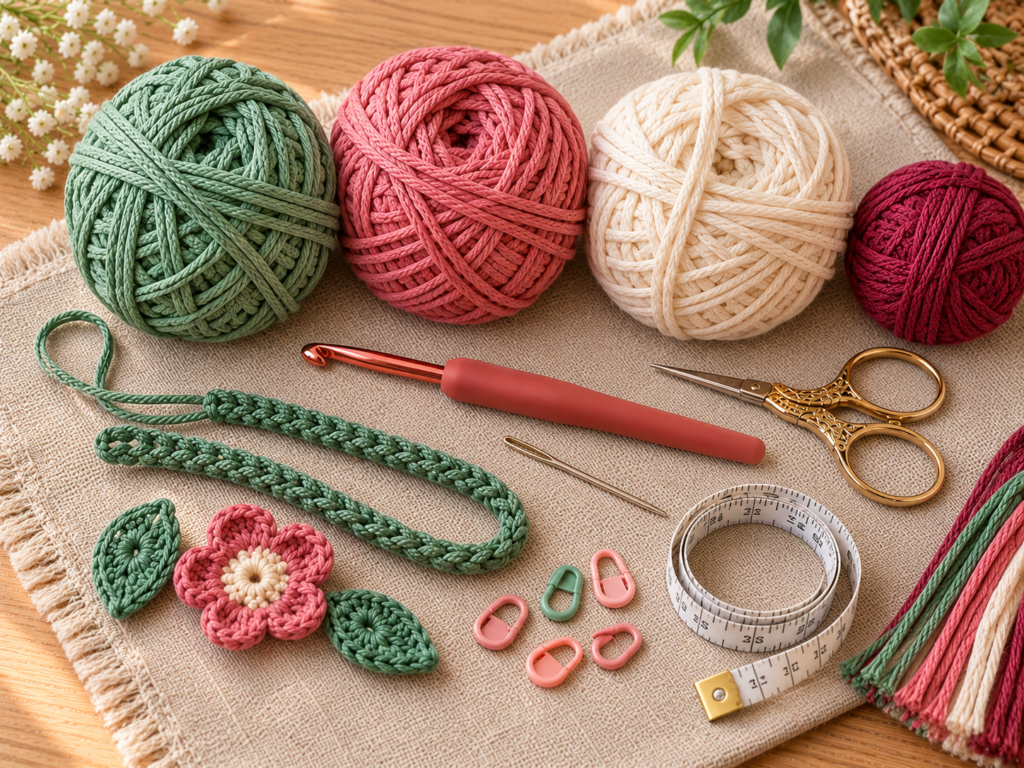
A crochet parandi is one of those handmade accessories that can turn a simple braid into something special. With delicate crochet flowers, little green leaves, and soft flowing tassels, it brings traditional braid decoration together with the charm of modern crochet.
The nicest part? You don’t need to know dozens of complicated stitches to make one.
In this beginner-friendly crochet parandi tutorial, you’ll learn how to create a flexible attachment loop, crochet three hanging cords, make small flowers and leaves, and assemble everything into a pretty floral hair accessory.
We’ll work with dusty rose, soft cream, muted sage, and a touch of deep berry. These colors give the finished piece a soft botanical look, but you can choose brighter shades for festive clothing or deeper colors for a wedding outfit.
The instructions below are an original, simplified floral parandi design. They aren’t a transcription of the reference video. The image placements correspond to the 12-shot photography plan above, so you can document the whole project as it is made.
What Is a Crochet Parandi?
A parandi, also spelled paranda, is a decorative hair-braid accessory associated particularly with Punjabi culture. Traditional versions can feature braided threads, colorful yarn, decorative ends, and tassels.
The traditional construction varies, including fixed and detachable versions, as documented by D’Source’s craft research.
A crochet parandi brings the same decorative idea into a crochet project. It may incorporate crocheted vines, flower motifs, leaves, hanging cords, and tassels.
This tutorial creates a lightweight floral interpretation, designed to hang along a braid or ponytail without using heavy decorations.
What You’ll Learn
By the end of this project, you will know how to:
- Make an adjustable-length foundation and attachment loop.
- Crochet three narrow, flexible cords with tidy edges.
- Create small pointed leaves using stitches of different heights.
- Crochet a simple five-petal flower.
- Cut, fold, and secure soft yarn tassels.
- Position and sew decorative motifs without twisting the cords.
- Customize the parandi to suit different hair lengths and occasions.
The project is suitable for someone who has already practiced basic chains and single crochet stitches. If you’ve never made a flower before, don’t worry: the flower consists of one simple repeated petal.
Project Details
| Feature | Details |
|---|---|
| Skill level | Confident beginner |
| Construction | Small flat motifs and three flat hanging cords |
| Finished length | Approximately 50–65 cm |
| Approximate time | 3–5 hours |
| Recommended yarn | DK cotton, weight 3 |
| Hook | 3.5 mm |
| Number of cords | 3 |
| Suggested flowers | 6 |
| Suggested leaves | 6 |
| Tassels | 3 |
| Terminology | US crochet terms |
Finished dimensions are approximate design targets rather than gauge-tested measurements. Your yarn and tension will affect the result.
Materials You’ll Need
Start with yarn that feels soft against your fingers and shows each stitch clearly.
For this project, smooth DK cotton is a practical choice. Cotton makes neat flowers, holds the shape of small leaves, and creates clearly visible stitch definition.
You’ll need approximately:
- 40–60 g muted sage green DK cotton yarn for the cords, loop, and leaves.
- 15–25 g dusty rose cotton yarn for the main flowers.
- 10–15 g cream cotton yarn for contrasting flowers and tassels.
- Small amounts of deep berry yarn for tassel accents.
- One 3.5 mm crochet hook.
- A pair of sharp scissors.
- A blunt tapestry or yarn needle.
- Two stitch markers or removable clips.
- A measuring tape or ruler.
- A small piece of cardboard approximately 10–12 cm wide for making tassels.
- A soft hair elastic, optional, for extra attachment security.
You can use leftover yarn for the little flowers. Just make sure the different yarns have roughly the same thickness so one flower doesn’t look much bulkier than another.
Avoid excessively heavy yarn for the long strands. Bulky cords and large tassels can pull on a hairstyle, especially when worn for several hours.
Crochet Abbreviations Used
The pattern uses US crochet terminology.
| Abbreviation | Meaning |
|---|---|
| ch | Chain |
| sc | Single crochet |
| hdc | Half double crochet |
| dc | Double crochet |
| tr | Treble crochet |
| sl st | Slip stitch |
| st / sts | Stitch / stitches |
| rep | Repeat |
| sp | Space |
| FO | Fasten off |
These abbreviations follow standard US crochet naming. In UK terminology, a US single crochet is called a double crochet, while a US double crochet is called a treble.

Welcome to the Craft Yarn Council
Before You Start
Check your yarn tension
Your crocheted cords should be flexible, but not loose or full of large gaps.
Make a short practice chain and work one row of single crochet stitches into it. If your fabric feels rigid and bunches together, loosen your tension slightly or try a larger hook.
If the stitches look uneven or floppy, adjust your yarn tension before beginning the actual parandi.
Consistency is more important than crocheting tightly.
How to count your stitches
Look at the upper edge of a row of crochet. Each completed stitch forms a small V.
Count the V shapes along the top to check your stitch count. For the narrow cords in this tutorial, each completed row has three single crochet stitches.
The turning chain does not count as a stitch.
Choose the right length
Before crocheting the full hanging cords, decide where you want the parandi to end.
For a shorter accessory, you might want a 35–40 cm hanging section. For a longer style, 45–55 cm works as an adjustable starting target.
Measure along the intended hairstyle rather than guessing from the person’s total hair length.
Remember that tassels add extra length at the bottom.
Right side and wrong side
For the main cords, either surface can face outward. They are simple rows of single crochet with a similar appearance on both sides.
For the flowers, the front is the side where the petals look best after the center has been tightened.
The back is the side used for attaching the flower to the cord.
One important beginner tip
Don’t sew your flowers onto the cords immediately after making them.
First, finish the cords, flowers, leaves, and tassels. Then lay everything flat and decide where each decoration should go.
This makes it much easier to keep the design balanced.
Step-by-Step Crochet Parandi Tutorial
Step 1: Crochet the Attachment Loop
The top attachment loop is the part used to secure the parandi to a braid or hair elastic.
It needs to be flexible and relatively slim so it doesn’t create a large lump near the hair.
Using muted sage green yarn, make a slip knot.
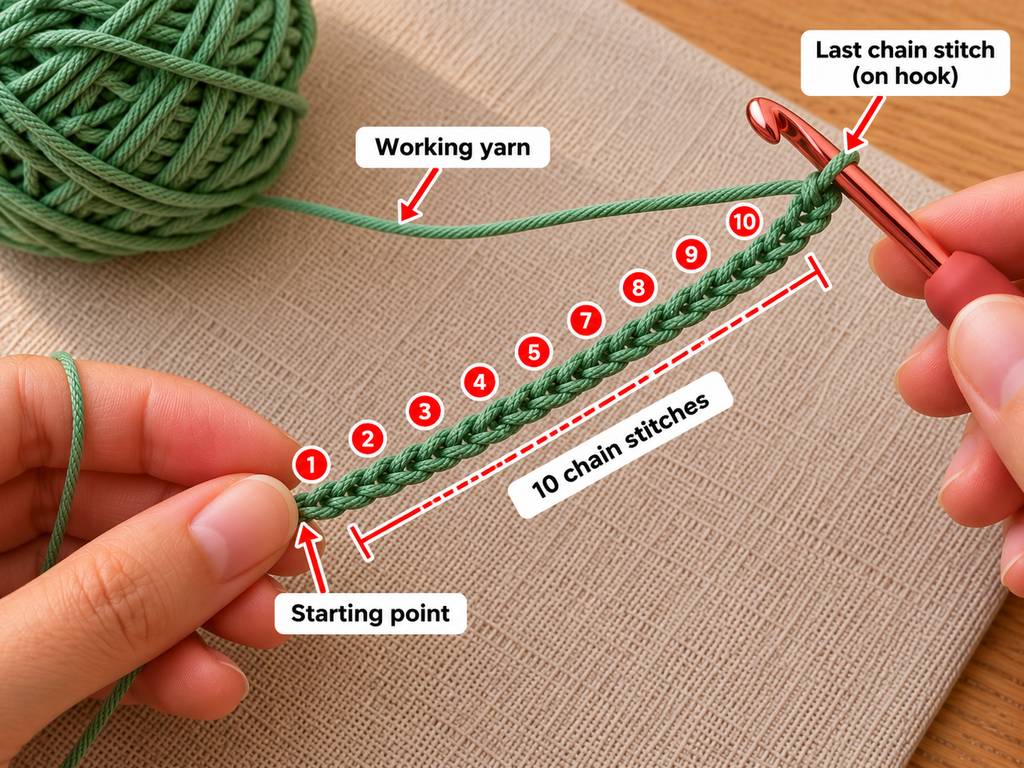
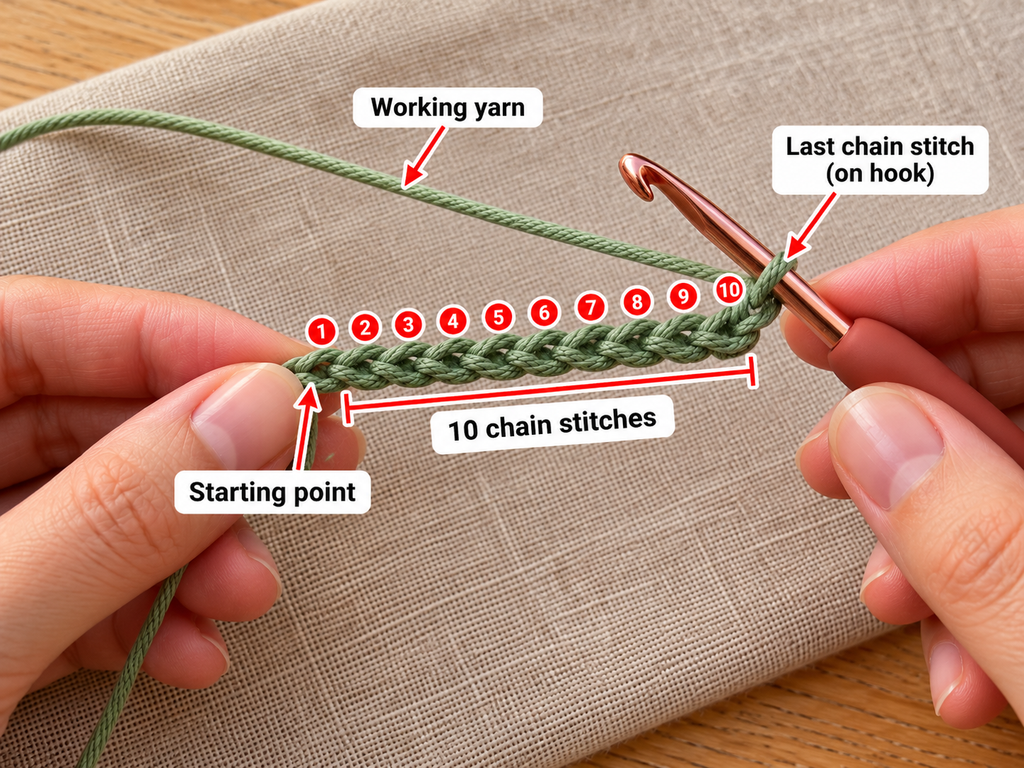
Foundation: Ch 22.
Check the chain before continuing. It should lie flat and should not be twisted.
Starting in the second chain from the hook, work one sc into each remaining chain.
You will have 21 sc.
Fasten off, leaving a long tail of approximately 20 cm for sewing.
Bring the two short ends together to form a soft loop. Do not sew the loop closed yet; we’ll attach it to the hanging strands after making them.
The finished loop should be roughly large enough to pass a small finger through, although exact size depends on tension.
Beginner tip: Keep the first foundation chain slightly loose. A tight foundation chain can make the finished loop curl inward.
Common mistake to avoid: Twisting the strip before sewing the ends together. Lay it flat and check that the stitch rows follow the same direction.
Step 2: Crochet the Three Hanging Cords
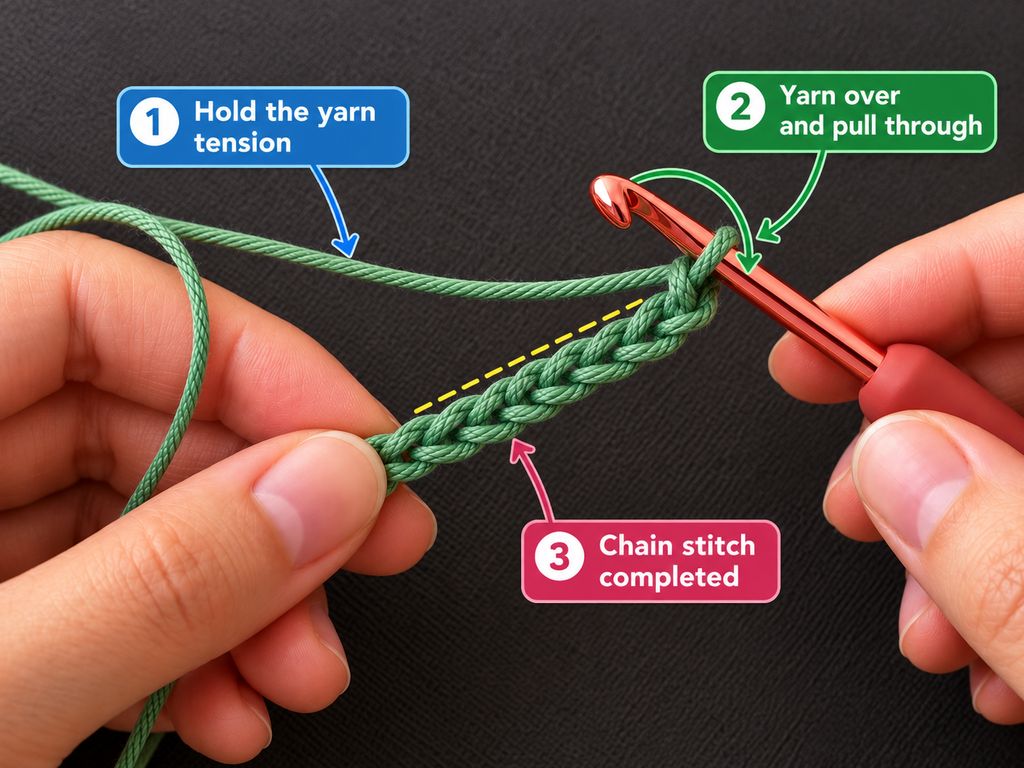
The hanging cords form the main length of the parandi. We’ll make three matching flat cords using single crochet.
Working three stitches across keeps them narrow and gives them a little more structure than an ordinary chain.
Using sage green yarn:
Row 1: Ch 4. Starting in the second chain from the hook, sc in each of the next 3 chains. (3 sc)
Row 2: Ch 1, turn. Sc in each of the 3 stitches. (3 sc)
Rows 3 onward: Repeat Row 2 until the cord measures approximately 42–50 cm, or your preferred length.
Fasten off, leaving a sewing tail at one end.
Repeat the same instructions twice more to make three cords.
Once all three are complete, lay them side by side.
They should have the same length when lying naturally, without stretching.
If one is slightly shorter, check whether its tension is tighter. You may need to add a few rows, or remake a section if the difference is noticeable.
Beginner tip: Count three stitches at the end of every row. Small crochet strips can accidentally grow or shrink when the turning chain is mistaken for a stitch.
Common mistake to avoid: Pulling the yarn too tightly at the edge of each row. This can create a cord that twists and refuses to hang straight.
Step 3: Crochet Six Small Pointed Leaves
The leaves add a botanical look without making the accessory too bulky.
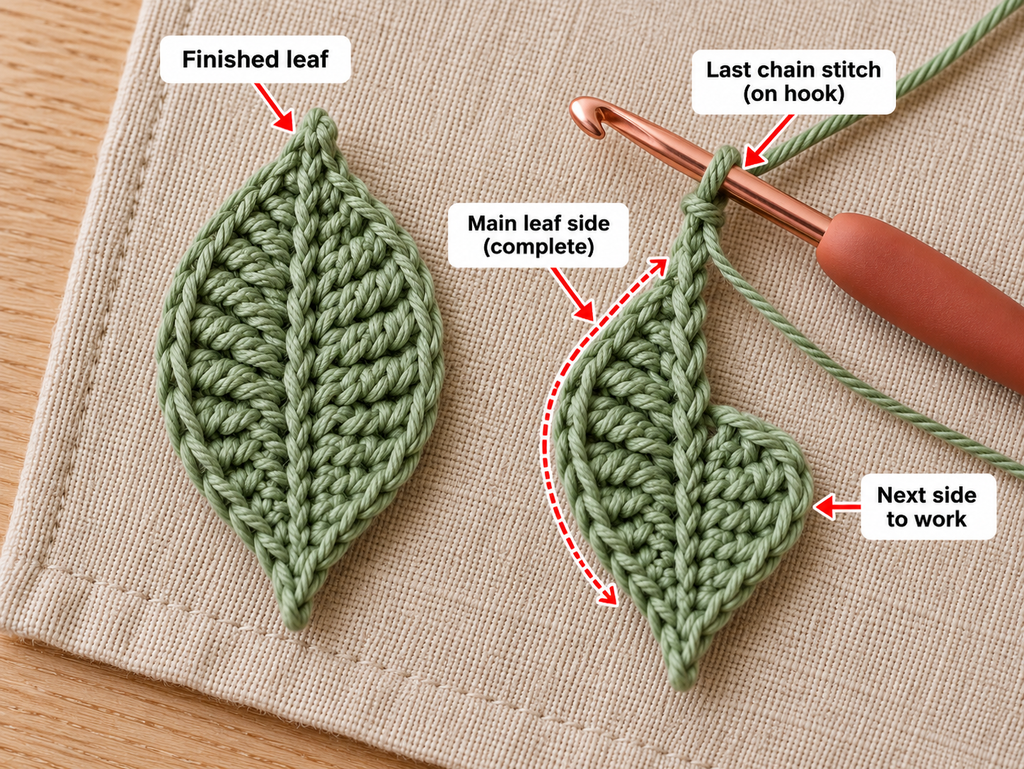
For this design, each leaf is made around a short foundation chain, increasing and decreasing stitch height to create a gently pointed shape.
Using sage green yarn:
- Make a slip knot and ch 7.
- Starting in the second chain from the hook, work 1 sl st in the first chain.
- Work 1 sc in the next chain.
- Work 1 hdc in the next chain.
- Work 1 dc in the next chain.
- Work 1 hdc in the next chain.
- Work 1 sc in the final chain.
Now rotate your work so you can crochet into the unused loops along the opposite side of the foundation chain.
Continue along that side, beginning at the same end where your last sc was worked:
- Work 1 sc into the unused loop of that end chain.
- Work 1 hdc in the next unused loop.
- Work 1 dc in the next unused loop.
- Work 1 hdc in the next unused loop.
- Work 1 sc in the next unused loop.
- Work 1 sl st in the unused loop nearest the narrow tip.
Fasten off, leaving a 12–15 cm tail.
Gently shape the leaf with your fingers.
The tallest stitches create the wider central portion, while the shorter stitches form the tapered ends.
Make six leaves using the same method.
Beginner tip: Check the first leaf against the others as you go. It is much easier to maintain consistent proportions when you have a finished sample nearby.
Common mistake to avoid: Working into the same loops on both sides of the chain. You need to access the remaining foundation loops to create a leaf with two sides.
Step 4: Cut the Yarn for the Tassels
A parandi wouldn’t have the same flowing appearance without its decorative tassels.
For this design, we’ll make three tassels using dusty rose, cream, and deep berry yarn.
Cut a piece of cardboard approximately 10–12 cm wide.
Wrap your selected yarn around the cardboard, keeping the wraps neat and not too tight.
For each tassel, make approximately 20 wraps. You can alternate colors or use separate bundles in the same tassel.
Slip the wrapped bundle carefully off the cardboard.
Cut through the loops at one end only, creating a group of yarn lengths of approximately 20–24 cm.
Gather the middle of the strands and fold them in half.
You now have a soft tassel bundle.
The final tassel length will be approximately 10–12 cm before trimming.
Make three matching bundles.
Beginner tip: Always use the same cardboard guide for all three tassels. It helps maintain consistent length without repeatedly measuring every strand.
Common mistake to avoid: Cutting the yarn from both folded ends before securing the center. You can lose the midpoint and end up with uneven tassels.
Step 5: Attach a Tassel to Each Cord
Take one completed sage green hanging cord.
Position the folded midpoint of one tassel at the bottom of the cord, so the loose yarn ends hang downward.
Use a long piece of matching sage yarn to stitch through the folded bundle and the lower end of the crocheted cord several times.
Pull the sewing yarn firmly enough to secure the bundle, but do not pull so tightly that you distort the cord.
Next, take a separate length of dusty rose yarn and wrap it around the tassel approximately 1 cm below its attachment point.
Make several neat wraps to create a small tassel neck.
Use a yarn needle to hide the wrapping yarn beneath the wraps. Secure it with a small knot or locking stitch hidden inside the bundle.
Repeat for the remaining two cords.
Place the cords together and compare the finished tassels.
Trim the loose ends so all three tassels have a similar shape.
Beginner tip: Stitching the folded tassel midpoint to the cord before wrapping its neck gives the tassel a more secure foundation than simply tying loose strands around the end.
Common mistake to avoid: Depending on one loose knot to hold the tassel. A tassel used in hair may be pulled or brushed accidentally, so secure the attachment with multiple stitches.
Step 6: Make Six Mini Crochet Flowers
Now comes one of the prettiest parts of the project: crocheting the little flowers.
We’ll use a simple five-petal design that lies relatively flat against the cords.
Make four flowers in dusty rose and two in cream.
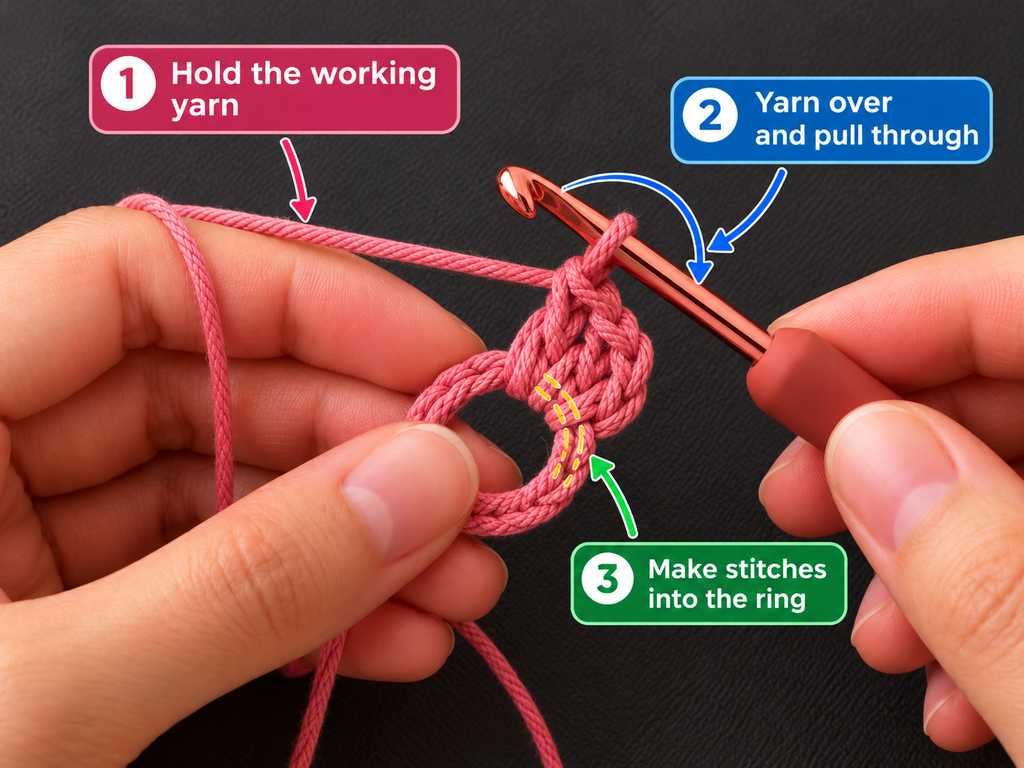
Starting ring: Make a magic ring with the first flower color. Alternatively, ch 4 and join with a sl st to form a small ring.
Ch 1 to prepare the work. This chain does not count as a stitch.
Flower round: Repeat the following petal five times into the center ring:
Ch 2, 2 dc into the ring, ch 2, sl st into the ring.
At the end of the fifth petal, gently pull the magic-ring tail to close the center.
Fasten off, leaving a long tail for sewing.
Your flower should have five clearly defined petals, with a total of ten dc stitches divided between the petals.
Take a moment to spread the petals with your fingertips.
Make the remaining five flowers using the same pattern.
Beginner tip: Work all five petals into the central ring, not into previous petals. If you find the ring becoming crowded, loosen the yarn slightly before tightening the center.
Common mistake to avoid: Forgetting the slip stitch at the end of each petal. That slip stitch brings the yarn back to the center and helps define the petal shape.
When your first flower is finished, compare all five petals.
They should be similar in size. Slight differences are perfectly normal in handmade crochet, but one very tight petal may look smaller than its neighbors.
A small crochet flower is much easier to shape before attaching it to the long parandi strand.
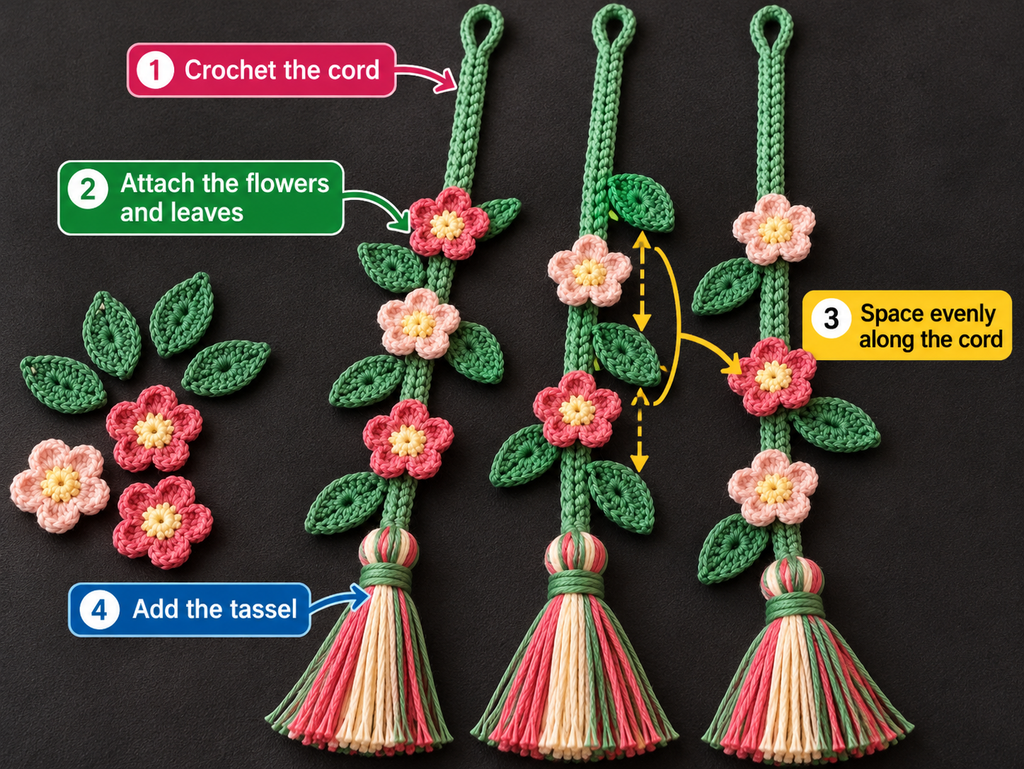
Step 7: Arrange the Flowers and Leaves
With the individual pieces finished, it’s time to plan how they will look together.
Lay the three crocheted cords vertically on a flat surface.
Place the top ends together, with the tassels pointing downward.
Arrange your flowers and leaves along the cords without sewing anything yet.
A balanced starting layout is:
- First cord: two dusty rose flowers and two sage leaves.
- Second cord: one cream flower, one dusty rose flower, and two sage leaves.
- Third cord: one cream flower, one dusty rose flower, and two sage leaves.
Leave the upper 8–10 cm of each hanging cord relatively undecorated.
This helps keep the top portion flexible where it meets the braid or ponytail.
Space the remaining decorations at different heights rather than putting all the flowers directly opposite one another.
For example, position one flower approximately one-third of the way down a strand, and another around two-thirds.
Place a leaf above or below the flower so the design looks like a small vine.
Stand back and check the arrangement.
Do the flowers look evenly distributed? Does one cord appear too heavy? Are any leaves hiding behind the flowers?
Move things around until you like the overall shape.
Beginner tip: Temporarily secure flowers with removable stitch markers before sewing them. This lets you lift the cords and inspect how the design hangs.
Common mistake to avoid: Decorating the very top of every cord with large flowers. That can make the attachment bulky and uncomfortable near the hair.
Step 8: Sew the Flowers and Leaves in Place
Thread your blunt yarn needle with the long yarn tail from one flower.
Hold the flower against its selected cord.
Insert the needle through a few stitches on the back of the flower, then through the cord beneath it.
Make two or three small securing stitches.
Avoid sewing right across the front petals. You want the flower to retain its rounded shape.
Weave the yarn tail into the back of the flower and fasten it securely.
Repeat for the remaining flowers.
Attach the leaves in the same way, sewing mainly along the lower center so the leaf tips can remain slightly free.
Once all pieces are attached, lift the cords and allow them to hang.
Check whether any decoration flips backward. If a flower rotates too easily, add another small stitch through the flower base and the cord.
Beginner tip: Use yarn that matches the flower or leaf being attached. If a stitch shows slightly on the front, it will be less noticeable.
Common mistake to avoid: Attaching a flower only by one loose stitch. It may rotate when the hair accessory moves.
Step 9: Join the Cords to the Attachment Loop
Gather the three plain top ends of the hanging cords.
Arrange them side by side so their decorative fronts face the same direction.
Using your yarn needle and sage yarn, stitch across the top ends several times to form a secure, flat connection.
Next, take the attachment-loop strip made in Step 1.
Fold it into a loop, and position its two short ends around the joined tops of the three hanging cords.
Sew the ends of the loop securely to the bundle, covering the cord connection without creating a large knot.
Check that the loop remains open and can be used for attachment.
Give each cord a gentle tug to confirm it is securely joined.
If the top looks too bulky, remove any unnecessary wraps or loose yarn and remake the seam more neatly.
Beginner tip: Keep the main connection compact. It should sit comfortably near a braid without pushing against the scalp.
Common mistake to avoid: Sewing one cord higher than the others. Align all three cords before completing the connection.
Step 10: Final Shaping and Finishing
Your handmade crochet parandi is almost complete!
Lay the finished accessory on a clean, flat surface.
Gently straighten the three hanging cords.
Check each flower and leaf to make sure it faces outward.
Trim the tassels one final time.
If your cotton flowers appear slightly curled, lightly mist them with water and shape them with your fingers.
Allow the accessory to dry completely before wearing.
Don’t stretch the hanging cords while they are wet. Cotton can change shape when pulled, and uneven stretching may cause the strands to hang at different lengths.
Finally, check the attachment loop and tassels for loose ends.
Your parandi should feel lightweight, flexible, and secure.
Pattern Notes and Stitch Counts
These notes are useful if you want to make another parandi later or adjust the dimensions for a different hairstyle.
Attachment loop: Ch 22, then work 21 sc along the chain. This creates a soft strip that can be sewn into a loop.
Hanging cords: Each cord starts with ch 4 and has exactly 3 sc per row. Continue until the target measurement is reached. The number of rows varies with individual tension.
Leaves: Each leaf begins with ch 7. Use increasing and decreasing stitch heights on the two sides of the chain to form its shape.
Flowers: Each flower has five petals. Each petal contains 2 dc stitches, with chains and slip stitches forming the surrounding shape.
Turning chain rule: When making the hanging cords, ch 1 at the start of each new row. This chain does not count as a stitch.
Repeat pattern: Repeat the second cord row until the required length. Repeat the flower-petal sequence five times for each flower.
Right side/wrong side: The cords are almost reversible. Sew flowers and leaves with their prettier sides facing outward.
Adjusting size: Increase or decrease the number of cord rows. Measure in centimeters rather than relying on a fixed row count.
The stitch counts above are the intended counts for the written design. This is a newly drafted pattern and has not been independently sample-tested, so make one practice flower and leaf before committing to a full set.
Common Beginner Mistakes and How to Fix Them
1. The hanging cords twist or curl
This usually happens when tension becomes too tight or changes significantly between rows.
Try relaxing your grip on the working yarn. If you’re finding it hard to insert the hook into stitches, your tension may be too tight.
You can also test a 4 mm hook with the same yarn.
2. One cord is shorter than the others
Even with the same number of rows, cords can differ slightly in length.
Instead of making every cord from the same number of rows, measure each finished cord while it lies flat.
Add or remove rows as necessary.
3. The leaves look round instead of pointed
Check the sequence of stitch heights. The middle of the leaf should contain the tallest stitch, with shorter stitches toward the ends.
If the tip still looks round, gently pinch it into shape before attaching.
4. The flowers look crowded in the center
The central ring may be too small for the number of stitches worked into it.
Try leaving the ring slightly open while making the petals, then tighten it gradually.
Don’t pull the center completely shut before the last petal is finished.
5. The tassels are uneven
Cut the yarn against a consistent measuring guide.
Secure the tassel first, then trim its bottom edge using sharp scissors.
Avoid stretching the tassel strands while trimming; they may bounce back to different lengths.
6. The flowers keep turning backward
A single loose stitch may not hold a flower in the correct position.
Add two or three securing stitches behind the flower, anchoring it across a small area of the cord.
7. The finished parandi feels too heavy
This can happen when thick yarn, large flowers, many beads, and long tassels are used together.
Use fewer flowers, shorter tassels, or finer yarn.
Lightweight decorations are especially important for accessories worn in the hair.
How to Customize This Crochet Parandi
Once you’ve made one floral parandi, it’s easy to personalize the next one.
Change the color palette
Try soft lavender and cream for a delicate look, or deep red and gold-toned yarn for festive styling.
For a botanical look, keep the cords green and use two or three flower colors.
If you prefer a more minimal accessory, use one color for the entire project.
Make the parandi shorter or longer
For shorter hairstyles, reduce the hanging cord length and use smaller tassels.
For a longer braid, add more rows to all three cords.
Always consider the tassel length when deciding the final measurement.
Add more flowers
A fuller floral parandi can include extra mini flowers between the larger ones.
However, avoid placing so many flowers that the cords become stiff or difficult to arrange.
Leaving occasional sections of plain cord gives the design breathing room.
Change the texture
For a more delicate accessory, use thinner cotton thread and a smaller hook.
For a softer appearance, try a smooth lightweight yarn with a gentle drape.
Avoid fuzzy yarn if you’re still learning, because it can hide the stitches.
Add a decorative edging
You can work a simple slip-stitch accent along one side of a cord using contrasting yarn.
Keep the edging loose enough so it doesn’t pull the cord into a curve.
Make a matching gift set
A crochet parandi looks lovely when paired with a matching small crochet flower hair clip, soft scrunchie, or miniature crochet flower brooch.
For a thoughtful handmade gift, choose a palette that matches the recipient’s favorite colors.
How to Wear a Crochet Parandi
The easiest way to wear this particular floral design is as a decorative addition to a secured braid.
Begin by creating your usual braid or ponytail and securing it with a soft elastic.
Pass the parandi’s attachment loop around or through the hair elastic and secure it gently.
Arrange the three hanging strands so they fall beside or over the braid.
If you prefer a more integrated style, you can incorporate plain portions of the cords into the braid, but keep bulky flowers and tassels below the braided section so they don’t snag.
Avoid winding the attachment tightly against the scalp.
The accessory should remain comfortable and should not pull on the hair when you move.
For active use, check the connection periodically and avoid dangling embellishments that may catch on clothing or accessories.
Finishing, Washing, and Care
A handmade crochet hair accessory will last longer if you store and wash it carefully.
Weaving in ends
Thread any remaining yarn tail into a blunt needle.
Pass it through several stitches on the back of the work, change direction, and weave through another small section.
Trim only after the tail is secure.
Gentle shaping
Lightly dampen a flower or leaf if it needs reshaping.
Arrange the petals evenly with your fingers and leave the accessory flat until dry.
Avoid heavy stretching.
Washing
Always follow the care instructions on the yarn label.
For washable cotton, gentle hand washing in cool water is often a suitable approach, but check the particular yarn and any added decorations first.
Support the tassels while washing so they do not become tangled.
Press excess water out gently with a towel. Do not wring.
Storage
Store the parandi flat or hang it from its attachment loop, with tassels hanging freely.
Avoid squeezing it beneath heavy items, because the flowers can lose their shape.
If small beads are added, make sure they cannot detach. Avoid loose small decorations on accessories intended for young children.
Quick Printable-Style Crochet Parandi Pattern Summary
Crochet Floral Parandi — Pattern at a Glance
| Skill level | Confident beginner |
| Yarn | DK cotton in four coordinating shades |
| Hook | 3.5 mm |
| Stitches | ch, sl st, sc, hdc, dc, tr |
| Attachment | Ch 22; 21 sc; sew into loop |
| Cords | Make 3; work 3 sc per row to preferred length |
| Leaves | Make 6; begin each with ch 7 |
| Flowers | Make 6; five repeated petals per flower |
| Tassels | Make 3 matching yarn bundles |
| Finishing | Sew motifs, join cords to loop, secure tassels, weave ends |
Copy Quick Pattern
Frequently Asked Questions About Crochet Parandi
1. Is crochet parandi suitable for beginners?
Yes, especially if you already know how to make chains and single crochet stitches. This design adds small leaves and simple flowers, so it’s best for a confident beginner rather than someone working with a hook for the very first time.
The individual pieces are manageable. The part that requires the most patience is making three matching cords and sewing the decorations securely.
2. What yarn is best for a crochet parandi?
Smooth cotton yarn is a useful beginner choice because it makes the stitches easy to see.
DK cotton works well for this project, while thinner cotton thread can create a more delicate result.
The yarn should be comfortable against hair and light enough to hang naturally.
3. How long should a crochet parandi be?
There isn’t one correct length.
A shorter decorative style may have hanging cords of approximately 30–40 cm. A longer style may use 45–55 cm or more.
Measure the intended hairstyle, then account for the tassel length and attachment loop.
4. Can I make a crochet parandi without flowers?
Absolutely.
You can create a simple tassel parandi using only three crocheted cords, an attachment loop, and tassels.
This is a particularly good beginner variation because it eliminates the motif-making and sewing stages.
5. How many flowers do I need for a floral crochet parandi?
This tutorial uses six small flowers.
You can use fewer flowers for a minimalist design or add several more for a fuller look.
The best number depends on the length of your cords and the size of the flowers.
6. Can I wash a crochet parandi?
Usually, yes, if the yarn and decorations are washable.
Check the yarn label first.
Gentle hand washing is often preferable for a decorated accessory, especially if it contains flowers, loose tassels, or delicate attachments.
Dry the accessory flat and reshape the motifs before storing.
7. How do I stop the crochet parandi from slipping out of my hair?
Use a secure but comfortable attachment method.
For this design, attach the crocheted loop around an existing hair elastic rather than relying on friction alone.
Test the attachment by gently moving the finished accessory before wearing it outside.
If it slips, try a different soft hair elastic or adjust the loop size. Avoid tightening it excessively.
Conclusion
A floral crochet parandi is a lovely project for practicing small crochet techniques while creating something wearable.
The basic construction is straightforward: make the attachment loop, crochet three narrow cords, add leaves and flowers, finish the tassels, and carefully join everything together.
What makes the project special is the opportunity to personalize every detail. You can use traditional bright colors, quiet botanical shades, or yarn that matches a favorite outfit.
Start with the simple six-flower version, take your time shaping each piece, and check how the strands hang before finishing.
Once you’ve made your first crochet parandi, you can use the same basic techniques for matching crochet hair accessories, floral ties, or decorative yarn ornaments.
Save this tutorial to your crochet inspiration board so you can return to the pattern whenever you want to make another color combination.