Some crochet projects require complicated shaping, careful increases, or hours of counting. This easy crochet ear warmer is different. You start with a simple chain, crochet a flat rectangle, and transform it into a cozy headband with a pretty twist at the front.
The result looks more detailed than the actual technique. The ribbing gives the fabric a soft, knitted appearance, while the folded seam creates a gathered centerpiece without cables, complicated stitch combinations, or separate decorative pieces.
If you already know how to make a chain and a single crochet stitch, you’re ready to try this project. And if you’re still practicing those basic stitches, an ear warmer is a lovely way to build confidence without committing to a large blanket or sweater.
This free crochet ear warmer pattern includes step-by-step instructions, helpful beginner tips, sizing guidance, common mistakes, and finishing advice.
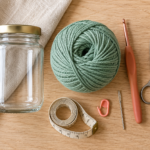
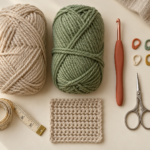
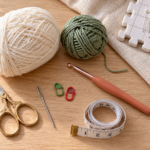
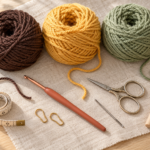
You only need one ball of yarn, a crochet hook, and a few simple tools.
What You’ll Learn
By the time you finish this crochet ear warmer, you’ll know how to:
- Create a comfortable foundation chain without pulling it too tight.
- Work neat rows of single crochet.
- Crochet through the back loop to make ribbed fabric.
- Maintain straight edges and consistent stitch counts.
- Adjust the size for different head circumferences.
- Create a twist-front headband using an interlocking fold.
- Sew an almost invisible seam.
- Finish and care for your handmade accessory.
The most satisfying part is that the entire headband is made from one rectangular piece of crochet fabric. There is no complicated shaping, and the decorative twist is created during assembly.
Crochet Ear Warmer Pattern at a Glance
| Pattern Detail | Information |
|---|---|
| Difficulty | Beginner |
| Construction | Flat rectangle, sewn into a loop |
| Main stitch | Single crochet back loop only |
| Yarn | Category 5 bulky yarn |
| Hook | 6 mm (J/10) |
| Finished width | Approximately 4–4.5 inches |
| Suggested finished circumference | About 19–20 inches for an adult medium, adjusted to fit |
| Time | Approximately 2–3 hours |
| Yarn needed | Approximately 70–100 yards (64–91 m), depending on size and gauge |
This is an original, measurement-adjustable pattern. The dimensions are targets rather than guaranteed results; yarn, hook choice, and personal tension will affect the actual size.
Materials You’ll Need
One reason crochet ear warmers are such enjoyable beginner projects is that they require very few supplies. You may already have everything in your crochet basket.
Yarn
For this pattern, choose a soft category 5 bulky yarn.
Bulky yarn works particularly well because it makes the fabric feel substantial without needing dozens of rows. The thicker yarn also makes individual stitches easier to see while you’re learning.
I recommend a smooth acrylic, wool blend, or similarly soft yarn. A yarn with a relatively even thickness will help the ribs look clear and consistent.
For the tutorial photography, we’ll use a muted dusty-sage green shade. It’s easy to see the stitch texture in this color, and it looks lovely with autumn and winter clothing.
Avoid very fuzzy, heavily textured, or extremely slippery yarn for your first ear warmer. Those yarns may look beautiful, but they can make it harder to identify the front and back loops of each stitch.
Crochet hook and accessories
You’ll need a 6 mm crochet hook, a pair of small scissors, a blunt tapestry needle for sewing, and a flexible measuring tape. Two stitch markers are optional but useful for identifying the first and last stitches of each row.
The hook size is a starting recommendation. Check your yarn label and adjust if your stitches are unusually stiff or loose.
Crochet Abbreviations Used
This tutorial uses US crochet terminology.
| Abbreviation | Meaning |
|---|---|
| ch | Chain |
| sc | Single crochet |
| BLO | Back loop only |
| st / sts | Stitch / stitches |
| rep | Repeat |
A US single crochet is called a double crochet in UK terminology. Make sure you’re using the US stitch instructions for this pattern.
How to make a single crochet
Insert your hook into the indicated stitch. Yarn over and draw up a loop, leaving two loops on the hook. Yarn over again and pull through both loops.
That’s one single crochet completed.
What does back loop only mean?
Look at the top of a crochet stitch. You’ll see two strands forming a small V.
The strand closest to you is the front loop, while the strand farther away is the back loop.
When you work a single crochet in the back loop only, insert your hook beneath the back strand instead of passing under both strands.
Leaving the front loop unused creates a raised line on the surface of the fabric. Repeating this technique creates the soft ribs that make this ear warmer so comfortable.
Before You Start
A few minutes of preparation will make the rest of the project easier.
1. Measure your head
Use a flexible measuring tape to measure the area where your ear warmer will sit.
Position the tape around your forehead, across your ears, and around the back of your head. It should be comfortable and level, rather than pulled tightly.
Crochet ribbing usually stretches, so your finished ear warmer may need to be slightly smaller than your head circumference.
The exact amount depends on the yarn and the stretch of your fabric.
| Head circumference | Initial target band length before joining |
|---|---|
| 19–20 inches | 17–18 inches |
| 20–21 inches | 18–19 inches |
| 21–22 inches | 19–20 inches |
| 22–23 inches | 20–21 inches |
| 23–24 inches | 21–22 inches |
These are starting targets, not rigid rules. Test the band gently before joining. The seam can also reduce the final circumference slightly.
2. Understand your gauge
Gauge describes how many stitches and rows fit within a specific measurement.
For this project, make a small practice swatch using your chosen yarn, hook, and back-loop-only single crochet.
Measure your stitches over a relaxed section of fabric without stretching it.
Because the initial chain runs around the head, your stitch gauge mainly controls the band’s circumference. The number of rows determines its width.
If your stitch gauge is different, adjust the foundation chain rather than forcing the fabric to match a fixed number.
3. Keep your crochet tension relaxed
One common beginner problem is pulling the working yarn too tightly.
If every stitch is difficult to enter, your fabric may become stiff and uncomfortable.
Try letting the yarn glide naturally through your fingers. Keep the loops on your hook large enough to work into without fighting them.
4. Learn to identify the row ends
The first and last stitches of each row are especially important.
When turning the work, beginners sometimes skip the first stitch or accidentally place an extra stitch into the turning chain.
We’ll use a chain-one turning method. The turning chain will not count as a stitch.
That means the stitch count stays the same throughout every row.
Step-by-Step Crochet Ear Warmer Tutorial
This pattern is worked lengthwise.
First, you’ll make a long foundation chain that establishes the circumference of the ear warmer. Next, you’ll build the width of the band by crocheting additional rows.
Once the rectangle is wide enough, you’ll fold and sew the short ends into a twist.
Step 1: Make the foundation chain
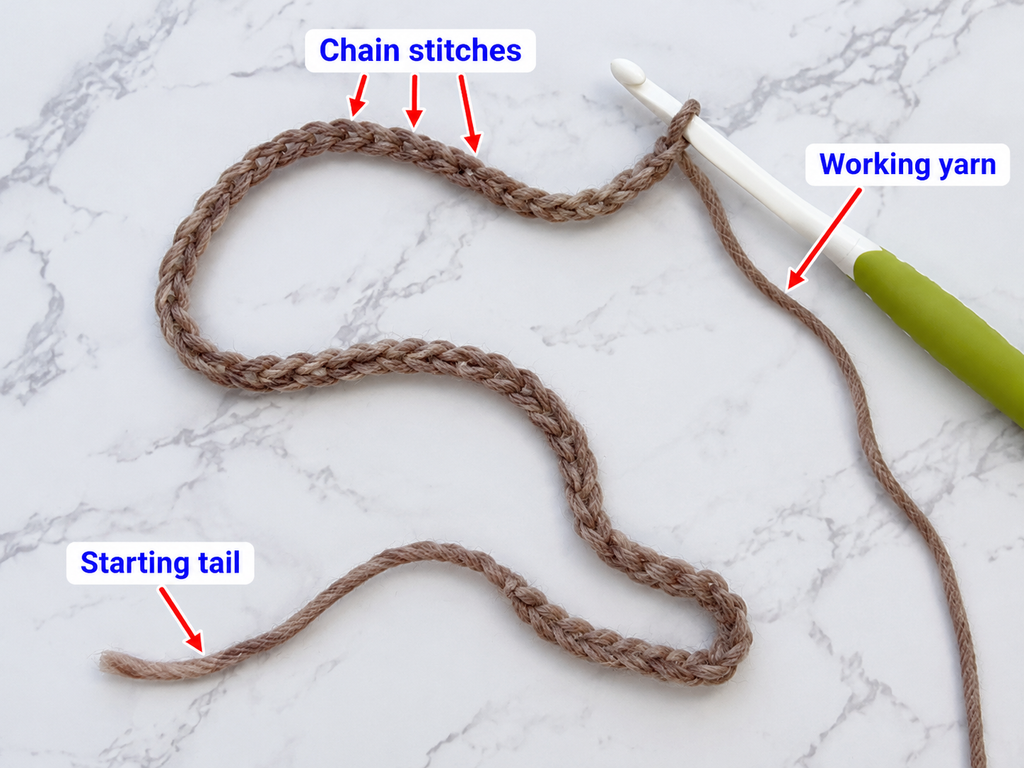
Start by making a slip knot and placing it on your 6 mm crochet hook.
Hold the working yarn comfortably in your non-dominant hand.
Yarn over and pull through the loop on the hook to make your first chain.
Continue chaining until your foundation reaches the length needed for your chosen head size.
For a sample adult ear warmer, chain 57 as an initial starting point.
This will produce 56 single crochet stitches in Row 1. However, 57 chains may be too short or too long depending on your actual gauge. Measure the chain gently without stretching it before continuing, and add or remove chains as needed.
Your chain should look like a neat series of little V shapes.
Beginner tip: Make the foundation chain slightly looser than you think you need. You can use a larger hook for the chain and switch back to the main hook for Row 1 if necessary.
Common mistake to avoid: Pulling the foundation too tightly can make one long edge of the finished ear warmer shorter and less stretchy than the other.
Step 2: Crochet the first row
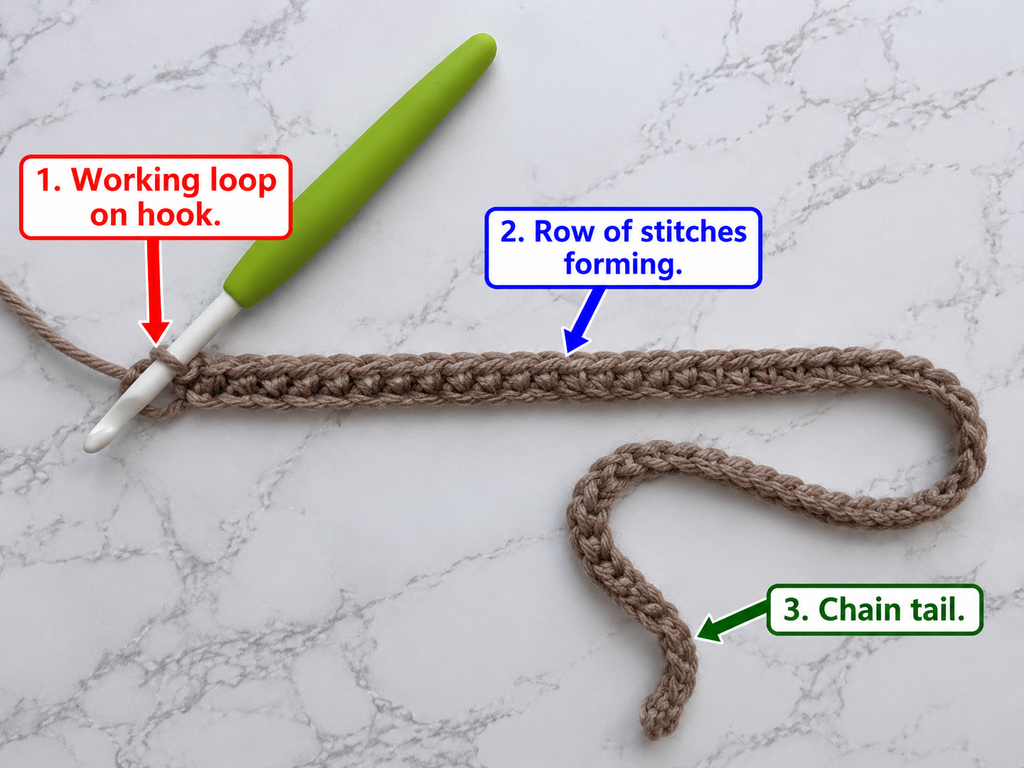
Once you’ve finished the foundation chain, it’s time to work your first row of single crochet.
Insert your hook into the second chain from the hook.
Yarn over and pull up a loop. You should now have two loops on your hook.
Yarn over once more and pull through both loops.
You’ve completed your first single crochet.
Continue working one single crochet into every remaining foundation chain.
If you started with 57 chains, you’ll have 56 single crochet stitches when you reach the end.
Pause here and count them carefully.
A foundation of a different length will have one fewer single crochet stitch than its starting chain count.
The first row may curl slightly or feel awkward to hold. That’s normal. The fabric becomes easier to handle once you’ve added a few more rows.
Beginner tip: Place a stitch marker into the first and last single crochet stitches of the row. This makes it much easier to find the row edges later.
Common mistake to avoid: Don’t crochet into the very first chain directly next to the hook. Starting in the second chain prevents an unwanted extra stitch and gives the edge a cleaner appearance.
Step 3: Begin the ribbed stitch pattern
Now we’re going to create the texture that makes this crochet ear warmer special.
Chain one and turn your work.
Look at the first stitch of the previous row. Find the V at the top and identify the loop farthest from you.
Insert your hook under that back loop only.
Work one single crochet.
Continue across the entire row, making one single crochet in the back loop of each stitch.
Remember that the turning chain does not count as a stitch.
If your first row contained 56 stitches, your second row should also contain 56.
When you finish the row, chain one and turn.
You may notice a fine horizontal ridge forming along the edge of your stitches. This is the beginning of the ribbed texture.
Beginner tip: Tilt the fabric slightly toward you to see the top loops clearly. Smooth, lightly colored yarn makes this easier.
Common mistake to avoid: Working through both loops will interrupt the intended ribbed pattern. If you accidentally work through both loops once, you can undo that stitch and correct it before continuing.
Step 4: Continue crocheting the ribbed rectangle
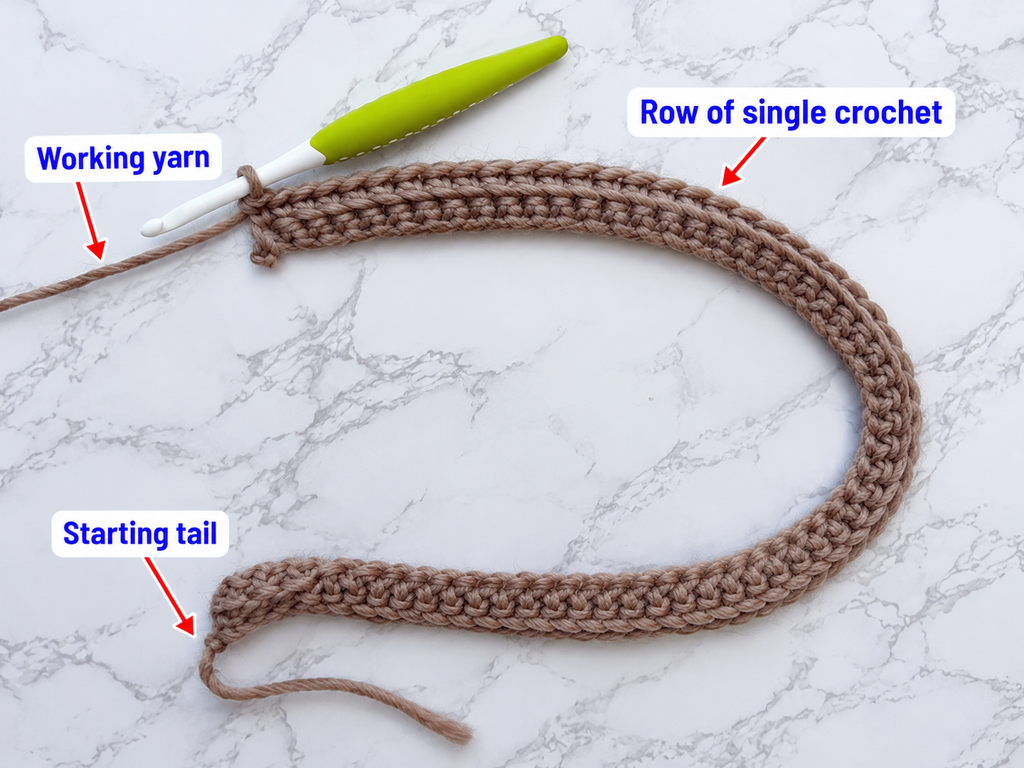
Once you understand the back-loop-only technique, the rest of the fabric is wonderfully repetitive.
For Row 3, work one single crochet into the back loop of every stitch across.
Continue using the same technique on every additional row.
The repeating pattern is:
Every row after Row 1: Chain 1, turn, then single crochet in the back loop only of each stitch across.
Repeat until the fabric is approximately 4–4.5 inches wide, or until you’ve reached your preferred width.
Depending on your tension, this may take roughly 14–20 rows or a different number. Always measure the actual fabric instead of relying on a fixed row count.
As you add rows, gently stretch the fabric sideways. You’ll see the ridges separate and spring back.
This flexibility is what helps the ear warmer fit comfortably.
Try laying your work flat every few rows. Both long edges should remain fairly straight, and the stitch count should stay consistent.
If one edge becomes noticeably narrower, count your stitches. You may have skipped the final stitch on one or more rows.
If the edge becomes wider, you may have accidentally crocheted into the turning chain.
Beginner tip: Check your stitch count every two or three rows. Small mistakes are much easier to correct before you’ve worked another ten rows.
Common mistake to avoid: Don’t tug on the fabric aggressively while measuring. Pulling it excessively will give you an inaccurate idea of the finished size.
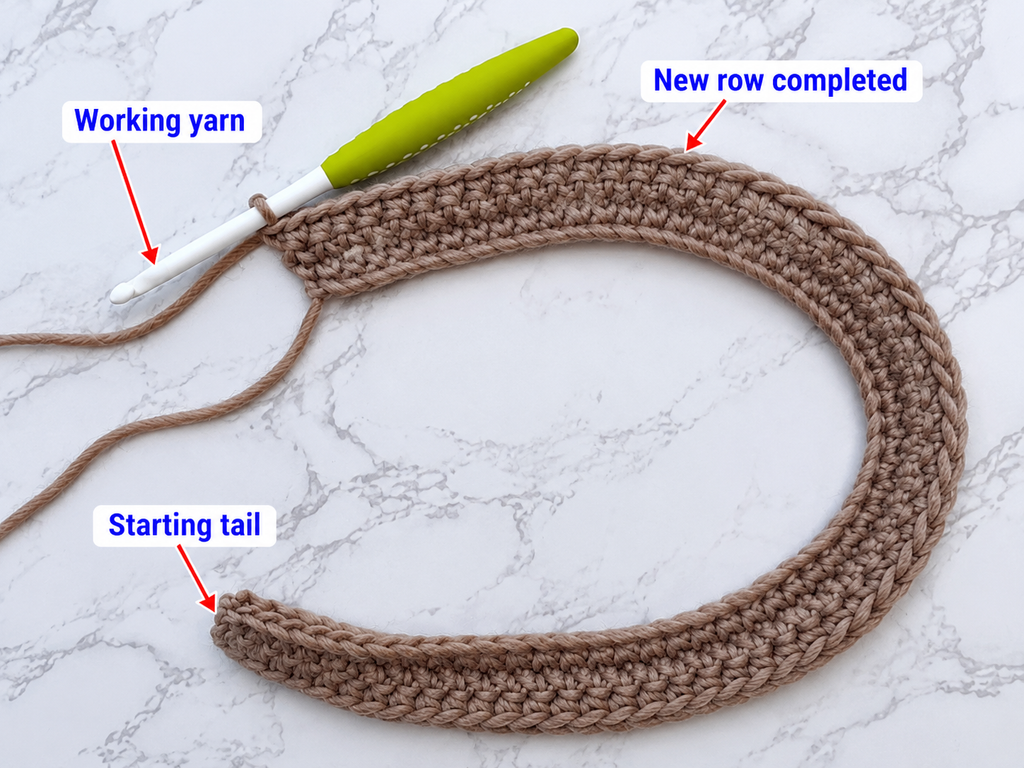
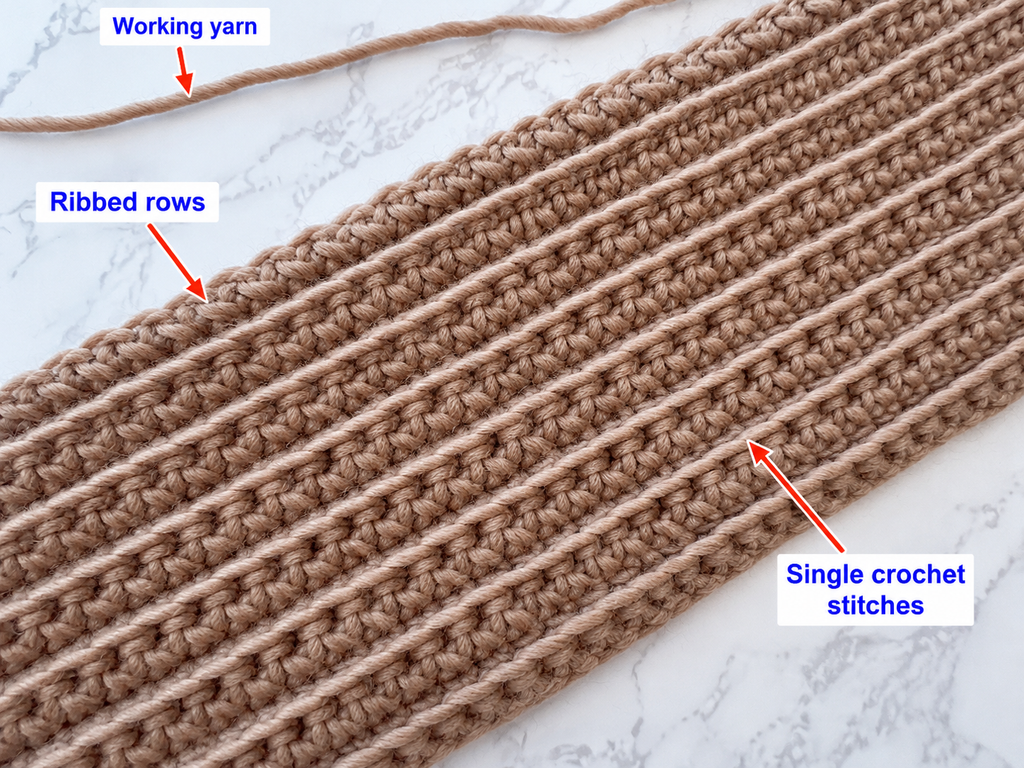
How the ribbed texture should look
Your fabric should develop an attractive series of small raised ridges.
These ridges are formed by the unused front loops from previous rows.
When the band is stretched, the ribs open slightly. When released, they draw closer together.
If your fabric looks completely flat, check that you’re working into the back loop only on each row.
If the stitches are uneven, don’t worry too much. Small tension differences are common during beginner projects, and often become less noticeable after the fabric relaxes.
Step 5: Check the length and width before finishing
Before cutting the yarn, take a moment to check your work.
Lay the rectangle on a flat surface and allow it to relax.
Measure the distance along the foundation-chain direction. This is the length that will wrap around your head.
Then measure across the rows to check the width, which determines how much of your ears the band will cover.
For a comfortable winter ear warmer, a width of approximately 4–4.5 inches is a useful target.
If you prefer a lighter autumn accessory, you can make it narrower.
Now bring the short ends together and loosely wrap the band around your head, or compare it against your head measurement.
Don’t sew anything yet.
The band should feel snug enough to remain in place but should not pinch or create uncomfortable pressure.
If the initial length is wrong, the cleanest adjustment is to change the foundation chain and remake the strip. Adding more rows will increase width, not circumference.
If the width is wrong, simply add or remove rows.
Beginner tip: Do your final measurement with the fabric relaxed, then gently stretch it to judge the available ease.
Common mistake to avoid: Confusing the long side and short side of the rectangle. In this pattern, the long side wraps around the head; the short ends are joined to form the twist.
Step 6: Prepare the fabric for the front twist
Once the rectangle is the correct size, fasten off, leaving a long yarn tail of approximately 18–24 inches for sewing.
Lay the crochet fabric flat with the side you prefer facing upward.
Because this stitch pattern is reversible, either side may be used as the outside.
Position the long edges horizontally, then bring the two short ends toward each other.
At this point, the fabric should resemble a loose ring.
Make sure the ribs run neatly around the band and that neither side has accidentally twisted.
You want to create the decorative twist during the next step, rather than accidentally twisting the entire length of fabric.
Beginner tip: Use your fingers to smooth the two short ends before folding. Straight, even edges make the seam much easier to sew.
Common mistake to avoid: Rotating one complete end of the band before joining. The interlocking fold, not a full-length twist, creates the intended gathered front.
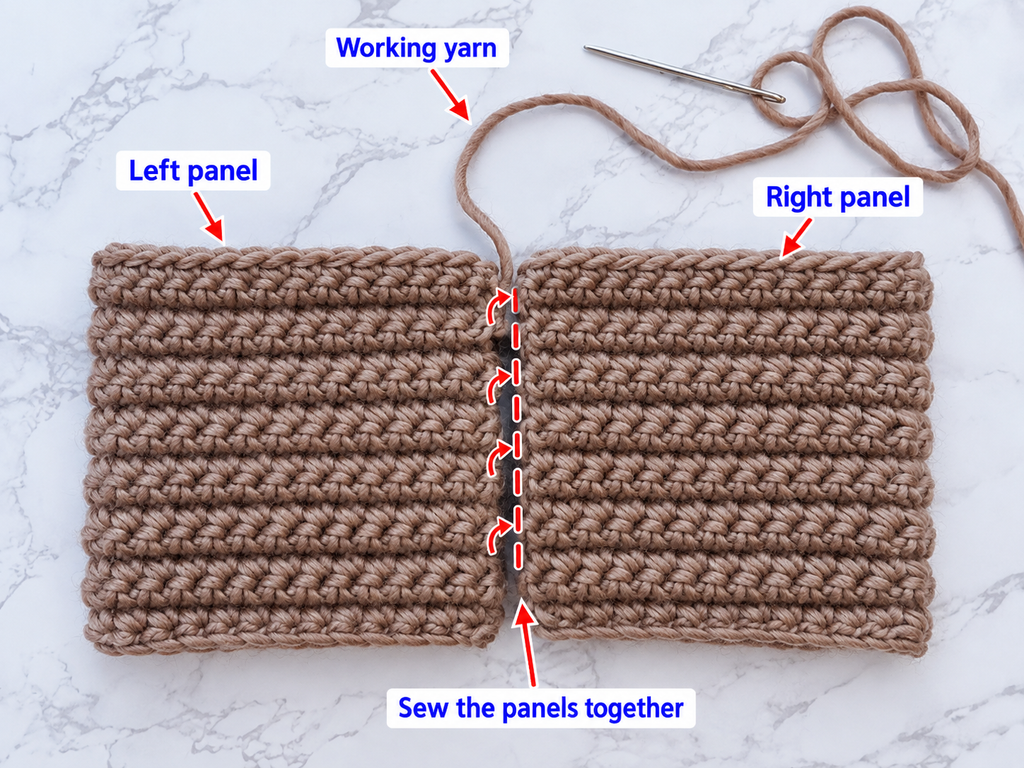
Step 7: Fold the ends to create the twist
This is the step that transforms a plain crochet rectangle into a stylish twisted headband.
Take one short end and fold it in half across the width of the band.
Do the same with the other short end.
Each folded end should resemble a small C when viewed from the side.
Now bring the two folded ends together so they interlock.
The easiest way to imagine this is as four alternating layers.
From one side to the other, the layers should follow this order: first half of End A, first half of End B, second half of End A, and second half of End B.
The folded ends are now woven into one another, rather than simply placed face-to-face.
Look closely at the folded edge. You should see four separate layers of crochet fabric stacked together.
Hold the entire folded section securely.
Once stitched and turned right side out, this interlocking arrangement produces the gathered knot-like appearance at the front of the ear warmer.
Beginner tip: Practice arranging the four layers two or three times before threading the needle. The arrangement becomes much easier once you’ve seen how the folds fit together.
Common mistake to avoid: Sewing two flat ends directly together without interlocking them will create a regular seam, not the desired twist.
Step 8: Secure the four folded layers
Before sewing, check the arrangement carefully.
All four layers should touch along one common edge.
If the layers have shifted, adjust them with your fingers until the seam edge is fairly even.
The folded section may look thick. That’s expected, especially when using bulky yarn.
You can place one or two stitch markers through the folded layers to prevent them from slipping while you thread the needle.
Take a moment to imagine where the needle will travel.
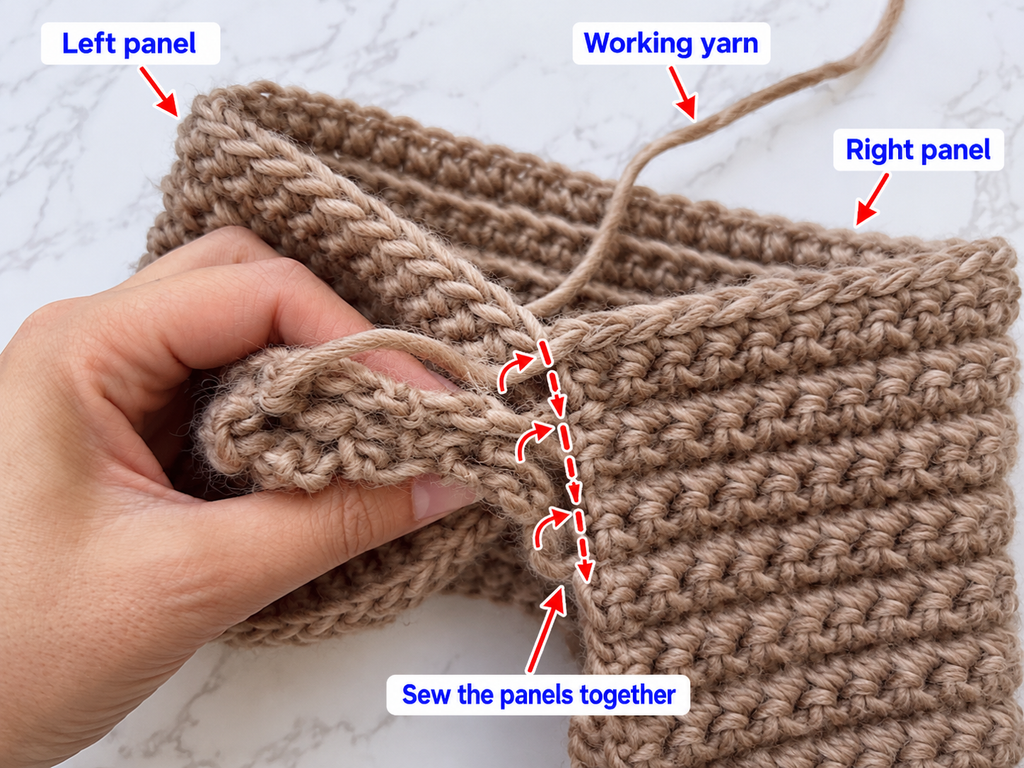
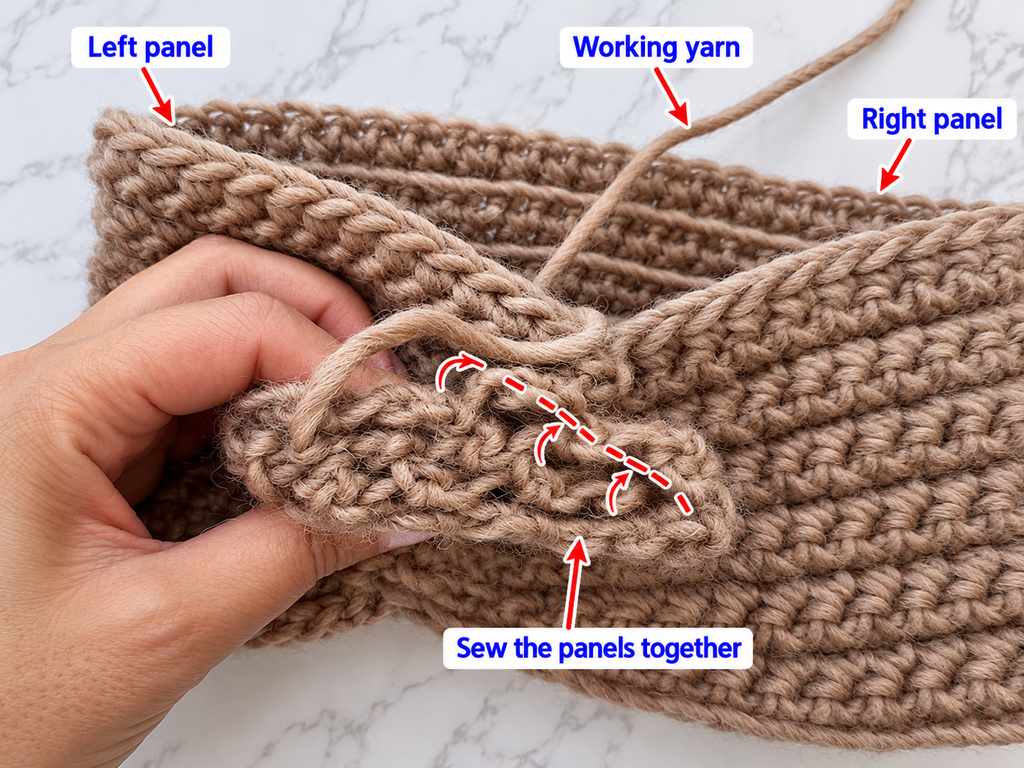
You’ll be sewing across the entire stacked edge, catching all four layers with every pass.
If one layer is missed, the twist may develop a gap when the headband is stretched.
Beginner tip: View the folded section from the side before sewing. It is much easier to count four layers from this angle.
Common mistake to avoid: Pulling one of the folded ends too far out of alignment. Keep the layers even so the twist sits near the center.
Step 9: Sew the twist together
Thread the long yarn tail through your tapestry needle.
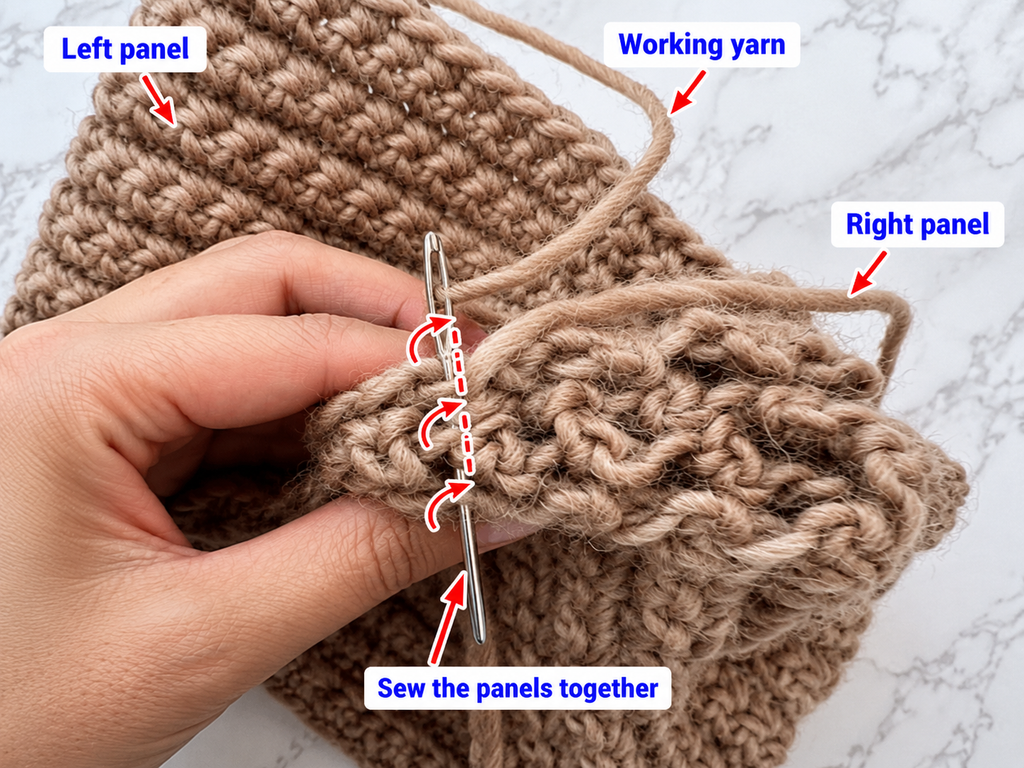
Starting at one end of the folded section, insert the needle through all four layers of crochet fabric.
Pull the yarn through gently until the stitch is snug.
Move a small distance along the seam and insert the needle through all four layers again.
Continue across the full width of the folded edge.
You can use a whipstitch or another secure hand-sewing method suitable for knitted or crocheted fabric.
The important point is that every stitch passes through all four layers.
Avoid pulling the yarn so tightly that the seam becomes a hard lump.
Once you reach the opposite side, inspect the seam. If needed, sew back across for extra strength.
Secure the yarn by weaving the tail through nearby stitches and changing direction at least once.
The seam doesn’t need to look decorative because it will be hidden inside the twist.
Beginner tip: Use a blunt tapestry needle with a large enough eye for your bulky yarn. A sharp sewing needle is unnecessary and can split the yarn.
Common mistake to avoid: Leaving the seam loose may cause the gathered centerpiece to separate after repeated wear. Check that every layer is securely attached.
Step 10: Turn the headband right side out
With the seam secure, gently open the headband into a loop.
Turn the gathered section so the seam is tucked inside and the attractive twisted detail faces outward.
Use your fingers to rearrange the ribs on both sides of the twist.
You may need to pull the fabric gently around the center until the folds look balanced.
The result should resemble a soft knot at the front, with the rest of the headband forming a smooth, ribbed band.
Try it on.
The twist should sit comfortably at the front of your head while the wider fabric covers your ears.
If the headband feels too loose, you may be able to open the seam, shorten the band slightly at the join, and sew it again. For substantial sizing changes, remake the foundation at the correct length.
Beginner tip: Shape the gathered section with your fingers rather than pulling hard on individual stitches.
Common mistake to avoid: Don’t leave the bulky seam exposed on the outside. Turn the fabric until the seam is concealed within the twist.
Pattern Notes and Stitch Counts
Here is the stitch structure for the sample pattern:
| Section | Instructions |
|---|---|
| Foundation | Chain 57, or adjust to your measured size |
| Row 1 | Single crochet in second chain from hook and every remaining chain (56 sts for sample) |
| Row 2 | Ch 1, turn, sc BLO in each stitch (56 sts) |
| Row 3 onward | Repeat Row 2 |
| Width | Continue until approximately 4–4.5 inches |
| Construction | Fold and interlock short ends |
| Seam | Sew securely through all four folded layers |
Turning chain rules
The chain one used when turning is simply there to help position the hook for the next row.
It does not count as a stitch.
Work the first single crochet into the first actual stitch of the row, not into the turning chain.
Right side and wrong side
The ribbed fabric is reversible, so there is no strict right or wrong side.
Choose whichever surface you prefer before joining the ends.
Working the repeat correctly
Every row after the foundation row uses the same repeat. There is no need to alternate different stitches or keep track of complex pattern sequences.
This makes the project particularly suitable for relaxed crocheting while listening to a podcast or watching television.
Common Beginner Mistakes and How to Fix Them
Even a simple headband can feel tricky when you’re still learning to crochet. These are the problems most worth checking.
1. The foundation chain is too tight. One edge may look shorter than the other and pull the fabric into a curve. Try making the foundation with a larger hook or using a looser tension.
2. The number of stitches changes between rows. If the rectangle narrows or widens, recount the stitches. Use markers at the ends, and don’t mistake the turning chain for an extra stitch.
3. The ribbed texture looks inconsistent. Some stitches may have been worked through both loops rather than the back loop only. Check the top V of each stitch before inserting the hook.
4. The finished headband feels too tight. The starting chain may not have been long enough, or the yarn may have very little stretch. Check the intended circumference before sewing and allow for the thickness of the seam.
5. The headband slides off easily. The finished circumference may be too large. Ribbing should stretch gently to fit; it shouldn’t hang loosely around the head.
6. The front twist looks lopsided. One folded end may have been pulled farther into the seam than the other. Before sewing, align all four layers evenly.
7. The center seam is bulky or uncomfortable. Avoid excessive knotting and overly tight stitches. Spread the folds gently after turning the headband right side out.
8. The edges curl or look uneven. Some curling is normal while crocheting ribbed fabric. Check stitch counts and let the fabric relax before deciding whether it needs gentle blocking.
The goal isn’t to make every stitch look perfect. It’s to create a comfortable, wearable ear warmer and improve your crochet skills along the way.
How to Customize This Crochet Ear Warmer Pattern
Once you’ve completed your first ear warmer, there are plenty of ways to make another one look different.
Try different yarn colors
Neutral colors like oatmeal, cream, charcoal, taupe, and camel are beautiful choices for winter accessories.
Dusty rose, forest green, burgundy, and soft blue are also lovely.
For beginners, solid colors are generally easier to work with because the stitches remain visible.
Self-striping yarn can be fun, but be aware that the stripes will travel along the length of the headband as the fabric is worked.
Make a narrower headband
For a lightweight autumn accessory, make the ribbed rectangle approximately 2.5–3 inches wide instead of the full 4–4.5 inches.
Keep the circumference suited to your head.
This creates a slimmer fashion headband that can be worn with a messy bun or ponytail.
Create extra ear coverage
If you prefer more coverage, work additional rows until the headband is approximately 5 inches wide.
This can be particularly comfortable in colder weather.
Remember that a very wide band will create a thicker twist, so choose soft yarn that folds easily.
Experiment with a different texture
Once you’re confident with this pattern, try a swatch using half double crochet in the back loop only.
It creates a different ribbed texture and can feel slightly softer and more flexible.
You can also try alternating rows of different simple stitches, but first make a sample to check the stretch and finished dimensions.
Add a simple border
You can work a decorative border along the two long edges if you’d like a more finished appearance.
A small round of single crochet can create a neat edge, although it may reduce stretch.
For the softest result, keep the border loose or leave the original ribbed edges as they are.
Make matching accessories
This stitch texture can inspire a coordinating scarf, cowl, or wrist warmers.
Use the same yarn and color for a matching handmade gift set.
A finished ear warmer is also a thoughtful gift because it requires relatively little yarn and doesn’t take as long as a sweater or blanket.
Finishing Instructions
Once the twisted seam is finished and the headband has been turned right side out, inspect the entire project.
Check that there are no loose yarn tails around the seam.
Thread any remaining ends onto a tapestry needle and weave them through several nearby stitches.
Avoid weaving every end in a straight line that could pull out when stretched. Changing direction makes the finish more secure.
Trim the excess yarn after the tail is safely secured.
Next, gently smooth the ribbed fabric with your hands.
If your ear warmer needs shaping, lightly dampen it according to the yarn manufacturer’s care instructions and lay it flat to dry.
Don’t aggressively stretch the headband during blocking, since that could make the finished circumference too large.
Acrylic yarn generally requires different care from wool or cotton, so always check the fiber content and washing instructions on the label.
For storage, fold the ear warmer loosely rather than leaving it stretched over a hook or hanger.
Quick Printable-Style Crochet Ear Warmer Pattern
Beginner Ribbed Crochet Ear Warmer Copy pattern
Skill level: Beginner
Materials: Category 5 bulky yarn, 6 mm hook, scissors, yarn needle, measuring tape.
Stitches: Chain, single crochet, single crochet in the back loop only.
Foundation: Chain 57 as an adjustable starting example, then sc across from the second chain (56 sts).
Repeat: Chain 1, turn, sc BLO across every row until approximately 4–4.5 inches wide.
Finishing: Fasten off with a long tail. Interlock two folded short ends, seam through four layers, turn right side out, and weave in ends.
Frequently Asked Questions
1. Is a crochet ear warmer easy for beginners?
Yes. A ribbed crochet ear warmer is a particularly approachable beginner project because it uses a basic stitch repeated across a flat rectangle.
You don’t need to work in the round, make increases or decreases, or follow complicated shaping instructions.
The folded twist is the most unusual part, but once you understand how the ends interlock, it becomes straightforward.
2. What is the best crochet stitch for an ear warmer?
Single crochet in the back loop only is a good choice because it creates a warm fabric with attractive ribbing.
Half double crochet can also work, especially when you want a softer or slightly more flexible headband.
For cold-weather accessories, avoid very open stitch patterns if warmth is the main goal.
3. How much yarn do I need to crochet an ear warmer?
Most adult ear warmers made with bulky yarn need approximately 70–100 yards, although the exact amount varies by stitch density, head size, width, and yarn type.
One reasonably sized ball of bulky yarn is often sufficient.
If you’re making a matching set, buy enough yarn from the same dye lot to keep the colors consistent.
4. How wide should a crochet ear warmer be?
A width of approximately 4–5 inches is comfortable for many adults and provides good ear coverage.
For a narrower fashion headband, 2–3 inches may be enough.
Try the band on before finishing, since ear coverage depends on how the headband sits and the wearer’s preferences.
5. How do I make a crochet ear warmer smaller or larger?
With this lengthwise construction, change the number of foundation chains to adjust circumference.
Add or remove rows to change width.
It’s useful to make a gauge swatch and measure the actual crochet fabric rather than rely only on standard stitch counts.
6. Why is my crochet ear warmer not stretchy?
You may be crocheting too tightly, using a stiff yarn, or working through both stitch loops instead of creating a flexible ribbed structure.
Try relaxing your tension, using a slightly larger hook, or selecting a softer yarn.
Also check that the foundation chain isn’t noticeably tighter than the rows above it.
7. Can I make this crochet ear warmer without the twist?
Absolutely.
For a simple flat ear warmer, bring the two short ends together without folding and interlocking them.
Sew the short ends with a neat, flexible seam, then turn the seam toward the inside.
This creates a classic circular ribbed headband with no gathered center.
Final Thoughts
A handmade crochet ear warmer is one of those satisfying projects that combines useful beginner practice with something you can wear immediately.
You only need to learn a few basic skills, and the repeating ribbed stitch gives you plenty of opportunity to develop comfortable yarn tension.
The finished twist adds a pretty detail without making the project difficult.
Try your first one in a soft solid color, then experiment with narrower bands, different yarns, or coordinating scarves.
Save this easy crochet ear warmer pattern for your next cozy weekend project, and enjoy turning a simple rectangle into a handmade winter accessory.