There is something lovely about making a sunflower from a few small balls of yarn. The brown center begins as a tiny circle, the yellow petals grow one by one around the edge, and suddenly you have a cheerful handmade flower that can brighten a bag, a blanket, or a little corner of your home.
If you have been looking for an easy crochet sunflower pattern, this tutorial will help you make your own flower without needing complicated stitches or a large amount of yarn.
We will start with a simple brown crochet circle, add twelve golden-yellow petals, and finish the flower neatly. You can keep your sunflower flat as an applique or add a green backing, leaves, and a decorative stem.
The best part? Most of the pattern is made with basic stitches you can practice as you go.
This beginner-friendly crochet sunflower tutorial includes stitch counts, step-by-step guidance, image references, and helpful tips for keeping the flower neat and symmetrical.
What You’ll Learn
By the end of this tutorial, you will know how to:
- Start a crochet sunflower with a magic ring.
- Make a flat circular center using single crochet stitches.
- Increase evenly without creating unwanted ripples.
- Change from brown yarn to yellow yarn.
- Create pointed petals with stitches of different heights.
- Repeat twelve petals around the sunflower center.
- Crochet an optional green leaf.
- Finish the flower and weave in yarn tails securely.
- Turn your sunflower into an applique, decoration, or gift.
This sunflower is an excellent small project for crocheters who already know the basic stitches and want to practice working in rounds.
Crochet Sunflower Pattern at a Glance
| Detail | Information |
|---|---|
| Skill level | Confident beginner |
| Project type | Crochet flower motif |
| Finished flower size | Approximately 3–4 inches (7.5–10 cm), depending on yarn and tension |
| Estimated time | 45–75 minutes |
| Yarn | Worsted-weight cotton (#4) |
| Crochet hook | 4.0 mm (G/6 US) |
| Center color | Cocoa brown |
| Petal color | Golden yellow |
| Optional leaf color | Sage green |
| Petals | 12 |
| Construction | Worked in rounds, followed by individual chain-based petals |
The measurements are estimates rather than dimensions from a tested sample. Make one flower and measure it before beginning a larger matching set.
Materials You’ll Need
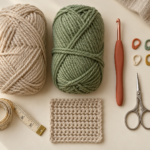
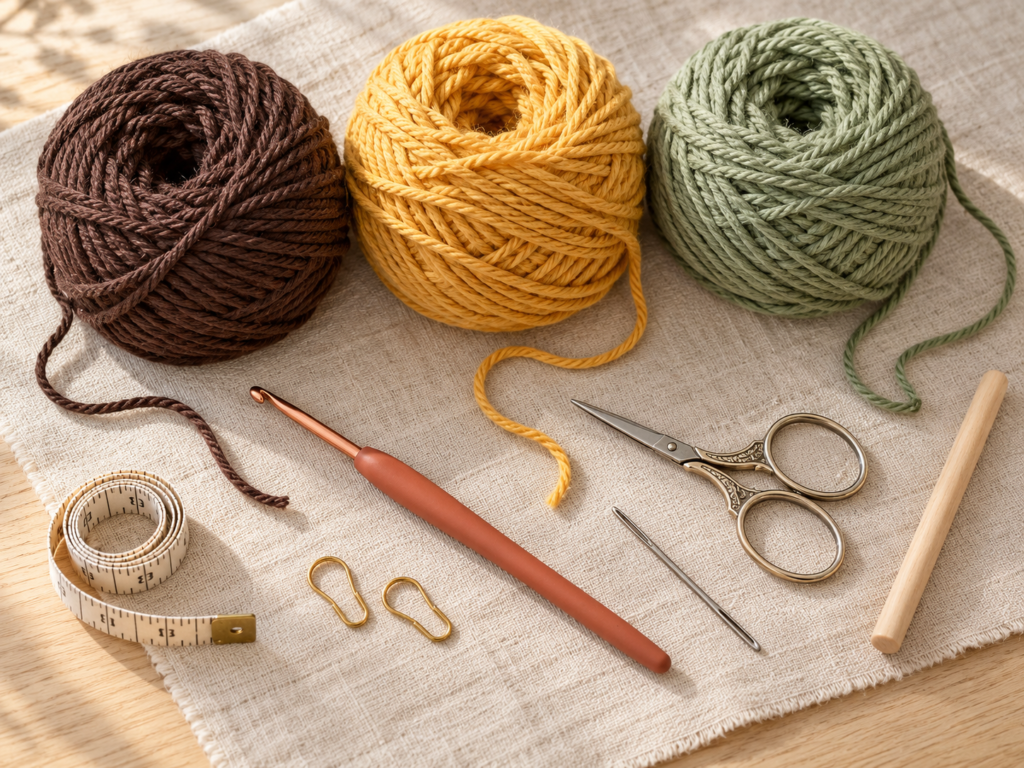
You do not need many supplies to make a crochet sunflower. This is a useful project for leftover yarn, especially if you already have small amounts of brown and yellow cotton.
Yarn
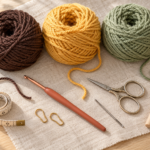
Choose smooth worsted-weight cotton yarn in these colors:
Dark cocoa brown: For the sunflower’s round center. A slightly darker shade gives the flower a natural seed-like appearance.
Golden yellow: For the petals. Mustard, honey, marigold, and sunflower yellow all look beautiful.
Sage green (optional): For a leaf, backing circle, or decorative stem.
Cotton yarn is particularly helpful because it shows stitch definition clearly and gives the petals enough structure to hold their shape.
You can also use acrylic yarn, but the finished flower may feel softer.
Crochet Hook
Use a 4.0 mm crochet hook with medium-weight cotton yarn.
If your stitches are particularly tight, try a slightly larger hook. If your petals look loose and floppy, consider a smaller hook.
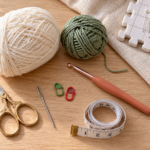
Other Supplies
- Small sharp scissors
- Blunt tapestry or yarn needle
- One stitch marker
- Measuring tape
- Optional smooth wooden dowel for a decorative stem
- Optional fabric-safe adhesive for a permanently assembled display piece
You will not need stuffing for the flat version of this sunflower.
Crochet Abbreviations Used
This pattern uses US crochet terminology.
| Abbreviation | Meaning |
|---|---|
| MR | Magic ring |
| ch | Chain |
| sc | Single crochet |
| hdc | Half double crochet |
| dc | Double crochet |
| sl st | Slip stitch |
| st / sts | Stitch / stitches |
| inc | Increase: two single crochet stitches in one stitch |
| rep | Repeat |
US/UK terminology note: US single crochet is UK double crochet, US half double crochet is UK half treble, and US double crochet is UK treble crochet.
For this pattern, follow the US terms exactly as written.
Before You Start
A few small preparations will make your sunflower much easier to crochet.
Choose yarn with good stitch definition
Smooth cotton is a good choice when learning a new flower pattern. Very fuzzy yarn can make it difficult to see individual stitches, particularly around the small center.
If you are learning to crochet in rounds for the first time, avoid very dark yarn while practicing. A medium brown is easier to see than almost-black chocolate yarn.
Keep your tension comfortable
Your stitches should be neat, but not so tight that you struggle to insert the hook.
When crocheting the sunflower center, uneven tension may cause the circle to cup or ripple. Pause after each round and lay the piece on a flat surface.
Understand how to count stitches
Each single crochet creates a small V shape along the outer edge.
When the pattern asks for 16 stitches, count the individual V shapes rather than the spaces between them.
Do not count the joining slip stitch as an extra single crochet.
Keep the center flat
The brown center is a circle, not a square, so there are no straight edges to maintain. Instead, focus on distributing the increases evenly and working into the correct stitches.
Our sunflower center finishes with 24 stitches. Each petal will occupy two consecutive stitches, giving you twelve evenly spaced petals.
Learn what a magic ring does
A magic ring is an adjustable loop that allows you to tighten the center hole after crocheting the first round.
It creates a tidier flower center than a large chain ring.
If the magic ring feels difficult, you can chain two and work the first eight single crochet stitches into the second chain from your hook. This produces a slightly different center but is a useful beginner alternative.
Step-by-Step Crochet Sunflower Tutorial
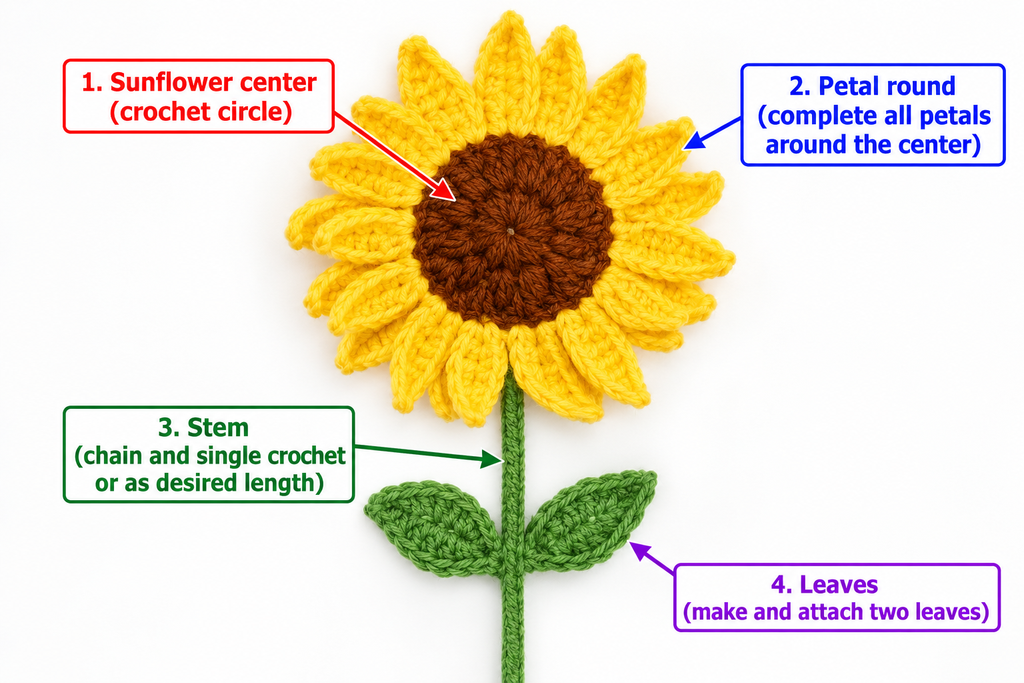
We will crochet the flower in three main sections: the brown center, the yellow petals, and optional green details.
The sunflower center uses joined rounds. At the end of each round, join into the first single crochet with a slip stitch, then chain one to begin the next round. The chain one does not count as a stitch.
Step 1: Make the Magic Ring
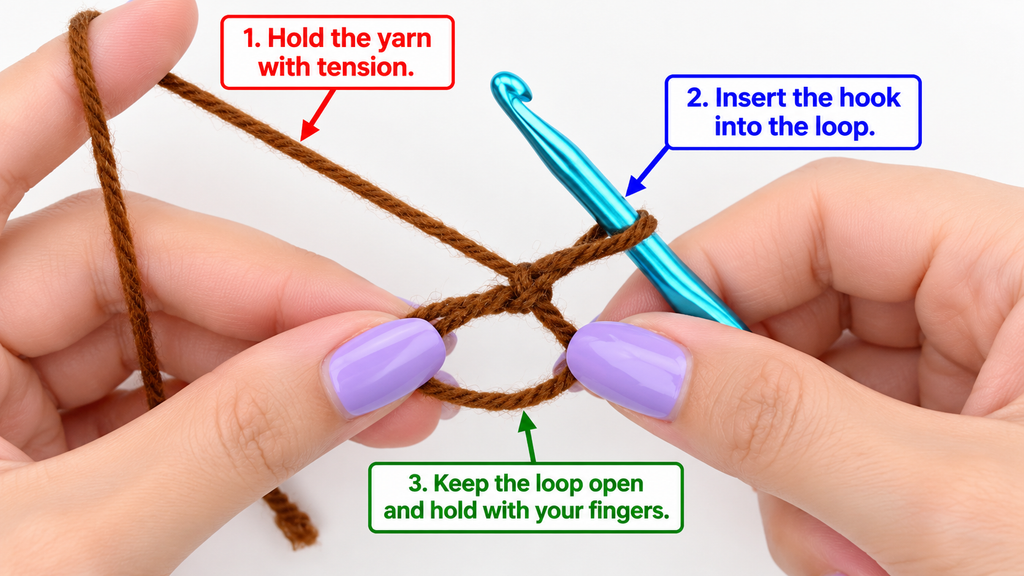
Take your brown yarn and leave a tail approximately 5–6 inches long.
Wrap the yarn around your fingers to create a loose loop.
Insert your crochet hook beneath the loop, catch the working yarn, and pull it through.
Chain one to secure the adjustable ring.
Do not tighten the ring yet. You need enough room to insert the first stitches.
Beginner tip: Keep the loose tail easy to reach. You will pull this tail after finishing your first round to close the hole.
Common mistake to avoid: Do not accidentally crochet around the working yarn instead of the ring and its adjustable tail.
Step 2: Crochet the First Round of the Center
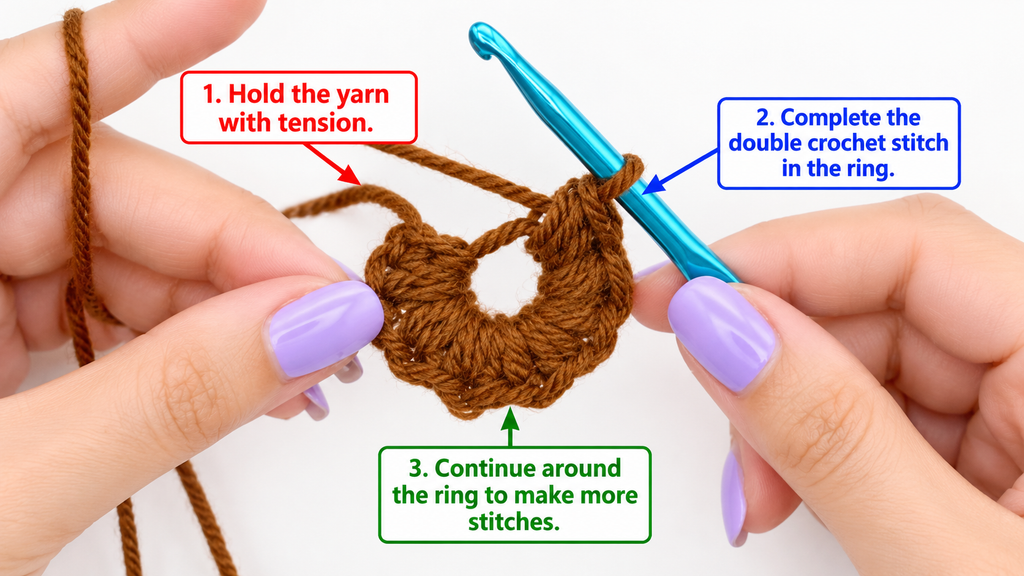
Now work eight single crochet stitches directly into the magic ring.
To make a single crochet:
- Insert your hook into the ring.
- Yarn over and pull up a loop.
- Yarn over again.
- Pull through both loops on your hook.
Repeat until you have eight single crochet stitches.
Gently pull the yarn tail to tighten the ring and close the hole.
Join the round by making a slip stitch into the first single crochet.
Round 1: 8 sc into MR. Join. (8 sts)
You should now have a tiny brown circle.
Beginner tip: Count the stitches before tightening the ring completely. It is much easier to fix a missing stitch while the circle is still open.
Common mistake to avoid: Do not count the initial chain as one of the eight single crochet stitches.
Step 3: Increase the Brown Center
The second round makes your sunflower center wider.
Chain one.
Work two single crochet stitches into the first stitch. This is called an increase.
Continue working two single crochet stitches into every stitch around the circle.
Because the first round contained eight stitches, the second round will contain sixteen.
Round 2: Inc in each st around. Join. (16 sts)
Lay your circle on the tabletop. It should be larger than before, although it may still look slightly uneven.
Beginner tip: Place a stitch marker in the first single crochet of the round. Move it whenever you start a new round.
Common mistake to avoid: An increase means working both stitches into the same V shape. If you accidentally work them into separate stitches, the circle will not grow correctly.
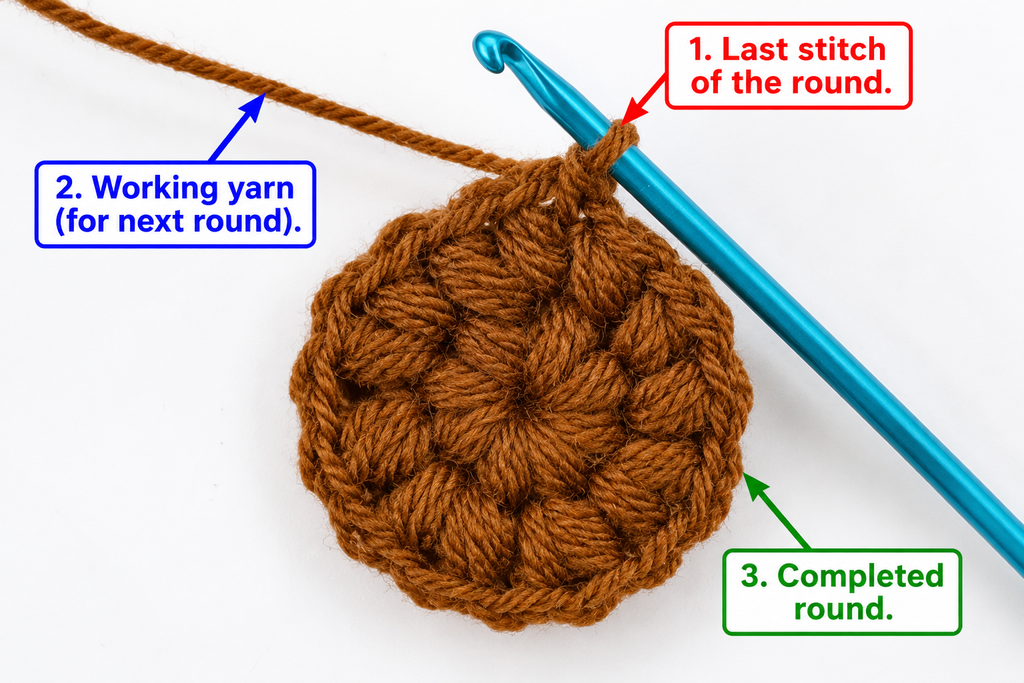
Step 4: Finish the Circular Sunflower Center
We are ready to make the last round of the brown center.
Chain one.
Work one single crochet into the first stitch.
In the next stitch, work two single crochet stitches.
Repeat this combination all the way around:
Round 3: (1 sc, inc) rep 8 times. Join. (24 sts)
At the end of this round, count twenty-four stitches.
Fasten off the brown yarn if you plan to add the yellow petals in a new color.
Leave a tail for weaving in.
Your brown circle should lie reasonably flat. It does not need to be perfectly rigid, because gentle shaping will help when the flower is finished.
Beginner tip: A completed third round of twenty-four stitches is important. We will use every stitch when attaching the twelve petals.
Common mistake to avoid: If the edge waves significantly, recount the stitches. An accidental extra increase is a common reason for unwanted ruffling.
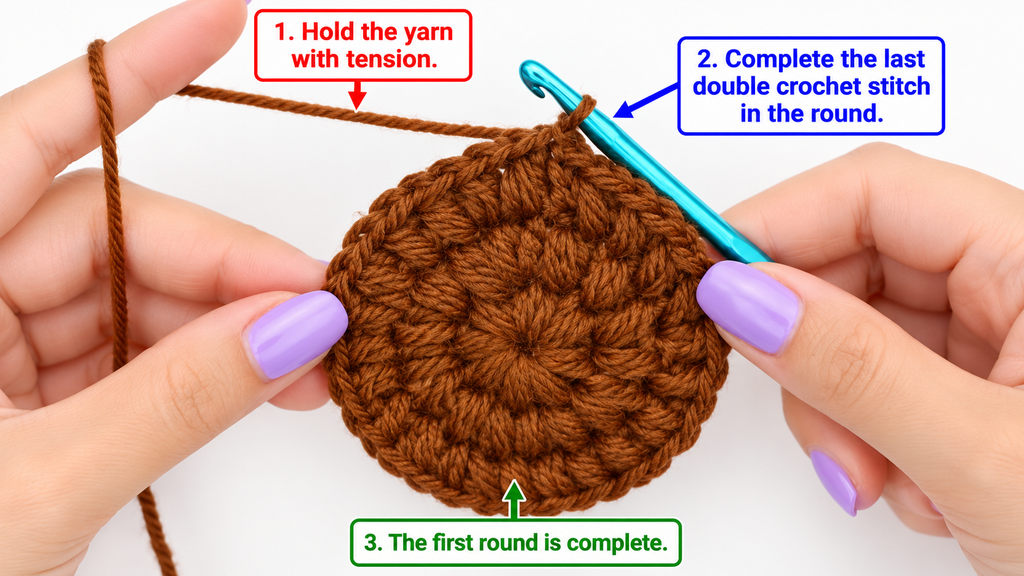
Step 5: Make an Optional Green Backing Circle
You can skip this step if you want a simple flat sunflower applique.
For a slightly sturdier flower, make a second circle using green yarn.
Follow the same three rounds:
- Round 1: 8 sc into a magic ring.
- Round 2: Increase in each stitch for 16 stitches.
- Round 3: Work one single crochet followed by an increase, repeated eight times, for 24 stitches.
Fasten off, leaving a long green yarn tail for sewing.
Do not attach the backing yet.
Keep it nearby until you have completed the petals and decided whether to add a stem.
Beginner tip: The green backing should be approximately the same diameter as the brown center. If one circle is noticeably larger, compare your tension before assembly.
Common mistake to avoid: Do not sew the backing over the yellow petals. It belongs behind the brown center only.
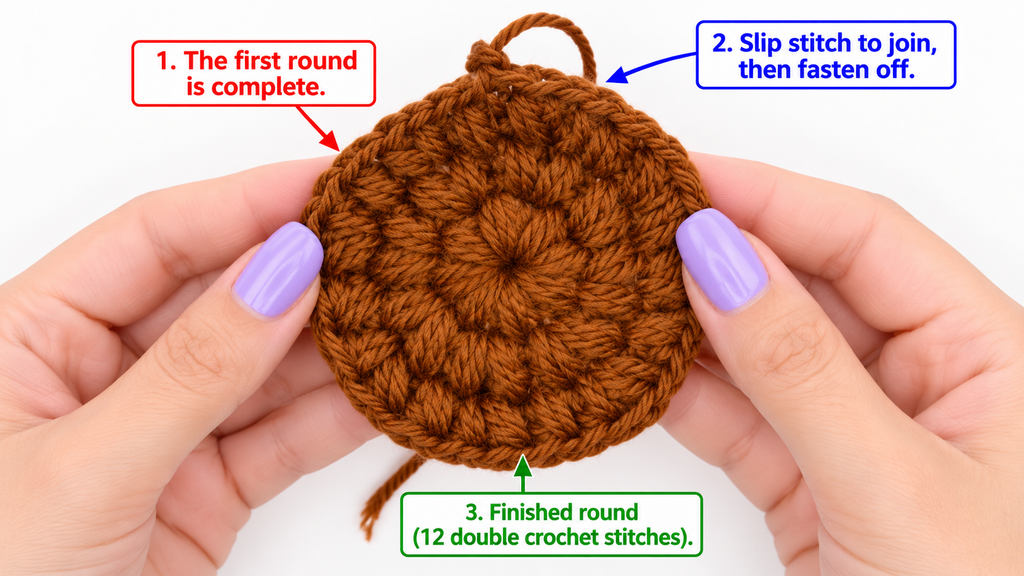
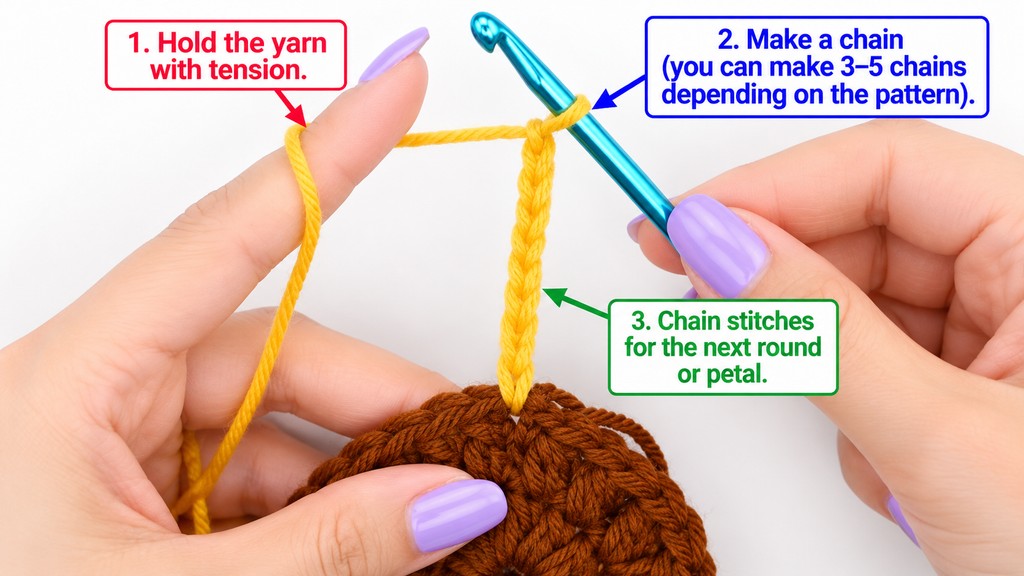
Step 6: Attach the Yellow Yarn and Make the First Petal Chain
Pick up your golden-yellow yarn.
Place the brown sunflower center with its front facing you.
Join the yellow yarn to any stitch along the outer edge using a slip stitch.
Now chain seven.
Petal foundation: Ch 7.
Your chain should extend outward like a small strand. This is the foundation for the first petal.
Do not pull these chains too tightly. You will need to crochet back along them.
Beginner tip: Try to keep every chain approximately the same size. Consistent foundation chains will make the petals look evenly shaped.
Common mistake to avoid: Do not confuse the loop currently on your hook with a completed chain stitch. Count the seven actual chain links below the hook.
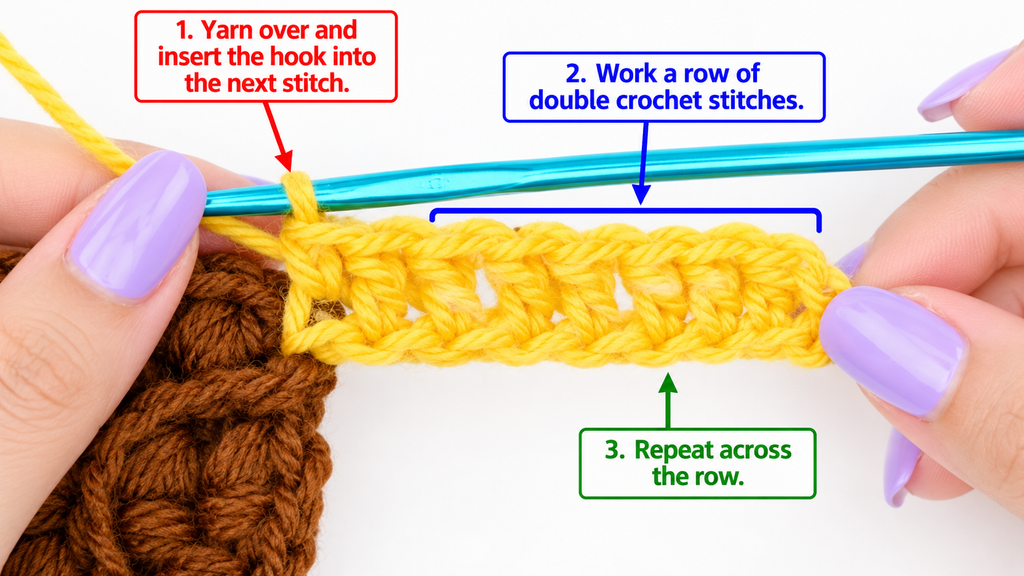
Step 7: Shape the First Sunflower Petal
We will now turn that chain into a narrow petal.
Beginning in the second chain from your hook, work the following stitches along the foundation chain:
- Slip stitch into the second chain from the hook.
- Single crochet into the next chain.
- Half double crochet into the next chain.
- Double crochet into the next chain.
- Half double crochet into the next chain.
- Single crochet into the last chain.
You have now worked along all six available chains.
The short stitches create tapered ends, while the taller stitches near the middle add fullness.
You should see a slender, slightly pointed yellow petal extending outward from the brown circle.
Do not fasten off.
Beginner tip: Lay the petal against your finger after finishing it. You should be able to see the stitch heights rising and then falling along the chain.
Common mistake to avoid: Make sure your double crochet uses one yarn over before inserting the hook. Working a treble crochet accidentally may make the center of the petal excessively tall.
Step 8: Secure the First Petal
Now return to the brown sunflower center.
Insert your hook into the next stitch after the stitch where the yellow yarn was attached.
Work a slip stitch to secure the petal.
Your first petal is complete.
One sunflower petal uses two consecutive center stitches: the first is the stitch where the petal starts, and the second is where the petal is secured.
This spacing is important because your brown center has twenty-four stitches, and we want twelve petals.
Beginner tip: After making your first petal, check that the yellow chain has not twisted before the anchoring slip stitch.
Common mistake to avoid: Do not skip an additional brown stitch between petals. That would leave too few attachment positions for twelve evenly spaced petals.
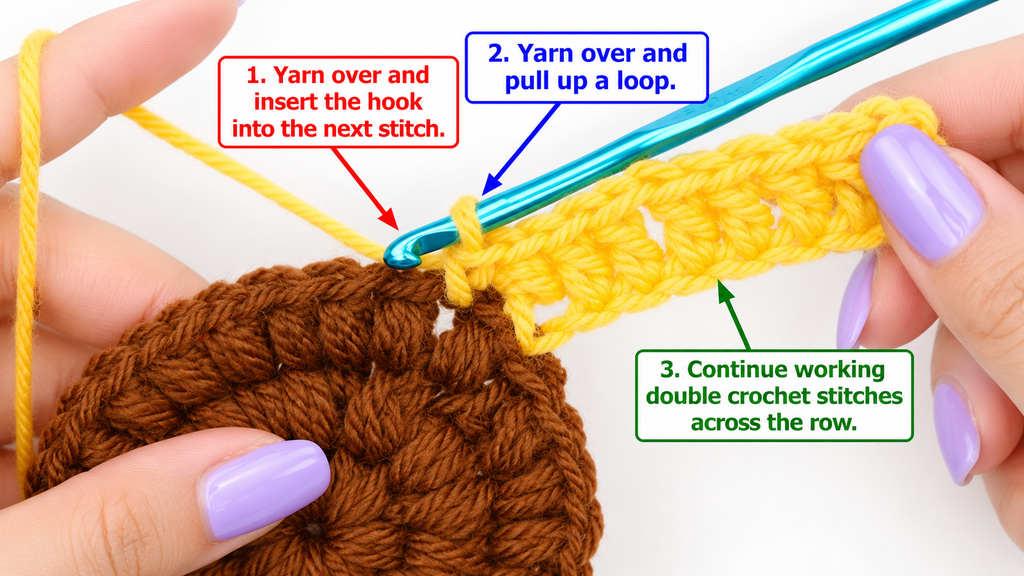
Step 9: Repeat Until You Have Twelve Petals
The remaining petals are made exactly like the first one.
Move to the next unused center stitch with a slip stitch. This starts the next petal.
Chain seven.
Work back along the chain:
Sl st, sc, hdc, dc, hdc, sc.
Then make a slip stitch into the following brown center stitch to secure the petal.
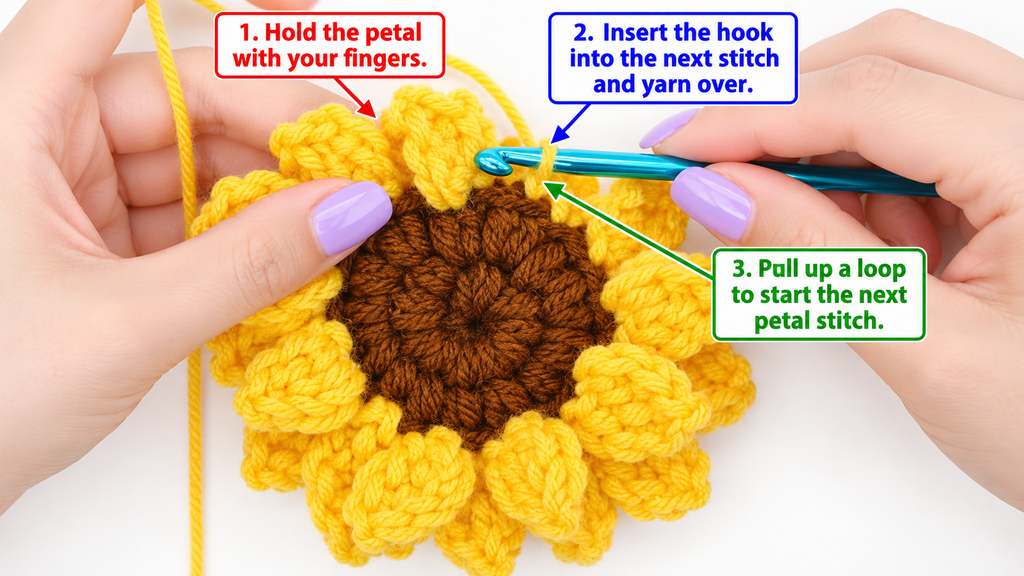
Continue this process around the entire brown circle.
For clarity, each subsequent petal begins by moving into the next unused brown stitch, then making its chain from that anchor.
At the end of the round, you should have twelve distinct yellow petals.
Because every petal uses two consecutive center stitches, the twenty-four brown stitches are distributed evenly:
24 center stitches ÷ 2 = 12 petals.
After the final petal, fasten off the yellow yarn and leave a short tail to weave into the back.
If you notice one petal looks a little different from the others, don’t worry immediately. Gently shape it between your fingers first.
Beginner tip: Stop after completing six petals. They should cover approximately half of the brown center. This is a quick way to catch spacing mistakes before finishing the round.
Common mistake to avoid: Avoid crocheting into the yellow slip stitches from earlier petals. The attachment points for this pattern are the original brown center stitches.
Step 10: Crochet an Optional Green Leaf
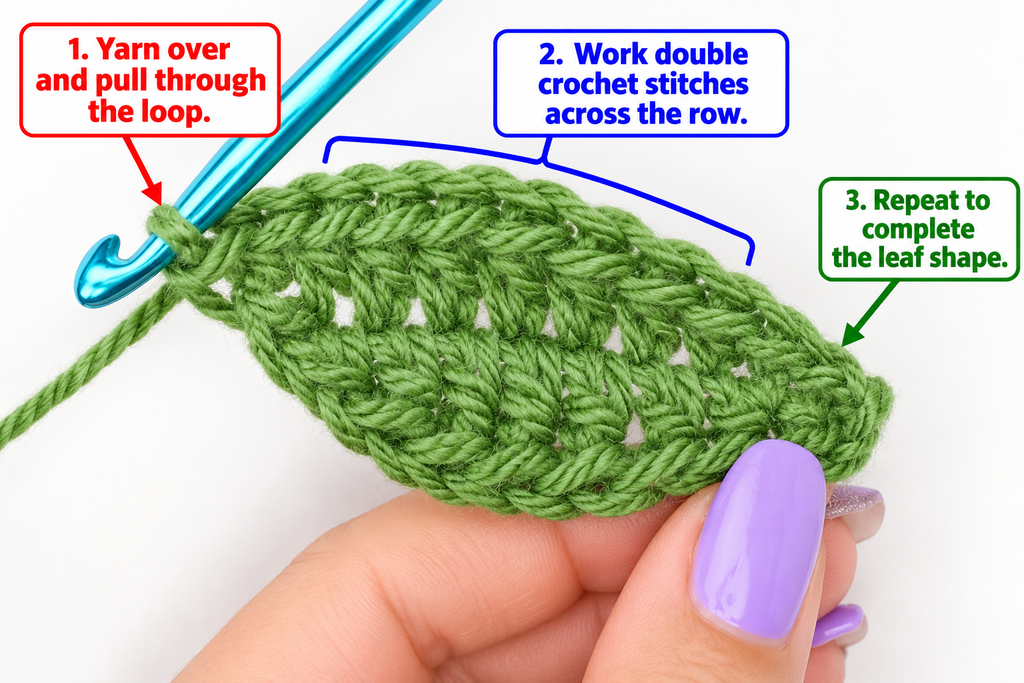
A green leaf adds a natural finishing touch, especially if you want to turn your flower into a small decoration.
Start with sage-green yarn.
Chain ten.
Beginning in the second chain from your hook, work:
- 1 slip stitch
- 1 single crochet
- 1 half double crochet
- 3 double crochet
- 1 half double crochet
- 1 single crochet
- 1 slip stitch
You have worked into all nine available chains.
Now turn the work around the end of the foundation chain rather than making a separate turning row.
Working into the unworked side of the same foundation chain, crochet the same sequence in reverse orientation along the opposite side:
1 slip stitch, 1 single crochet, 1 half double crochet, 3 double crochet, 1 half double crochet, 1 single crochet, 1 slip stitch.
Join into the beginning area with a slip stitch.
The stitches should form a narrow oval or leaf shape around the central foundation chain.
Fasten off, leaving a long tail for attaching.
Make a second leaf if desired.
Beginner tip: Do not pull the foundation chain too tightly. A stiff chain may cause the leaf to bend sharply down the middle.
Common mistake to avoid: Work around the opposite side of the original chain, not into the tops of the stitches you just completed.
Step 11: Attach the Green Backing
If you made the optional backing circle, place the sunflower face down on your work surface.
Position the green circle behind the brown center, keeping the wrong sides together.
The yellow petals should extend beyond the edges of both circles.
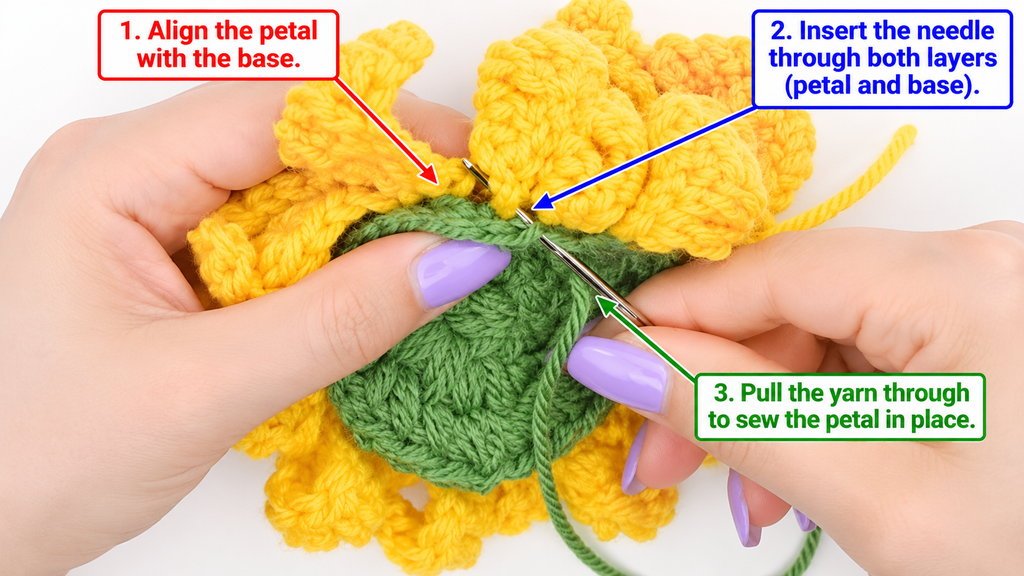
Using your tapestry needle and the long green yarn tail, sew around the edge of the two center circles using small, even stitches.
Work through the outer edges of the green and brown circles.
Do not stitch the petals into the seam.
If you want to attach a dowel stem, leave a small opening at the bottom of the circles for inserting it.
For a flat applique, close the entire seam.
Beginner tip: Use small, evenly spaced sewing stitches rather than pulling the yarn very tightly. Tight seams may distort the circular center.
Common mistake to avoid: Do not accidentally catch the front portions of the yellow petals while sewing the backing.
Step 12: Add an Optional Decorative Stem
If you want to display your sunflower in a vase, you can add a simple decorative stem.
For a sturdier option, choose a smooth wooden floral dowel.
Wrap sage-green yarn around the dowel, keeping the turns close together so the wood does not show through.
Secure the yarn at both ends.
Insert the upper end of the wrapped dowel into the small opening left behind the sunflower center.
Stitch the green backing around the upper end of the stem to help hold it in place.
For a permanent display flower, an appropriate craft adhesive can help secure the dowel inside the backing. Allow it to cure fully according to the manufacturer’s instructions.
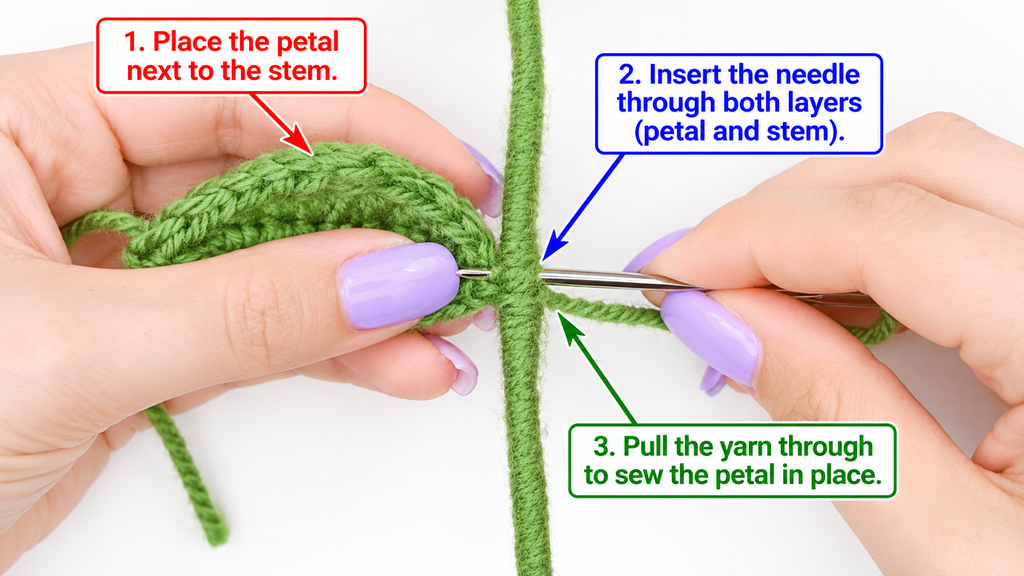
Attach your green leaves to the wrapped stem using their yarn tails and a tapestry needle.
For a balanced appearance, position two leaves at slightly different heights.
Beginner tip: The stem should support the flower without pulling the center downward. Use a sufficiently sturdy dowel and reinforce its attachment if necessary.
Common mistake to avoid: Do not use sharp exposed floral wire for a beginner gift or an item intended for children.
Pattern Notes and Stitch Counts
Here is the construction logic behind the sunflower.
Brown Center
| Round | Instructions | Stitch Count |
|---|---|---|
| 1 | 8 sc in magic ring | 8 |
| 2 | Increase in every stitch | 16 |
| 3 | (1 sc, inc) repeat 8 times | 24 |
This creates the attachment base for twelve petals.
Yellow Petals
Each petal follows this sequence:
Join or move into the next unused brown stitch, chain seven, then work back along the chain with a slip stitch, single crochet, half double crochet, double crochet, half double crochet, and single crochet.
Slip stitch into the next brown stitch to finish.
Repeat twelve times around the sunflower center.
Turning Chain Rules
The brown circle is worked in joined rounds. Chain one at the beginning of each new round. This chain does not count as a single crochet.
The petals are worked along short chains rather than regular back-and-forth rows. No additional turning chain is needed.
Right Side and Wrong Side
The right side is the flower’s visible front.
Keep the neat side of the brown center facing outward when attaching the petals.
If adding a backing, place it behind the brown center and hide the yarn tails between the layers.
Adjusting Flower Size
You can change the size by switching yarn thickness and hook size while keeping the same stitch counts.
For a larger sunflower, try a thicker cotton or acrylic yarn with a hook appropriate to its label.
For a smaller flower, choose lightweight cotton yarn and a smaller hook.
If you change the center’s stitch count, you may also need to redesign the petal placement so the repeat divides evenly.
Common Beginner Mistakes and How to Fix Them
1. The brown center looks like a bowl
This usually happens when tension is too tight, the hook is too small, or some increases have been missed.
Fix: Check the stitch count first. If it is correct, loosen your tension or try a slightly larger hook.
2. The center becomes wavy
A strongly rippled circle may contain too many increases, or the stitches may be too loose for the yarn.
Fix: Count the stitches at the end of every round. Keep eight, sixteen, and twenty-four as your checkpoints.
3. The magic ring leaves a visible hole
The adjustable tail may not have been pulled tightly enough.
Fix: Carefully tighten the center before weaving in the starting tail. Secure the tail through several neighboring stitches so the ring cannot loosen easily.
4. Some petals are noticeably longer
Uneven chains or accidentally substituted stitches can change their size.
Fix: Count seven chains for every petal and use exactly the same stitch-height sequence each time.
5. The petals are unevenly spaced
It is easy to skip a center stitch accidentally when moving from one petal to the next.
Fix: Check that each petal occupies two consecutive brown center stitches. After six petals, you should have covered half the circle.
6. The petals curl more than expected
A slight curve is normal with shaped crochet petals, but strong curling may indicate tight stitches or a tension difference between the center and petals.
Fix: Gently smooth the petals or lightly block the finished flower. Avoid stretching the stitches aggressively.
7. The green backing shows from the front
This happens if the backing is too large or attached off-center.
Fix: Compare the brown and green circles before sewing. Align the outer stitch edges evenly and keep the seam behind the petals.
How to Customize This Crochet Sunflower Pattern
Once you have completed your first sunflower, there are plenty of ways to make the next one different.
Try different sunflower colors
A dark brown center with bright yellow petals creates the classic sunflower appearance.
For a softer farmhouse style, try chocolate brown and muted mustard.
You can also combine a deep rust center with warm golden-orange petals for an autumn-inspired version.
For a more playful flower, try pastel yellow petals and a caramel-colored center.
Make the flower smaller
Use DK or sport-weight yarn with an appropriately sized hook.
The same stitch counts can create a smaller decorative flower that works well on a hat, hair clip, or gift tag.
Be especially careful with petal tension when using fine yarn.
Make a larger sunflower
Try bulky yarn with a matching hook.
A larger motif makes a cheerful embellishment for an oversized tote bag or decorative cushion.
Keep in mind that the larger petals may need gentle blocking to maintain their shape.
Add a decorative border
If you prefer a fuller petal outline, add a contrasting edge to the finished yellow petals using surface slip stitches or a carefully worked edging.
Work slowly and avoid adding so many stitches that the petals begin to ripple.
Add texture
For a more textured flower, experiment with raised embroidery stitches over the brown center after finishing the crochet.
Small, scattered stitches in lighter brown can suggest sunflower seeds without changing the construction of the original center.
Create a sunflower garland
Make several matching flat sunflowers and attach them to a crocheted chain or a sturdy decorative cord.
Space them evenly and add small green leaves between the flowers.
This makes a cheerful seasonal decoration for a craft room or mantel.
Decorate accessories
A single sunflower can turn a plain crochet accessory into something special.
Try sewing your flower onto a tote bag, granny square blanket, denim jacket, or simple crochet pouch.
For bags and garments, sew around the brown center securely instead of attaching only one small section.
For items intended for young children, avoid detachable small embellishments and ensure attachments are secure.
Finishing Instructions
A few minutes of finishing can make your sunflower look much neater.
Fasten off carefully
After completing the last petal, cut the yellow yarn, leaving a tail long enough to weave in.
Pull the yarn tail through the final loop and tighten it gently.
Avoid pulling so tightly that the last petal becomes distorted.
Weave in the yarn ends
Thread each tail onto a blunt tapestry needle.
Weave the tail through several stitches on the back of the corresponding color.
Change direction once or twice to help secure the yarn.
Trim any remaining excess after the tail feels secure.
If you made a green backing, conceal the tails before closing the backing seam whenever practical.
Shape the sunflower petals
Lay the finished flower on a clean, flat surface.
Use your fingertips to gently separate the yellow petals and arrange them around the center.
Aim for an even circular outline without stretching individual stitches too far.
Block the flower if needed
Light blocking can improve the shape of cotton petals.
Check the yarn’s care instructions first.
If appropriate for the fiber, lightly dampen the flower, place it on a suitable blocking surface, and gently shape each petal.
Allow it to dry completely before removing it.
Avoid excessive heat, especially when working with acrylic yarn.
Washing and care
For a flat cotton applique, follow the yarn manufacturer’s laundering directions.
Gentle hand washing and drying flat are often suitable, provided the attached materials also tolerate water.
If your flower has a wooden stem, adhesive, or other decorative components, avoid soaking it unless all materials are washable.
Store the flower away from prolonged direct sunlight to help reduce color fading.
Quick Printable-Style Crochet Sunflower Summary
Skill level: Confident beginner
Finished size: Approximately 3–4 inches, depending on yarn and tension
Materials: Brown, yellow, and optional green worsted cotton yarn; 4.0 mm hook; scissors; yarn needle
Stitches: Chain, single crochet, half double crochet, double crochet, slip stitch
Starting method: Magic ring
Brown center:
- Round 1: 8 sc into MR (8).
- Round 2: Inc in every st (16).
- Round 3: (1 sc, inc) × 8 (24).
Join rounds with a slip stitch. Beginning chain one does not count as a stitch.
Petal repeat: Join yellow in a center stitch, ch 7, then work sl st, sc, hdc, dc, hdc, sc back along the chain. Sl st into the next center stitch. Move by slip stitch into the next unused center stitch to begin another petal.
Repeat: 12 petals total.
Optional leaves: Ch 10; work sl st, sc, hdc, 3 dc, hdc, sc, sl st along the chain. Work the corresponding sequence along the other side of the foundation chain.
Finishing: Fasten off, weave in ends, shape petals, and optionally sew on a green backing and decorative stem.
Crochet Sunflower Pattern FAQ
Is this crochet sunflower pattern suitable for beginners?
Yes, it is suitable for confident beginners who can make chains, single crochet stitches, and basic increases.
The petal section also introduces half double crochet and double crochet stitches, making it a useful project for practicing different stitch heights.
If you are completely new to crochet, practice the basic stitches on a small swatch first.
How long does it take to crochet a sunflower?
A small flat sunflower may take approximately 45–75 minutes for a beginner.
Once you become familiar with the petal repeat, making additional flowers is often faster.
Adding leaves, a backing, and a decorative stem will require extra time.
What yarn works best for crochet sunflowers?
Smooth cotton yarn is a good choice because it holds stitch definition and makes the petals easy to see.
Worsted-weight cotton is particularly beginner-friendly.
Acrylic yarn also works, although it may create a softer flower that needs more shaping.
Can I make a crochet sunflower without a magic ring?
Yes. Chain two and work the first eight single crochet stitches into the second chain from the hook.
This is a simple alternative for crocheters who find the adjustable ring difficult.
The center may have a small opening, which you can reduce while weaving in the starting yarn tail.
Why are my crochet sunflower petals curling?
The petals may curl because your stitches are tight, your hook is too small, or the yarn has a firm texture.
A little curling can look natural.
If the petals curl too much, check the stitch sequence and try gently blocking the finished sunflower.
Can I use this sunflower pattern for a blanket?
Yes. The flat version works well as an applique on a crochet blanket.
Use a coordinating yarn needle to sew the brown center firmly to the blanket.
Keep the petals free if you prefer a dimensional effect, or secure them gently with a few small stitches if the blanket will receive frequent use.
For baby items, prioritize secure attachment and avoid removable parts.
How do I make my crochet sunflower look more realistic?
Choose natural, slightly muted shades instead of overly bright colors.
Use a dark cocoa-brown center, warm golden-yellow petals, and muted green leaves.
Keep your petal sizes consistent and give the flower a little shaping when finished.
Small changes in color and finishing often make a bigger difference than adding complicated stitches.
Conclusion
Learning how to crochet a sunflower is a satisfying way to practice working in rounds, changing yarn colors, and building a decorative motif from simple stitches.
Start with the flat flower if you want a quick project. Once you feel comfortable, experiment with different yarn colors, optional leaves, and a decorative stem.
One little sunflower can become a bag embellishment, a handmade gift, or the beginning of a colorful flower garland.
Save this easy crochet sunflower pattern so you can return to it whenever you have a little yellow yarn and feel like making something cheerful.