Some Christmas gifts are especially lovely because they don’t need to be expensive or complicated. A little cotton yarn, a crochet hook, and a quiet hour can turn into something useful, personal, and beautiful enough to wrap with a ribbon.
If you’re looking for easy crochet Christmas gifts that don’t require a complicated pattern, these handmade snowflake coasters are a wonderful place to begin.
They look delicate, but their construction is surprisingly straightforward. You’ll start with a simple crocheted circle, add six little chain arches, and finish with pointed edges that give each coaster its snowflake shape.
The best part? You don’t need to memorize dozens of stitches or learn complicated joining techniques.
This step-by-step crochet tutorial walks you through every stage, including how to start the center, keep your stitch counts correct, shape the points, and finish your coaster so it lies neatly on the table.
Make one for a stocking filler, crochet four for a thoughtful hostess gift, or create a whole matching set for someone who loves Christmas coffee mornings.
What You’ll Learn
By the end of this project, you’ll know how to:
- Start a crochet project using an adjustable magic ring.
- Crochet double crochet stitches in joined rounds.
- Increase evenly to create a flat circular center.
- Make chain arches around a crochet circle.
- Form six decorative snowflake points.
- Count stitches and recognize common mistakes.
- Secure yarn ends and gently block your finished coaster.
- Turn a small crochet project into an attractive handmade Christmas gift.
This is a confident-beginner project. If you’ve already practiced chain stitches, single crochet, and double crochet, you have the basic skills you need.
Project Details
| Feature | Details |
|---|---|
| Skill level | Confident beginner |
| Project | Six-point snowflake coaster |
| Approximate size | 3–4.5 inches (7.5–11.5 cm), depending on yarn, tension, and blocking |
| Estimated crochet time | 35–60 minutes |
| Yarn | DK-weight cotton |
| Hook | 3.5 mm (E/4) |
| Construction | Four joined rounds |
| Main techniques | Double crochet, chain arches, pointed stitch groups |
| Recommended colors | Winter ivory, sage green, soft red |
| Terminology | US crochet terms |
The finished size is an estimate for this original design, not a verified measurement from a completed sample. For daily coaster use, check that your actual piece adequately supports the intended glass or mug.
Materials You’ll Need
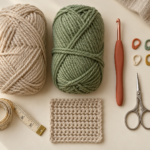
You don’t need a large collection of crochet supplies for these snowflake coasters. In fact, this is a lovely way to use leftover cotton yarn from previous projects.
Yarn
Choose a smooth DK-weight cotton yarn.
Cotton is a practical choice for drink coasters because it is absorbent, relatively easy to care for, and shows individual stitches clearly.
For the tutorial, we’ll use soft winter ivory. The neutral shade makes it easier to see every little detail while creating a timeless Christmas look.
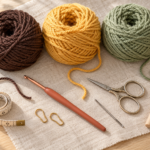
You can also make additional coasters in muted sage green, cranberry red, or natural oatmeal.
Allow approximately 10–20 yards of yarn per coaster as a provisional planning estimate. Actual yardage depends on your tension and finished dimensions.
Crochet hook
Use a 3.5 mm crochet hook.
A comfortable hook is particularly helpful when you’re making several Christmas gifts in one sitting. If the stitches feel excessively tight, experiment with a slightly larger hook and check the resulting coaster’s firmness.
Additional tools
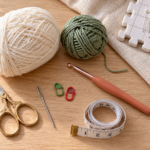
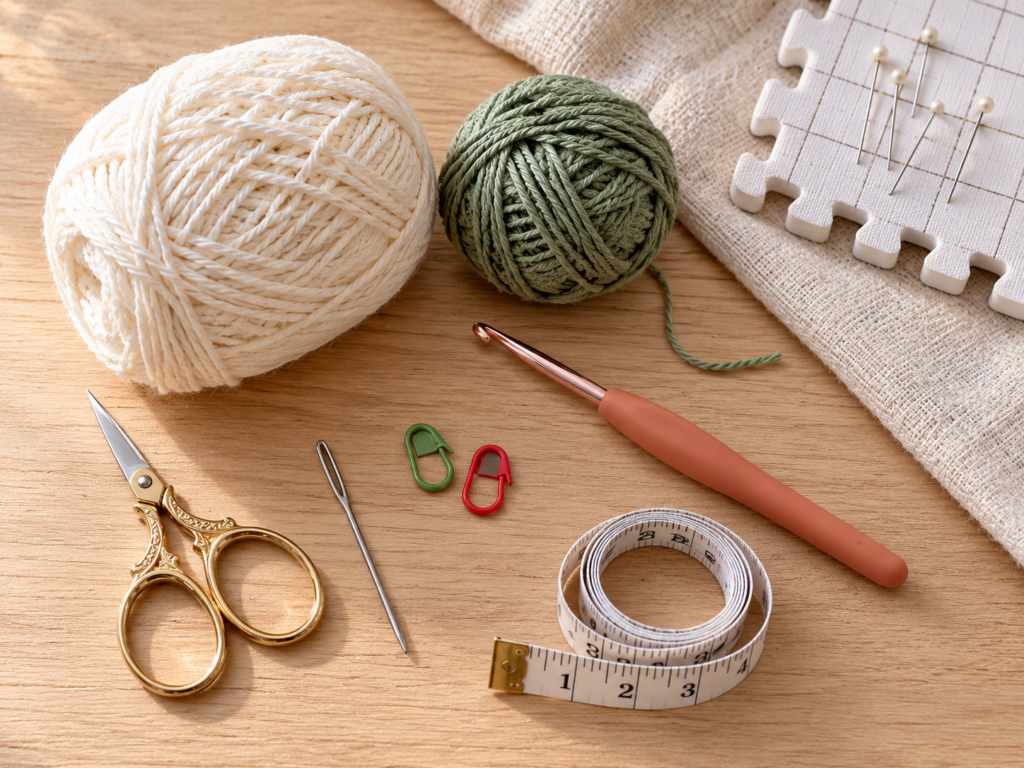
You’ll also need sharp scissors, a blunt yarn needle, a couple of removable stitch markers, a measuring tape or ruler, a towel, and optionally a foam blocking mat with rustproof pins.
Crochet Abbreviations Used
This tutorial uses US crochet terminology throughout.
| Abbreviation | Meaning |
|---|---|
| ch | Chain |
| sc | Single crochet |
| dc | Double crochet |
| sl st | Slip stitch |
| st / sts | Stitch / stitches |
| sp | Space |
| rep | Repeat |
| rnd | Round |
| yo | Yarn over |
Important for UK readers: US single crochet is called double crochet in UK terminology, while US double crochet is called treble crochet in UK terminology. This pattern follows the US names only.
You can consult the Craft Yarn Council’s crochet abbreviations guide if you’re unfamiliar with any notation.

Welcome to the Craft Yarn Council
Before You Start
Understand the basic construction
This snowflake is worked from the center outward.
First, you’ll make a small disk using two rounds of double crochet. Next, you’ll create six chain arches around the edge. Finally, you’ll work a decorative pointed group into each arch.
The entire project is crocheted in one continuous piece, using joined rounds. There are no separate snowflake points to sew on afterward.
Gauge and tension
Exact gauge isn’t essential for a decorative coaster, but consistent tension matters.
Your double crochet stitches should be firm enough that the center holds its shape without feeling stiff. Your chain arches should be relaxed enough to stretch gently into six equal spaces.
If you tend to crochet tightly, avoid pulling each chain snug immediately after making it. Tight chain spaces make the final points difficult to shape.
Learn to count your stitches
There are three useful counting checkpoints:
- Round 1 finishes with 12 double crochet stitches, counting the beginning chain-2 as one double crochet.
- Round 2 finishes with 24 double crochet stitches.
- Round 3 creates exactly six chain arches.
Don’t continue if you have five or seven arches. It’s much easier to correct a counting error before the decorative outer edge begins.
Right side and wrong side
Both sides of the coaster are usable. However, keep the same face toward you while working each round so the tutorial stays easy to follow.
You will not turn the piece between rounds.
Choose your Christmas color palette
If this is your first snowflake, use one light-colored yarn throughout. This makes the stitches easier to recognize and avoids extra ends.
Once you’ve finished one, try a small set with two ivory coasters, one sage green coaster, and one cranberry coaster. The colors will look coordinated even if they aren’t identical.
Step-by-Step Crochet Snowflake Coaster Tutorial
The pattern below is an original four-round six-point construction.
For the clearest results, read each step before crocheting it and compare your stitch counts at the end of each round.
Step 1: Make an adjustable magic ring
Begin with your winter ivory yarn.
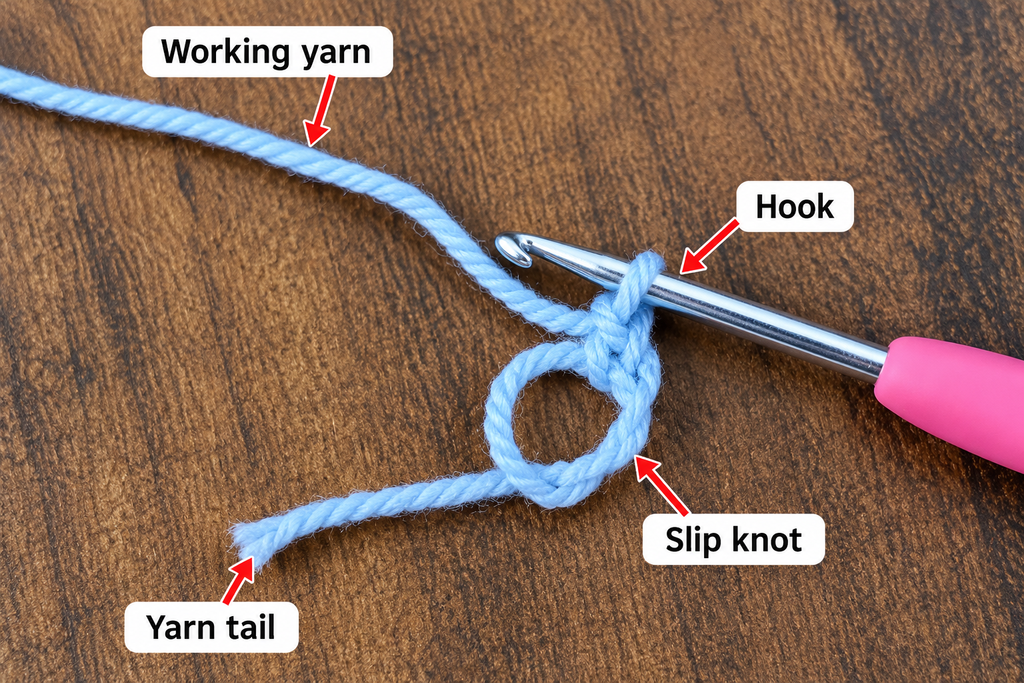
Leave a tail around 5–6 inches long. Wrap the yarn around two fingers to create a loop, bringing the working strand across the tail.
Insert your crochet hook through the loop, catch the working yarn, and draw a loop through. Make one chain stitch to hold the adjustable ring in place.
Don’t pull the center completely closed yet. You’ll need enough room to work your first round into it.
If you’ve never used a magic ring before, practice opening and tightening the ring a couple of times before beginning the actual project.
Beginner tip: Keep the yarn tail visible. You’ll pull that tail later to close the center neatly.
Common mistake to avoid: Don’t accidentally crochet into the chain stitch you made to secure the magic ring. The first round is worked into the adjustable ring itself.
Step 2: Crochet the first center round
Now you’ll create the solid center of your snowflake.
Round 1:
Chain 2. For this pattern, that chain-2 counts as your first double crochet stitch.
Work 11 more double crochet stitches into the adjustable ring.
You should now have 12 stitches in total, including your starting chain-2.
To work a US double crochet, yarn over, insert your hook into the ring, draw up a loop, yarn over and pull through two loops, then yarn over and pull through the final two loops.
Repeat this until all 11 additional double crochets are complete.
Slip stitch into the top of the beginning chain-2 to close the round. Be sure to insert your hook into the second chain, not the first.
Stitch count: 12 dc.
Beginner tip: Count the tops of the stitches, not the vertical posts. The beginning chain-2 counts as one stitch in this particular pattern.
Common mistake to avoid: If you make 12 double crochets in addition to the starting chain-2, you’ll end up with 13 stitches and your next round will be uneven.
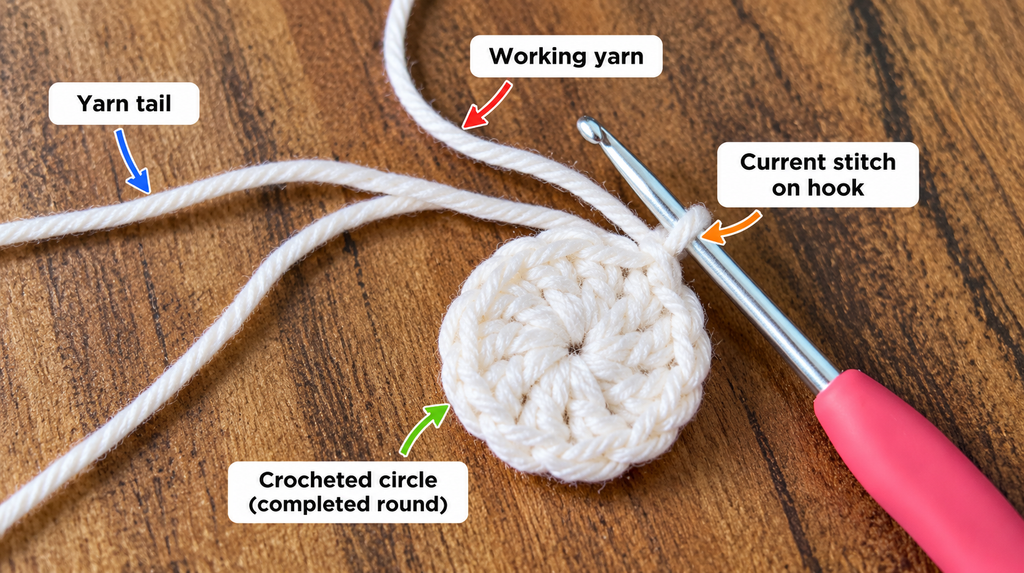
Step 3: Close the center and check the circle
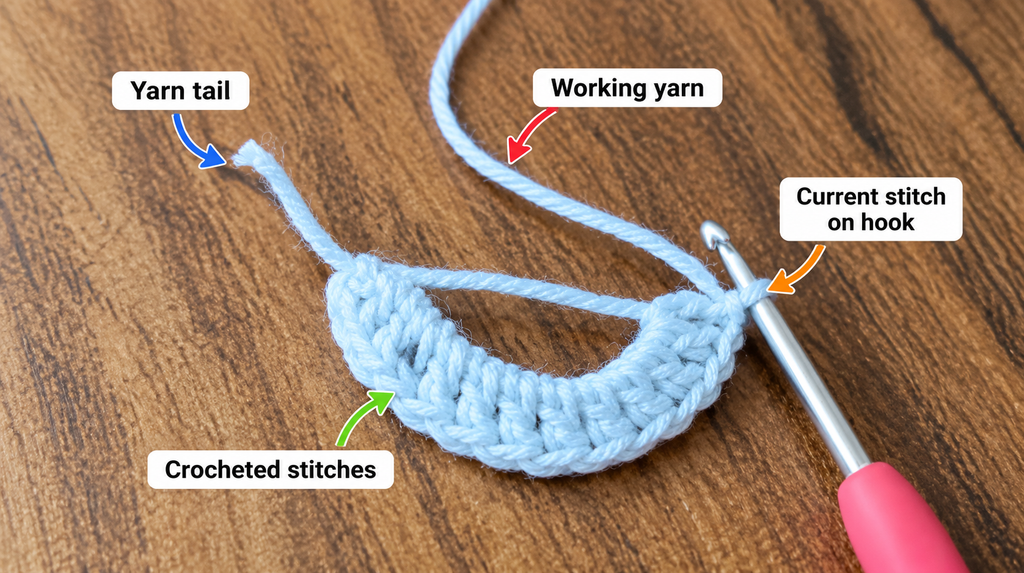
Once the first round is joined, hold the crocheted stitches gently between your thumb and forefinger.
Find the short yarn tail that belongs to your adjustable ring. Pull it slowly until the center hole closes.
You should see a small circular disk with a fairly neat middle.
Don’t yank the yarn too quickly. Cotton can catch slightly against itself, and pulling forcefully may distort the first couple of stitches.
If the center still has a tiny opening, that’s okay. You’ll secure the tail later when you finish the coaster.
Lay the disk flat and count the 12 stitches one more time.
Beginner tip: Put a removable stitch marker into the top of the beginning chain-2 before counting. This makes it easier to locate the joining point.
Common mistake to avoid: A loose center is usually a yarn-tail issue, not a problem with the double crochet stitches. Try tightening the ring before undoing your work.
Step 4: Increase to make a larger center
The next round gives the snowflake a broader middle. This helps create a more useful resting area for a cup or small glass.
Round 2:
Chain 2, counting this as the first double crochet.
Make one double crochet into the same stitch at the base of your chain-2.
Then work two double crochet stitches into every remaining stitch around.
When you reach the end, join with a slip stitch into the top of the beginning chain-2.
Stitch count: 24 dc.
This increase is simple: you’re placing two stitches into every stitch from the previous round.
Take a moment to lay your growing disk on the table.
The center should be mostly flat. Slight ripples can settle after the next round and gentle blocking, but significant ruffling may indicate that you’ve accidentally added too many stitches.
Beginner tip: Count your stitches in groups of six. Four groups of six equal the required 24 stitches.
Common mistake to avoid: Remember that the starting chain-2 is already the first of the two double crochets worked into the initial stitch. Only add one more double crochet there.
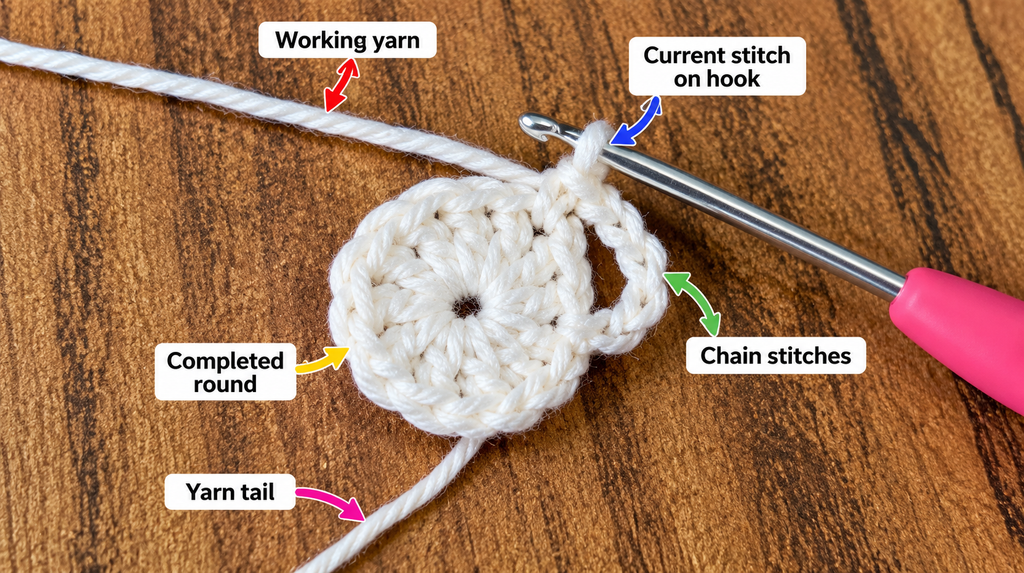
Step 5: Begin the openwork chain arches
Now for the fun part! This round transforms your plain little crochet circle into the beginning of a snowflake.
Rather than adding stitches evenly across the entire outer edge, you’ll create six curved chain spaces.
These spaces become the foundation for your decorative points.
Round 3:
Chain 1. This chain does not count as a stitch.
Single crochet into the first stitch, the same stitch where your joining slip stitch sits.
Chain 5.
Skip the next 3 stitches from Round 2.
Single crochet into the following stitch.
You’ve now made your first chain arch and anchored it to the center.
Continue with the following sequence:
Chain 5, skip the next 3 stitches, single crochet into the following stitch.
Repeat this until you have six single crochet anchors in total.
After the sixth single crochet, chain 5 and skip the final three unworked stitches. Slip stitch into the first single crochet of the round.
You should have six chain-5 arches around the center, evenly separated by single crochet anchors.
Beginner tip: The skipped stitches are still part of your circle. You’re not losing stitches by skipping them; you’re creating the open spaces that give the snowflake its delicate shape.
Common mistake to avoid: Don’t accidentally place your single crochet into the third skipped stitch. You skip three complete stitches, then work into the fourth.
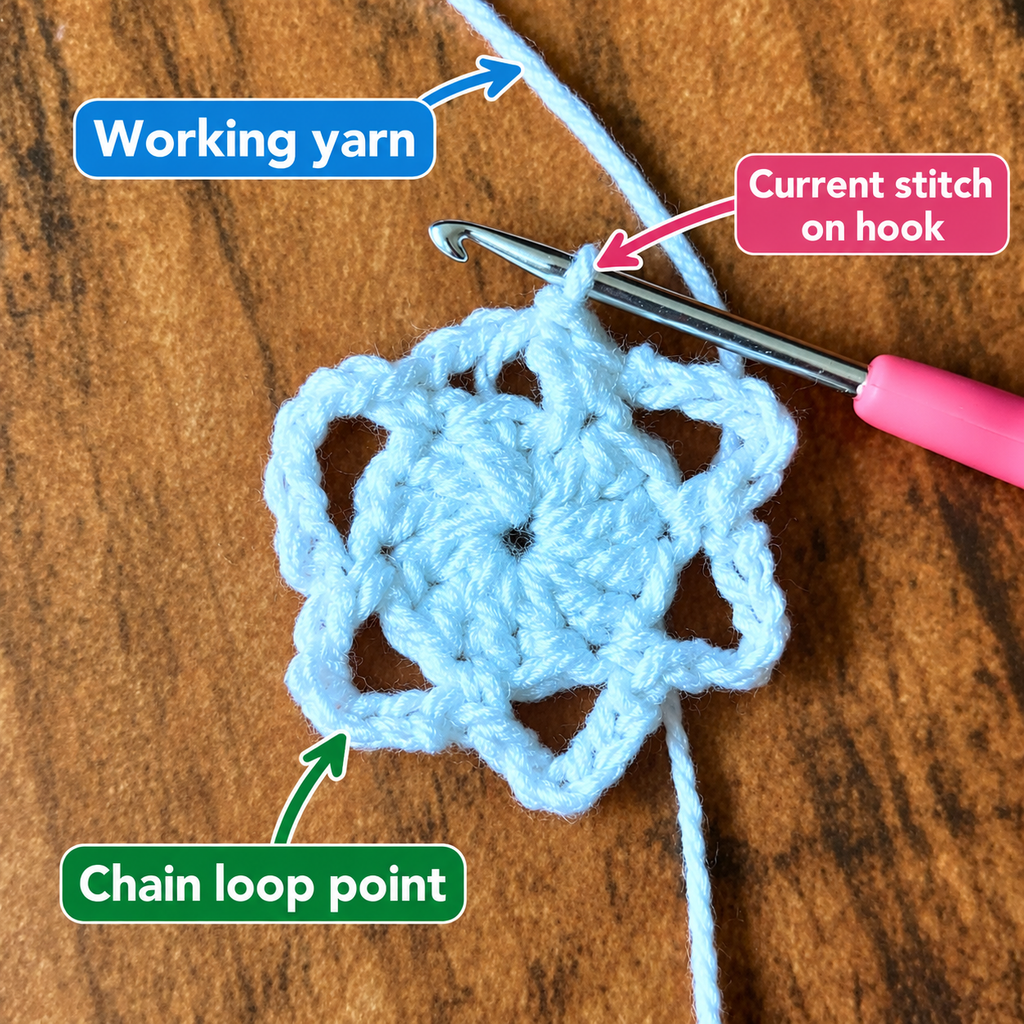
Step 6: Check all six arches
Before working the final round, put down your hook and look carefully at the shape.
You should see a circular center surrounded by six open loops that resemble petals.
Gently spread the arches with your fingers.
They don’t have to be perfectly identical yet, but they should contain five chain stitches each and be anchored at regular intervals.
Count them clockwise from your first single crochet.
One, two, three, four, five, six.
If you have the correct number, you’re ready for the decorative edging.
If one arch looks unusually short, count its chain stitches. You may have accidentally made four instead of five.
If the entire piece curls into a shallow bowl, check that you haven’t worked your chains too tightly. A slightly loose chain is easier to shape than a tight one.
Beginner tip: Don’t stretch the arches aggressively. Just open them enough to see where the hook needs to go in the next round.
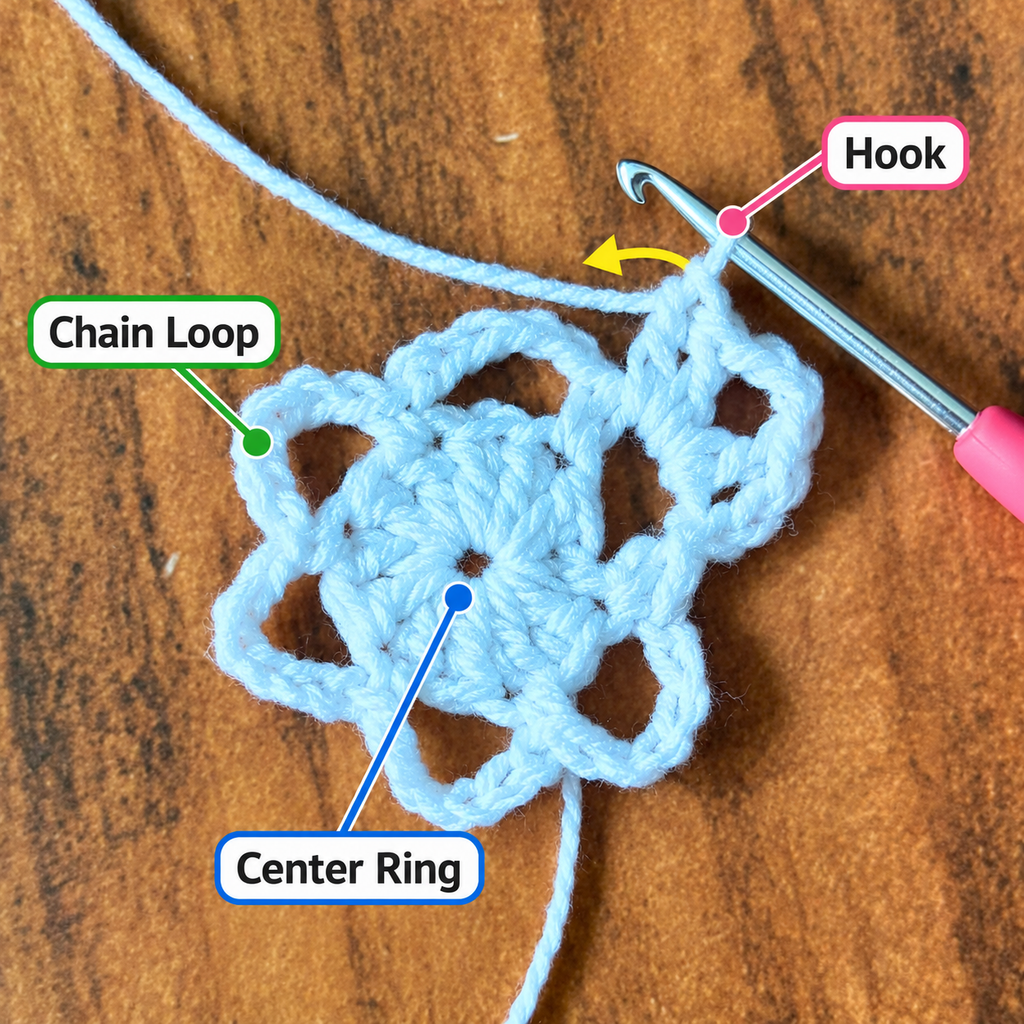
Step 7: Crochet the first snowflake point
The final round gives your snowflake its distinctive Christmas shape.
Each chain arch will hold one pointed decorative group. You’ll repeat the same stitch sequence six times, so once you’ve completed the first point, the remaining five become much easier.
Round 4:
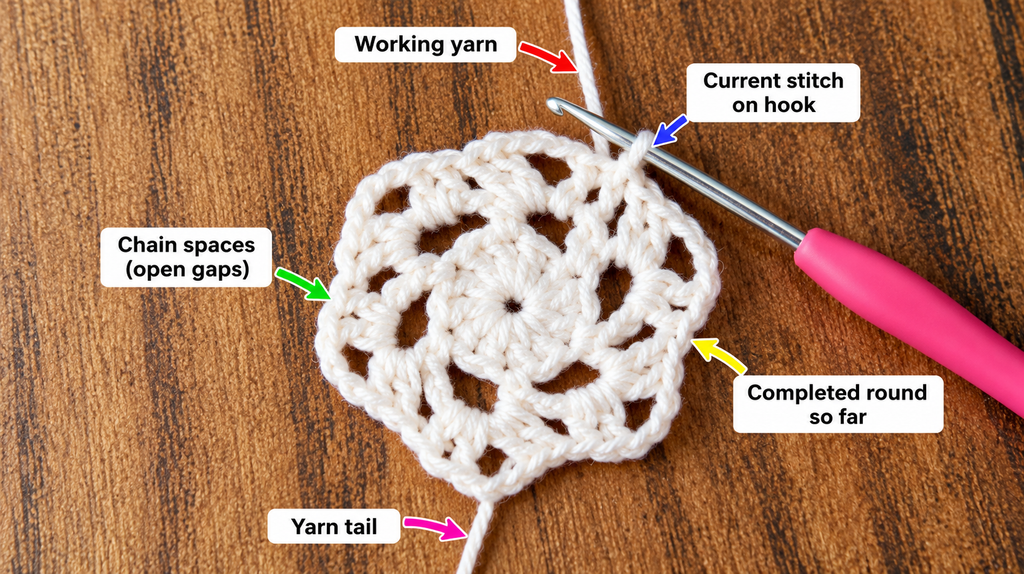
Slip stitch into the first chain-5 arch to position your hook inside the space.
Work the following stitches into that same arch:
1 single crochet, 2 double crochet, chain 3, 2 double crochet, 1 single crochet.
This creates one complete snowflake point.
The first single crochet forms a low edge. The two double crochets add height. The chain-3 creates the tip, and the second pair of double crochets brings the shape back down.
The final single crochet completes the point neatly.
You should now see a small peaked section above the first arch.
All six stitches in the group—two single crochets and four double crochets—are worked into the chain-5 arch itself, not individually into the chain stitches.
Beginner tip: Keep the three chains at the top of your point slightly relaxed. They form the little peak that you’ll shape more clearly during blocking.
Common mistake to avoid: Don’t put the final two double crochets into the chain-3 tip. They belong in the original chain-5 arch, alongside the first stitches.
Step 8: Repeat the point in each remaining arch
Now repeat exactly the same group inside the next chain-5 arch:
Single crochet, 2 double crochet, chain 3, 2 double crochet, single crochet.
Do not add an extra chain between points. Simply move directly into the next arch and work the next group.
Repeat until all six arches have one complete pointed section.
After the sixth group, slip stitch into the first single crochet of Round 4 to join.
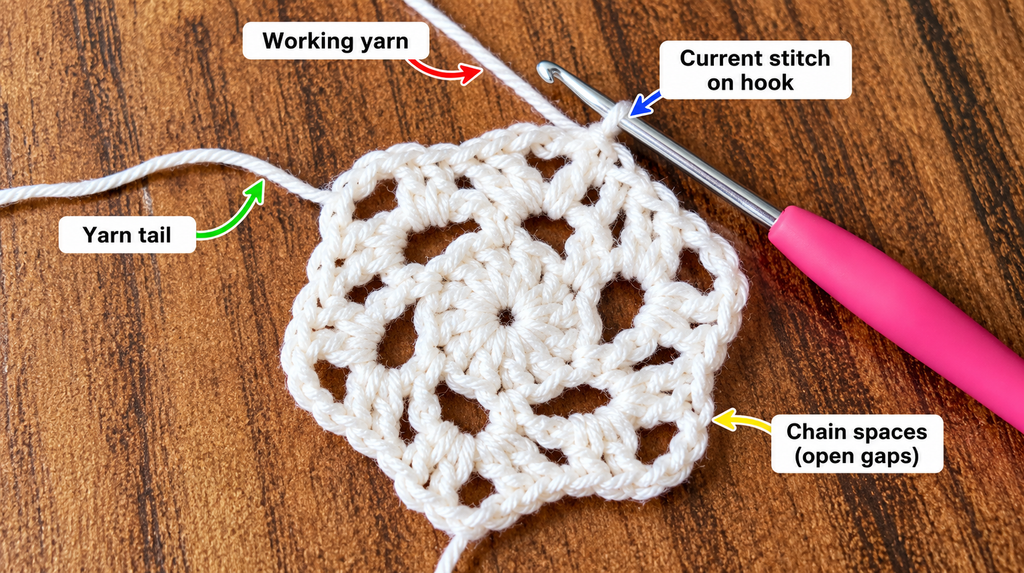
The points should be relatively even, with a small opening below each decorative section.
Don’t worry if they look a little rounded rather than sharply pointed. That’s normal before blocking, especially with soft cotton yarn.
Beginner tip: After every second point, count how many arches you’ve completed. A quick check prevents you from discovering a missed section at the end.
Common mistake to avoid: Make sure you always insert the hook under the whole chain arch. Working into one strand of a chain can distort the motif and create uneven heights.
Step 9: Check the completed snowflake shape
Congratulations! The crochet portion is now complete.
Place your snowflake on a flat surface and gently smooth the stitches with your fingertips.
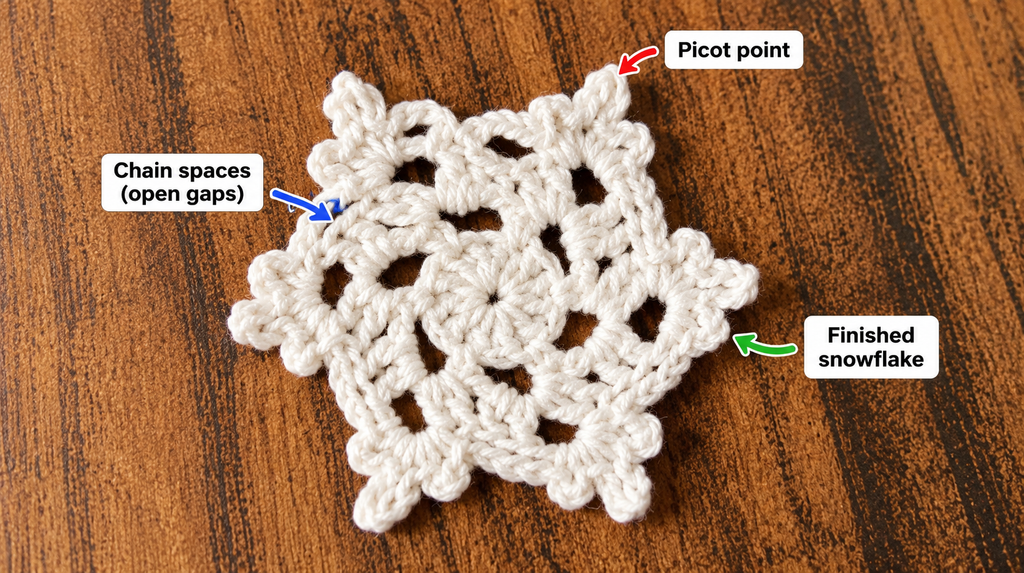
You should see one circular center, six open arches, and six decorative points.
Look at the space between each point. The shape should be balanced, with no unusually large gaps or crowded areas.
Because the snowflake is still attached to your working yarn, this is a good opportunity to make any corrections before cutting the yarn.
If one point is noticeably different, undo the outer round as far as necessary and redo that section.
If all six points are present and look reasonably even, you’re ready to fasten off.
Beginner tip: Don’t judge the final appearance before blocking. Cotton often relaxes after washing, and the pointed edges become much neater when gently shaped.
Step 10: Fasten off and weave in the yarn ends
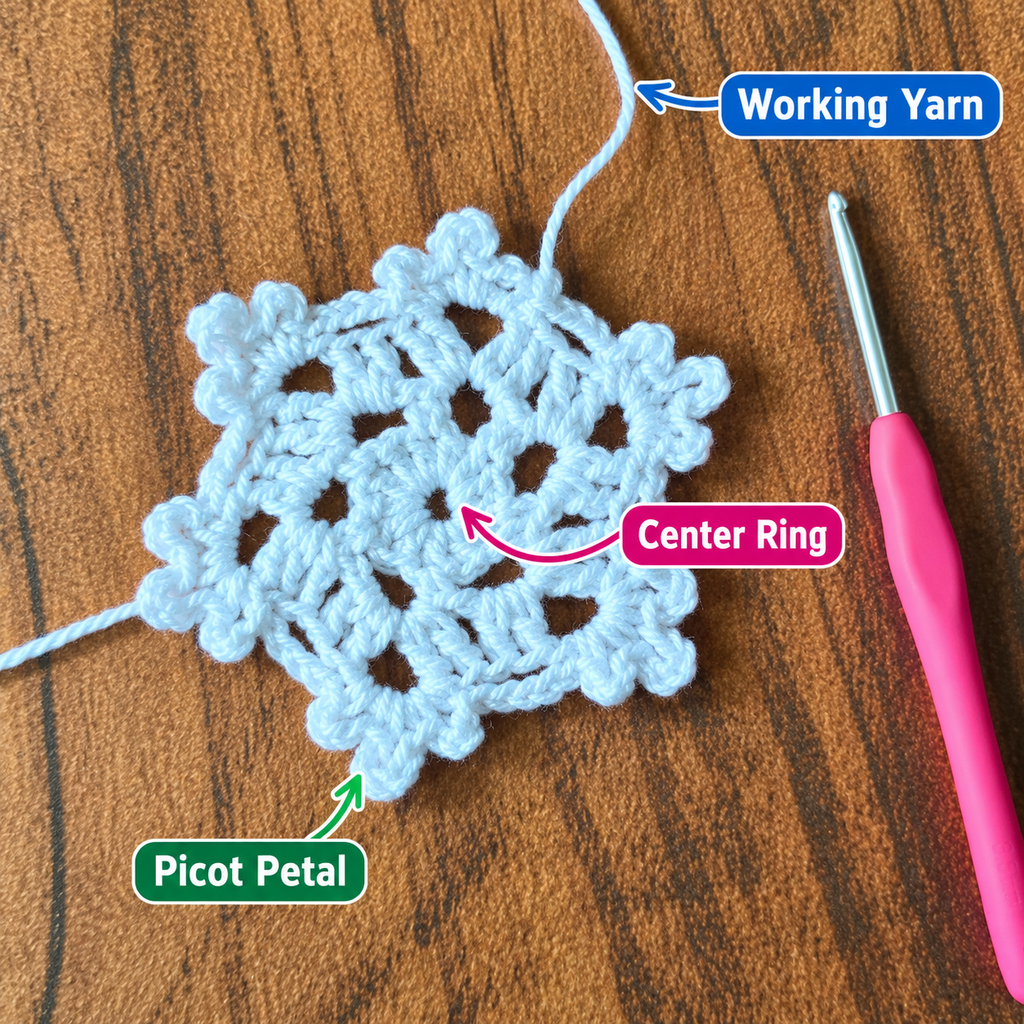
Cut your working yarn, leaving a tail approximately 5–6 inches long.
Draw the cut end all the way through the active loop and pull gently to secure it.
Thread the tail onto your yarn needle.
Turn your snowflake over and weave the tail through the backs of several nearby stitches. Reverse direction and weave through a few more stitches for additional security.
Trim the yarn close to the fabric without cutting any of the actual crochet stitches.
Repeat the process with the starting tail at the center. Before weaving it in, make sure the magic ring is closed firmly.
Avoid using large knots if possible. Knots can create uncomfortable bumps under cups, and a coaster looks tidier when its ends are hidden within the stitches.
Beginner tip: Don’t cut tails too short before weaving. You need enough yarn to pass securely through multiple stitches.
Common mistake to avoid: Cutting the starting tail before securing it can allow the magic ring to open later, especially after washing.
Crochet Pattern Notes
Turning chain rules
This coaster is made in joined rounds, not back-and-forth rows.
The starting chain-2 counts as the first double crochet in Rounds 1 and 2.
The chain-1 at the beginning of Round 3 does not count as a stitch.
Round 4 is joined using a slip stitch. You do not need to make a turning chain because you aren’t turning the work.
Stitch counts
| Round | Expected result |
|---|---|
| 1 | 12 double crochet stitches |
| 2 | 24 double crochet stitches |
| 3 | 6 single crochet anchors and 6 chain-5 arches |
| 4 | 6 pointed groups, each containing 2 sc, 4 dc, and one chain-3 tip |
Repeat pattern
The main decorative repeat is:
(sc, 2 dc, ch 3, 2 dc, sc) into each chain-5 space.
Repeat once per arch, six times in total.
Adjusting the size
This exact version is designed as a small decorative coaster. Its final size depends on the yarn and hook, so measure your first completed sample before planning a matching set.
For a larger snowflake, the simplest adjustment is to use a slightly thicker cotton yarn and a correspondingly larger hook.
If you want to add another round or change the number of center stitches, that requires recalculating the six evenly spaced anchor points. Do not simply add random increases, because that can distort the snowflake.
For a larger mug base, consider pairing the snowflake motif with a separate solid circular coaster underneath it. This also helps protect the tabletop where the snowflake has open spaces.
Common Beginner Mistakes and How to Fix Them
1. My snowflake has seven points instead of six
This usually means an extra anchor stitch was added during the chain-arch round.
Return to Round 3 and count the arches carefully. You need exactly six chain-5 spaces.
The best solution is to undo the incorrect round and remake it before proceeding.
2. My center looks like a little bowl
A cupped center often means the fabric is too tight, the hook is too small for your tension, or the number of increases is insufficient because some were missed.
Check that you have 24 double crochet stitches in Round 2.
If the count is correct but the center still cups strongly, loosen your tension or try a slightly larger hook.
3. My snowflake points are uneven
Uneven points usually come from inconsistent chain tension or accidentally omitting one stitch from the decorative repeat.
Each point needs the same group: one single crochet, two double crochets, three chains, two double crochets, and one single crochet.
Check the stitch group before beginning the next point.
4. My chain arches are too small
This can happen when the five chains are pulled excessively tight.
Try making your chains more gently, keeping the working yarn relaxed.
You want the arches to open naturally without large floppy loops.
5. My crochet center has a hole
If you used a magic ring, pull the starting tail firmly before weaving it in.
A tiny central opening may be acceptable in a decorative snowflake, but the ring should be secured so it cannot loosen.
If you’ve already woven the tail in and the center is opening, you may need to unweave the tail and tighten the ring again.
6. The edges curl after finishing
Some curling is normal in an unblocked decorative motif.
First, check that the stitch counts and point repeats are correct. Then use gentle wet blocking to relax the yarn and shape the six tips.
If the curling is severe, blocking alone may not correct an incorrect stitch count.
7. My snowflake looks messy on the back
Yarn tails that travel across open chain spaces can show from the front.
Instead, weave the tails through solid stitches near the center or along the denser parts of the points. Change direction within the stitches to secure the ends without creating visible lines.
How to Customize Your Crochet Christmas Gifts
Once you’ve completed your first snowflake, you’ll probably find yourself imagining different colors and gift combinations.
These little coasters are especially good for personalizing because they use small amounts of yarn.
Try a classic Christmas color scheme
For a traditional holiday look, make coasters in ivory, cranberry red, and deep forest green.
Use the same yarn weight for every coaster so the sizes remain reasonably consistent.
A set of four or six will look beautiful tied together with natural twine.
Create a soft neutral collection
If you’re making a gift for someone who prefers minimal home décor, use warm ivory, oatmeal, and muted sage.
These colors work throughout winter and don’t look overly seasonal.
You could pair the coasters with a neutral ceramic mug or a packet of herbal tea.
Make a colorful family gift set
Create one snowflake in a different color for each person in the household.
Soft dusty pink, pale blue, cream, and sage all work well together.
Attach a small gift tag with a handwritten note so everyone knows which coaster belongs to them.
Experiment with yarn weight
Fine cotton gives you a smaller, delicate-looking snowflake.
Medium-weight cotton can produce a larger, more substantial motif, though you’ll need to check the size with your chosen hook.
Very fluffy or highly textured yarn is less suitable for a first attempt because it can hide the stitch structure.
Add a subtle decorative accent
For a decorative-only snowflake, you might use a gently sparkling yarn or add a hanging loop.
However, avoid beads, hard embellishments, or bulky decorations on any coaster intended to sit beneath a drink. These can make glasses unstable and increase the chance of spills.
Create different gift combinations
These are particularly nice for teachers, friends, coworkers, neighbors, and family members.
You could bundle four coasters with a mug, pair two with a small package of tea, or create a larger set for someone who enjoys holiday entertaining.
For gift wrapping, stack the completely dry coasters flat and tie them loosely with a narrow cotton ribbon.
A handwritten label such as “Handmade for Your Cozy Christmas Moments” adds a personal touch without requiring an elaborate presentation.
Finishing Instructions: How to Block a Crochet Snowflake Coaster
Blocking is the finishing step that gives your snowflake a more defined appearance.
It helps the chain arches open gently and allows the six tips to sit more evenly.
Wet blocking for cotton
Fill a small bowl with cool or lukewarm water.
Place your completed coaster in the water and allow it to become evenly damp.
Remove it and squeeze out the excess water gently. Don’t twist or wring the fabric.
Lay it between two clean towels and press lightly to remove additional moisture.
Place the snowflake flat on a foam blocking mat or another suitable surface.
Gently spread the six points so they’re equally spaced around the center.
Use rustproof pins near the tips if necessary, making sure the pins hold the yarn without splitting or damaging it.
Allow the snowflake to dry completely before removing the pins.
You usually don’t need starch for a functional cotton coaster. A stiffened decorative snowflake may look crisp, but a washable, flexible coaster is generally more practical.
Washing and everyday care
Always follow the care instructions for the yarn you’ve used.
Many cotton yarns can be gently hand-washed or machine-washed on an appropriate delicate cycle, but the yarn label should take priority.
Wash your coasters when needed and reshape them while damp.
Lay them flat to dry rather than hanging them from a point, which can stretch the openwork.
If you’re gifting a set, include a small care card so the recipient knows how to keep the snowflakes looking beautiful.
A note about hot cups
Cotton coasters are suitable for many everyday drink situations, but an openwork snowflake does not form a continuous protective surface. Hot liquid, condensation, or spilled drinks can pass through the openings.
Don’t rely on the snowflake alone to protect delicate furniture from very hot cups or moisture. Place it over a suitable solid coaster or protective surface when necessary.
Turn Your Snowflakes Into Beautiful Christmas Presents
One little snowflake is charming, but a matching set makes the gift feel especially thoughtful.
Try making four in the same yarn and color palette.
Once they’re washed, blocked, and completely dry, stack them together with the points aligned.
Wrap the stack with a small piece of cotton ribbon or twine. Add a recycled kraft paper tag and write a simple message on the back.
For an extra-special gift, place the coaster set inside a small box with a plain ceramic mug.
You can also include a sealed packet of tea or instant hot chocolate.
The result is inexpensive to assemble, yet feels far more personal than an ordinary store-bought present.
Quick Printable-Style Crochet Pattern Summary
Easy Six-Point Snowflake Coaster
Skill level: Confident beginner
Yarn: DK-weight cotton
Hook: 3.5 mm
Stitches: ch, sc, dc, sl st
Starting method: Adjustable magic ring
Terms: US crochet terminology
Round 1: Magic ring, ch 2 (counts as first dc), 11 dc into ring, sl st to top of beginning ch 2. (12 dc)
Round 2: Ch 2 (counts as first dc), 1 dc in same first st, 2 dc in every remaining st, sl st to top of beginning ch 2. (24 dc)
Round 3: Ch 1 (does not count), sc in first st, ch 5, sk next 3 sts, sc in next st; repeat from * to * five times total, then ch 5, sk final 3 sts, sl st to first sc. (6 ch-5 arches)
Round 4: Sl st into first ch-5 arch, (sc, 2 dc, ch 3, 2 dc, sc) in the arch; repeat from * to * in each of the remaining five arches, sl st to first sc. (6 points)
Finish: Fasten off, securely weave in both yarn tails, gently wet block, and dry flat.
Copy pattern summary
Frequently Asked Questions About Crochet Christmas Gifts
1. What are the easiest crochet Christmas gifts for beginners?
Small projects that use basic stitches are usually the most manageable. Think washcloths, simple coasters, bookmarks, flat ornaments, and uncomplicated scarves.
A snowflake coaster is a nice choice if you’ve already practiced double crochet and are ready to learn a small project worked in rounds.
Start with one coaster rather than committing to a large gift set immediately. It will help you find a comfortable tension before making several identical pieces.
2. How long does it take to crochet a snowflake coaster?
For a confident beginner, plan around 35–60 minutes for the crochet portion of one coaster. Your first piece may take longer while you learn the pattern.
Once the repeat feels familiar, later coasters may go more quickly.
Remember that washing and blocking require additional drying time, so don’t leave that part until the last minute before gift wrapping.
3. Can I make crochet snowflakes using acrylic yarn?
Yes, acrylic can work well for decorative ornaments and lightweight seasonal decorations.
However, cotton is usually a more practical choice for everyday drink coasters because of its absorbency and fabric characteristics.
If you want to use acrylic, test the finished item carefully and avoid exposing it to very hot items or direct heat.
4. How much yarn do I need to make six crochet snowflake coasters?
As a rough planning estimate, a set of six may use approximately 60–120 yards of DK cotton, depending on size, tension, and the yarn you choose.
This is not a measured consumption figure for a test-crocheted sample.
For consistent results, make one complete coaster, measure how much yarn it used, and multiply by six. Allow some extra yarn for fastening off and minor variations.
5. Why won’t my crochet snowflake lie flat?
The most common reasons are uneven tension, missed increases, excessively tight chain arches, or an incorrect number of stitches.
First, check the counts for Rounds 1 and 2.
Then make sure Round 3 has exactly six chain-5 spaces.
If the pattern is correct, gentle blocking may help relax the fabric and give your points a cleaner shape.
6. Can these crochet snowflakes be used as Christmas tree ornaments?
Yes. For decorative ornaments, you can add a small hanging loop to one of the six points.
Chain around 12–18 stitches to form a loop, then secure it firmly at the chosen point. Adjust its length to suit the tree branch.
Use a lightweight yarn if you want the ornament to hang neatly. Keep loose strings and small decorative parts away from young children and pets.
7. What can I pair with crochet coasters for a Christmas gift?
Crochet coasters work beautifully with mugs, tea, packaged hot chocolate, or a small coffee gift card.
For a teacher or coworker, a set of two coasters with a simple handwritten note is already thoughtful.
For a larger handmade gift, pair your coasters with a crocheted washcloth or a matching small basket.
Conclusion
Handmade Christmas gifts don’t need to take weeks to finish.
Sometimes the loveliest presents begin with a small ball of cotton yarn and a simple idea.
These six-point crochet snowflake coasters give you the chance to practice basic stitches, experiment with colors, and create something useful for friends and family.
Make your first coaster slowly, check your stitch counts, and enjoy watching the shape grow from an ordinary circle into a little Christmas snowflake.
Once you’ve completed one, you’ll have the confidence to create a matching set in your favorite holiday colors.