A locker can become cluttered surprisingly quickly. Pens disappear under notebooks, earbuds get pushed into corners, sticky notes bend, and small school supplies somehow end up underneath everything else.
A handmade crochet locker pouch gives those smaller items one dedicated place while using the otherwise empty vertical space on the locker door or wall.
This beginner-friendly project is made from one simple crocheted rectangle. You fold part of that rectangle upward to form the storage pocket, crochet the two sides closed, and then add a reinforced yarn strap at the top.
There is no zipper to install, no lining to sew and no complicated shaping.
If you can make a chain and single crochet, you can work through this pattern.
The finished organizer is especially useful for pencils, pens, sticky notes, a small calculator, charging cables, earbuds, lightweight personal-care items and other small locker essentials.
The tutorial below walks through the project from the foundation chain to the final hanging strap, with visual references planned for every important construction stage.
What You’ll Learn
By completing this crochet locker pouch, you will practice:
- Making and counting a foundation chain
- Working single crochet in rows
- Recognizing the top loops of a stitch
- Maintaining a consistent stitch count
- Crocheting straight edges
- Measuring a crochet panel
- Folding a flat panel into a pocket
- Joining two crochet layers with single crochet
- Making a reinforced crochet hanging strap
- Weaving in ends securely
- Adjusting a crochet pouch to fit your own locker
Materials You’ll Need
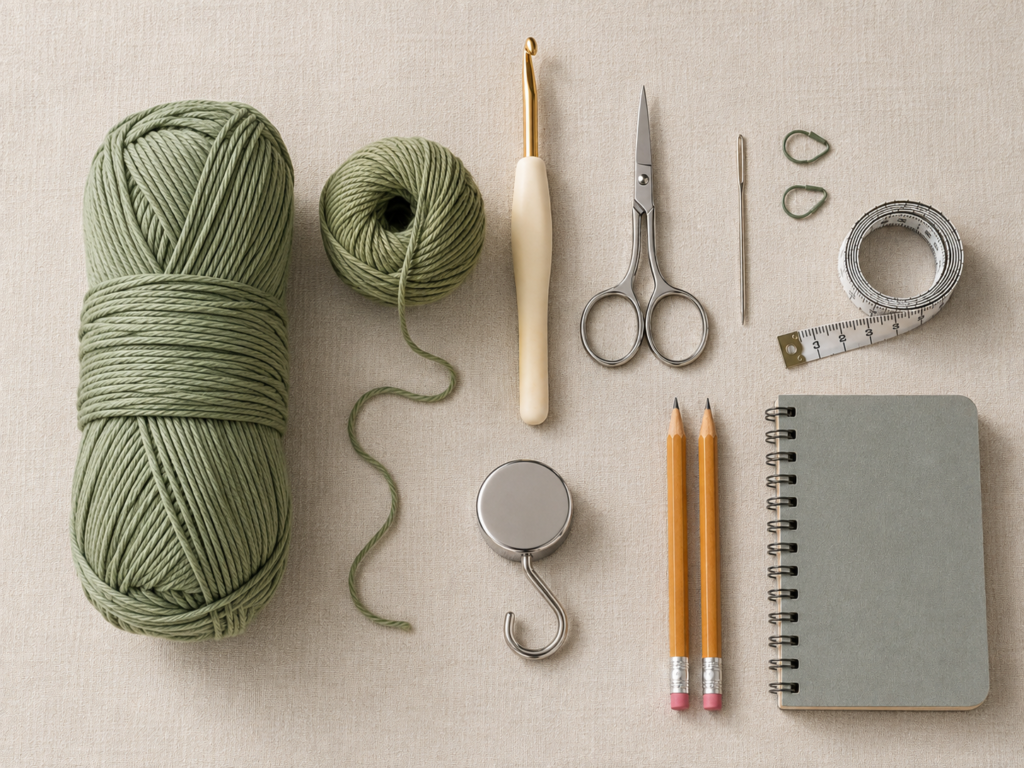
For one medium locker pouch, gather:
- Approximately 130–160 yards of medium #4 cotton or cotton-blend yarn
- 5.0 mm crochet hook
- Scissors
- Blunt yarn or tapestry needle
- 2 stitch markers
- Measuring tape
- One locker hook, magnetic hook or adhesive hook for hanging
- Optional removable decoration, label or tassel
Cotton is an excellent choice because this pouch needs enough structure to remain useful when loaded. Very soft acrylic yarn can work, but it may stretch more when the pouch is filled.
If you substitute another yarn weight, rely on measurements rather than blindly following stitch numbers.
The Craft Yarn Council classifies yarns and provides standardized guidance for yarn weights and crochet hook sizing; those standards are useful when substituting materials.
Crochet Abbreviations Used
This pattern uses US crochet terminology.
- ch = chain
- sc = single crochet
- sl st = slip stitch
- st/sts = stitch/stitches
- rep = repeat
- RS = right side
- WS = wrong side
These abbreviations follow common US crochet conventions listed by the Craft Yarn Council.
US/UK terminology note
The main stitch in this tutorial is US single crochet.
In UK terminology, the equivalent stitch is called double crochet.
Finished Size
Using medium #4 cotton and a 5.0 mm hook, the sample is designed to finish at approximately:
9–9¼ inches wide × 11–12 inches tall, including the exposed back section but excluding the hanging strap.
The front storage pocket is approximately:
9 inches wide × 7 inches deep.
Measurements can vary according to yarn, hook size and individual tension.
Gauge / Tension
Exact gauge is not critical for this organizer, but a useful target is approximately:
14–15 single crochet stitches × 15–16 rows = 4 inches / 10 cm
The more important goal is a firm fabric.
If your stitches are loose enough that pencils push through the fabric or the pouch stretches dramatically, switch to a smaller hook.
If the fabric becomes stiff and difficult to work, increase the hook size slightly.
Before You Start
Count every row
The pouch works best when both long edges contain the same number of rows. Uneven edges make the folding and side seams more difficult.
Do not accidentally add stitches
The final stitch at the end of a row can be easy to miss.
After several rows, count your stitches again. You should still have the same number you started with.
Keep the turning chain separate
The chain 1 used to begin a new row does not count as a stitch in this pattern.
Work the first single crochet into the first true stitch.
Aim for firm rather than loose tension
This project is storage, not clothing. A slightly dense fabric is useful because it supports the contents.
Choose practical colors
A medium or slightly deeper shade hides everyday marks better than pure white. Sage, denim blue, rust, charcoal, burgundy and mustard are all practical choices.
Step-by-Step Crochet Tutorial
Step 1: Make the Foundation Chain
Make a slip knot and place it on your 5.0 mm hook.
Chain 35.
Before continuing, spread the chain gently across your table and check that it is not twisted.
Starting in the second chain from the hook, work one single crochet into each chain across.
You will have:
34 single crochet stitches.
This becomes the width of the pouch.
If your row is already considerably wider or narrower than about 9 inches, adjust now rather than finishing the entire rectangle.
Beginner tip
When crocheting into the starting chain, rotate each chain slightly toward you. This can make the back and top loops easier to see.
Common mistake to avoid
Do not crochet into the chain currently sitting on your hook. Begin with the second chain from the hook.Step 2: Crochet the Main Rectangle
Now work the body of the organizer.
For every following row:
Ch 1 and turn. Work 1 sc in each stitch across.
Maintain 34 stitches per row.
Continue until you have approximately 44 rows total, or until the rectangle measures about 11½ inches long.
The exact number of rows matters less than the finished measurement.
The finished rectangle should be firm, flat and noticeably longer than it is wide.
Beginner tip
Place a stitch marker into the first stitch of a row and another into the last stitch while you learn to identify your edges.
Common mistake to avoid
If the rectangle gradually becomes narrower, you are probably skipping the last stitch.
If it grows wider, you may be accidentally crocheting into the turning chain.
Step 3: Check Your Stitch Texture and Edges
Before forming the pocket, examine the fabric.
Every single crochet should create a small V along the top edge.
Your hook should pass under both loops of that V unless the pattern specifically tells you otherwise.
Lay the rectangle flat.
Compare the left and right edges. They do not need to look machine-perfect, but both sides should have approximately the same length and the corners should remain reasonably square.
If one edge is noticeably shorter, recount your rows before assembling the pouch.
Beginner tip
Periodically stop crocheting and lay your work flat. Detecting a problem after five rows is much easier than discovering it after forty rows.
Common mistake to avoid
Do not pull the first and last stitches of every row extremely tight. Tight edge stitches can cause the rectangle to curve inward.
Step 4: Decide the Pocket Depth and Fold the Panel
Lay the completed rectangle vertically with the starting edge nearest you.
Measure approximately 7 inches upward from the bottom.
Fold the lower part of the rectangle upward at that point.
The two side edges should line up.
You should now see:
- A front pocket approximately 7 inches deep
- A back section extending approximately 4–4½ inches above the pocket
Place a stitch marker through both layers near each upper corner of the pocket.
Do not sew or crochet anything yet.
Put several real items into the temporarily folded pouch. Try a pencil, sticky-note pad or small calculator.
This simple fitting step allows you to adjust the pocket depth before committing to the seams.
Beginner tip
Use measurements rather than row counts when possible. Differences in tension can make the same number of rows taller or shorter from one crocheter to another.
Common mistake to avoid
Do not fold the pouch so high that almost no backing remains above the pocket. You need enough upper fabric for the hanging strap to support the organizer.
Step 5: Crochet the First Side Seam
Keep the panel folded.
Attach the working yarn at one upper corner of the pocket.
Insert your hook through both layers.
Pull up a loop.
Chain 1 to secure the yarn.
Now work single crochet evenly down the side through both the front and back layers.
Aim for approximately one single crochet per row end.
Continue until you reach the lower folded corner.
Fasten off.
The crocheted seam serves two purposes: it closes the pocket and creates a slightly reinforced border.
Beginner tip
Do not try to insert the hook into a perfectly identical spot on every row edge. Row ends can look different. Concentrate on spacing the stitches evenly.
Common mistake to avoid
If the seam begins rippling, you may be placing too many single crochets along the edge.
If the side puckers dramatically, you may be using too few.
Step 6: Join the Second Side
Repeat the same joining process on the opposite edge.
Try to use approximately the same number of side-seam stitches as you did on the first side.
When finished, place the pouch flat and compare the two sides.
The opening should remain approximately horizontal and the backing should sit centered behind the pocket.
Fasten off.
You now have the basic locker pouch.
Beginner tip
Before cutting the yarn, place the organizer upright and make sure neither seam twists the fabric.
Common mistake to avoid
One seam worked much tighter than the other can pull the pouch sideways. Match the tension you used on the first seam.
Step 7: Add the Reinforced Hanging Strap
The hanger should support the weight of the pouch without stretching excessively.
Attach yarn securely to the upper-left corner of the back panel.
Chain approximately 35, or enough chains to create a loop that fits comfortably over your chosen locker hook.
Without twisting the chain, slip stitch it securely into the upper-right corner.
Turn your work so you can crochet back along the chain.
Work 1 single crochet into each chain across the entire strap.
Slip stitch securely near the first attachment point.
Fasten off, leaving a tail long enough to weave in safely.
The row of single crochet strengthens the chain and creates a wider, more comfortable hanging strap.
Test the strap
Before placing valuable items in the pouch, hang the empty organizer from your locker hook.
Gently pull downward on the pouch.
Check that:
- Both attachment points remain secure
- The strap does not twist
- The locker hook supports the load
- The fabric does not stretch excessively
Beginner tip
If your hook is large, lengthen the strap.
If you use two magnetic hooks rather than one center hook, you can make two small reinforced loops instead.
Common mistake to avoid
A very long loose chain will stretch when the pouch is loaded. Reinforcing the chain with single crochet makes a significant difference.
Pattern Notes
Turning chain
Chain 1 at the beginning of each body row.
The chain 1 does not count as a stitch.
Stitch count
Keep 34 sc across the body panel.
Counting regularly is more important than crocheting quickly.
Repeat pattern
After the first row, the body repeat is simply:
Ch 1, turn, sc in each stitch across.
Right side and wrong side
Plain single crochet has only a subtle difference between the two sides.
Choose whichever face you prefer as the front before folding the pocket.
Size adjustments
The easiest way to resize this project is by measurement.
For a wider pouch, add foundation chains.
For a narrower pouch, remove chains.
For a deeper pocket, fold more of the rectangle upward.
For a taller backing panel, crochet a longer rectangle before folding.
Common Beginner Mistakes
1. The pouch becomes narrower as you crochet
Cause: Missing the final stitch.
Fix: Count every few rows and use markers in the first and last stitches.
2. The pouch becomes wider
Cause: Accidentally working into the turning chain.
Fix: Remember that the chain 1 does not count as a stitch.
3. The rectangle curls
A small amount of curling is normal.
Heavy curling usually means your tension is very tight.
Try relaxing your yarn hand or moving up 0.5 mm in hook size.
4. The side seam ripples
This usually happens when too many stitches are worked into the row ends.
Undo the seam and space your single crochets more evenly.
5. The pocket stretches when filled
Your yarn or gauge may be too loose.
Cotton works particularly well for storage.
For a pouch that will hold heavier objects, use a smaller hook or add a simple fabric lining.
6. The hanger stretches too much
Do not rely on an unreinforced chain.
Work one row of single crochet back across the hanging chain.
7. The pocket opening leans to one side
Check that you folded the rectangle evenly and that both side seams contain similar numbers of stitches.
How to Customize This Crochet Project
Change the yarn color
A locker pouch can be made in school colors, favorite colors or a neutral shade.
Try:
- Sage green
- Navy
- Burgundy
- Mustard
- Cream
- Dusty rose
- Charcoal
- Teal
You can also use two colors: one for the main rectangle and another for the side seams and strap.
Change the size
For pencils and earbuds, make it narrower.
For a calculator and small notebook, increase the width.
Always check the dimensions of your intended locker before making a very large pouch.
Add a contrasting border
Before folding the pouch, work one round of single crochet around the rectangle in a contrasting color.
This gives the finished organizer a more defined edge.
Add texture
Once you are comfortable with the basic design, the plain single crochet panel can be replaced with:
- Moss stitch
- Lemon peel stitch
- Half double crochet
- Suzette stitch
- Waistcoat stitch
Remember that different stitches produce different gauges.
Add a label area
Sew a small removable fabric label or blank name tag to the front.
Avoid permanently attaching heavy embellishments that might pull the pocket forward.
Make two smaller pockets
A more advanced variation can divide the front storage space with a vertical sewn or crocheted seam.
One side can hold pens and the other can hold small accessories.
Gift ideas
This makes a useful handmade gift for:
- Back-to-school students
- Teachers
- College students
- Dorm residents
- Office workers
- Craft-room organization
It can also be used outside a locker as a bedside organizer, desk-side pouch or small wall-storage pocket.
Finishing Instructions
Use a blunt tapestry needle to weave every yarn tail through the wrong side of the crochet fabric.
Change direction at least once while weaving so the tail is less likely to work loose.
Trim only after the yarn feels secure.
Blocking
For cotton yarn, light blocking can help straighten the pouch.
Gently dampen the finished organizer or follow the care instructions on your yarn label.
Shape the pouch on a flat towel.
Square the corners and straighten the strap.
Allow it to dry completely before hanging.
Avoid aggressively stretching the fabric.
Washing and Care
Follow the care instructions for the specific yarn you used.
For a pouch that contains school supplies, occasional spot cleaning may be sufficient.
Remove all contents and any detachable locker hook before washing.
Lay flat or reshape after washing when necessary.
Load Safety
Crochet stretches.
This pouch is intended for lightweight everyday objects such as pens, pencils, sticky notes, earbuds and similar accessories.
Do not use a lightweight magnetic hook or crocheted pouch to suspend heavy objects, glass containers or anything that could cause injury if it falls.
Test your locker hook separately before loading the pouch.
Quick Printable-Style Summary
Skill level: Beginner / Easy
Finished size: Approximately 9–9¼ inches wide × 11–12 inches tall
Yarn: Medium #4 cotton or cotton blend
Hook: 5.0 mm
Main stitches: Chain, single crochet, slip stitch
Starting method: Chain 35; work 34 single crochet across
Body: Continue in single crochet rows until rectangle measures approximately 11½ inches long
Pocket: Fold approximately 7 inches of the lower panel upward
Sides: Single crochet through both layers along each side
Hanger: Crochet a chain between the two upper corners and reinforce the chain with one row of single crochet
Finishing: Fasten off, weave in ends securely, lightly block if desired and test the hanger before loading the pouch
FAQ
Is a crochet locker pouch beginner-friendly?
Yes. This version uses only chain stitches, single crochet and slip stitches.
The body is simply a rectangle, making it considerably easier than shaped bags or zipper pouches.
What is the best yarn for a crochet locker pouch?
Medium-weight cotton is one of the most practical choices.
Cotton produces good stitch definition and tends to make a firmer storage fabric.
Cotton blends are also suitable.
Acrylic works, but very soft acrylic may stretch more under weight.
Can I make the locker pouch larger?
Yes.
Increase the number of foundation chains to make it wider and crochet additional rows to make it taller.
Measure the inside of the locker first so the finished pouch does not interfere with shelves or the door.
Can I use two magnetic hooks?
Yes.
Instead of one long center strap, crochet one small reinforced loop at each upper corner.
Place one loop over each magnetic hook.
This can distribute the load more evenly.
Can I add a zipper?
You can, but a zipper significantly changes the construction.
For an easy beginner project, the open pocket is faster and more practical.
A separate crochet zipper pouch is a better choice if you need secure storage for very small objects.
Why is my crochet locker pouch stretching?
The most common causes are loose tension, very stretchy yarn or carrying too much weight.
Try cotton yarn, a smaller hook or a fabric lining.
The hanging strap should also be reinforced rather than left as a plain chain.
What can I store in a crochet locker pouch?
Good lightweight options include:
- Pens
- Pencils
- Highlighters
- Sticky notes
- Earbuds
- Charging cable
- Small calculator
- Index cards
- Lightweight personal accessories
Avoid loading it with heavy books or fragile objects.
Conclusion
A useful crochet project does not need complicated shaping.
This crochet locker pouch pattern turns a basic rectangle into an organizer that gives beginner crocheters practice with the skills they use again and again: straight rows, consistent stitch counts, simple joining and practical finishing.
Once you have made the basic version, the construction is easy to modify. Make a smaller pencil pouch, add two hanger loops, experiment with color blocking or crochet several coordinating organizers for a dorm, craft room or office.
Save the tutorial so you can reuse the same construction whenever you need a simple hanging crochet pocket.





