Small crochet projects are especially useful when you are learning because you can practice the important skills—counting stitches, crocheting in the round, shaping, joining yarn and finishing neatly—without committing to several days of work.
This crochet headphone case pattern is designed for a compact wireless earbud or headphone charging case, similar in size to common AirPods-style cases. It is not intended for full-size over-ear headphones.
Instead of relying on one fixed commercial device size, this tutorial teaches you how to check the crochet against your actual charging case as you work. That makes it much easier to adapt the design to slightly wider, taller or thicker earbud cases.
The construction is intentionally simple. You will crochet an oval base, build a firm single-crochet body in continuous rounds, make two short shaped shoulder sections around the top, add a tidy border, and finish with an optional reinforced loop for clipping the case to a bag.
Most importantly, the project uses basic stitches, so an adventurous beginner can make it.
What You’ll Learn
- How to crochet around both sides of a starting chain to form an oval
- How to work continuous single-crochet rounds
- How to use a stitch marker correctly
- How to check fit while crocheting
- How to divide stitches for simple top shaping
- How to crochet short rows
- How to make a basic sc2tog decrease
- How to join fresh yarn cleanly
- How to edge an irregular opening
- How to crochet a reinforced carrying loop
- How to adjust the pattern for another headphone-case size
Materials You’ll Need
For the sample version, use:
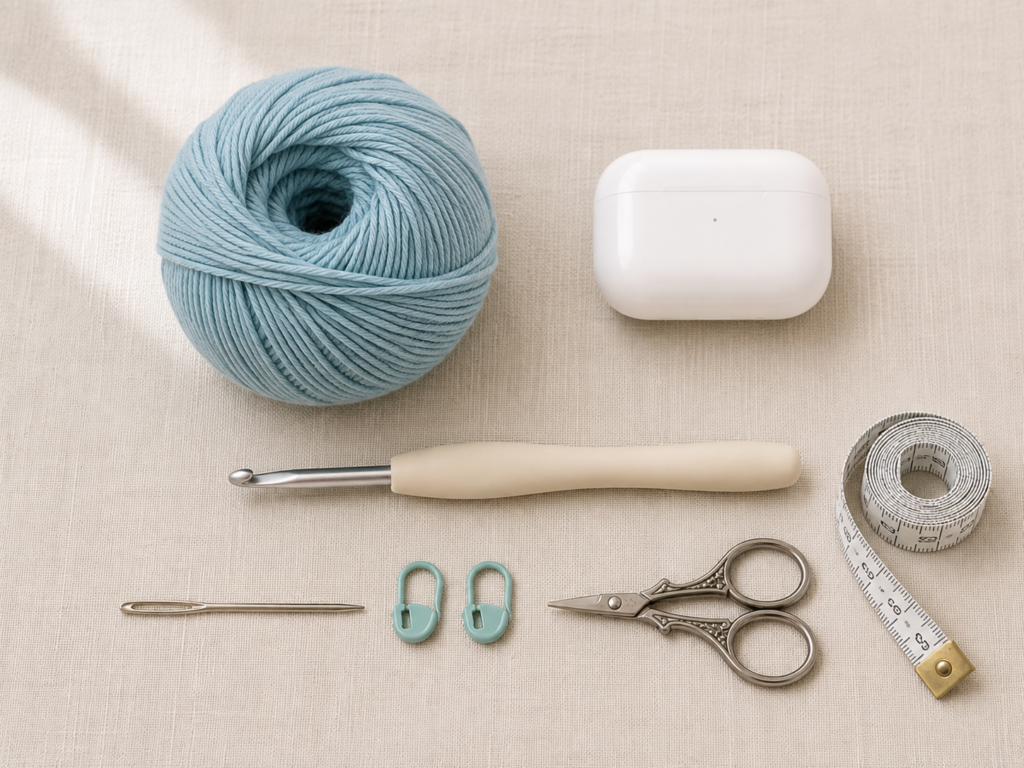
- 15–25 yards / 14–23 m of DK or light worsted cotton yarn
- 3.5 mm / E-4 crochet hook
- Yarn or tapestry needle
- Small scissors
- 2–4 locking stitch markers
- Measuring tape
- Your wireless headphone charging case for fit checks
- Optional small swivel clasp or key ring
Cotton is particularly useful here because it creates a relatively firm fabric and usually gives good stitch definition. Avoid very fuzzy yarn for your first case because the small stitches and shaping are easier to see in smooth yarn.
The Craft Yarn Council classifies DK/light worsted yarn in its light yarn category and lists 3.5–4.5 mm as a common crochet-hook range for that category.
Crochet Abbreviations Used
This tutorial uses standard US terminology:
- ch = chain
- sc = single crochet
- sc2tog = single crochet two together/decrease
- sl st = slip stitch
- st/sts = stitch/stitches
- rnd = round
- rep = repeat
- RS = right side
- WS = wrong side
These abbreviations align with standard Craft Yarn Council crochet terminology. Note that US single crochet is called double crochet in UK terminology.
Before You Start
Gauge and tension
Exact gauge is less important here than fit.
Your fabric should feel firm rather than floppy. You should still be able to insert your hook without fighting the stitches, but the gaps between single crochets should be small enough that the plastic charging case does not show prominently through the fabric.
For reference, a dense DK cotton fabric may land around 18–20 single crochets per 4 in/10 cm, although yarn and personal tension vary substantially.
If your crochet is very loose, try a 3.25 mm hook.
If it feels rigid and difficult to work, move to 3.75 mm.
Measure first
Measure:
- Width of the charging case
- Depth/thickness
- Height from bottom to hinge/lid line
The pattern sample begins with ch 8, but that number is only a starting point.
If your headphone case is much wider, begin with 9 or 10 chains.
If it is noticeably narrower, try 7.
Count your stitches
When working in a spiral, the beginning of the round does not create an obvious seam. Move your stitch marker into the first stitch of every new round.
Do not place the marker around the hook loop. It belongs inside the completed stitch.
Keep the sides straight
Once the oval base is the correct size, stop increasing completely.
Accidentally adding stitches in later rounds causes the body to flare like a bowl.
Curling
A small amount of curling during the first two rounds is normal. Once several body rounds are complete, the project naturally develops into a pouch shape.
US/UK terminology
This pattern uses US terms. US sc = UK dc.
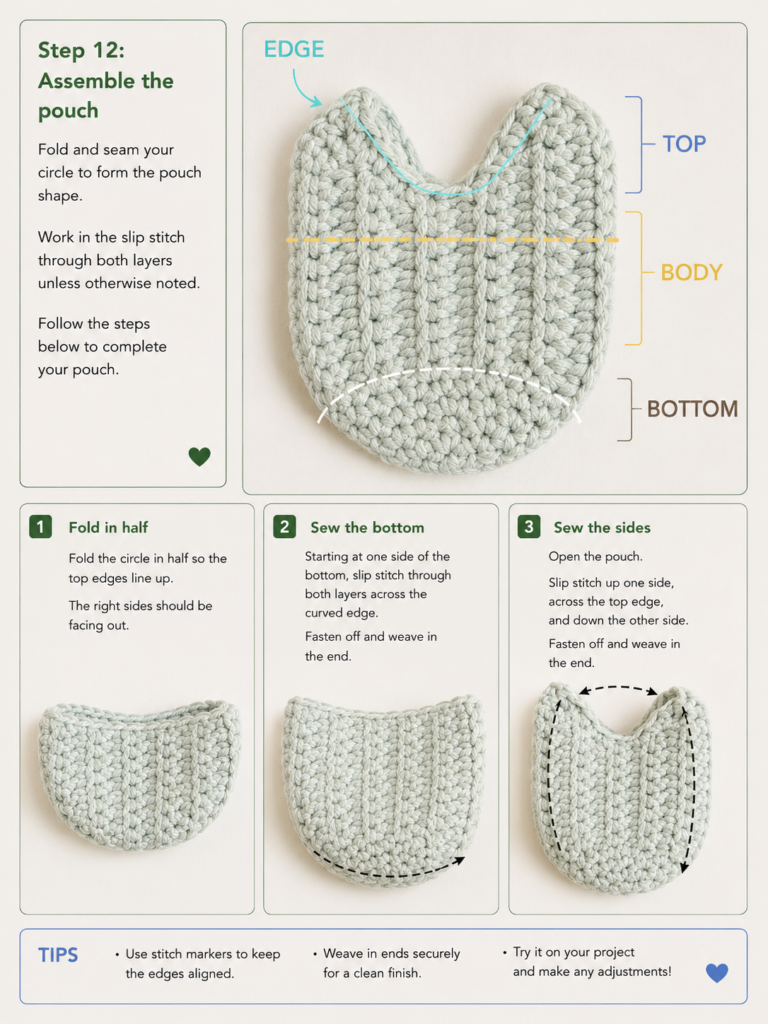
Step-by-Step Crochet Tutorial
Step 1: Crochet the Oval Base
Start with ch 8.
You will work around both sides of this foundation chain rather than turning normally.
Round 1
Work 2 sc into the second chain from your hook.
Sc once in each of the next 5 chains.
Work 4 sc into the final chain. Those extra stitches turn your work around the end of the foundation.
Now rotate the chain so you can work along the unused loops on the opposite side.
Sc in each of the next 5 chain loops.
Work 2 sc into the same foundation chain that contains your beginning stitches.
You should have approximately 18 stitches around the oval.
Place a stitch marker.
Round 2
The goal is to expand the two rounded ends without widening the straight sides excessively.
Work 2 sc in each of the first 2 stitches.
Sc in the next 5.
Work 2 sc in each of the next 4 stitches around the far end.
Sc in the next 5.
Work 2 sc in each of the final 2 stitches.
You now have 26 stitches.
Before going farther, press the oval against the bottom of your actual charging case.
It should be close to the same footprint but slightly smaller because crochet stretches.
Beginner tip: The oval does not need to look perfectly flat when relaxed. Check it against the device rather than judging it only on the table.
Common mistake to avoid: Do not continue increasing automatically. Extra increases make the cover too loose.
Step 2: Build the Fitted Single-Crochet Body
From this point forward, work one sc in every stitch.
Do not join the rounds.
Continue in a spiral, moving your stitch marker after each round.
For the sample, 8–11 even rounds usually create enough body height, but device dimensions and yarn gauge will change that number.
Every two or three rounds, slide the plastic case into the crochet.
The cover should stretch around it without buckling.
Stop when the crochet reaches approximately the lid/hinge line.
If you continue too high before dividing for the shoulders, it becomes difficult to open the charging case.
Beginner tip: A snug fit is better than a loose fit. Cotton generally relaxes slightly with use.
Common mistake to avoid: If the body suddenly widens, count your stitches. You probably worked two stitches into one stitch by accident.
Step 3: Mark the Two Upper Shoulder Sections
Remove the device temporarily.
Flatten the crochet pouch gently.
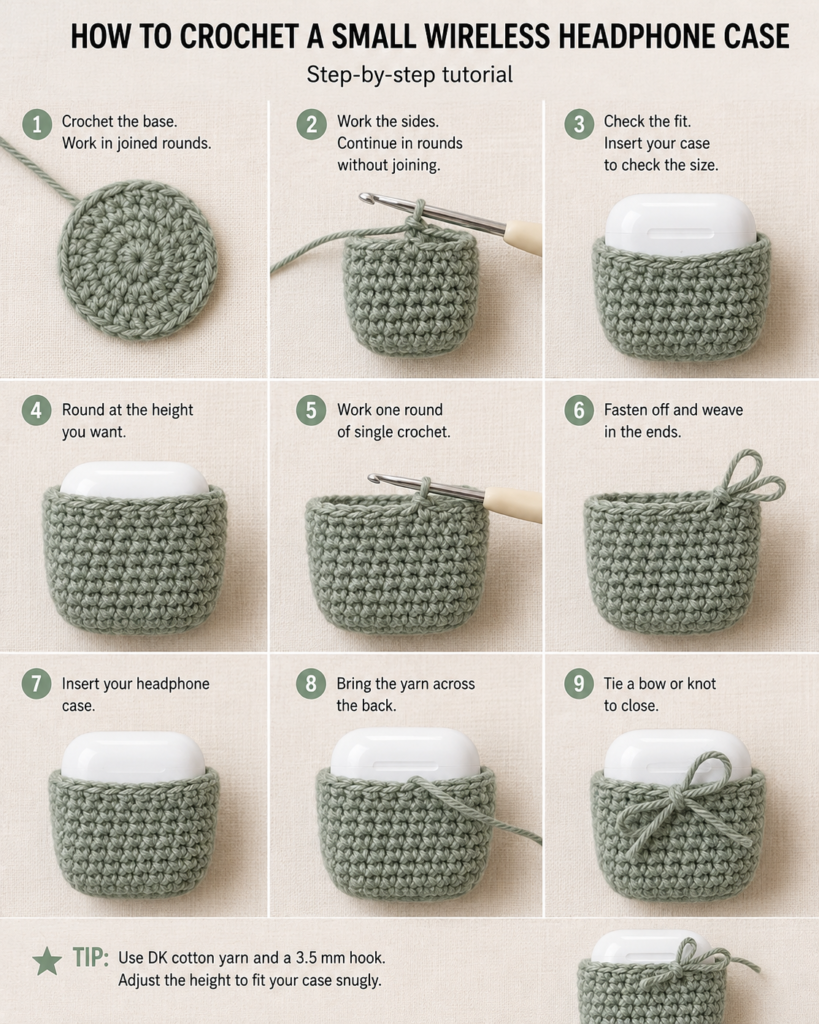
Rather than enclosing the entire lid, this version forms two short side shoulders. They help hug the case while leaving the center areas accessible.
With 26 stitches in the sample:
- Reserve 6 stitches for one center opening.
- Reserve 6 stitches opposite it.
- The remaining 14 stitches become two groups of 7.
Place markers at the beginning and end of each 7-stitch shoulder.
Do not worry if your stitch count differs.
The important idea is symmetry: the two side sections should have the same number of stitches.
Beginner tip: Insert the device again after placing the markers. Confirm that the gaps line up naturally around the top before crocheting.
Common mistake to avoid: Do not judge “center” only from the spiral marker. Flatten the actual pouch and identify its physical front, back, left and right.
Step 4: Crochet and Taper the First Shoulder
Attach your working yarn at the first marker if necessary.
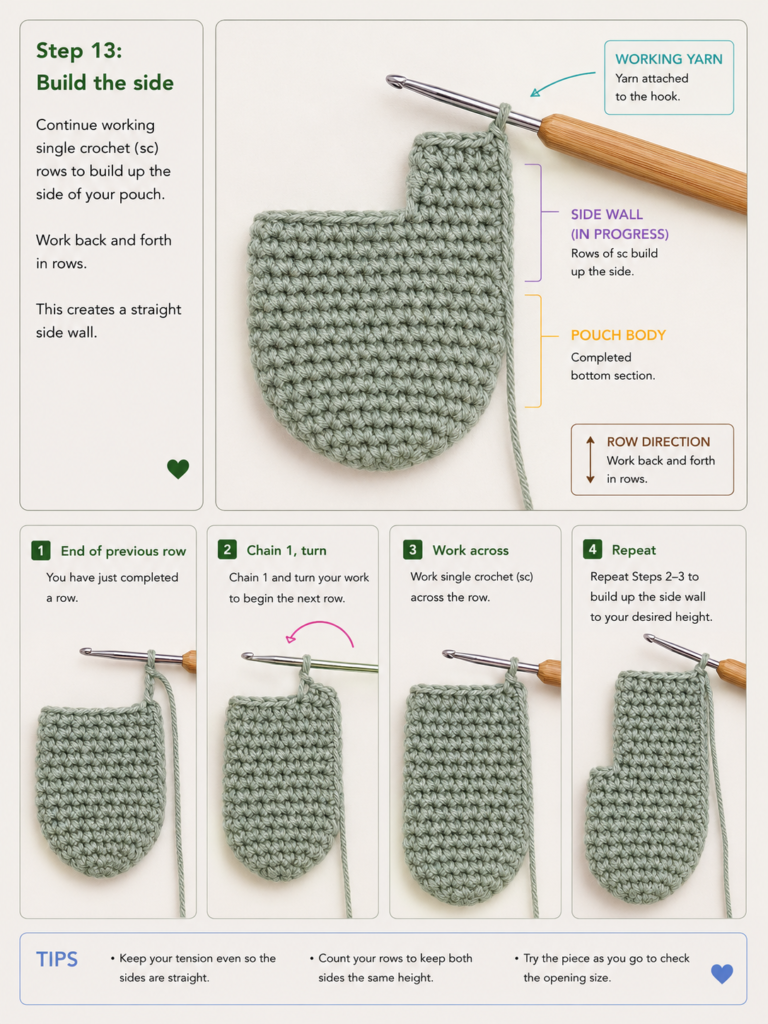
Shoulder Row 1
Sc across the 7 marked stitches.
Ch 1 and turn.
The ch-1 does not count as a stitch.
Rows 2–3
Sc in all 7 stitches.
Ch 1 and turn after each row.
Row 4
Sc2tog over the first two stitches.
Sc in the next 3 stitches.
Sc2tog over the final two stitches.
You now have 5 stitches.
Row 5
Sc across all 5 stitches.
Fasten off.
This slight taper prevents the shoulder from looking boxy and reduces bulk near the lid.
Beginner tip: An sc2tog simply turns two neighboring stitches into one. Insert the hook into the first stitch and pull up a loop, insert into the second stitch and pull up another loop, yarn over and draw through all loops.
Common mistake to avoid: Do not skip a stitch instead of decreasing. Skipping leaves a visible hole.
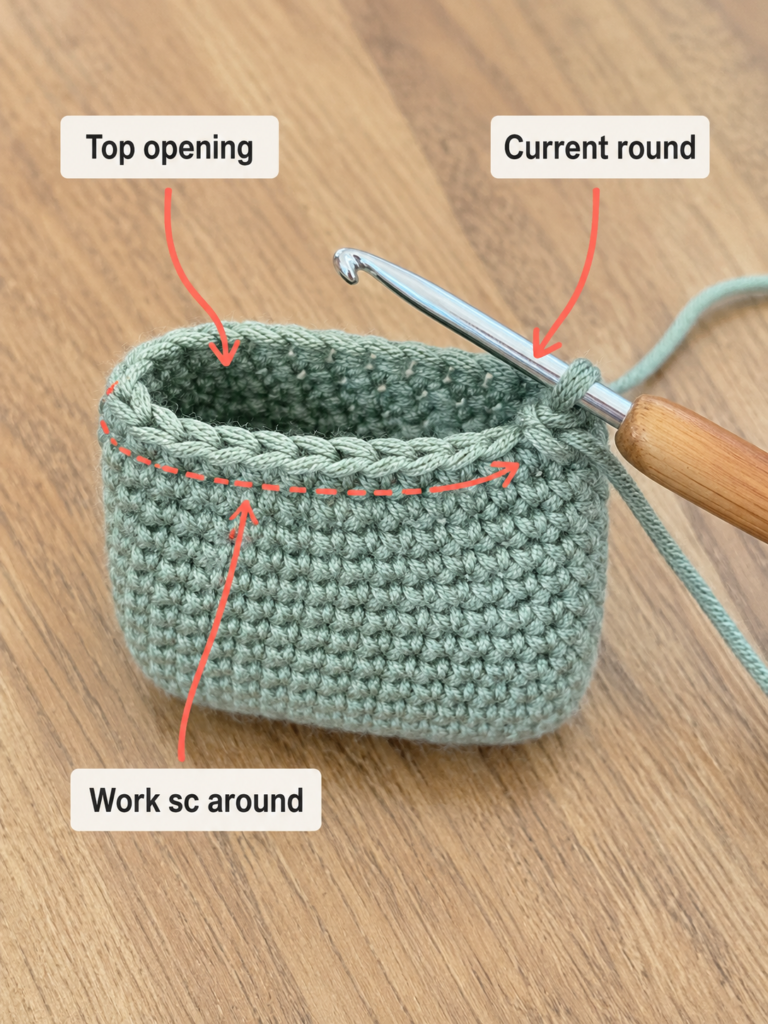
Step 5: Crochet the Second Shoulder
Turn the pouch so the opposite marked section faces you.
Join fresh yarn in the first stitch of that 7-stitch group.
Pull up a loop and secure it without tightening the edge excessively.
Repeat the same five-row shoulder sequence.
Before fastening off, compare the two sections.
They should be:
- The same width
- The same number of rows
- Approximately the same height
- Tapered in the same direction
If one appears noticeably taller, count its rows before continuing.
Beginner tip: After joining fresh yarn, your first actual sc is still worked into the designated first stitch. The loop used for joining does not replace it unless your instructions explicitly say otherwise.
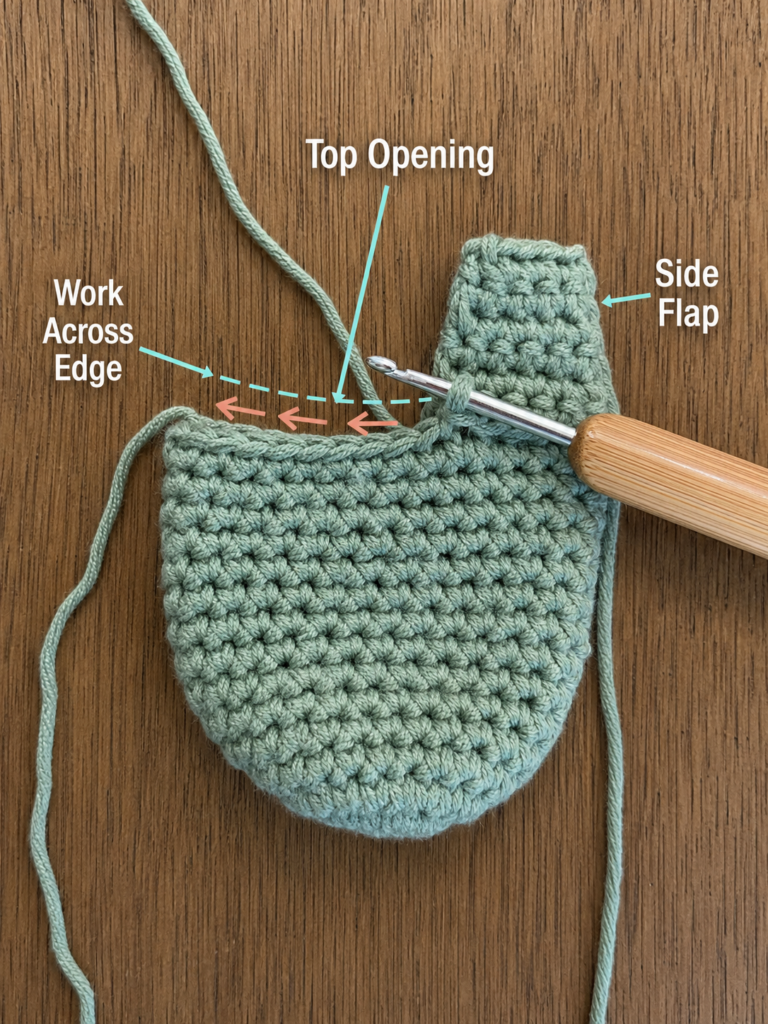
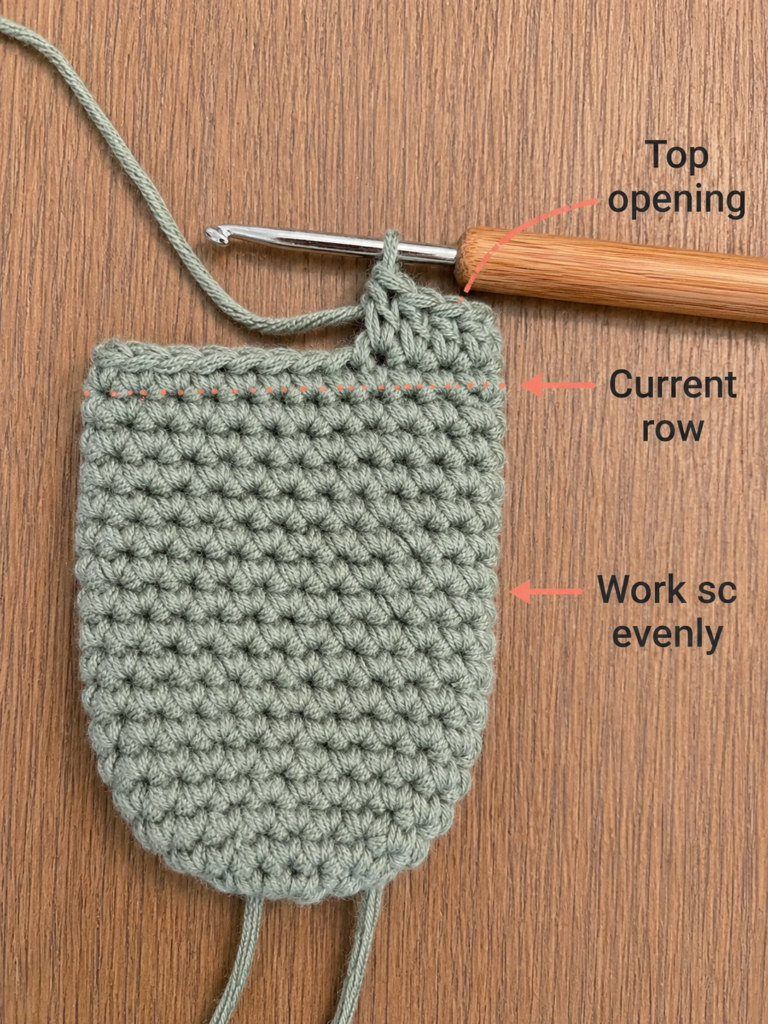
Step 6: Crochet a Clean Edge Around the Opening
You now have several different edge types around the top:
- Normal stitch tops
- Short-row side edges
- Tapered shoulder edges
- Two lower center openings
A single edging round makes all of these areas look intentional.
Join yarn somewhere inconspicuous, preferably near one of the lower center sections.
Ch 1.
Work sc evenly around the entire opening.
Across normal stitches, work one sc per stitch.
Along the vertical row ends of each shoulder, aim for roughly one sc per single-crochet row.
At a tight inside corner, you may need to skip a crowded insertion point or use sc2tog across two nearby locations.
At a sharp outside corner, 2 sc in the corner can help the edging turn smoothly.
The goal is not a predetermined stitch count. The goal is a flat edge.
Finish with sl st to your first sc and fasten off.
Beginner tip: Stop every few stitches and look at the fabric. If the edging ruffles, you are adding too many stitches. If it pulls inward strongly, you need slightly more spacing.
Common mistake to avoid: Do not force one stitch into every visible hole along a row edge. Those holes are not always equivalent to regular stitches.
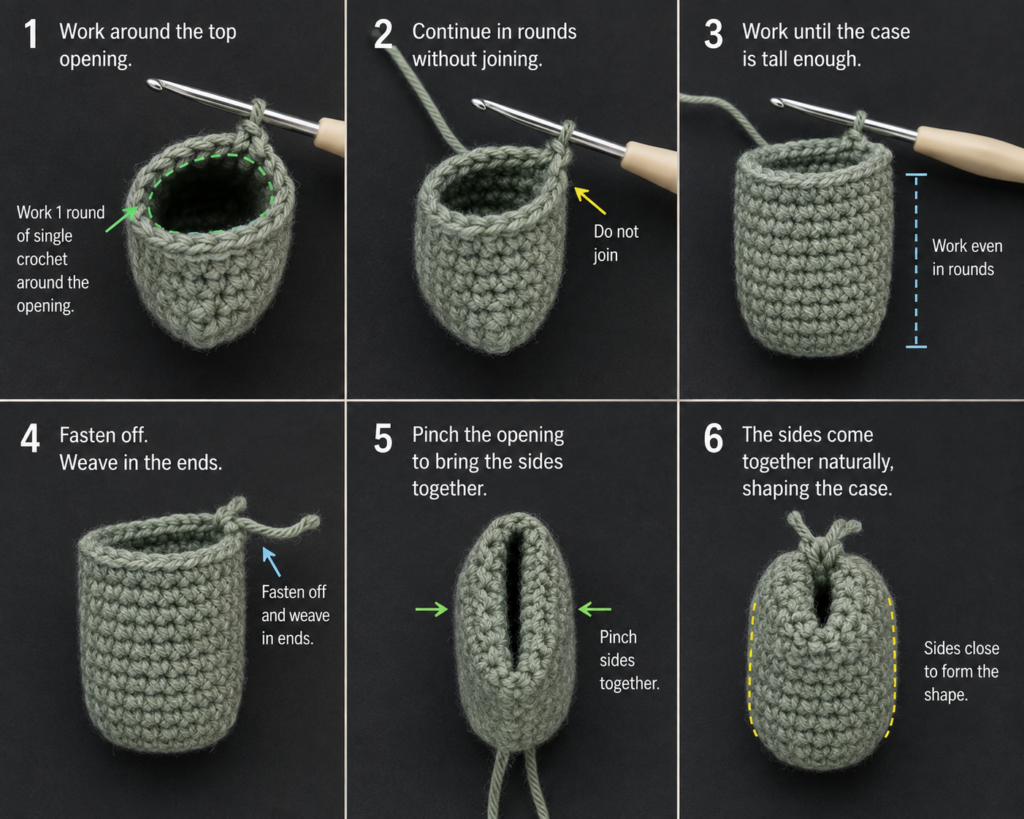
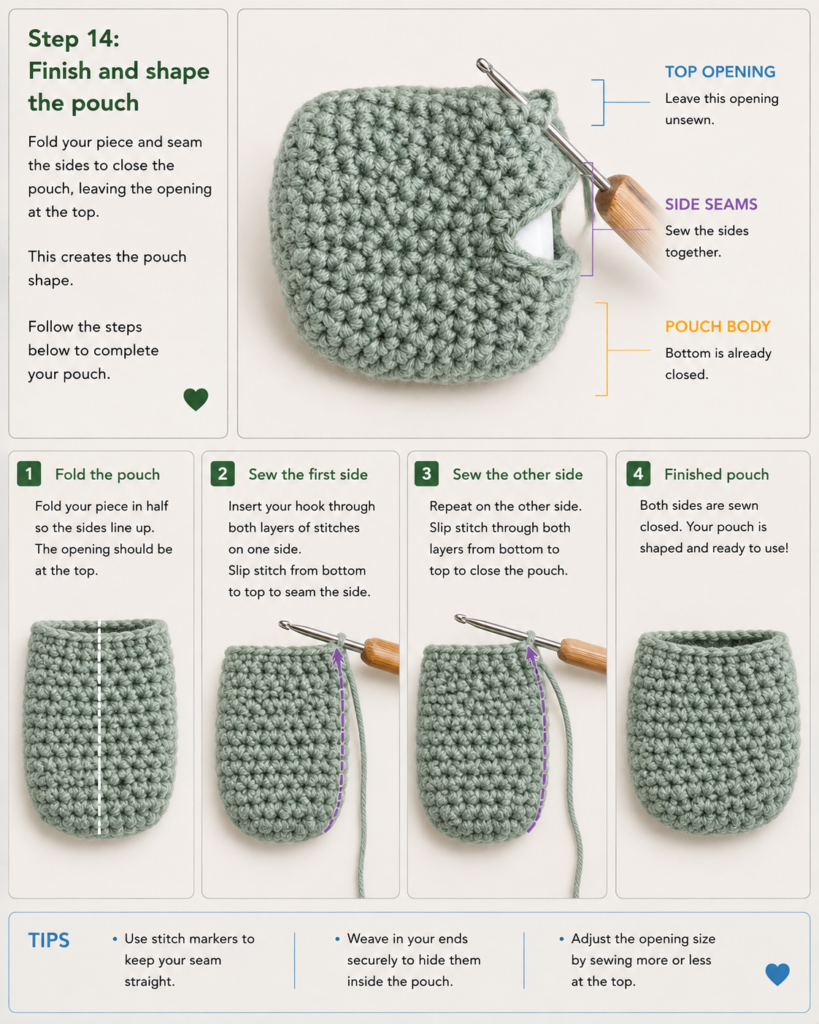
Step 7: Add a Reinforced Carry Loop
A small loop lets you attach the finished case to a bag hook or key ring.
Join yarn securely at one upper outside corner.
Chain approximately 22–26, depending on the length you prefer.
Instead of immediately returning to the case, reinforce the cord:
Sl st into the second chain from your hook.
Continue working one sl st through each chain until you reach the case.
Sl st firmly back into the same upper corner or into the adjacent edging stitch.
Fasten off with a long enough tail to weave securely through several stitches.
Do not make an extremely long loop. A short loop is less likely to catch on objects inside a bag.
Beginner tip: Keep the chain relaxed. A very tight foundation chain is difficult to slip stitch back through.
Common mistake to avoid: Never rely on one loose yarn tail to support the loop. Weave the tail back and forth through the dense crochet several times.
Pattern Notes and Stitch Notes
Turning chains
The ch-1 used before turning the shoulder rows does not count as a stitch.
Always insert the hook into the first actual sc when beginning the next row.
Stitch count
The sample body uses 26 stitches per round after the oval is expanded.
If your case requires a different base, your number may differ.
Once the base fits, maintain that same body stitch count on every plain round.
Repeat
Body rounds repeat one simple instruction:
Sc once in every stitch around.
Working in rounds versus rows
The base and body are worked in continuous rounds.
The two shoulder sections are worked back and forth in rows.
The final edging returns to working around the opening.
Right side and wrong side
During the spiral body, the outside of the pouch remains the RS.
Once you begin turning for short shoulder rows, alternate RS and WS normally.
Size adjustment
If the oval is too narrow after Round 1, complete another controlled increase round.
If it is already the right width after the first oval round, you can omit some Round 2 increases.
Fit is more important than copying the sample stitch number.
Common Beginner Mistakes
1. The case is too loose
Cause: Loose tension, too large a hook, or an oversized oval base.
Fix: Use a smaller hook or remove an increase round. The cover should need a gentle stretch when first inserted.
2. The body keeps getting wider
Cause: Accidental increases during the spiral.
Fix: Count after every few rounds. If your starting body has 26 stitches, each plain body round should still have 26.
3. A visible diagonal line appears
A subtle spiral shift is normal in continuous rounds.
If the line is very obvious, your stitch marker may have moved or you may be adding/skipping stitches around the beginning of the round.
4. One shoulder is taller than the other
Cause: Different row counts.
Fix: Count the horizontal rows rather than estimating visually.
5. The tapered section has holes
Cause: Stitches were skipped rather than decreased.
Fix: Use sc2tog to merge two stitches into one.
6. The edging ruffles
Cause: Too many stitches were worked into row ends.
Fix: Undo several inches and space the edging stitches farther apart.
7. The edging pulls the opening closed
Cause: Too few edging stitches or very tight tension.
Fix: Add another stitch around corners/row ends or use a hook 0.25–0.5 mm larger for the edging only.
8. The loop stretches immediately
Cause: A plain chain can elongate.
Fix: Slip stitch back through the foundation chain, as described above, or work a narrow row of sc instead.
How to Customize This Crochet Project
Change the yarn
Smooth cotton is ideal for a structured case, but cotton-acrylic blends also work.
Avoid very bulky yarn unless you deliberately want a chunky case. Bulky stitches can obscure the compact shape and may make the device difficult to handle.
Add color changes
A simple stripe around the lower body is one of the easiest variations.
Change colors at the stitch marker and carry the unused yarn only if the stripe is very short. Otherwise, cut and weave the old color in.
Try:
- Cream body + sage edging
- Dusty blue + ivory
- Terracotta + oatmeal
- Charcoal + mustard
- Blush + burgundy
Make it taller or shorter
Simply add or subtract even body rounds before beginning the shoulder sections.
Always compare against the actual device.
Add a contrasting border
Work the edging in a second color to make the top shape more visible.
This is especially effective if the entire body is one solid color.
Use surface texture
Once you understand the basic dimensions, experiment with:
- BLO single crochet
- Waistcoat stitch
- Tiny bobbles
- Simple tapestry crochet
- Alternating stripe rounds
Keep the lower fabric relatively dense so the case remains supportive.
Turn it into a gift
Because the project requires little yarn, it works well for:
- Stocking stuffers
- Teacher gifts
- Teen gifts
- Travel accessories
- Craft-market sets
- Matching phone-accessory gifts
- Scrap-yarn projects
Finishing Instructions
Use a tapestry needle to weave every tail through the dense fabric.
Change direction at least once while weaving so a tail cannot easily pull straight back out.
Trim only after checking that the end feels secure.
Insert the empty charging case and gently massage the crochet into its final shape.
For a tiny project like this, aggressive wet blocking is usually unnecessary.
If you do wash it, remove all electronics first.
Follow the care instructions on the yarn label. Reshape the empty crochet case and allow it to dry completely before inserting electronic equipment again.
Never put the electronic charging case into wet or damp crochet.
Quick Printable-Style Summary
Skill level: Beginner
Project: Fitted wireless headphone/earbud charging-case cover
Yarn: DK/light worsted cotton, approximately 15–25 yd
Hook: 3.5 mm / E-4
Main stitches: ch, sc, sc2tog, sl st
Starting method: Ch 8 and work around both sides of the chain to create an oval.
Sample base: Expand oval to approximately 26 sts, or stop increasing when it fits the bottom of your own device.
Body: Sc evenly in continuous rounds until the body reaches the lid/hinge area.
Top: Divide the remaining circumference into two equal shoulder sections separated by center openings.
Shoulders: Work several short rows; taper the final rows with sc2tog.
Edging: Sc evenly around the entire shaped opening.
Loop: Chain approximately 22–26 and sl st back through the chain for reinforcement.
Finishing: Fasten off, weave ends securely, shape around the empty device.
FAQ
Can a complete beginner crochet this headphone case?
Yes, provided you already understand how to make a chain and basic single crochet. Working around both sides of the foundation chain and crocheting a decrease may be new, but both are explained in the tutorial.
What yarn is best for a crochet headphone case?
Smooth cotton or cotton-blend DK yarn is particularly useful because it creates visible stitches and a relatively firm fabric. A fuzzy yarn makes small shaping details harder to see.
Can I use worsted-weight yarn instead?
Yes, but the case will become larger unless you reduce the starting chain and stitch count. Use your actual charging case as the sizing template.
How do I make the pattern fit a different brand of earbuds?
Measure the bottom first and adjust the foundation chain until your crochet oval is slightly smaller than the plastic case. Then stop increasing once the oval matches the footprint. Continue the body until it reaches the lid line.
Why should the crochet cover be slightly smaller than the device?
Single crochet stretches. A cover that is exactly the same relaxed size as the plastic case can become loose after regular handling.
Do I need a button or zipper?
No. This version relies on a snug fitted body and shaped top. You could add a small button tab later, but it is optional.
Can I wash the crochet headphone case?
The crochet fabric can normally be washed according to the yarn manufacturer’s instructions, but remove the electronics first and allow the fabric to dry completely before putting the device back inside.
Conclusion
A small crochet headphone case pattern is a useful way to practice several crochet skills in one manageable project. You begin with a simple oval, learn to keep a consistent stitch count in the round, make two small shaped sections, tidy the opening with an edging round, and finish with a functional carry loop.
Once you have made one version that fits your particular charging case, write down your final foundation-chain length, body stitch count and number of rounds. Your second case will be much faster—and you can begin experimenting with stripes, contrast edging and textured stitches without having to work out the dimensions again.
Because the project requires very little yarn, it is also a practical way to use leftover cotton from larger crochet projects.





