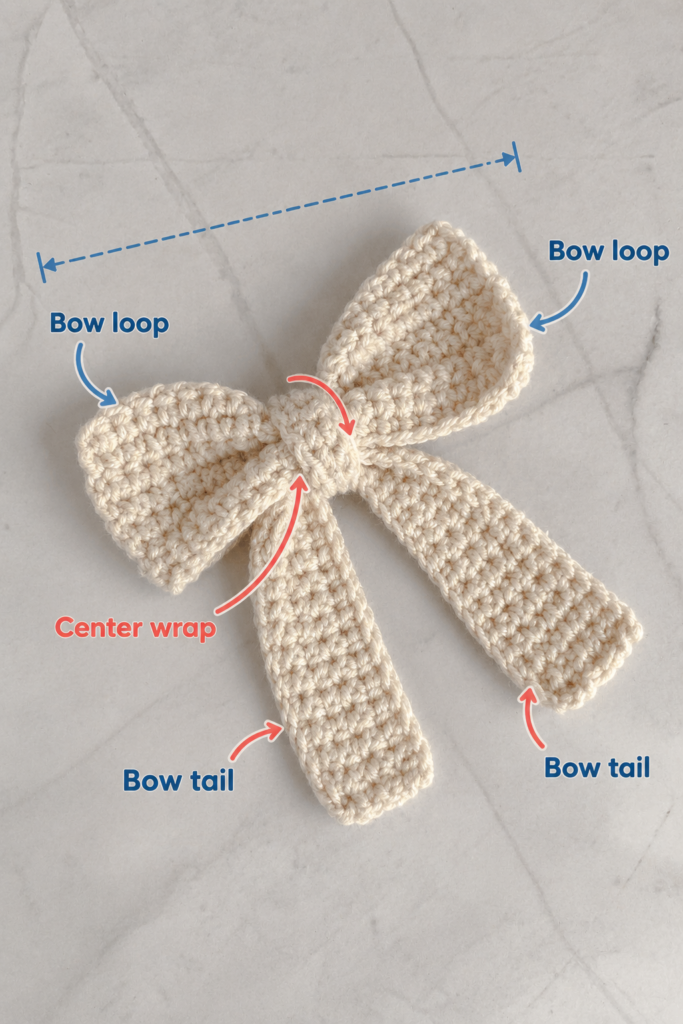
A traditional cheer bow gets its personality from three things: a wide top bow, a tightly gathered center, and long tails that frame the hairstyle. Crochet can create the same playful silhouette while adding soft handmade texture.
This easy crochet cheer bow pattern is designed for crocheters who are comfortable making a chain but may still be learning how to keep rows straight and assemble finished pieces.
Instead of using complicated shaping stitches, we will crochet three simple pieces and bring them together at the end. That makes this project much easier to understand because you can concentrate on one skill at a time.
The finished design works especially well in school colors, sports-team colors, dance-team colors, birthday themes, or holiday combinations.
This is an original tutorial inspired by the general construction principles of fabric and crochet bows. The reference article above was selected only because its photography clearly demonstrates the visual progression from flat crochet pieces to an assembled bow. Its written pattern is not reproduced here.
What You’ll Learn
- How to crochet a flat bow panel with half double crochet.
- How to keep the edges of a small rectangle straight.
- How to create a longer strip for cheer-style tails.
- How to find the exact center of your crochet pieces.
- How to accordion-fold crochet fabric into a bow.
- How to secure several layers without distorting them.
- How to add a contrasting crochet center band.
- How to attach the finished bow securely to a hair clip or elastic.
Materials You’ll Need
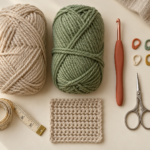
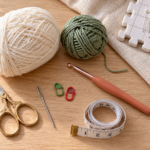
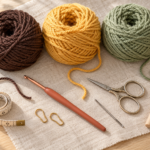
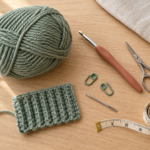
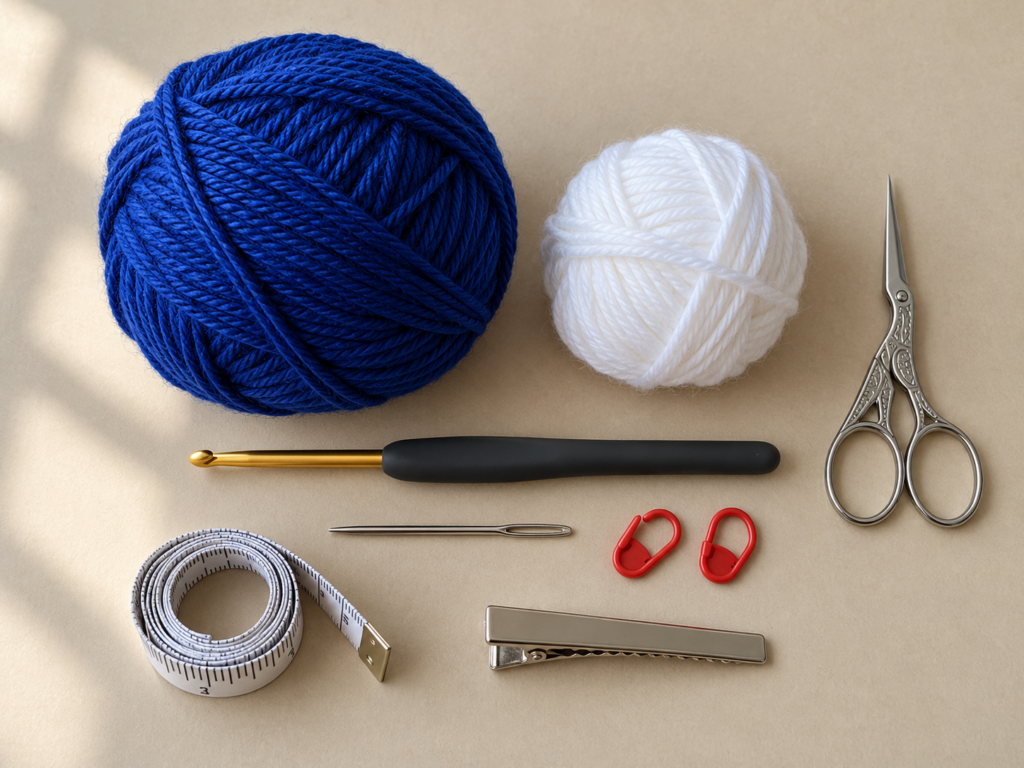
For one medium cheer bow:
- Medium #4 yarn in Color A for the bow and tails — approximately 35–50 yards.
- Small amount of medium #4 yarn in Color B for the center band.
- 4 mm crochet hook.
- Tapestry needle.
- Scissors.
- 2 locking stitch markers.
- Measuring tape.
- Optional metal alligator clip, French barrette, or strong hair elastic.
- Optional sewing thread and needle for permanently securing a clip.
A 4 mm hook is within the normal range often used with medium yarn, although the exact hook should always be adjusted for the desired fabric. The Craft Yarn Council emphasizes metric hook sizing because letter sizes may vary between manufacturers.
Crochet Abbreviations Used
ch = chain
sc = single crochet
hdc = half double crochet
st / sts = stitch / stitches
rep = repeat
RS = right side
WS = wrong side
This tutorial uses U.S. crochet terminology.
If you use UK terminology, remember that U.S. sc is UK dc, and U.S. hdc is UK htr. Craft Yarn Council
Before You Start
Gauge and tension
Exact gauge is not critical because this is an accessory rather than fitted clothing.
What matters more is creating fabric that is:
- firm enough to hold a bow shape;
- soft enough to fold easily;
- consistent across all three pieces.
If your bow feels floppy, try a hook 0.5 mm smaller.
If the fabric becomes stiff and difficult to fold, go up 0.5 mm.
How to count stitches
Look along the top edge of your row. Each stitch forms a small V.
Do not count the loop already on your hook as a stitch.
Place a marker in the first stitch of a row if you repeatedly lose the edges.
How to keep the edges straight
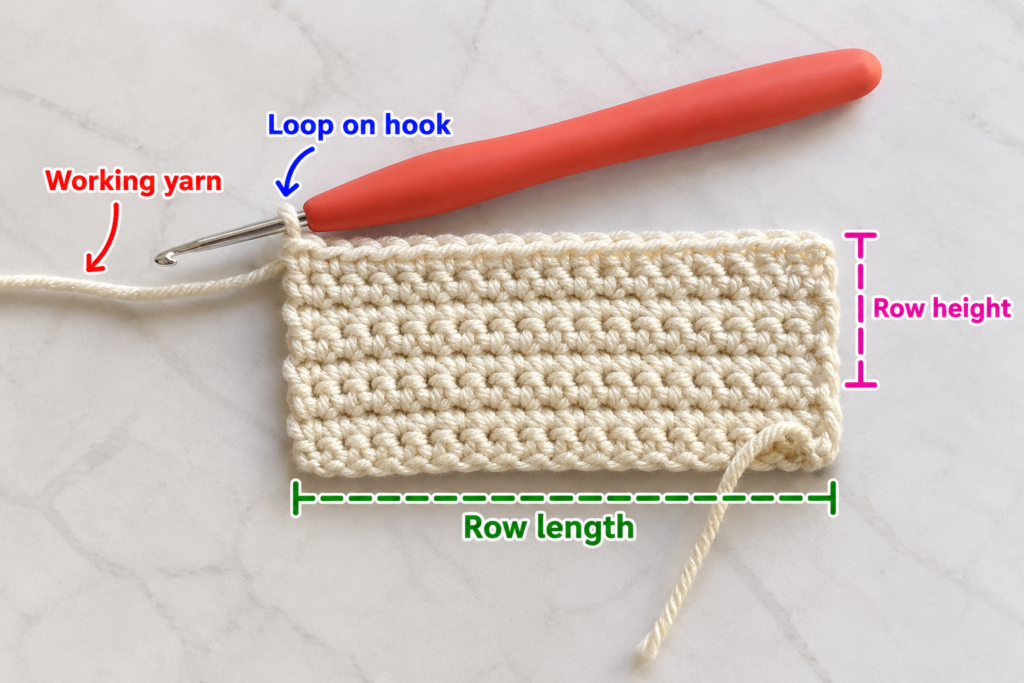
The most common cause of widening or narrowing is accidentally crocheting into the turning chain.
For this project, the turning chain is only for height. It does not count as a stitch.
After every row, recount before continuing.
How to avoid curling
A tiny amount of curling is normal.
Severe curling usually means your foundation chain is too tight. Make the starting chain loosely or make the foundation chain using a hook 0.5 mm larger, then switch back to your regular hook.
Choosing cheer-bow colors
Two-color combinations usually create the strongest cheer look.
Try:
- royal blue + white;
- red + white;
- black + gold;
- purple + silver;
- green + white;
- pink + black.
Use the darker or brighter team color for the large pieces and the contrasting color for the narrow center wrap.
Step-by-Step Crochet Tutorial
Step 1: Make the Foundation Chain for the Main Bow
With Color A, make a slip knot.
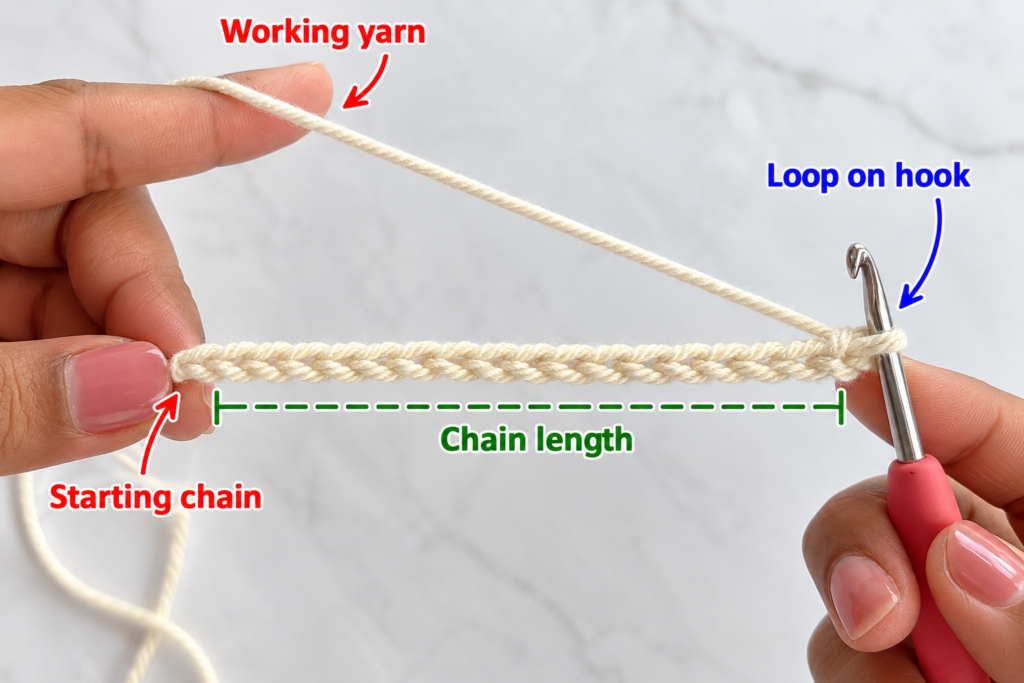
Chain 25.
The chain should lie flat without twisting. Do not pull every new loop tightly against the hook.
Think of the foundation chain as the width of the finished upper bow before it is gathered.
Beginner tip:
Lay your chain on the table after every 8–10 chains. If it curls into a tight spiral, loosen your tension.
Common mistake to avoid:
Do not count the slip knot as chain 1.
Step 2: Crochet the First Row
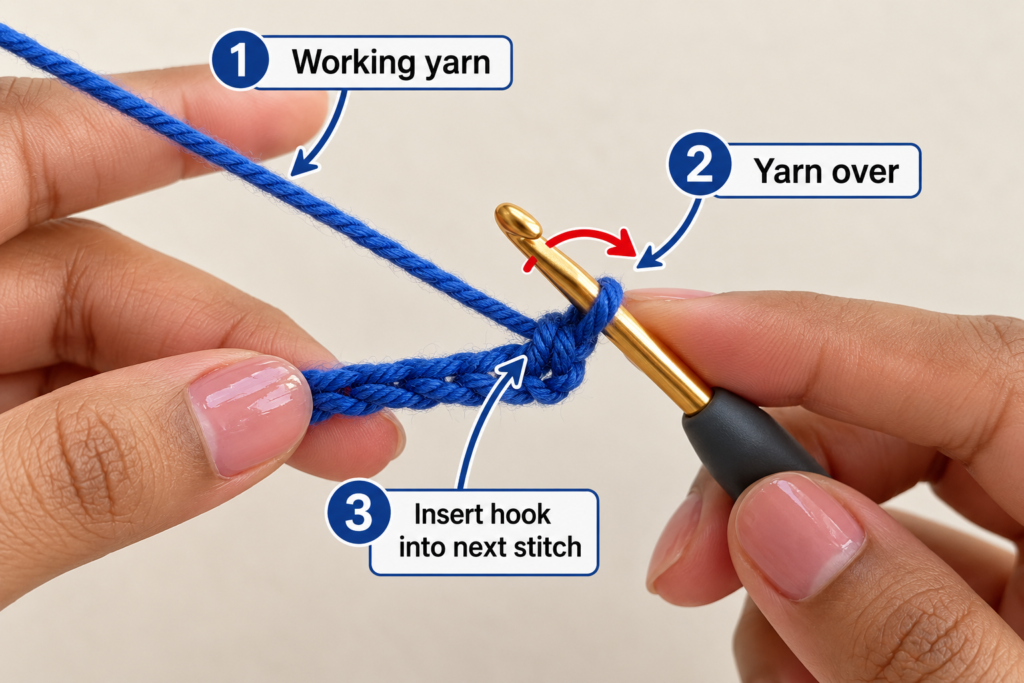
Work 1 hdc into the second chain from the hook and then make 1 hdc in every remaining chain.
You should finish with 24 hdc.
To make a half double crochet:
- Yarn over.
- Insert the hook into the stitch.
- Yarn over and pull up a loop.
- You now have three loops on the hook.
- Yarn over and pull through all three loops.
Chain 1 and turn.
The chain-1 turning chain does not count as a stitch.
Beginner tip:
Pause after every few stitches and look at the fabric. The bottom edge should remain relaxed rather than pulling inward.
Common mistake to avoid:
Make sure you are not skipping the final chain. The last chain is often tighter and can be difficult to see.
Step 3: Complete the Main Bow Panel
For Rows 2–7:
Work 1 hdc in every stitch across.
Chain 1 and turn after Rows 2–6.
At the end of Row 7, do not add another row.
Your stitch count should remain 24 stitches per row.
You now have a compact rectangle that forms the two upper wings of the cheer bow.
The exact dimensions will depend on your yarn and tension. A piece around 6–7 inches wide works nicely for a medium hair bow, but the proportion is more important than the exact measurement.
Fasten off, leaving a sewing tail about 18 inches long.
Beginner tip:
Count at the end of every row instead of waiting until the rectangle is finished.
Common mistake to avoid:
If your rectangle gradually becomes narrower, you are probably missing the last stitch of each row.
Step 4: Crochet the Long Tail Panel
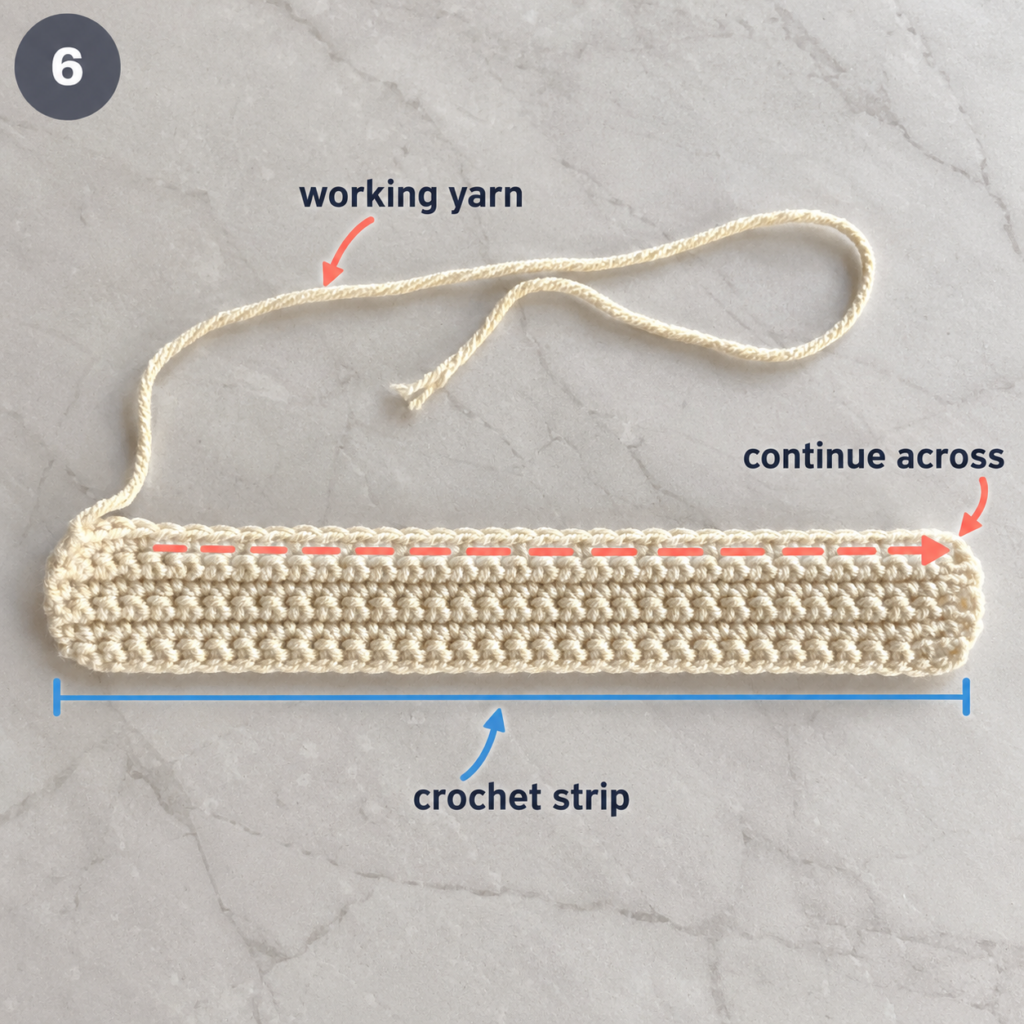
The tail panel creates the characteristic long cheer-bow silhouette.
With Color A, chain 39.
Work 1 hdc into the second chain from the hook and 1 hdc into every chain across.
You should have 38 hdc.
Chain 1 and turn.
Work a total of 4 rows of hdc.
Fasten off, leaving an 18-inch sewing tail.
The tail rectangle should be noticeably longer and narrower than the main bow panel.
Beginner tip:
Compare both sides of the strip after every row. Long pieces make accidental increases or decreases much easier to notice.
Common mistake to avoid:
Do not stretch the strip while measuring it. Let the crochet fabric relax naturally.
Step 5: Crochet the Contrasting Center Band
Switch to Color B.
Chain 9.
Work 1 sc in the second chain from the hook and in every remaining chain.
You should have 8 sc.
Chain 1 and turn.
Work another row of 8 sc.
Repeat once more for 3 rows total.
Fasten off with a long tail for sewing.
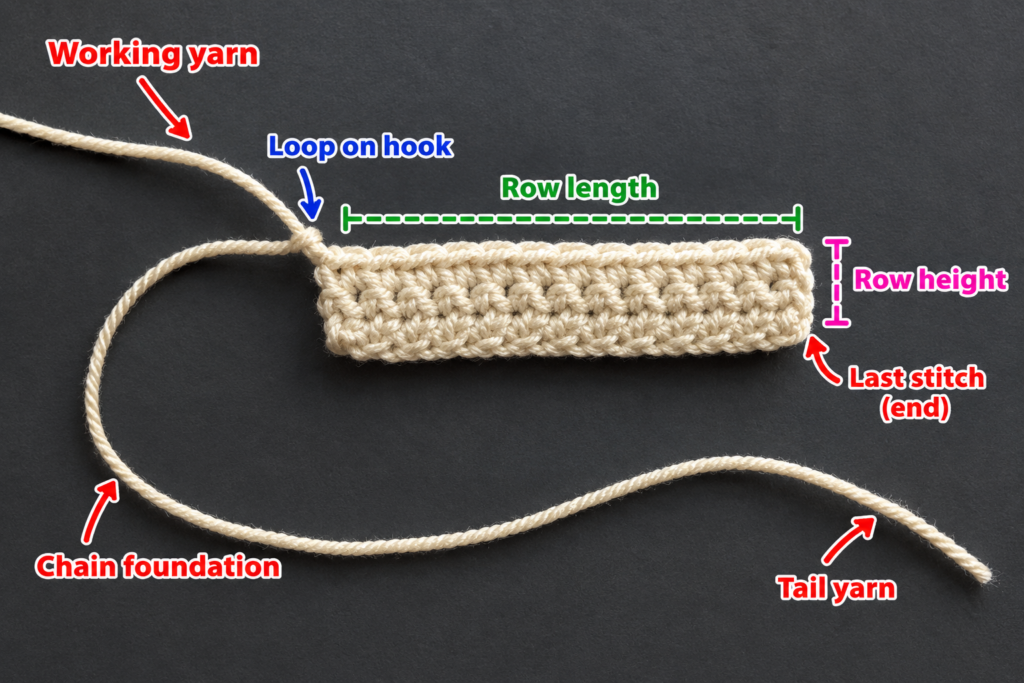
This band will cover the gathering stitches at the middle of the bow, so it should be narrower than the bow but wide enough to hide the wrapped yarn.
Beginner tip:
Before fastening off, hold the strip loosely around your finger. It should bend easily without feeling stiff.
Common mistake to avoid:
Do not make the center band too long. An oversized band can slide sideways after the bow is assembled.
Check Your Three Pieces
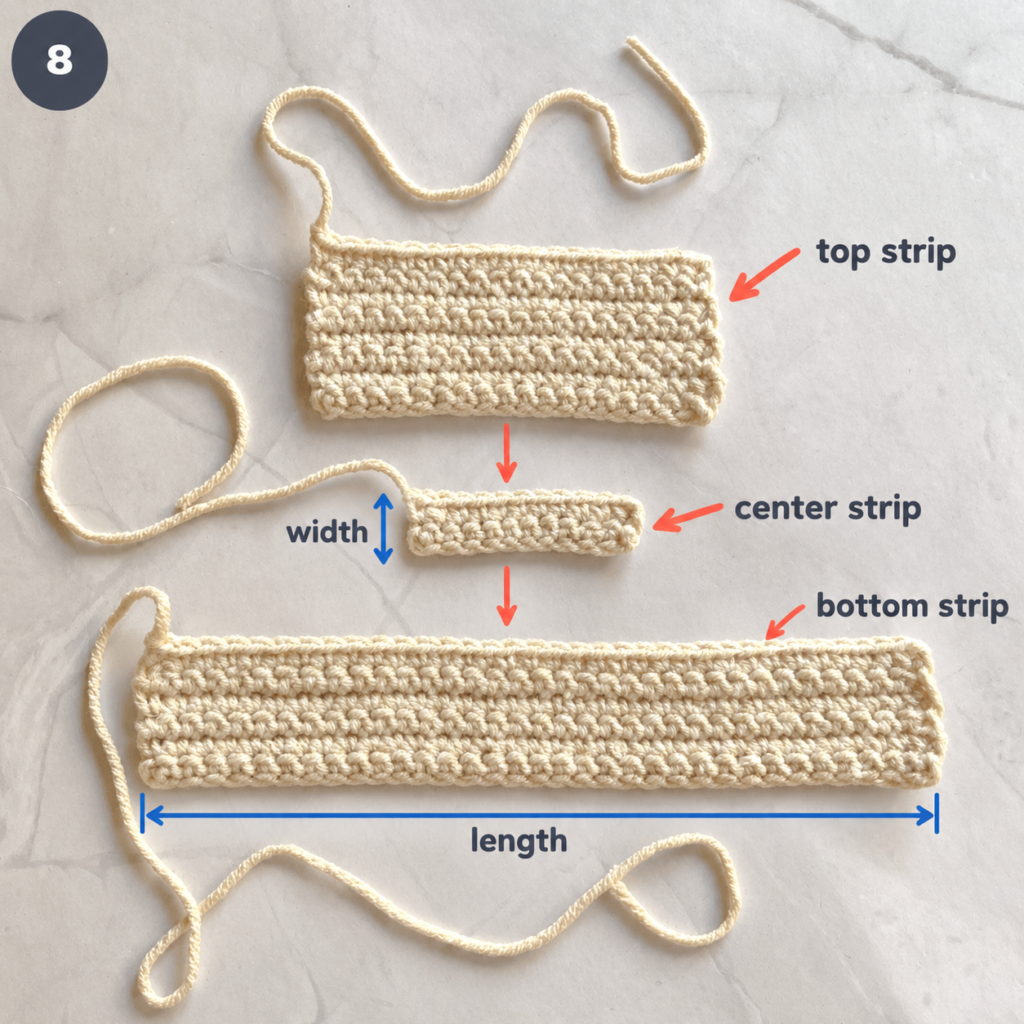
You should now have:
- One medium rectangle for the upper bow.
- One long, narrow rectangle for the tails.
- One small contrasting rectangle for the center wrap.
Do not rush into sewing yet.
Lay the pieces flat and gently straighten their edges.
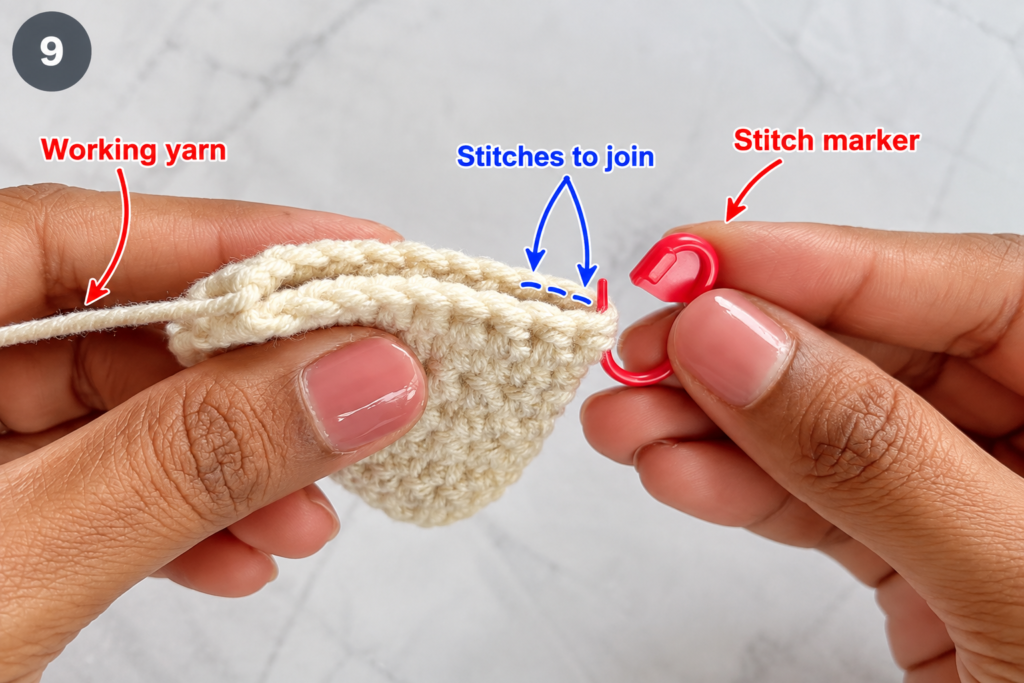
Step 6: Mark the Exact Center of the Main Bow
Fold the upper bow rectangle in half from side to side.
Match both short edges carefully.
Place a locking stitch marker at the fold.
Open the piece again.
That marker identifies the true midpoint.
Thread the long Color A yarn tail onto your tapestry needle and bring the yarn toward this center position through the back of the stitches.
Beginner tip:
Finding the center mathematically before gathering gives you much more even bow loops.
Common mistake to avoid:
Do not simply guess the midpoint by eye. Even a small error becomes obvious after the bow is cinched.
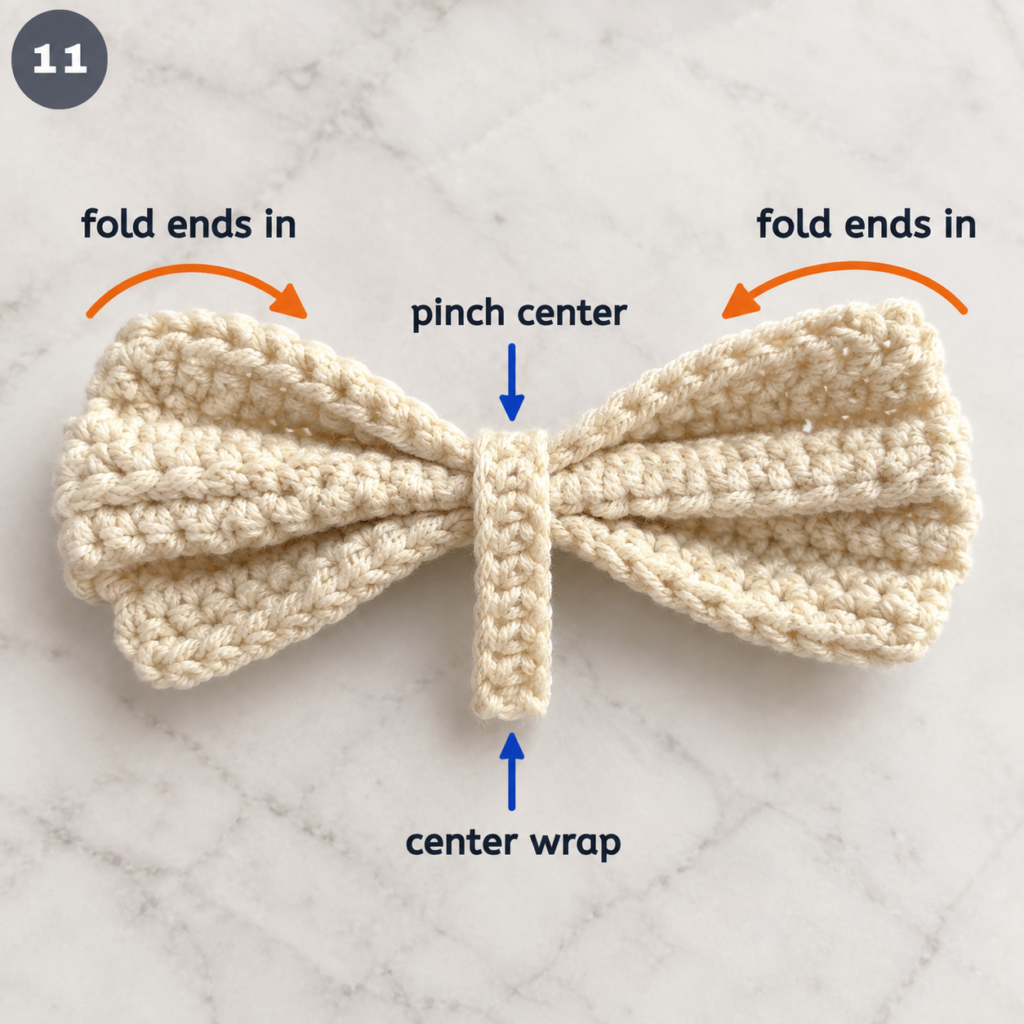
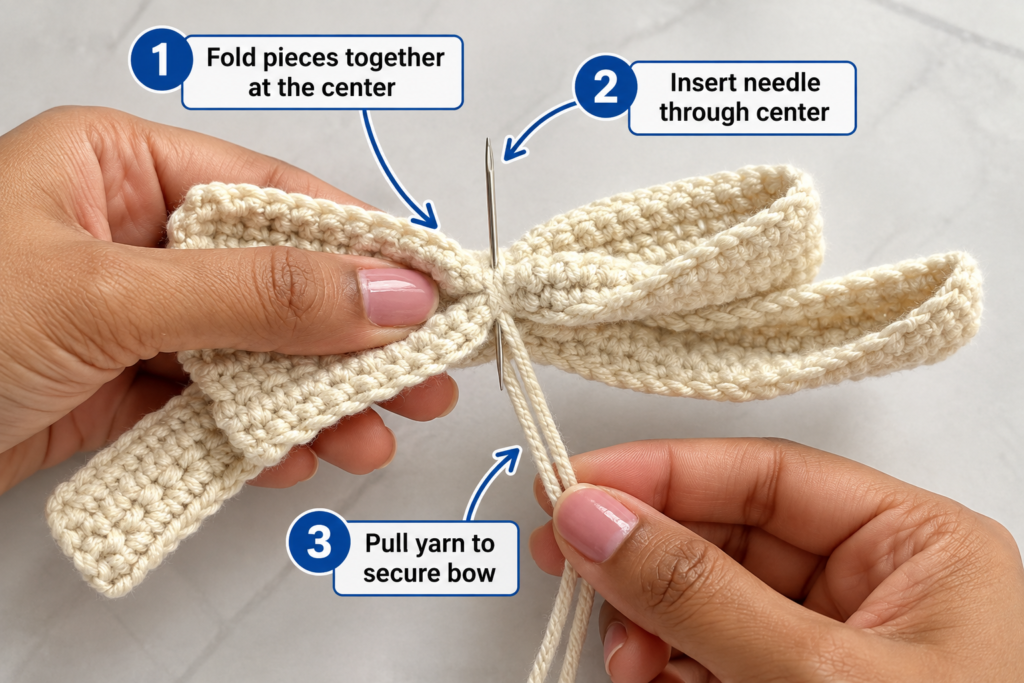
Step 7: Create the Accordion Fold
Now form the shape that turns the flat rectangle into a bow.
Hold the center between your fingers.
Push the middle slightly forward.
Bring the upper and lower edges backward so the center forms a shallow W-shaped accordion fold.
Viewed from the side, you should see alternating folds rather than one simple flat pinch.
Adjust the left and right sides until they appear equal.
Beginner tip:
Do not immediately sew the first fold you make.
Hold it, rotate the piece toward you, and check the symmetry first.
Common mistake to avoid:
A simple single pinch can make the bow look flat. The small accordion fold gives the loops more dimension.
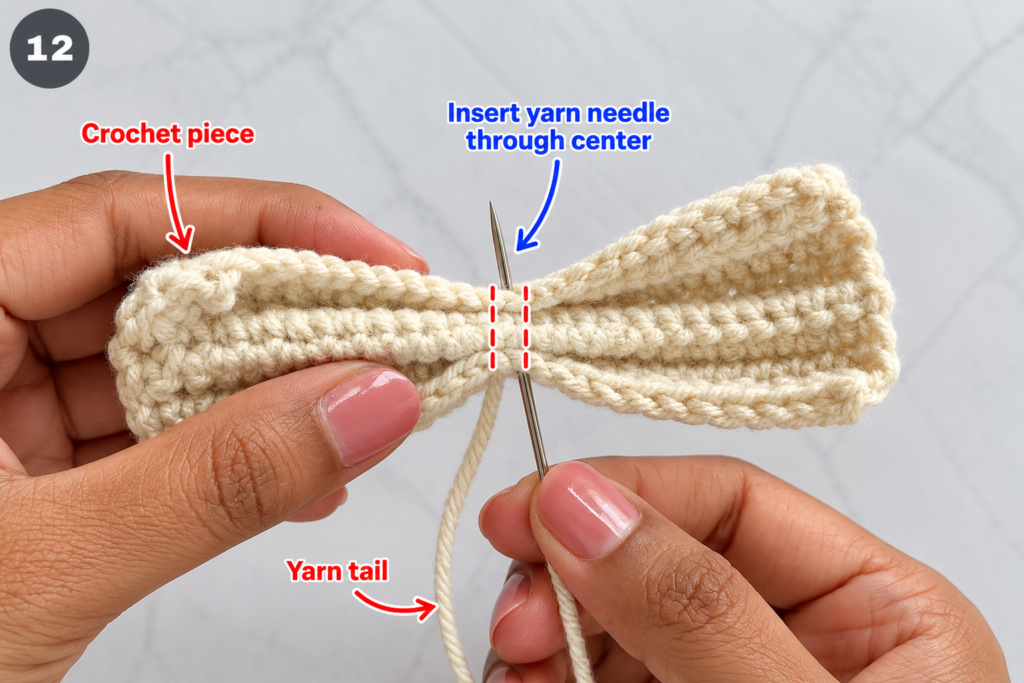
Step 8: Sew and Wrap the Center
Keeping the fold compressed, pass the tapestry needle through all layers near the middle.
Take another secure pass in the opposite direction.
Next, wrap the remaining Color A yarn around the gathered center two or three times.
Pull firmly enough to hold the folds, but not so tightly that the yarn crushes or puckers the crochet fabric.
Secure at the back.
Do not worry about making the wraps beautiful because the contrasting center strip will cover them later.
Beginner tip:
After the first wrap, release your grip slightly and inspect both loops. You can still adjust them before making the final wrap.
Common mistake to avoid:
Do not wrap so tightly that the stitches become permanently distorted.
Step 9: Shape and Attach the Cheer Tails
Fold the long tail rectangle exactly in half to locate its center.
Mark that point.
Now create a small accordion fold at the center of the tail panel, just as you did with the upper bow.
The two ends of the long rectangle should now hang downward as separate tails.
Place this gathered midpoint behind the center of the finished upper bow.
Angle the two tails slightly outward.
Using the long yarn tail and tapestry needle, sew through:
- the gathered tail section;
- the wrapped center of the upper bow;
- and back through the tail section.
Repeat several times.
Beginner tip:
Before knotting, place the bow flat on the table. Adjust the tails until the angles look balanced.
Common mistake to avoid:
Avoid attaching the tails while one is twisted. Both should display the same surface of the crochet fabric when viewed from the front.
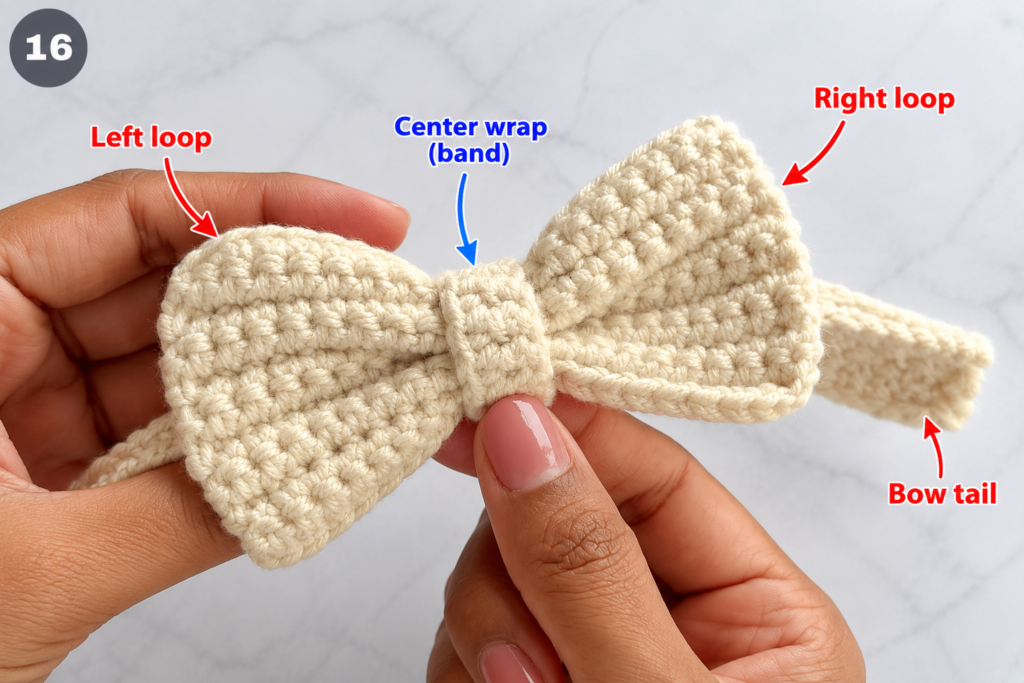
Step 10: Add the Center Band
Place the Color B strip across the front center of the bow.
Wrap both ends around the back.
The strip should cover:
- the blue gathering yarn;
- the seam between the upper bow and tails;
- most of the assembly stitches.
Overlap the center-band ends slightly at the back.
Using its long yarn tail, sew through the overlapping band ends.
Take care not to sew all the way through the front of the bow unless necessary.
Weave the remaining yarn through several nearby stitches and trim.
Beginner tip:
Center the contrasting band before sewing. It is one of the first things the eye notices on the finished bow.
Common mistake to avoid:
Do not make the wrap extremely tight. A very tight center can cause the upper loops to collapse.
Optional: Attach the Bow to a Hair Clip
For a cheer-inspired hair accessory, a strong metal barrette or alligator-style clip gives better control than simply tying the bow into the hair.
Position the clip horizontally across the back of the bow.
Use strong sewing thread or matching yarn to stitch around the stationary upper portion of the clip.
Keep all stitches away from the moving hinge.
Pull firmly after every few stitches.
For an accessory that will be used actively during sports, dance, or cheer practice, durability matters more than making the back perfectly invisible.
Safety note: Small clips and detachable accessories can be choking hazards. Keep removable hardware away from babies and very young children.
Pattern Notes or Stitch Notes
Turning chain
Chain 1 is used for turning throughout this tutorial.
The turning chain does not count as a stitch.
Main bow stitch count
Maintain 24 hdc across each row.
Tail stitch count
Maintain 38 hdc across each row.
Center band stitch count
Maintain 8 sc per row.
Right side and wrong side
Because ordinary hdc is worked back and forth, either surface can be used as the front.
The most important thing is consistency: when assembling, make sure the same preferred surface faces outward on both bow wings and both tails.
Size adjustments
The easiest way to change the finished width is to change the foundation chain.
For a smaller bow, remove approximately 4–6 chains from the main panel and proportionally shorten the tail strip.
For a larger bow, add chains rather than dramatically increasing row height.
Maintaining the wide-and-shallow proportion is what keeps the project looking like a cheer bow rather than a square decorative bow.
Common Beginner Mistakes
1. The bow wings are different sizes
Cause: The center was marked incorrectly before folding.
Fix: Open the piece, fold it perfectly in half again, and mark the true center before regathering.
2. The panel gets narrower after every row
Cause: The last stitch is being skipped.
Fix: Place a marker in both edge stitches while learning.
3. The bottom foundation chain curves severely
Cause: The chain tension is tighter than the hdc tension.
Fix: Remake the chain more loosely or use a slightly larger hook for the chain only.
4. The center looks bulky
Cause: Too many yarn wraps were used before the center band was added.
Fix: Two or three wraps are normally enough when the center is also stitched.
5. One tail faces backward
Cause: The tail strip twisted before being attached.
Fix: Lay both tails flat before the final sewing passes.
6. The bow looks flat
Cause: The rectangle was merely pinched instead of accordion-folded.
Fix: Create three shallow folds through the center before securing.
7. The center band slides around
Cause: It is either too loose or only joined to itself.
Fix: After sewing the ends together, add one or two concealed anchoring stitches into the back of the bow.
How to Customize This Crochet Project
Change the team colors
Crochet the main bow in your primary team color and the center band in the secondary color.
For a stronger two-tone effect, crochet the tails in the secondary color instead.
Add a stripe
For experienced beginners, make one or two rows of the upper rectangle in a contrasting color.
This produces a stripe running across both loops after assembly.
Make longer cheer tails
Add chains to the tail-panel foundation.
Remember that one long rectangle is folded at the midpoint, so adding 10 chains produces roughly 5 chains’ worth of extra visible length per tail.
Create pointed-looking tails
Crochet naturally produces straight rectangle ends in this construction.
For a stronger ribbon effect, fold each lower corner inward slightly and secure it with a few hidden stitches.
That creates a subtle tapered illusion without cutting the crochet fabric.
Try different textures
For a ribbed variation, work the hdc rows in the back loop only.
For a smoother, denser bow, use single crochet for all panels.
For a softer puffier bow, use standard hdc with a slightly larger hook.
Add a decorative button
A small flat button can be sewn onto the center wrap.
Avoid heavy embellishments if the bow will be worn during physical activity.
Gift ideas
Crochet cheer bows work well for:
- cheer-team gifts;
- dance recital gifts;
- school-spirit baskets;
- birthday accessories;
- sports-team fundraisers;
- matching sibling hair bows;
- backpack embellishments;
- gift wrapping.
Finishing Instructions
Inspect the bow from the front before weaving in the final tails.
Check:
- Are the loops equal?
- Do the tails leave the center at matching angles?
- Is the contrasting center strip vertical?
- Are all assembly stitches hidden?
Once everything is positioned correctly, weave each yarn end through at least several nearby stitches on the back.
Change direction once while weaving; this helps prevent the end from sliding out.
Trim close to the fabric without cutting a crochet stitch.
Blocking
Heavy blocking usually is not necessary.
If the tails curl, lightly dampen them and arrange the bow flat on a towel until completely dry.
Acrylic yarn should not be exposed to high heat unless you understand how that specific fiber reacts.
Washing and care
Follow the care instructions on your yarn label.
If a metal clip is permanently attached, hand washing is usually more convenient than machine washing because the hardware can snag other fabrics.
Pat the bow into shape and allow it to dry flat.
Quick Printable-Style Summary
Skill level: Beginner / Easy
Yarn: Medium #4 smooth acrylic or cotton blend
Hook: 4 mm
Stitches: ch, sc, hdc
Main bow: Ch 25; work 24 hdc across for 7 rows.
Tail panel: Ch 39; work 38 hdc across for 4 rows.
Center band: Ch 9; work 8 sc across for 3 rows.
Assembly: Mark center → accordion-fold main panel → stitch and wrap → fold tail panel → attach behind bow → wrap contrasting center band.
Finishing: Weave ends securely, shape the loops and tails, and optionally sew to a strong hair clip.
FAQ
Is this crochet cheer bow pattern suitable for beginners?
Yes. You need to know how to chain, make a single crochet, and make a half double crochet. The shaping is done after the flat pieces are crocheted, so no complicated increases or decreases are required.
What yarn is best for a crochet cheer bow?
A smooth medium-weight yarn is easiest to work with. Acrylic is affordable and holds color well, while cotton creates crisp stitch definition. Avoid highly fuzzy yarn for your first bow because it makes stitch counting harder.
How do I make my crochet bow stiff enough to hold its shape?
First try using a slightly smaller hook. Dense crochet fabric usually holds its shape better than loose fabric. Cotton can also create a firmer bow than very soft acrylic.
Can I make this bow without the tails?
Yes. Simply stop after shaping the upper bow and adding the center wrap. You will have a traditional crochet hair bow rather than a cheer-style bow.
How can I make the cheer bow larger?
Increase the foundation chain of the main rectangle and add one or two rows if needed. Increase the tail length proportionally. Make a test panel before committing to a very large version.
Can I attach the crochet bow to an elastic instead of a clip?
Yes. Sew a strong, snag-free hair elastic to the back during assembly. Stitch around the elastic rather than piercing through it repeatedly, which can weaken rubber-core elastics.
Why does my crochet cheer bow curl?
A tight foundation chain is usually responsible. Try loosening your chain tension or using a hook 0.5 mm larger for the foundation chain.
Conclusion
A crochet cheer bow looks more complicated than it really is because most of the shape is created during assembly, not while crocheting.
Once you can make three straight rectangles, find their centers, and create a neat accordion fold, you can repeat the same construction in almost any school, sports, dance, or holiday color combination.
Make the first version slowly and concentrate on clean edges and symmetrical shaping. After that, this becomes an excellent scrap-yarn project for producing matching bows in several colors.
Save the tutorial so you can return to the folding and assembly steps when making your next one.