There is something especially satisfying about making your first pair of crochet socks. Unlike a scarf or a blanket, socks need to fit a particular shape. They have a heel, a toe, and an ankle opening—and at first, figuring out how all those pieces come together can seem complicated.
This easy crochet socks pattern takes a more approachable route.
Instead of crocheting a complicated tube or learning several advanced heel techniques, you’ll work a long, flat piece of crochet fabric. A few simple increases and decreases create the heel and toe, and carefully placed seams transform the fabric into a cozy sock.
The result is a pair of soft, handmade indoor socks with a comfortable ribbed cuff.
We’ll go through the construction from the beginning, including how to measure your foot, adjust the length, keep your stitch counts consistent, and finish the seams without uncomfortable lumps.
This project is best suited to someone who already knows how to make a chain and a single crochet stitch. If you’ve crocheted a washcloth or small scarf, you’re ready to try something new.
What You’ll Learn
By following this crochet socks tutorial, you’ll learn how to:
- Crochet a flat sock shape using simple single crochet rows.
- Use increases and decreases to form a shaped heel and toe.
- Adjust the sock length to match your foot.
- Change yarn colors neatly between sections.
- Make a stretchy, ribbed ankle cuff.
- Sew flat crochet pieces into a wearable sock.
- Fix uneven edges, tight stitches, and other beginner mistakes.
The tutorial includes a flexible pattern that can be adjusted with your own foot measurements rather than relying entirely on shoe-size charts.
Crochet Sock Pattern at a Glance
| Detail | Information |
|---|---|
| Skill level | Confident beginner |
| Construction | Flat, seamed sock |
| Yarn | Worsted weight, Category 4 |
| Hook | 4.5 mm |
| Main stitch | Single crochet |
| Shaping | sc2tog decreases and sc increases |
| Cuff | Single crochet in back loop only |
| Finished size | Adjustable adult size |
| Sock type | Cozy indoor socks |
| Number of pieces | One continuous body and one separate cuff per sock |
This version is a beginner instructional pattern rather than a professionally size-graded or independently pattern-tested design. Check your measurements and try on the first sock before making its partner.
Materials You’ll Need
Choose materials that are comfortable against your skin and easy to handle.
Yarn
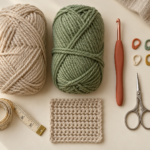
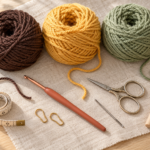
For this tutorial, use approximately 200–300 yards (185–275 meters) of smooth, Category 4 worsted-weight yarn for a pair of short indoor socks. Actual usage depends on your foot size, gauge, and cuff height.
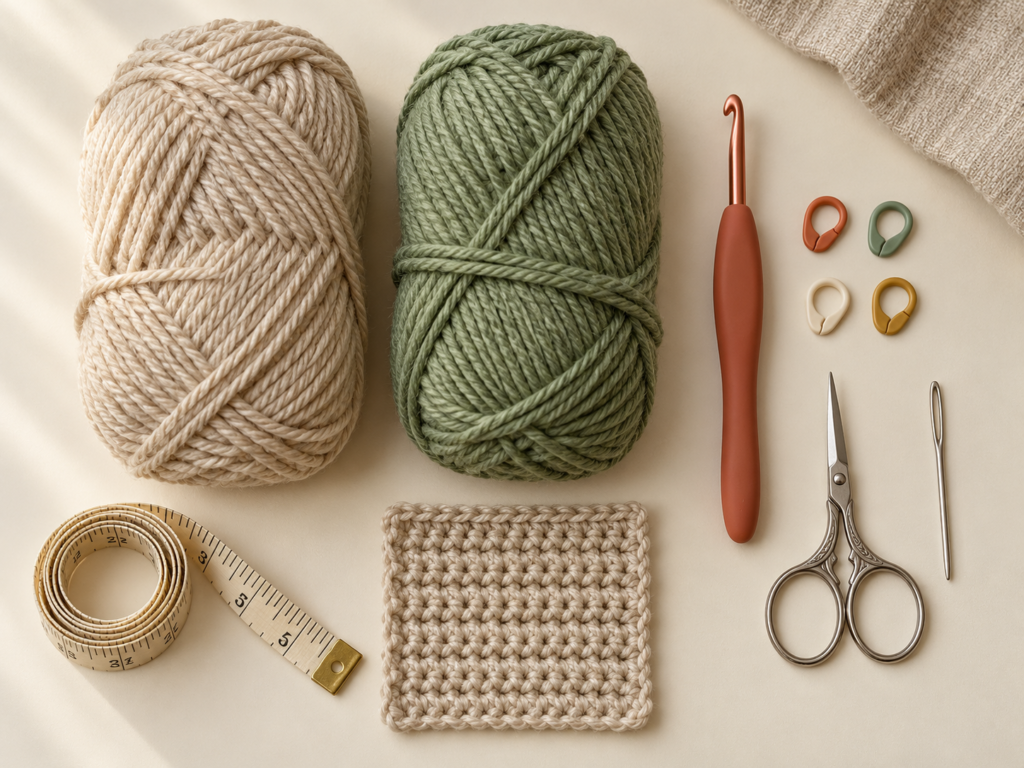
Our color plan uses dusty sage green for the foot and warm oatmeal cream for the shaped heel, toe, and ribbed cuff.
A soft wool blend with some synthetic fiber is a good option. Quality acrylic blends also work for beginner practice. Avoid very fluffy boucle yarn on your first sock because its fibers can hide the individual stitches.
Tools
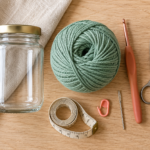
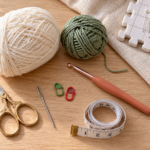
- 4.5 mm crochet hook
- Sharp scissors
- Blunt yarn or tapestry needle
- Four removable stitch markers
- Flexible measuring tape
- Notebook or row counter
- Optional nonslip sole treatment suitable for textiles
If the fabric is very tight, try a larger hook. If the stitches have large gaps, try a smaller one.
Crochet Abbreviations Used
This pattern uses US crochet terminology.
| Abbreviation | Meaning |
|---|---|
| ch | Chain |
| sc | Single crochet |
| sc2tog | Single crochet two stitches together |
| inc | Increase by working 2 sc into one stitch |
| sl st | Slip stitch |
| st / sts | Stitch / stitches |
| rep | Repeat |
| BLO | Back loop only |
| RS | Right side |
| WS | Wrong side |
In UK terminology, US single crochet is called double crochet.
How to make a single crochet decrease
A single crochet decrease turns two stitches into one.
Insert the hook into the next stitch, yarn over, and pull up a loop. Insert the hook into the following stitch, yarn over, and pull up another loop. You now have three loops on the hook.
Yarn over and pull through all three loops.
You have completed one sc2tog.
How to increase
Insert your hook into the next stitch and make one single crochet.
Instead of moving to the next stitch, insert your hook into that same stitch again and work another single crochet.
One stitch has become two.
These two shaping techniques are all you need for the heel and toe.
Before You Start: Gauge, Size, and Fit
Socks are different from most flat crochet projects because fit matters as much as appearance.
A blanket can be slightly bigger than planned and still work perfectly. A sock that is too small may be uncomfortable, while one that is too large can bunch up underneath your foot.
Measure your foot
Measure three things:
Foot length: From the back of your heel to the tip of your longest toe.
Foot circumference: Around the widest part of your forefoot.
Ankle circumference: Around the ankle where the cuff will sit.
For example, you might measure a foot length of 24 cm and a circumference of 22 cm. Those are sample measurements, not universal sizing numbers.
For cozy worsted-weight socks, begin by aiming for a gentle, snug fit with a little stretch available. The exact negative ease depends on how elastic your chosen yarn and stitch fabric are.
Make a gauge swatch
Chain 21 and work 20 single crochet stitches across. Continue for enough rows to make a swatch larger than 10 cm square.
Measure the central 10 cm of fabric.
For the sample calculations in this tutorial, we’ll use an illustrative gauge of approximately:
- 18 single crochet stitches per 10 cm
- 20 single crochet rows per 10 cm
This is a planning gauge, not a guaranteed result for every yarn or crocheter.
At this gauge, 16 sc stitches make a fabric strip about 8.9 cm wide. After folding it into two layers, the approximate unstretched sock circumference is 17.8 cm, not including seam allowance. That may fit a relatively narrow foot, but it would probably be too snug for someone whose widest foot circumference is 22 cm.
For a 22 cm foot, a more reasonable starting width at this gauge might be 18 or 20 stitches per row, depending on the fabric’s elasticity and how much width the seam consumes.
The worked example below uses 16 stitches to make the shaping easy to follow. Adjust your foundation count after swatching, and preserve equal-width upper and lower panels.
How to count your stitches
Every stitch looks like a small V when viewed from above.
Place a stitch marker in the first and last stitches of a row. This makes it easier to see where each new row begins and ends.
Do not count the turning chain as a stitch in this pattern.
How to prevent curling
Slight curling is normal, especially when crocheting a narrow strip.
If the fabric curls tightly, your stitches may be too firm. Relax your tension, increase hook size if appropriate, and periodically smooth the fabric on a flat surface.
Do not stretch the sock aggressively to force it into shape.
Step-by-Step Crochet Socks Tutorial
The sock is constructed in this order:
Heel → sole → toe → upper foot → side seams → ribbed cuff.
Working everything flat means you don’t need to manage a complicated heel turn in the round.
We’ll use a sample starting width of 16 single crochet stitches, and the heel and toe will each narrow to 10 stitches before widening again.
You can change the starting width for your own fit. The important rule is to keep the decreases symmetrical and return to your starting stitch count before continuing the straight panels.
Step 1: Make the foundation chain
Start with your oatmeal-colored yarn.
Make a slip knot and chain 17.
Insert your hook into the second chain from the hook. Make one single crochet.
Continue working one single crochet into every chain until you reach the end.
You should have 16 single crochet stitches.
Chain 1 and turn.
Work another single crochet in each stitch across.
Continue until you have three straight rows, each containing 16 stitches.
The fabric should look like a small rectangle.
Keep the chain row relaxed because it will form part of the outer heel area, and a very tight foundation can create an uncomfortable edge.
Beginner tip: Count every row rather than assuming you have the correct number of stitches.
Common mistake to avoid: Working into the turning chain creates an extra stitch and makes the edge widen unexpectedly.
Step 2: Narrow the heel using decreases
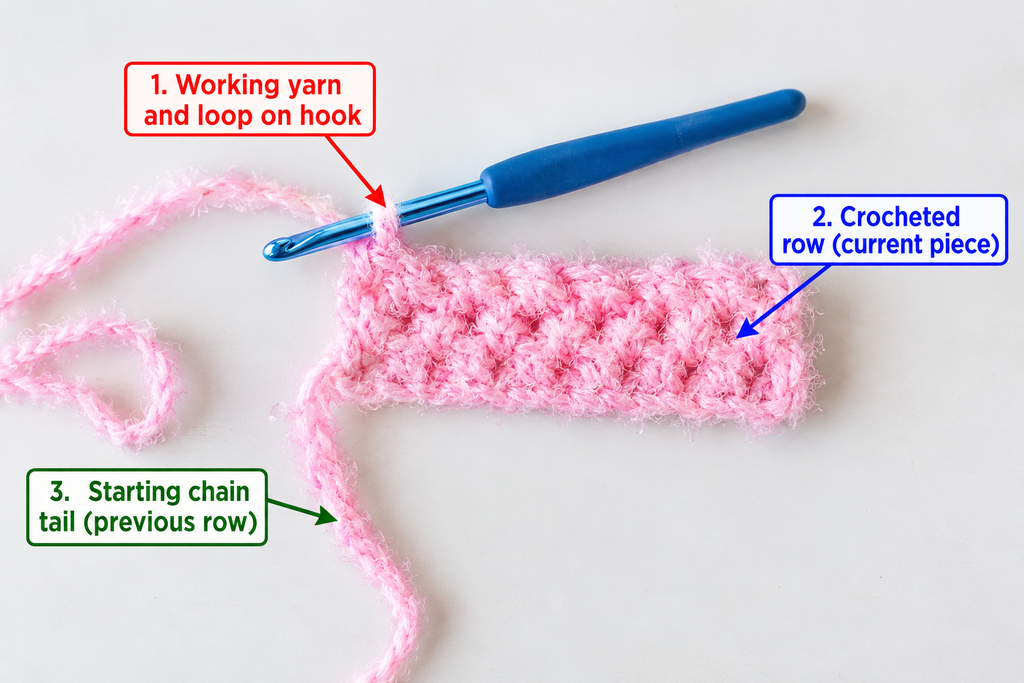
Now you’ll shape the first side of the heel.
Instead of working straight across forever, you’ll decrease at both ends of selected rows.
Follow this sample sequence:
| Heel row | Instructions | Stitch count |
|---|---|---|
| 1–3 | sc in every stitch | 16 |
| 4 | sc2tog, sc 12, sc2tog | 14 |
| 5 | sc2tog, sc 10, sc2tog | 12 |
| 6 | sc2tog, sc 8, sc2tog | 10 |
| 7–8 | sc across without shaping | 10 |
Chain 1 and turn after every row.
Once you finish Row 6, the fabric should visibly narrow toward the center.
Rows 7 and 8 create a small straight section at the narrowest point.
This narrow area becomes part of the shaped heel when the fabric is folded and sewn.
If you’ve never decreased before, make a small swatch with scrap yarn and practice bringing two stitches together until the motion feels comfortable.
Beginner tip: Put markers at both ends of the row so you know exactly where to decrease.
Common mistake to avoid: Decreasing only one side will make the heel lean sideways. Always decrease once at each end of a shaping row.
Step 3: Widen the heel again
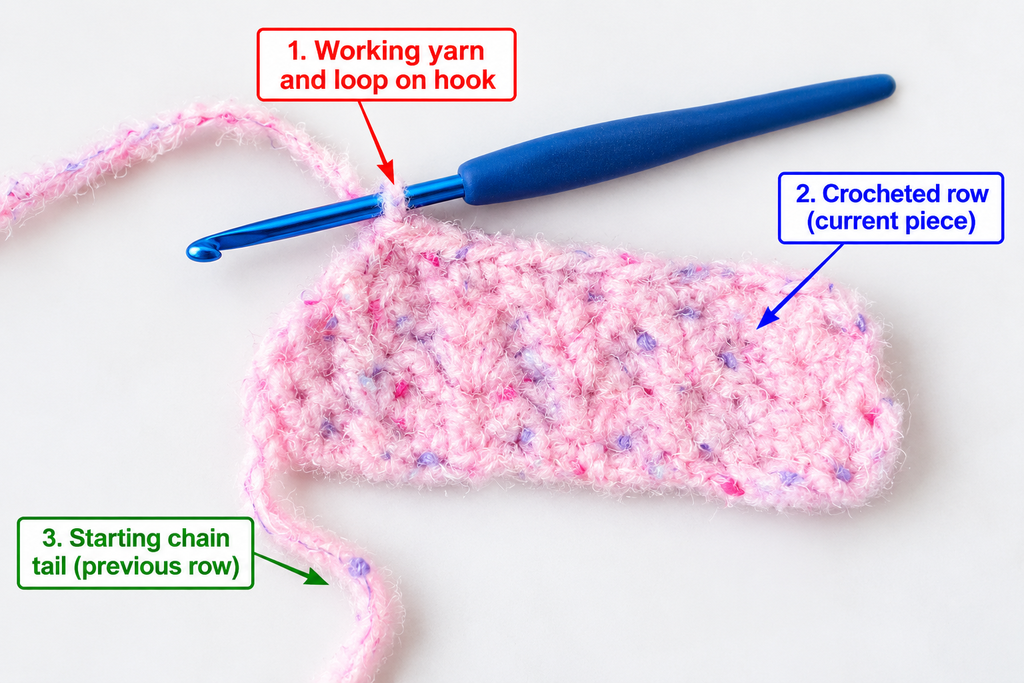
Now we’ll reverse the shaping.
Working increases at both ends brings the heel back to its original width.
Follow these rows:
| Heel row | Instructions | Stitch count |
|---|---|---|
| 9 | inc, sc 8, inc | 12 |
| 10 | inc, sc 10, inc | 14 |
| 11 | inc, sc 12, inc | 16 |
Chain 1 and turn after each row.
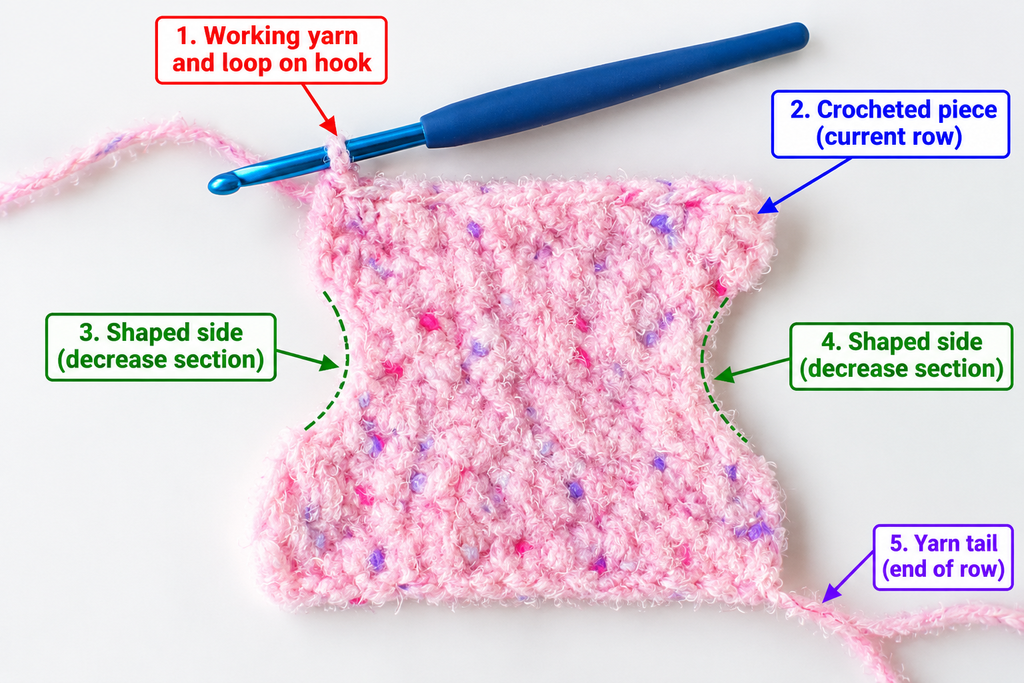
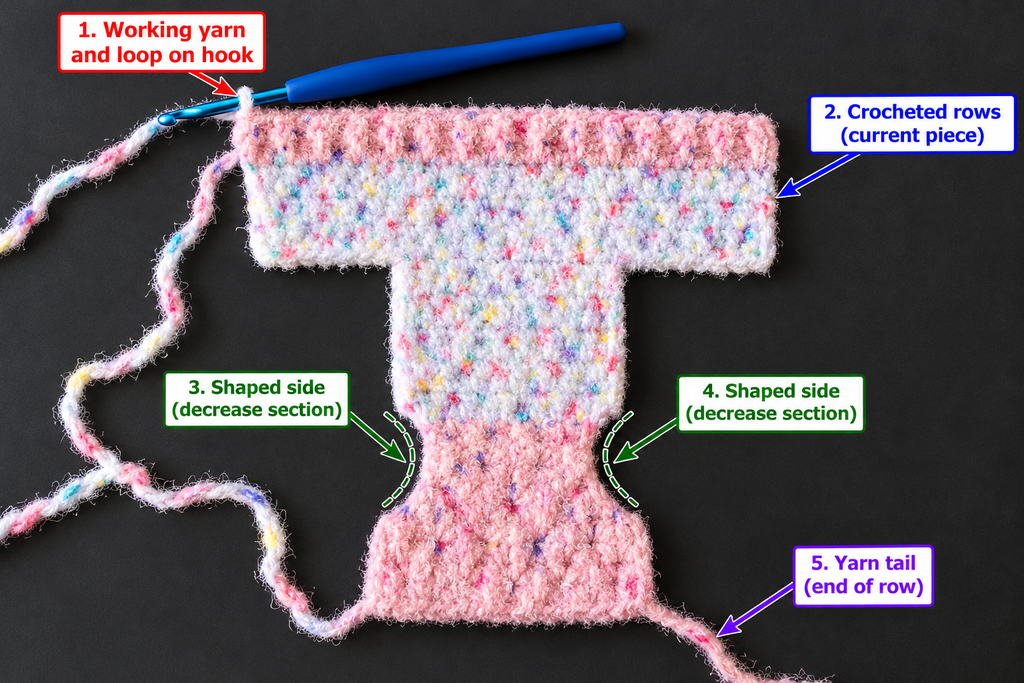
Your heel now has a recognizable hourglass-like outline: wider at one end, narrower in the middle, and wider again at the other end.
This shape is the foundation of the heel pocket.
Hold the panel gently against the back and underside of your heel to see how the narrow section helps create curvature.
Don’t worry if it does not yet look like a sock. The three-dimensional structure appears during assembly.
Beginner tip: Make sure you finish with the same number of stitches you started with.
Common mistake to avoid: If you increase into the wrong stitch, one side may become uneven. Check that both end increases line up with the previous rows.
Step 4: Crochet the bottom of the foot
Once the heel is complete, switch to dusty sage yarn.
Make the color change while completing the final stitch of the heel: before the last pull-through, pick up the new sage yarn and pull it through to finish the stitch.
Chain 1 and turn.
Work 16 single crochet stitches across.
Continue making straight rows without increases or decreases.
This section becomes the bottom of the foot, also called the sole.
As you work, you’ll notice that the sage fabric grows away from the shaped heel. Keep the sides straight and count the stitches at the end of every few rows.
The number of sole rows depends on your foot length and gauge.
For now, continue until your flat heel-and-sole section approaches the length needed before the toe shaping begins.
Beginner tip: Write down how many straight sage rows you make. You’ll repeat the same number for the upper foot.
Common mistake to avoid: Accidentally missing the final stitch of a row will narrow the sole. Use your edge marker and count regularly.
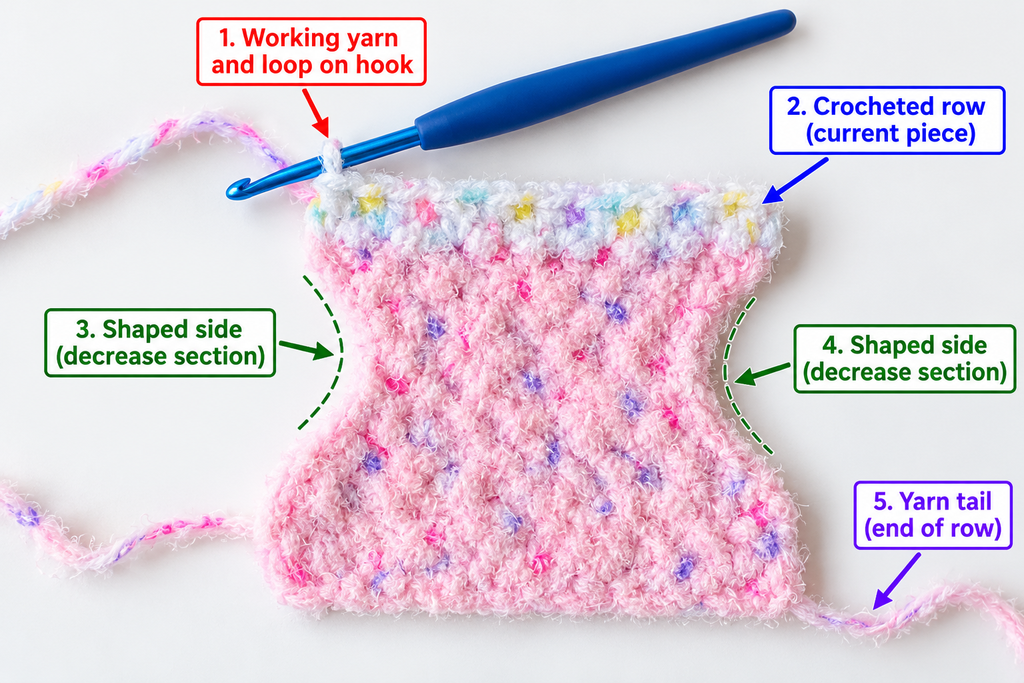
Step 5: Check the foot length
Before you move on to the toe, measure your progress.
Place your crocheted panel on a flat surface without stretching it.
Measure from the outer edge of the heel fabric toward the working edge of the sole.
Your aim is to leave enough length for the shaped toe section. With the sample 20-rows-per-10-cm gauge, the full 11-row heel shaping section is approximately 5.5 cm long, while the 9-row toe shaping section will be approximately 4.5 cm.
For a 24 cm foot, that suggests starting with roughly 14 cm of straight sole fabric between the heel and toe sections, then checking the folded shape on the foot before committing.
Because crochet fabric can shorten when sewn and worn, the measurement is only a starting calculation.
Work a few extra rows if needed, or remove rows if the fabric is too long.
Write down the final number of sage rows in your notebook.
Beginner tip: If you are making socks for someone else, trace their foot on paper and compare your folded sock blank with the outline.
Common mistake to avoid: Measuring only the straight sole section and ignoring the heel and toe shaping may produce an oversized sock.
Step 6: Begin the toe decreases
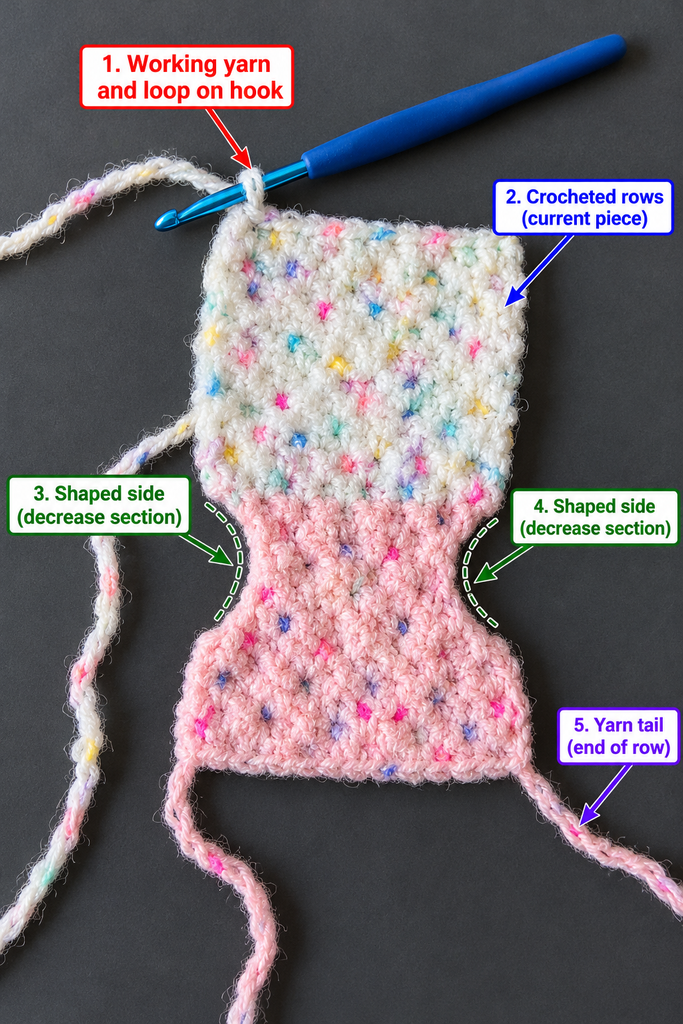
Switch back to oatmeal cream yarn.
The toe is shaped in a similar way to the heel, using gradual decreases followed by increases.
For the first three rows of the sample toe:
| Toe row | Instructions | Stitch count |
|---|---|---|
| 1 | sc across | 16 |
| 2 | sc2tog, sc 12, sc2tog | 14 |
| 3 | sc2tog, sc 10, sc2tog | 12 |
| 4 | sc2tog, sc 8, sc2tog | 10 |
Chain 1 and turn after each row.
Your foot panel will begin narrowing as you approach the middle of the toe.
Try not to pull your stitches tightly. The toe must have enough room for your toes without causing a hard, uncomfortable ridge.
Beginner tip: The toe should look symmetrical. If one side curves more sharply, check whether you have missed a decrease.
Common mistake to avoid: Pulling the decrease loops too tightly creates a stiff toe that may be uncomfortable to wear.
Step 7: Finish shaping the toe
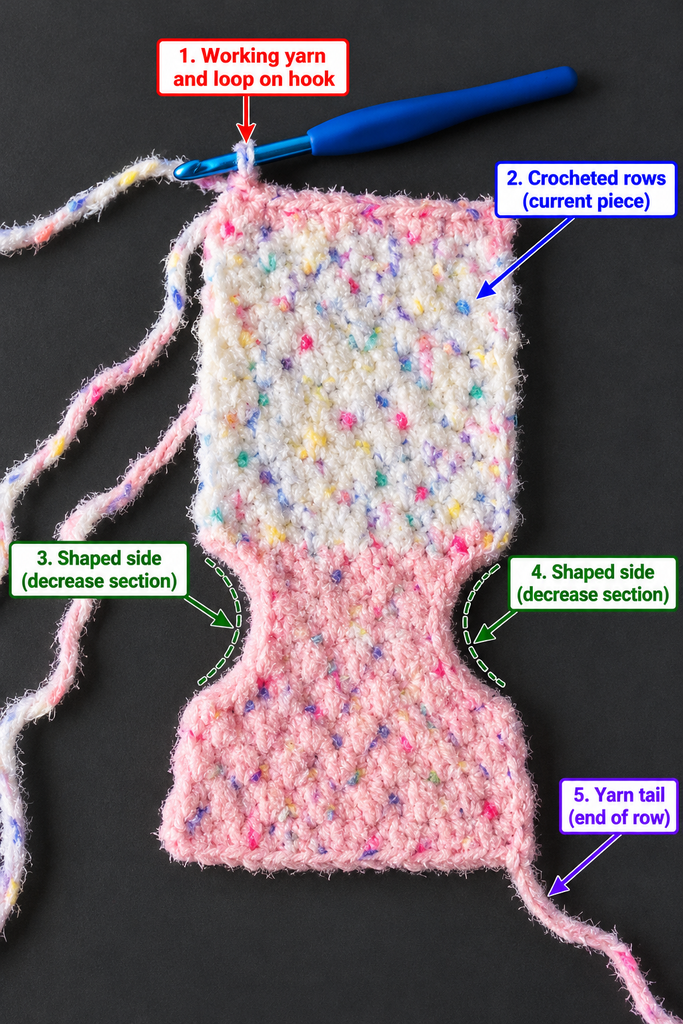
Continue working in cream.
The second half of the toe brings the fabric back to its original width.
| Toe row | Instructions | Stitch count |
|---|---|---|
| 5 | sc across | 10 |
| 6 | inc, sc 8, inc | 12 |
| 7 | inc, sc 10, inc | 14 |
| 8 | inc, sc 12, inc | 16 |
| 9 | sc across | 16 |
Now gently fold the toe section at the narrowest part, lining up the two wider sections.
This fold creates the front of the sock.
The cream section should curve around the toes rather than sitting completely flat.
If the toe feels too short, return to the narrowest section and add one or two straight rows there. If it is too loose, consider reducing the number of straight rows.
Beginner tip: Hold the folded toe against your actual toes before beginning the upper foot.
Common mistake to avoid: Making the upper and lower halves different widths will create an uneven toe seam.
Step 8: Crochet the top of the foot
Change back to dusty sage green yarn.
Now you’ll crochet the upper part of the sock.
Chain 1, turn, and work 16 single crochet stitches across.
Continue straight, using the same number of sage rows that you worked for the bottom of the foot.
Matching these measurements is important because the top and bottom edges will be sewn together.
If the upper foot is shorter, the finished sock may twist. If it is longer, extra fabric may gather across the top of your foot.
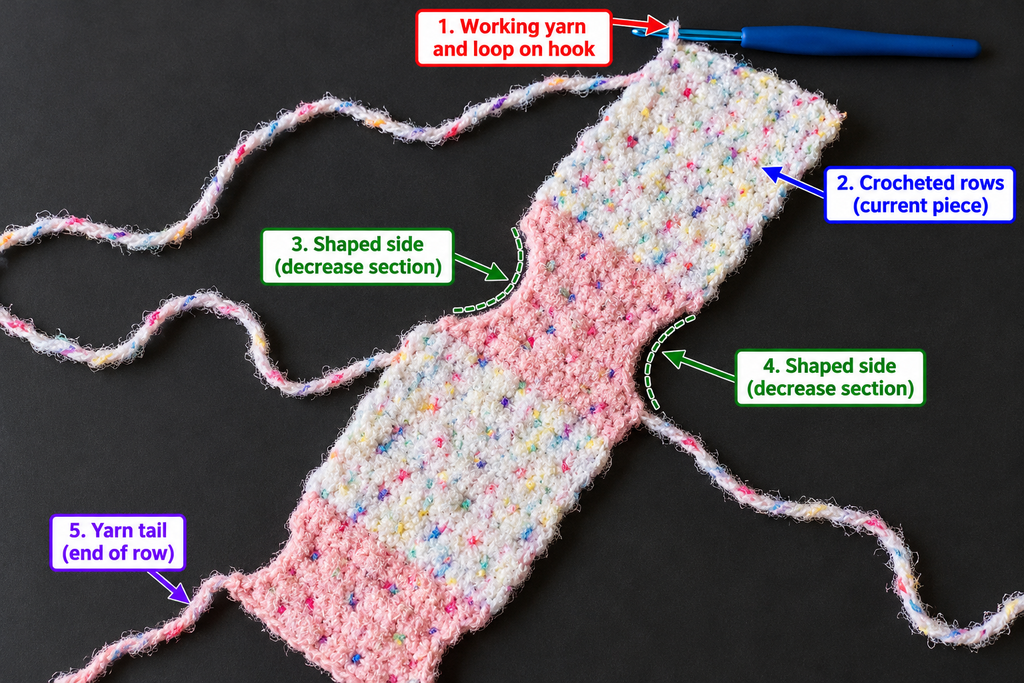
After completing the upper rows, the entire sock body will be one long shaped piece of crochet fabric.
Lay it on the table and check the sections: cream heel, sage sole, cream toe, and sage upper foot.
Fold the piece around the toe to bring the top and bottom foot sections together.
At this stage, loosely pin the sides with stitch markers and try the sock against your foot.
The open heel area will still need to be sewn into its final shape.
Beginner tip: Compare the upper and lower foot row counts before fastening off.
Common mistake to avoid: Do not stretch one panel to force it to match the other during sewing. Correct significant differences before assembling.
Step 9: Make the ribbed ankle cuff
A ribbed cuff gives your sock a more finished appearance and adds stretch around the ankle.
For this version, we’ll make the cuff separately.
With oatmeal yarn, chain 9.
Work one single crochet into the second chain from the hook and into each remaining chain.
You should have 8 stitches.
Chain 1 and turn.
For the next row, work single crochet stitches through the back loop only.
Continue repeating back-loop-only single crochet rows until the strip is long enough to wrap comfortably around the ankle opening with a little stretch.
The cuff strip will have eight stitches across its height, while the number of rows determines its circumference.
Make sure the resulting loop can stretch over your heel before joining the ends.
Once the strip reaches the correct length, fold it so the first and last rows meet. Sew these short ends together, forming a ring.
Set the completed cuff aside for assembly.
Beginner tip: Test the cuff by gently stretching it over the widest part of your heel before sewing it onto the sock.
Common mistake to avoid: A cuff that fits your ankle while lying flat might still be too small to pull over your heel.
Step 10: Shape the heel and position the cuff
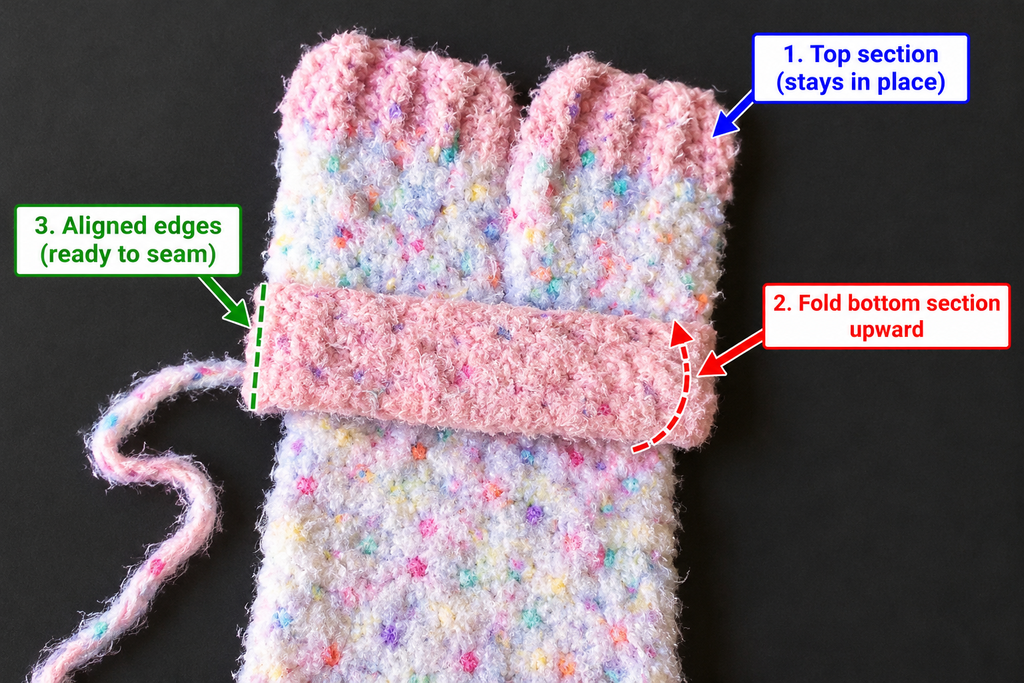
Before sewing the long sides of the sock, fold the flat body at the center of the toe and align the upper and lower panels.
At the heel end, bring the shaped heel edges together to create a pocket for the back of your foot.
Use stitch markers to hold the heel edges in place temporarily.
Check that the heel is centered beneath the ankle opening and that the upper-foot panel does not twist.
Use a blunt yarn needle and matching yarn to join the relevant heel edges with small, even stitches. Do not close the ankle opening.
Try the loosely assembled sock on before tightening the final stitches.
Once the heel pocket fits comfortably, position the ribbed cuff around the open ankle edge.
Align the cuff seam with the back of the heel.
Place markers at the front, back, and sides to distribute the cuff evenly.
Sew the cuff onto the ankle opening, catching a stitch from the cuff and a corresponding stitch or row edge from the sock body.
Avoid pulling the sewing yarn so tightly that the cuff loses its elasticity.
Beginner tip: Use removable stitch markers to position the cuff before sewing.
Common mistake to avoid: Attaching the cuff unevenly may pull the heel off-center or create unwanted folds.
Step 11: Sew the foot seams
Now sew the remaining edges of the upper and lower foot panels.
Place the sock with the wrong side facing out if you want to hide the seam allowances inside.
Line up corresponding rows along one side of the foot.
Thread a yarn needle with matching sage yarn.
Work along the edges using mattress stitch or a small whip stitch.
For mattress stitch, pick up a matching edge loop on one side, then a corresponding edge loop on the opposite side, alternating back and forth.
Keep the seam firm but flexible.
Continue toward the shaped toe, joining the matching edges.
Repeat on the opposite side.
At the toe, make sure there are no holes left where the upper and lower portions meet.
Turn the sock right side out.
The foot should now have a recognizable sock shape.
Beginner tip: Try on the sock before weaving in all the ends. Small fit adjustments are easier before everything is secured.
Common mistake to avoid: Pulling the side seam tightly can shorten the foot and make the sock uncomfortable.
Step 12: Make the second sock
Repeat the entire process for the second foot.
Use the same yarn and hook, and refer to the stitch counts and measurements you recorded.
Check these details before finishing:
The foundation width should match. Both socks should have the same number of shaping rows at the heel and toe. The straight sole and upper-foot row counts should match their corresponding sections. The cuff should be the same height and circumference.
Place the finished socks next to each other to compare their length and shape.
Small handmade differences are normal. A noticeable size difference is usually caused by a changed stitch count, tension, or row count.
Pattern Notes and Stitch Counts
This project is based on repeated rows of single crochet, with shaping worked at both edges.
Turning chains: Chain 1 at the end of every flat row. This chain does not count as a stitch.
Worked sample: Start with 16 stitches, decrease to 10, and increase back to 16.
Heel: Three straight rows, three decrease rows, two narrow rows, and three increase rows.
Sole: Work 16 single crochet stitches per row until the required length.
Toe: One straight row, three decrease rows, one narrow row, three increase rows, and one final straight row.
Upper foot: Work the same number of straight rows as the sole.
Right and wrong sides: Either side may be used as the outside if the fabric is visually similar, but remain consistent. For the seaming version described here, sewing with the wrong side out helps conceal the seams once turned.
Sizing: For a wider foot, begin with a larger even foundation count. Keep the same number of decreases on each side and confirm the narrow middle is still wide enough for your heel and toes.
Important: Changing yarn weight changes the size, row height, thickness, and stretch. Always measure again when substituting yarn.
Common Beginner Mistakes and How to Fix Them
1. The sock is too tight
This usually happens because the foundation width is too narrow, the cuff is too small, or the fabric is worked too firmly.
Check the foot circumference against the combined width of your two folded foot panels. If the fabric is not wide enough, add foundation stitches and repeat the shaping calculation.
For the cuff, check that it can stretch over your heel.
2. The heel looks crooked
Uneven shaping often comes from decreasing on one side more frequently than the other.
Count your stitches after every decrease and increase row.
Both sides should narrow at the same rate.
If you notice an error after one row, undo that row rather than continuing and trying to compensate later.
3. The toe is pointed instead of rounded
This happens when the narrowest section is too short or the decreases are too abrupt.
Add another straight row at the narrowest toe section to make the curve gentler.
Try the folded toe against your foot before moving on.
4. The sock feels bulky underneath
Thick crochet fabric and heavy seams can feel uncomfortable under the foot.
Use smooth yarn, make the side seams as flat as possible, and avoid bulky knots on the inside.
This pattern is intended primarily for indoor wear.
5. The cuff doesn’t stretch enough
If your cuff feels stiff, your BLO stitches may be too tight or the cuff ring may be too short.
Try a slightly larger hook for the cuff, or add more ribbing rows.
Do not tighten the sewing thread excessively when attaching the cuff.
6. One sock is longer than the other
Different row counts are the most common cause.
Write down your exact sole and upper-foot row counts for the first sock, then repeat them.
Compare the finished pieces before seaming.
7. Small holes appear at the heel or toe
Holes often form where several edges come together.
Use matching yarn to close the gaps with small, secure stitches.
Avoid pulling too hard, or the fabric may pucker.
8. The stitches become difficult to see
Very fluffy or dark yarn makes it harder to identify the top loops.
Use a smooth, light-colored yarn while learning the pattern.
Once you’re confident with shaping and seaming, experiment with textured yarns.
How to Customize This Crochet Socks Pattern
One advantage of working socks flat is that you can adjust the length and color placement without changing complicated round instructions.
Change the yarn
For warmer winter socks, try a wool blend with a soft finish.
For lighter indoor socks, experiment with a thinner yarn, but expect to recalculate your stitch and row counts.
Choose yarn with enough stretch or elasticity to allow the sock to move comfortably with your foot.
Create striped socks
Instead of making the entire foot one color, alternate two compatible yarn shades every few rows.
Soft cream and sage make a subtle color combination. Dusty rose and oatmeal are another lovely choice.
For clean stripes, change colors at the final pull-through of the last stitch of a row.
Make ankle socks
Shorten the cuff to create a low ankle version.
Check that the cuff still holds the sock comfortably without pressing into the skin.
Make taller socks
Increase the cuff height by adding more stitches to the starting cuff chain.
For a much taller leg section, you’ll need to shape the fabric around the ankle and calf rather than simply extending a narrow tube.
Try a textured cuff
Once you’re comfortable with the BLO ribbing, experiment with alternating simple stitch textures.
Keep the main foot fabric smooth for comfort.
Make a matching gift set
A handmade pair of crochet socks is a thoughtful gift for winter birthdays, Christmas, Mother’s Day, or a cozy self-care basket.
Choose two complementary colors and add a handmade gift tag or simple ribbon.
If you’re unsure of the recipient’s exact measurements, ask for their foot length rather than guessing based only on shoe size.
Finishing Instructions
Finishing is what makes a handmade crochet project feel comfortable and polished.
Fasten off securely
After your final stitch, cut the working yarn, leaving a tail long enough to secure.
Pull the yarn tail through the final loop and tighten gently.
Do not make bulky knots where the fabric will sit against the foot.
Weave in the ends
Thread each loose yarn tail through a yarn needle.
Weave it through several stitches on the inside of the sock, following the direction of the crochet fabric.
Reverse direction once if needed for security.
Trim the remaining yarn close to the surface without cutting any working stitches.
Check the seams
Turn the socks inside out and inspect the heel, toe, and sides.
Look for loose loops, open gaps, or thick knots.
Correct any areas that may rub against the skin.
Wash and shape gently
Follow the yarn manufacturer’s care instructions.
For many washable wool blends, gentle washing and laying the socks flat to dry helps relax the stitches.
Smooth the socks into shape while damp rather than stretching them aggressively.
Avoid high heat unless the yarn label explicitly allows it.
Consider nonslip soles
Crochet socks can slide on polished wood, tile, and other smooth floors.
For indoor walking, consider applying a textile-safe nonslip treatment according to its manufacturer instructions or adding appropriate fabric grip patches.
Allow any applied coating to cure completely before wearing.
Quick Printable-Style Crochet Socks Pattern Summary
Beginner Crochet Socks — Pattern Card
US crochet terminology • Adjustable indoor socks
Skill level: Confident beginner
Yarn: Category 4 worsted weight, two colors
Hook: 4.5 mm, adjusted for gauge
Main stitches: sc, sc2tog, sc inc, sc BLO, sl st
Starting method: Chain 17, sc across for 16 stitches
Heel: Shape from 16 to 10 and return to 16 stitches
Sole: Work straight rows to required length
Toe: Shape from 16 to 10 and back to 16 stitches
Upper foot: Repeat the sole’s straight-row count
Cuff: Chain 9, work 8 sc BLO per row until the strip fits the ankle opening; seam into a ring
Assembly: Fold at toe, shape and sew heel, attach cuff, sew foot sides, turn right side out
Finishing: Weave ends, check fit, wash and dry flat
Make two matching socks.
Copy pattern summary
Frequently Asked Questions About Crochet Socks
Are crochet socks easy for beginners?
Crochet socks are suitable for confident beginners who know how to make chains, single crochet stitches, and simple increases and decreases.
Flat constructions are especially approachable because you can see the heel, foot, and toe shaping before assembly.
The most challenging part is usually fitting and sewing rather than the individual stitches.
What is the best yarn for crochet socks?
For this cozy indoor pattern, a soft worsted-weight wool blend or washable acrylic blend is a practical option.
For thinner socks intended to fit inside shoes, fingering-weight sock yarn with nylon or another reinforcing fiber is often more appropriate.
Avoid very stiff or abrasive yarns, especially for the sole.
Can you crochet socks using only single crochet?
Yes. Single crochet creates a dense fabric that is useful for socks.
This tutorial uses single crochet for the main sections, along with single crochet increases and decreases for shaping.
The cuff uses single crochet worked in the back loop only.
How much yarn do I need for one pair of crochet socks?
For short, worsted-weight indoor socks, approximately 200–300 yards (185–275 meters) is a reasonable starting allowance.
Your actual yardage depends on foot size, stitch gauge, yarn thickness, and cuff height.
Buy enough yarn from the same dye lot if you want the pair to match closely.
Why do my crochet socks feel stiff?
Crochet fabric is often less elastic than knitted sock fabric.
Working too tightly, using an unsuitable yarn, or creating bulky seams can make that stiffness more noticeable.
Try a softer yarn, a suitable larger hook, and flatter seam techniques.
How do I make crochet socks in different sizes?
Measure the foot length and circumference before beginning.
Adjust the foundation width to fit the foot circumference after folding, then adjust the number of straight sole and upper-foot rows to fit the required length.
Keep both socks identical and maintain symmetrical decreases and increases.
Can I wear crochet socks with shoes?
You can, but bulky worsted-weight indoor socks may be uncomfortable inside fitted shoes.
For regular shoes, choose a more lightweight sock design with thinner yarn, controlled shaping, and flatter seams.
The pattern in this tutorial is designed primarily for cozy indoor use.
Conclusion
Once you understand how the heel, sole, toe, and upper foot fit together, crocheting socks becomes much easier to visualize.
This pattern gives you a manageable introduction to sock construction using stitches you may already know. You can practice basic shaping, learn to sew a wearable project, and adjust the finished size to fit your own feet.
For your first pair, choose smooth yarn, keep a row-count note beside you, and try on the sock before completing the seams.
When you’ve finished, save this crochet socks pattern so you can make a second pair in a different color or experiment with a new cuff style.
A cozy handmade pair of socks also makes a lovely next project after mastering simple scarves, washcloths, or granny squares.