A handmade table does not need an elaborate centerpiece to feel special. Sometimes a small detail does most of the work.
This crochet fall napkin ring pattern turns a small amount of yarn into a warm, textured table accessory that works beautifully for September dinners, Thanksgiving place settings, autumn parties, and handmade hostess gifts.
The construction is intentionally simple. You will crochet a short rectangular strip, use back-loop-only single crochet to give it subtle ribbing, check the strip against the size you want, and sew the two short ends together.
There is no complicated shaping, no magic ring, no increasing, and no need to memorize a long stitch repeat.
If you can make a chain and single crochet, this is an excellent project for practicing consistent tension while creating something useful at the same time.
The tutorial below uses US crochet terminology and gives you step-by-step checkpoints so you can tell whether your napkin ring is developing correctly before moving on.
What You’ll Learn
By the end of this tutorial, you will know how to:
- create a short crochet foundation chain;
- crochet an even first row;
- recognize the back loop of a crochet stitch;
- make ribbed fabric with back-loop-only single crochet;
- count stitches without accidentally adding or losing them;
- adjust a napkin ring to different napkin thicknesses;
- form a flat crochet strip into a ring;
- make a neat sewn seam;
- weave in yarn ends securely;
- adapt the project for different fall color palettes.
Finished Size
The sample napkin ring is approximately:
- 1¼–1½ in / 3–4 cm wide
- 5¾ in / 14.5 cm circumference before seaming adjustment
- roughly 1¾–1⅞ in / 4.5–4.8 cm internal diameter, depending on yarn and tension.
Exact gauge is not critical because this project can be measured as you crochet.
Estimated Time
Allow approximately 20–30 minutes per ring once you are comfortable with the stitch.
For a set of four, plan on roughly two relaxed crochet sessions rather than trying to rush through all of them at once.
Materials You’ll Need
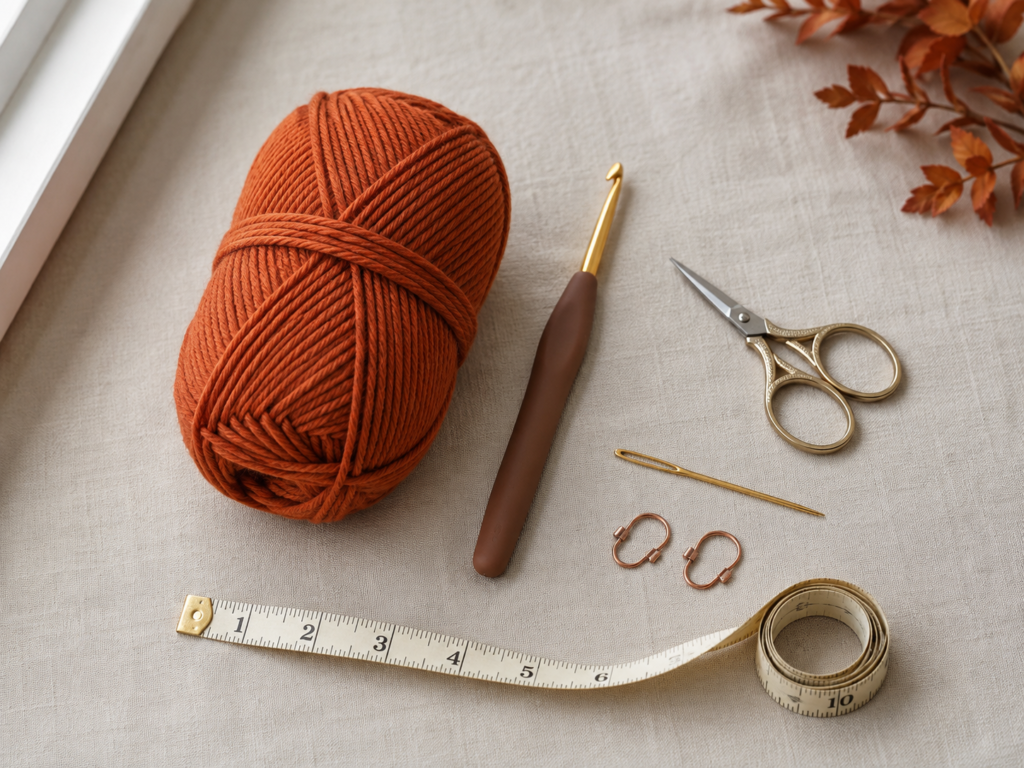
Yarn
Use a smooth #4 medium/worsted-weight yarn.
Cotton is particularly practical for table accessories because it creates defined stitches and generally produces a firm fabric. A cotton blend is also suitable.
The Craft Yarn Council classifies yarn by standardized weight categories and lists approximately 4.5–5.5 mm crochet hooks within the recommended range for medium/#4 yarn, making the 5 mm hook used here a sensible starting point.
For a fall palette, try:
- pumpkin rust;
- burnt orange;
- ochre;
- mustard gold;
- olive;
- moss green;
- cinnamon;
- warm taupe;
- deep burgundy.
You only need a small amount for each ring, so this is an excellent scrap-yarn project.
Crochet Hook
5.0 mm / H-8 crochet hook
If your fabric is very loose and floppy, try 4.5 mm.
If your stitches are difficult to enter, move up to 5.5 mm rather than forcing the hook through tight loops.
Other Supplies
- small scissors;
- blunt tapestry or yarn needle;
- flexible measuring tape;
- optional stitch marker.
Crochet Abbreviations Used
This tutorial uses standard US terminology.
- ch = chain
- sc = single crochet
- sl st = slip stitch
- st/sts = stitch/stitches
- rep = repeat
- BLO = back loop only
- RS = right side
- WS = wrong side
The Craft Yarn Council confirms that sc means single crochet in US terminology; the equivalent stitch is called double crochet in UK terminology.
US/UK Note
If you normally use UK crochet terminology:
US single crochet = UK double crochet.
The stitch itself is the same; only the name changes.
Before You Start
Gauge and Tension
You do not need to match a strict stitch gauge.
Instead, focus on two practical measurements:
- your strip should be approximately 1¼–1½ inches wide;
- keep adding ribbed rows until the strip comfortably wraps into the napkin-ring size you want.
Your stitches should be firm enough that the ring keeps its shape, but not so tight that inserting the hook becomes difficult.
How to Count Your Stitches
After the foundation row, you should have 7 single crochet stitches.
Every ribbed row afterward also contains 7 stitches.
Count the V-shaped tops before turning if you are unsure.
The turning chain does not count as a stitch.
Keeping the Edges Straight
The most common place to lose a stitch is the final stitch of the row.
Before beginning each new row:
- chain 1;
- turn;
- locate the first real stitch;
- work across all seven stitches;
- check that you have reached the last stitch.
If one side begins to taper inward, you are probably skipping an edge stitch.
If it spreads outward, you may accidentally be crocheting into the turning chain.
Preventing Curling
A small amount of curl is normal with narrow ribbed crochet.
Severe curling usually means your tension is too tight.
Loosen your grip slightly and allow the hook shaft—not just the narrow hook tip—to determine loop size.
Choosing Fall Colors
For a coordinated dinner table, use one dominant autumn shade instead of changing colors within every ring.
For example:
- four pumpkin-rust rings for an ivory table setting;
- mustard rings with olive napkins;
- burgundy rings with oatmeal linens;
- alternating rust and moss rings for a farmhouse Thanksgiving table.
Using one color per ring also keeps the project beginner-friendly because there are only two ends to weave in.
Step-by-Step Crochet Tutorial
Step 1: Make the Foundation Chain
Make a slipknot and place it on your 5 mm hook.
Do not pull the slipknot extremely tight against the hook shaft.
Chain 8.
The chain determines the width of your napkin ring rather than its circumference.
Try to keep the chains similar in size.
Beginner tip:
After every few chains, slide the loops onto the full shaft of the hook. This helps prevent increasingly tight chain stitches.
Common mistake to avoid:
Do not count the loop currently sitting on your hook as one of the eight chains.
Step 2: Crochet the First Row
Turn the chain so you can clearly see the individual loops.
Insert your hook into the second chain from the hook.
Make one single crochet:
- insert hook;
- yarn over;
- pull up one loop;
- you now have two loops on the hook;
- yarn over again;
- pull through both loops.
Continue placing 1 sc in every remaining chain.
At the end, count your stitches.
You should have:
7 sc
The first row should look like a short, narrow strip.
Beginner tip:
If the foundation chain rotates while you crochet, pause and straighten it before inserting the hook again.
Common mistake to avoid:
Do not accidentally crochet into the first chain directly beneath the hook. Skipping that first chain creates the correct working height for the single crochet row.
Step 3: Begin the Ribbing
Now we change how the hook enters each stitch.
Chain 1 and turn.
Look across the top of the previous row. Each stitch has a small V made from two loops.
The loop nearest you is the front loop.
The loop farther from you is the back loop.
For this project, work only through that back loop.
Insert your hook through the back loop of the first stitch and make 1 sc.
Continue:
1 sc BLO in each stitch across.
You should still have:
7 sts
Working repeatedly through only the back loops causes the unused front loops to form raised horizontal ridges.
Those ridges create the soft ribbed appearance.
Beginner tip:
Before completing the stitch, glance at the top of the fabric. You should still be able to see the unused front loop.
Common mistake to avoid:
Do not alternate between using both loops and using one loop. The fabric will still work, but the ribbing will look interrupted.
Step 4: Continue the Ribbed Rows
From this point forward, the repeat is simple.
For every row:
Ch 1, turn. Sc BLO in each of the 7 sts across.
Continue repeating that row.
After four or five rows, gently stretch the fabric sideways.
You should see a sequence of raised ridges.
The little rectangle will gradually grow longer while remaining approximately the same width.
Stitch-count checkpoint:
Every row = 7 sc
If you have six, you probably missed an edge stitch.
If you have eight, you may have accidentally crocheted into the turning chain.
Beginner tip:
Count every row while learning. Seven stitches take only a moment to count, and correcting one row immediately is far easier than discovering a narrowing edge ten rows later.
Common mistake to avoid:
Do not judge the length while the strip is strongly stretched. Ribbing is elastic. Measure it relaxed or only very gently extended.
Step 5: Check the Napkin Ring Length
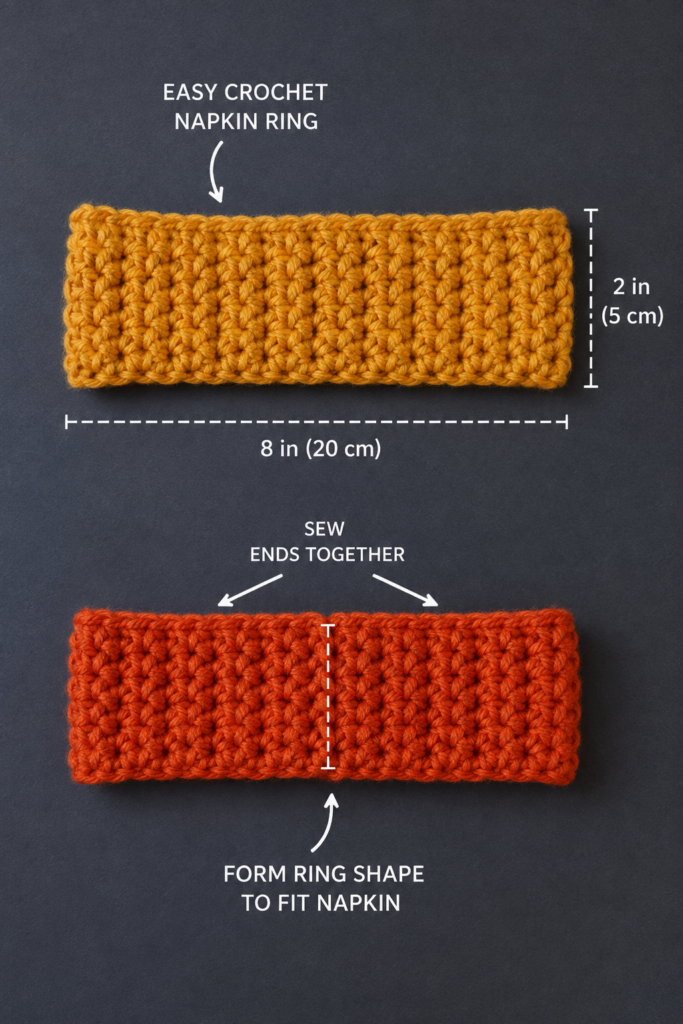
Continue the ribbing until the strip measures approximately 5½–6 inches / 14–15 cm.
For the sample size, aim for about:
5¾ inches / 14.5 cm
Measurement is more useful than an exact row number because different crocheters naturally produce different row heights.
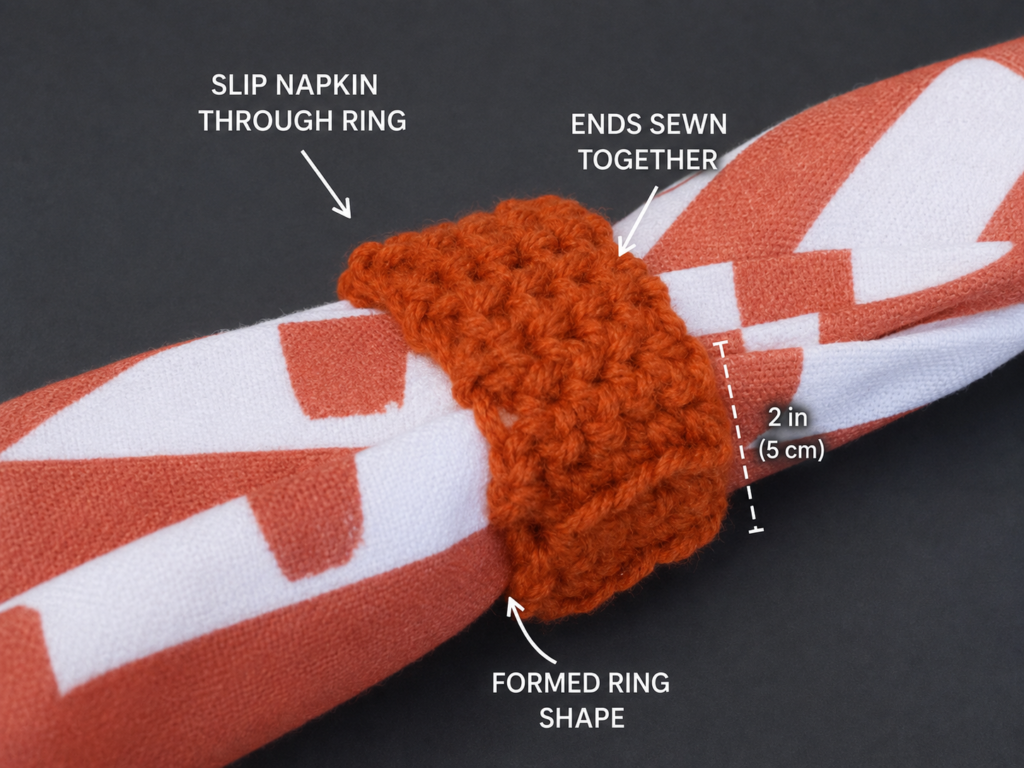
Before fastening off, curve the strip into a ring.
If possible, test it around the folded napkin you intend to use.
You want the ring to hold the napkin without crushing it.
For thick linen napkins, you may need a slightly longer strip.
For thin cotton napkins, make it shorter.
Beginner tip:
Temporarily pinch the two short ends together and slide the folded napkin through. Add another row or two if the fit feels too tight.
Common mistake to avoid:
Do not make the ring extremely loose. Crochet fabric can relax slightly with use.
Step 6: Fasten Off
Once you are happy with the length, stop after completing a full row.
Cut the yarn, leaving approximately 12 inches / 30 cm for sewing.
Yarn over with the cut tail or pull the cut tail completely through the remaining loop.
Gently snug the last stitch.
Do not cut the tail shorter yet—it will become your seaming yarn.
Beginner tip:
Using the same yarn tail to seam the piece means one fewer yarn end to weave in later.
Common mistake to avoid:
Do not pull the final loop so tightly that the last corner puckers.
Step 7: Join the Short Ends
Thread the long yarn tail onto your tapestry needle.
Bring the two short edges of the crochet strip together.
Make sure the ribbing runs continuously around the ring rather than becoming twisted.
Match the stitches:
- first stitch to first stitch;
- second to second;
- continue across all seven stitches.
Sew through corresponding edge loops.
A simple whip stitch works well for beginners.
Pull each stitch until the edges meet, but avoid cinching the seam tightly.
Beginner tip:
After making two or three sewing stitches, pause and check the outside of the ring. It is much easier to correct alignment before the entire seam is finished.
Common mistake to avoid:
Do not twist the strip before sewing. Lay it flat first, bring the two short edges directly toward one another, then form the circle.
Step 8: Finish the Seam and Shape the Ring
When you reach the opposite edge, secure the yarn.
Weave the tail through several nearby stitches on the inside of the napkin ring.
Change direction once before trimming the excess. This helps prevent the tail from working loose.
Weave in the beginning tail in the same manner.
Turn or rotate the ring so the seam sits where you prefer.
For a table setting, the seam usually looks cleanest at the bottom or back of the napkin.
Gently shape the ring into a circle using your fingers.
No stiff insert is required.
Beginner tip:
A handmade crochet ring does not need to look perfectly circular while empty. Once a folded cloth napkin is placed inside, the fabric naturally takes shape around it.
Common mistake to avoid:
Do not trim a yarn tail immediately beside the last stitch. Weave it through several stitches first.
Pattern Notes or Stitch Notes
Starting Chain
Ch 8
Foundation Row
Work across the foundation chain to create:
7 sc
Ribbed Repeat
Ch 1, turn, sc BLO in each of the 7 sts across.
Repeat until the strip reaches your desired circumference.
Turning Chain Rule
The beginning ch 1 does not count as a stitch.
Stitch Count
Keep 7 stitches in every row.
Right Side / Wrong Side
This ribbed stitch pattern is nearly reversible, so there is no critical right side or wrong side.
Choose whichever surface looks neater as the outside before seaming.
Size Adjustment
To make the ring wider, increase the foundation chain.
For example:
- chain 7 for a narrower band;
- chain 8 for the standard sample;
- chain 9–10 for a wider statement band.
To change the circumference, do not alter the foundation chain. Instead, add or remove ribbed rows.
That distinction is useful:
Foundation-chain length = band width.
Number of rows = ring circumference.
Common Beginner Mistakes
1. The Napkin Ring Gets Narrower
Cause: Missing the last stitch of some rows.
Fix: Count seven stitches at the end of every row until your edges remain consistently straight.
2. The Strip Gets Wider
Cause: Crocheting into the turning chain.
Fix: Remember that the turning ch 1 does not count as a stitch. Begin in the first real single crochet.
3. The Ribbing Suddenly Disappears
Cause: Crocheting through both loops instead of only the back loop.
Fix: Look at the V on top of each stitch before inserting your hook. The hook should enter only the loop farthest from you.
4. The Fabric Is Very Stiff
Cause: Excessively tight tension or a hook that is too small for the yarn.
Fix: Relax the working yarn and consider changing from a 5 mm to a 5.5 mm hook.
5. The Ring Is Too Loose
Cause: The strip was measured while stretched or too many rows were added.
Fix: Undo the seam if necessary, remove one or two rows, and check the circumference again with the crochet relaxed.
6. The Seam Looks Bulky
Cause: Sewing repeatedly through large portions of the edge rather than matching individual stitches.
Fix: Pair corresponding edge stitches and pull only firmly enough to bring the edges together.
7. The Ring Is Twisted
Cause: One end of the strip rotated before seaming.
Fix: Lay the rectangle completely flat first. Bring the two short edges together without flipping either end.
How to Customize This Crochet Project
One advantage of such a simple structure is that it is easy to change without redesigning the entire project.
Change the Yarn
Cotton gives crisp stitch definition.
A cotton-acrylic blend may feel slightly softer.
A smooth acrylic yarn can also work well for decorative rings, particularly if you already have scraps available.
Avoid extremely fuzzy yarn for your first set because fuzzy fibers make the back loops more difficult to identify.
Change the Fall Colors
Try a coordinated six-ring palette:
- two pumpkin rust;
- two mustard;
- two olive.
Or keep every ring identical for a more formal table.
Deep burgundy with cream linen creates a traditional autumn look, while rust with sage feels more contemporary.
Change the Size
For oversized napkins, continue crocheting additional rows.
For narrow cocktail napkins, remove rows.
If you are gifting a set and cannot measure the recipient’s napkins, a circumference around 5½–6 inches is a practical starting range for many folded cloth napkins.
Add a Decorative Button
Sew a small wood or coconut-shell button directly over the seam.
It does not need to function as a closure—the button can simply hide the join and add rustic fall texture.
Keep the button securely sewn if children will be handling the table linens.
Add a Crochet Leaf
A small separately crocheted maple or oak leaf can be sewn to the front.
Keep it relatively flat so the napkin still sits comfortably on the table.
Add Surface Embroidery
Use a contrasting yarn and tapestry needle to embroider:
- one tiny wheat stem;
- a simple initial;
- a miniature leaf vein;
- two short decorative lines.
Use the Pattern for Gifts
A set of four or six rings makes an easy handmade:
- hostess gift;
- housewarming present;
- Thanksgiving gift;
- autumn wedding table favor;
- seasonal market item.
Tie the finished set together with cotton twine and include a small yarn-care note.
Finishing Instructions
Once the seam is secure, weave both yarn tails into the inside of the fabric.
Do not leave loose ends where they can catch on the napkin.
If the ring looks slightly uneven, shape it with your fingers.
Optional Light Blocking
For cotton yarn, you can lightly dampen the ring, reshape it, and allow it to dry flat before inserting a napkin.
However, always follow the care instructions printed on your yarn label because suitable blocking and washing methods differ by fiber. The Craft Yarn Council likewise recommends following manufacturer care instructions and notes that different yarns may require different blocking methods.
Avoid aggressive stretching—you want the ribbing to retain its texture.
Washing and Care
Table accessories can occasionally pick up food or drink stains.
For that reason, keeping the yarn label is useful.
Wash according to the fiber manufacturer’s instructions, reshape while damp if necessary, and dry thoroughly before storing.
Quick Printable-Style Summary
Project: Ribbed Crochet Fall Napkin Ring
Skill level: Beginner
Yarn: #4 medium/worsted-weight cotton or cotton blend
Hook: 5.0 mm / H-8
Other materials: Scissors, tapestry needle, measuring tape
Stitches: ch, sc, BLO sc
Starting method:
Ch 8.
First row:
Beginning in the second chain from hook, work 1 sc in each chain across.
Stitch count:
7 sts.
Repeat:
Ch 1, turn. Work 1 sc BLO in each of the 7 sts.
Continue until the strip measures approximately 5½–6 inches, or fits your chosen folded napkin comfortably.
Finishing:
Leave a long yarn tail. Align the short edges, sew them together stitch-for-stitch, secure the seam, and weave in both ends.
Sizing rule:
Change the foundation-chain length to alter band width.
Change the number of rows to alter ring circumference.
FAQ
Is this crochet fall napkin ring pattern suitable for a complete beginner?
Yes. The project uses only chains and single crochet, with the main new technique being working through the back loop only.
If you already know how to chain and single crochet, the project is a practical introduction to ribbing.
What yarn is best for crochet napkin rings?
Smooth worsted-weight cotton is an excellent choice because the stitch definition is clear and the finished fabric has enough body to hold its shape.
A cotton blend or smooth acrylic can also work.
How much yarn do I need for one napkin ring?
Very little.
These are ideal scrap projects. The exact yardage depends on yarn thickness, circumference, and width, but one ordinary skein of worsted yarn is enough for many rings.
Can I make these crochet napkin rings without sewing?
Yes.
You could slip stitch the two short edges together with your hook instead of using a tapestry needle.
A sewn join, however, gives beginners more control over the bulk of the seam.
Why is my crochet napkin ring curling?
A little curling is normal while working a small ribbed rectangle.
If it curls strongly, your tension may be too tight. Relax your yarn tension or try a slightly larger hook.
How do I make the ring bigger?
Continue the ribbed-row repeat until the strip is longer.
Do not add more foundation chains unless you want the band itself to become wider.
Can I use this pattern for Thanksgiving?
Absolutely. Pumpkin rust, mustard, olive, cinnamon, burgundy, and warm neutral yarns turn this simple ribbed design into an easy Thanksgiving table accessory.
The rings also work well for a harvest dinner, fall wedding, Friendsgiving, or seasonal hostess gift.
Final Result
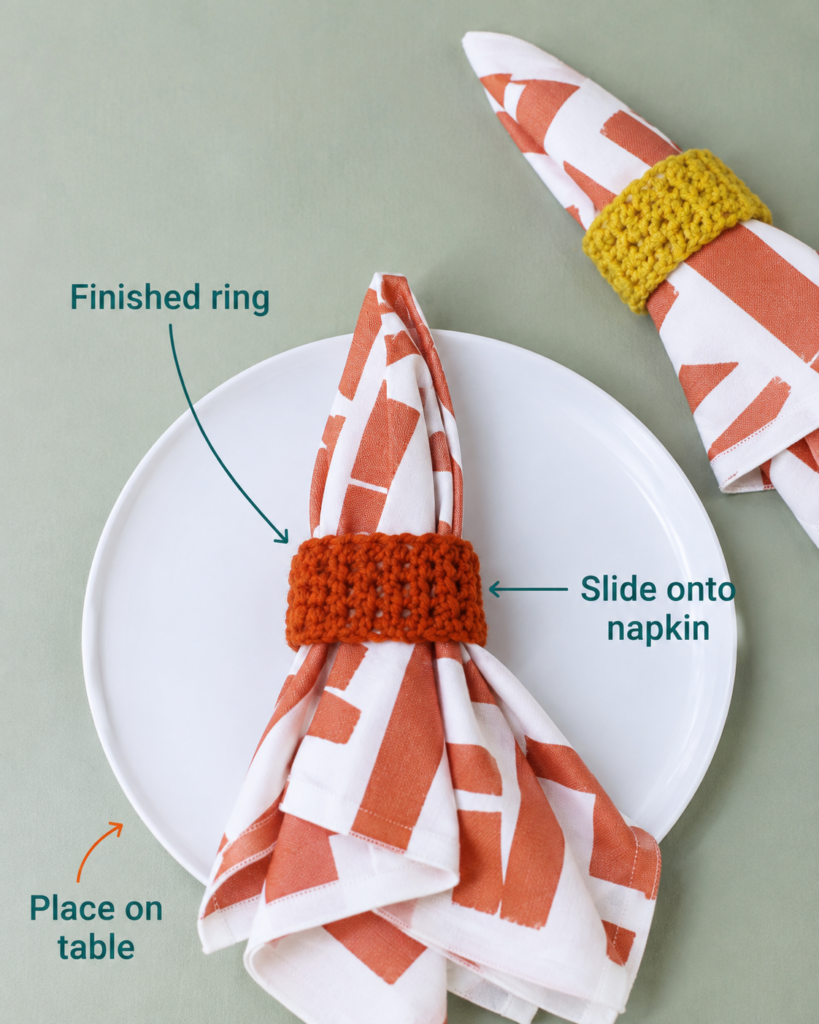
Once the napkin is inserted, gently turn the seam toward the underside and arrange the ribbing so it sits evenly.
The result is simple rather than overly decorative: a small band of handmade texture that immediately gives an autumn table a warmer look.
Because each ring requires only a small amount of yarn, making several is also a useful way to use leftovers from larger fall crochet projects.
Conclusion
This crochet fall napkin ring pattern is intentionally small, practical, and forgiving.
You can concentrate on basic crochet skills without committing to a large project, and every completed practice piece can become part of an autumn table setting.
Once you are comfortable with the first ring, make the remaining set assembly-line style: crochet all the rectangles first, check their measurements together, then seam and finish them in one sitting. That makes it much easier to keep the entire set consistent.
Save the pattern for your next fall table, and consider using the same pumpkin-rust yarn for a matching crochet coaster, leaf applique, or small table basket.





