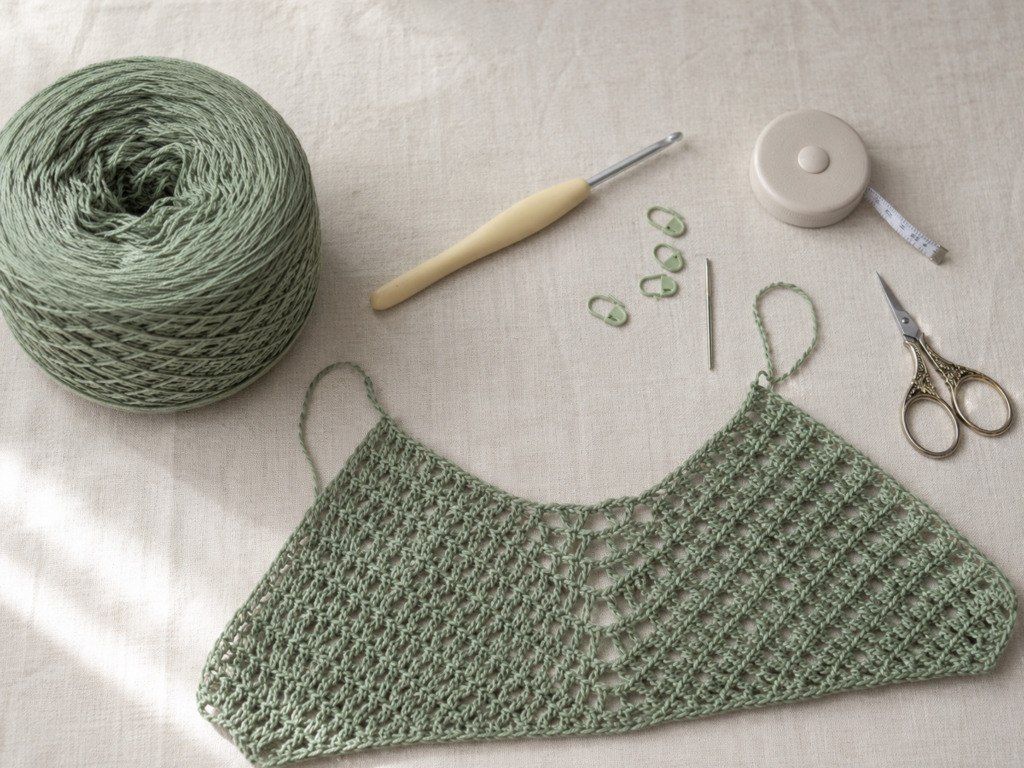
A crochet vest is one of the most approachable ways to move from scarves and small accessories into handmade clothing. You get to practice real garment skills—measuring, shaping, joining sections, checking fit, and finishing edges—without worrying about sleeves.
This crochet halter vest pattern uses a particularly useful construction method for beginners: start at the neckline, build the front and back sections downward, join everything underneath the arms, and then continue the body until the vest reaches the length you want.
Instead of forcing every crocheter into one rigid set of numbers, this tutorial combines a sample gauge with fit checkpoints. That means you can make the vest more cropped, longer, looser, or more fitted without having to redesign the entire project.
The finished design has a clean summer silhouette with a higher halter-style neckline, open shoulders, shaped armholes, and a lightly fitted body. The sample uses basic half double crochet rather than an advanced lace or linked stitch, making the fabric easy to read while you work.
What You’ll Learn
- How to crochet a stable halter neckline.
- How to build a front bib from the neckline downward.
- How to create separate back shoulder sections.
- How to increase evenly without creating jagged edges.
- How to join front and back sections with underarm chains.
- How to crochet continuously around the body.
- How to add subtle waist shaping.
- How to adjust the length and width.
- How to finish armholes and openings neatly.
- How to block a crochet vest so it hangs correctly.
Materials You’ll Need
For a warm-weather vest, choose yarn that creates definition without becoming stiff.
Yarn: CYC #3/light/DK cotton, cotton-bamboo, or breathable cotton blend.
Approximate yardage:
- XS–S: 650–800 yards
- M–L: 800–1,000 yards
- XL–2XL: 1,000–1,150 yards
- 3XL: approximately 1,150–1,300 yards
These are planning estimates rather than fixed pattern requirements because your chosen length and fit will affect yardage.
The Craft Yarn Council classifies DK/light-worsted yarn in its #3/light category and lists typical hook ranges as general guidelines rather than fixed rules.
You will also need:
- 4.5 mm crochet hook
- Optional 4.0 mm hook for edging
- Scissors
- Yarn needle
- 4–6 stitch markers
- Flexible measuring tape
- Blocking mat and rust-resistant pins if available
Crochet Abbreviations Used
- ch = chain
- sc = single crochet
- hdc = half double crochet
- hdc2tog = half double crochet two together
- sl st = slip stitch
- st/sts = stitch/stitches
- rep = repeat
- inc = increase
- dec = decrease
- RS = right side
- WS = wrong side
This tutorial uses U.S. crochet terms. A U.S. single crochet is a U.K. double crochet, while a U.S. half double crochet is called half treble in U.K. terminology.
Before You Start
Check Your Gauge
Make a swatch before starting the actual vest.
With a 4.5 mm hook, crochet a square at least 5 inches wide using half double crochet.
A useful target for this tutorial is approximately:
16 hdc stitches × 11 rows = 4 × 4 inches after blocking.
Your exact gauge does not have to match mine if you use the made-to-measure checkpoints, but you do want fabric that feels comfortable.
If your swatch is very dense and stiff, move up a hook size.
If the fabric looks too loose or transparent for the coverage you want, move down a hook size.
The Craft Yarn Council recommends checking gauge with a swatch and changing hook size when the swatch dimensions differ from the target.
Measure Before Crocheting
Take four measurements:
High chest: Measure across the front from one arm crease to the other.
Full bust: Measure around the fullest part of your bust.
Armhole depth: Measure vertically from the top shoulder area to where you want the underarm of the vest to sit.
Desired garment length: Measure from your chosen neckline position to your preferred hem.
For a relaxed summer vest, aim for approximately 1–2 inches of positive ease around the body.
How to Count Half Double Crochet
Look at the top of the row. Every completed hdc creates a clear V.
Count those V shapes.
Do not count:
- The working loop on your hook.
- The turning chain if the instructions say it does not count as a stitch.
Keep the Edges Straight
For this tutorial:
Ch 1 at the start of an hdc row. The ch 1 does not count as a stitch.
Place the first hdc into the first actual stitch and the last hdc into the final stitch.
Using markers in both edge stitches can save a surprising amount of frustration.
Avoid Curling
A tight starting chain is one of the main causes of curling.
Make your foundation chain with relaxed tension. If necessary, make the chain with a hook 0.5 mm larger and then return to the 4.5 mm hook.
Step-by-Step Crochet Tutorial
Step 1: Crochet the Halter Neck Band
The neckline needs enough structure to support the weight of the garment without feeling tight.
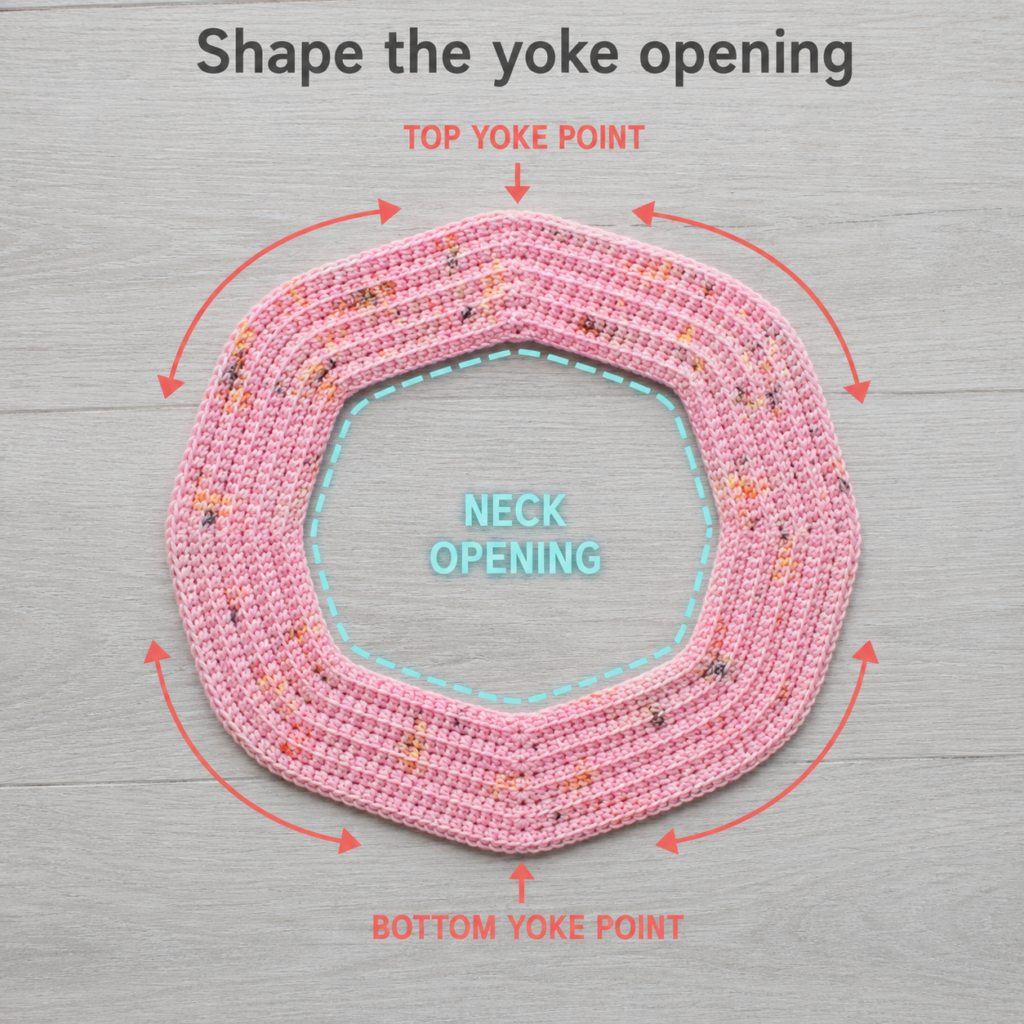
Start by making a chain that comfortably passes over your head and settles around the base of the neck.
For many adult sizes, a finished circumference somewhere around 22–26 inches is a useful starting zone, but measure yourself instead of choosing a number blindly.
Join the chain with a slip stitch, taking care not to twist it.
Neck Band Round 1
Ch 1.
Work 1 sc in every chain around.
Sl st to the first sc.
Rounds 2–5
Ch 1.
Sc in every stitch.
Join.
Try the band over your head after Round 2.
The neck opening should:
- Pass over your head comfortably.
- Rest smoothly.
- Not pull against the front of your throat.
- Not sag dramatically away from the shoulders.
If you prefer a thinner neckline, stop after three or four rounds.
Beginner tip: Lay the band flat every round or two. A twist is much easier to fix now than after the yoke has been added.
Common mistake to avoid: Do not make the neck band tight simply because crochet can stretch. A cotton-rich garment generally has less elastic recovery than a wool garment.
Step 2: Mark and Crochet the Front Bib
Lay the neck band flat with the joining seam centered at the back.
Find the point directly opposite the seam. This is center front.
Measure approximately 8–10 inches of the neckline centered around this point. This section will become the top of the front bib.
Place one marker at each end.
Join the main yarn at the first marker using your 4.5 mm hook.
Front Bib Row 1
Ch 1.
Hdc evenly across the marked section.
Turn.
Front Bib Row 2
Ch 1.
Work 2 hdc into the first stitch.
Hdc across until one stitch remains.
Work 2 hdc into the final stitch.
Turn.
You increased by two stitches.
Continue Shaping
Repeat the increase row until the bib gradually widens toward the underarm.
Try the piece against your body every few rows.
Stop increasing when the front section reaches roughly the width you want across the front at bust level.
For many body shapes, the increase section will measure approximately 7–10 inches vertically.
If you reach the correct width before reaching underarm depth, work several rows without increasing.
Beginner tip: Put a marker in the first and last stitches. Those two stitches are where the increases happen.
Common mistake to avoid: Do not put both increases into the second stitch because you accidentally skipped the first edge stitch. This produces a strange stepped edge.
Step 3: Make the Two Back Shoulder Sections
Return to the neck band.
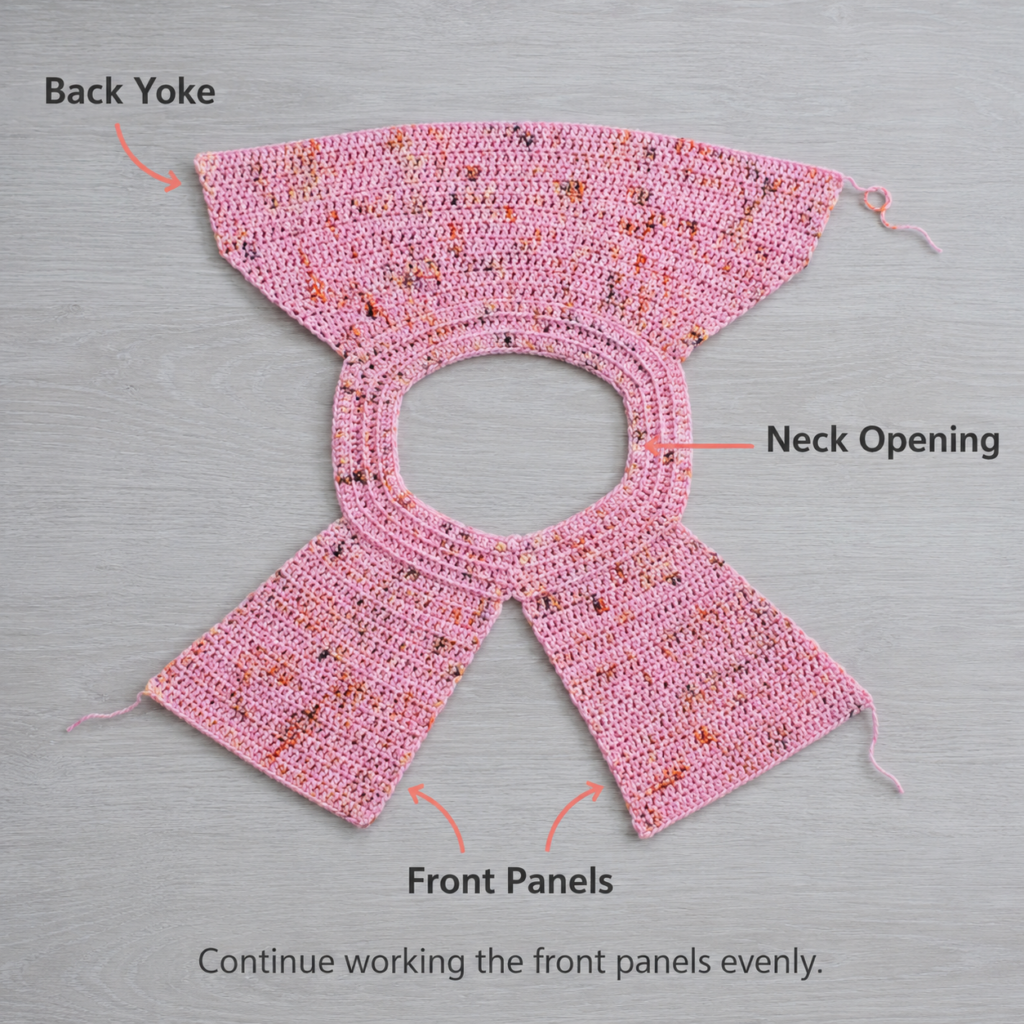
The back of the vest will use two separate sections with a small opening between them. That opening makes the halter shape visually lighter and helps the upper back lie smoothly.
Mark an equal number of stitches on the left and right back portions of the neck band.
Start with the left shoulder.
First Back Shoulder
Join yarn.
Ch 1.
Hdc across the marked stitches.
Turn.
For the following rows, increase at the outer armhole edge by working 2 hdc in the edge stitch.
Keep the inner back edge straight.
Continue until the shoulder section reaches approximately the same depth as the front bib.
Fasten off.
Second Back Shoulder
Repeat on the opposite side, mirroring the increases.
The two shoulder pieces should look symmetrical when the garment is placed flat.
You do not need them to be millimeter-perfect. The goal is a balanced wearable shape.
Try the developing yoke over your shoulders.
Check that:
- The neckline lies flat.
- The shoulder sections reach toward your underarms.
- The front provides your desired coverage.
- The back opening sits centrally.
Beginner tip: Measure both shoulder sections by rows rather than relying only on your eyes.
Common mistake to avoid: Increasing on the wrong edge makes one shoulder expand toward the center back instead of toward the armhole.
Step 4: Join the Front and Back at the Underarms
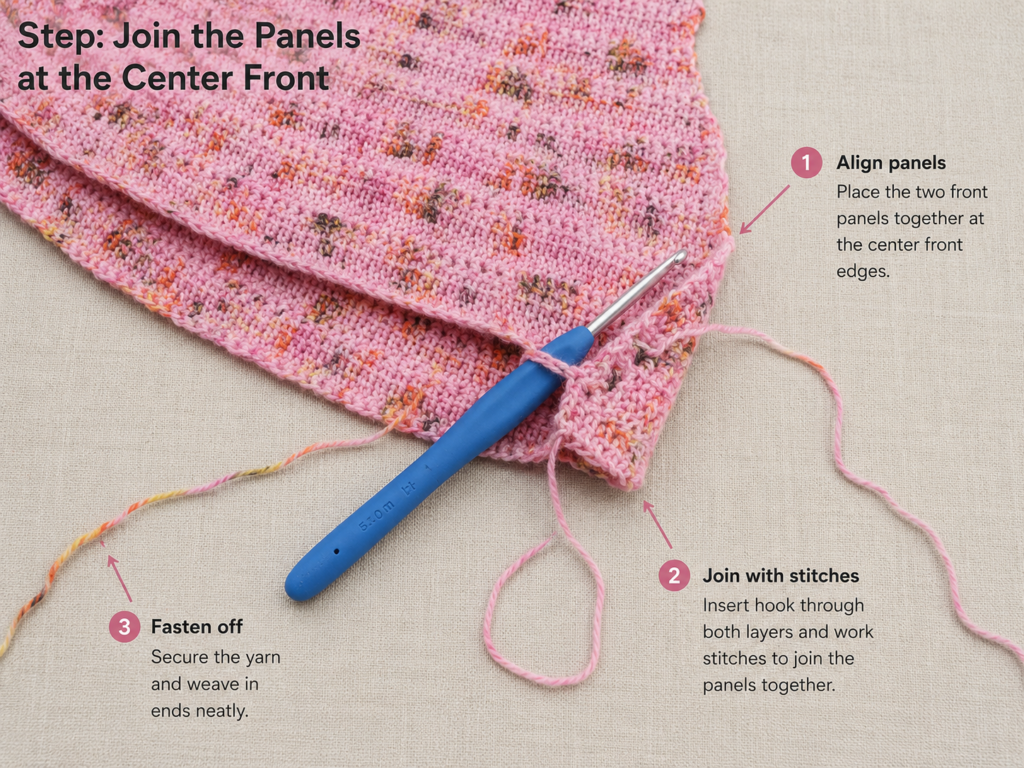
This is the moment when several flat crochet pieces begin to look like clothing.
Put the yoke on or hold it around your torso.
Estimate the distance between the front bib and the corresponding back shoulder edge underneath your arm.
Create a loose chain long enough to span that distance comfortably.
For a close fit, you may only need about 1–2 inches.
For a looser vest, you may want 2–4 inches.
Crochet across the front bib, chain the required number of stitches at the first underarm, continue across the back sections, then create the second matching underarm chain.
The two underarm chains must contain the same number of stitches.
Beginner tip: Make the chains slightly relaxed. A tight underarm bridge can dig into the body even when the rest of the vest fits correctly.
Common mistake to avoid: Do not decide your final underarm chain count without trying the yoke on. This is one of the easiest places to customize garment fit.
Step 5: Establish the First Complete Body Round
On the next round, work one hdc into each established stitch.
When you reach the underarm chain, work one hdc into each chain.
Continue around the entire garment.
Join to the first hdc.
You now have a continuous torso section.
Place a marker at each side, approximately under the center of each arm.
Those markers make later shaping much easier.
For the next 2–3 rounds:
Ch 1, hdc in every stitch, join.
Trying the garment on after these first rounds is worthwhile. You are checking the circumference before investing time in the entire body.
Beginner tip: Keep your first round of stitches across the chain relaxed.
Common mistake to avoid: Accidentally crocheting around the whole chain instead of placing stitches into individual chain stitches creates a different structure and can make the underarm unstable.
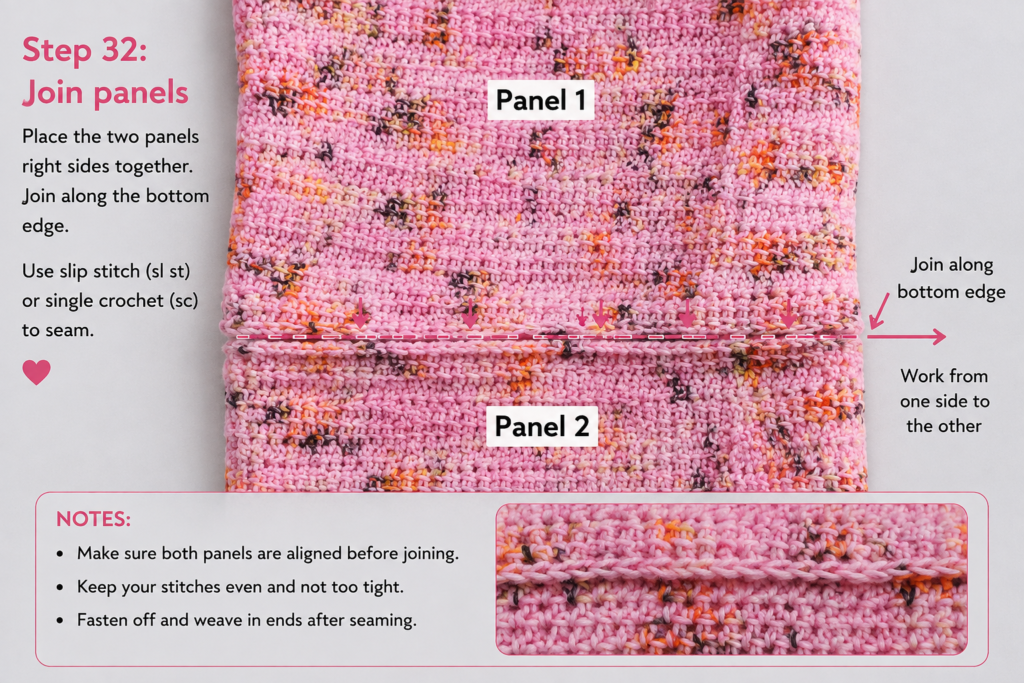
Step 6: Add Optional Waist Shaping
A straight body is perfectly acceptable, especially if you want a relaxed layering vest.
For a gently fitted version, decrease around the side markers.
Shaping Round
Work in hdc until approximately two stitches before the first side marker.
Hdc2tog.
Continue across the front or back.
At the corresponding position near the second side, hdc2tog again.
Complete the round.
You have removed two stitches.
Work one or two rounds without decreasing.
Repeat the decrease round.
For subtle shaping, two to four decrease rounds total are usually enough.
Stop decreasing when the vest sits comfortably against your waist.
If your hips are wider than your waist and you are making a longer vest, reverse the process near the lower body by adding increases.
How to Make an Increase
Work 2 hdc into one stitch at each side.
Keep increases symmetrical.
Beginner tip: Smaller, gradual adjustments usually produce a smoother garment than removing many stitches in a single round.
Common mistake to avoid: Aggressive waist decreases can make the hem ride upward.
Step 7: Crochet the Body to Your Preferred Length
Once the fit is comfortable, crochet one hdc into every stitch around.
Continue until the vest reaches your desired length.
Useful style options include:
Cropped: Finish around the natural waist.
Standard: Finish between natural waist and high hip.
Long: Continue to the upper or mid hip.
Before beginning the hem, put the vest on one more time.
Crochet fabric can look longer when lying on a table than when worn.
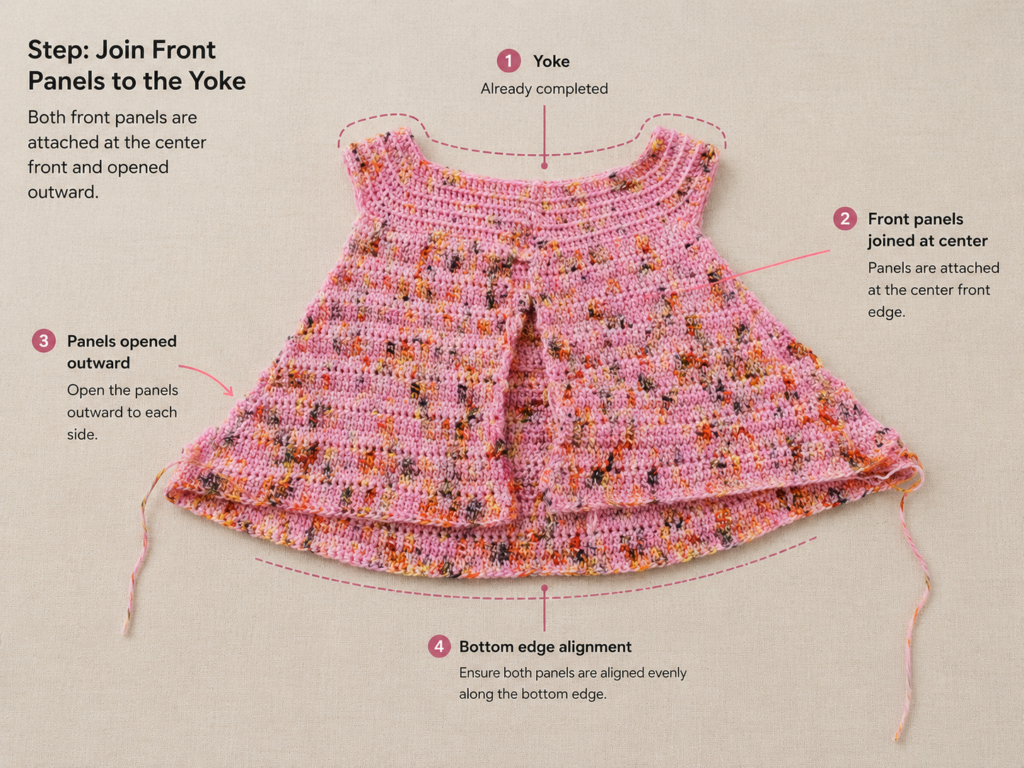
Step 8: Add a Simple Hem
Switch to the 4.0 mm hook if you want a slightly firmer finish.
Hem Round 1
Ch 1.
Sc in every stitch around.
Join.
Rounds 2–4
Sc in every stitch.
Join.
Alternatively, use your 4.5 mm hook and continue with hdc if you want a softer, less structured hem.
A simple hem works well because the halter neckline is already the visual focus.
Beginner tip: If the hem starts flaring, your edging stitches may be looser than the body stitches. Switch to the smaller hook.
Pattern Notes or Stitch Notes
Turning Chain Rules
When working flat hdc sections:
- Ch 1 before turning.
- The ch 1 does not count as a stitch.
- Place your first hdc into the first stitch.
When working body rounds:
- Ch 1.
- Hdc into the same stitch where the round begins unless otherwise noted.
- Join with a slip stitch to the first actual hdc.
Stitch Count
The exact stitch count changes according to your starting neckline, upper-body measurements, and underarm chain.
The important rule is symmetry.
Both armholes should have matching shaping.
Both underarm chains should contain the same number of stitches.
Both sides should receive the same number of waist decreases or increases.
Repeat Pattern
Main body repeat:
Ch 1, hdc in every st around, sl st to first hdc.
Right Side and Wrong Side
When working flat portions, alternate RS and WS rows naturally as you turn.
After joining the body, keep the same side facing outward for every round.
Common Beginner Mistakes
1. Making the Neck Opening Too Small
The neck band may fit comfortably around your neck but still fail to pass over your head.
Fix: Test it over your head before adding the yoke.
If necessary, undo the joining slip stitch and add chains.
2. Losing Edge Stitches
If your supposedly straight section becomes narrower every row, you are probably skipping the first or last stitch.
Fix: Place markers in both edge stitches.
3. Uneven Front Increases
Increasing on one edge more frequently than the other creates a crooked bib.
Fix: Count your rows and confirm that every increase row adds exactly two stitches.
4. Tight Underarms
An underarm chain can look generous when the garment is lying flat but feel restrictive when worn.
Fix: Try the yoke on before completing the next full round.
5. Baggy Underarms
The opposite problem occurs when too many chains are added.
Fix: Remove a few chains before crocheting into them.
6. Excessive Waist Shaping
Removing too many stitches can make the body pull diagonally toward the waist.
Fix: Alternate one decrease round with one or two plain rounds.
7. Flaring Hem
A tight body followed by loose edging can create a ruffle.
Fix: Use a smaller hook for the hem or intentionally maintain firmer tension.
8. Skipping the Gauge Swatch
This matters especially for wearables. Gauge affects not only width but also armhole depth, neckline proportions, and total yardage.
Fix: Crochet and wash a swatch before committing to the garment.
How to Customize This Crochet Project
Change the Yarn
For a lightweight summer vest, try:
- Mercerized cotton
- Cotton-bamboo
- Cotton-linen blend
- Cotton-acrylic blend
Pure cotton gives excellent definition but can become heavier in a long garment.
Bamboo blends usually add fluid drape.
Change the Color
A single solid color makes stitch counting easiest for beginners.
Good wearable choices include:
- Sage green
- Ecru
- Terracotta
- Dusty blue
- Chocolate brown
- Soft black
- Mustard
- Cream
For stripes, introduce the new color at the beginning of a round so the transition remains near the back.
Make It Cropped
Stop the body approximately at the natural waist and add the hem.
This also reduces yarn requirements significantly.
Make It Longer
Continue the body rounds until the fabric reaches your desired hip level.
If your hips are wider than your waist, add symmetrical increases near the side markers.
Make a Looser Vest
Add a few more stitches to each underarm chain.
You can also eliminate waist decreases entirely.
Add Texture
Once you are comfortable with the basic version, replace occasional hdc rounds with:
- BLO hdc
- Simple mesh rounds
- Alternating hdc and sc rows
- Small granny-style stripe sections
Do not switch to an elaborate stitch until you understand how that stitch affects gauge.
Add a Decorative Border
Instead of four rounds of sc, try:
- Crab stitch
- Picot edging
- Small scallops
- BLO ribbing
Keep decorative edging relatively narrow around the armholes so it does not irritate your skin.
Finishing Instructions
Edge the Armholes
Use the smaller 4.0 mm hook if the openings feel loose.
Join yarn near the bottom of the armhole.
Ch 1.
Work sc evenly around the entire opening.
The challenge is not adding too many stitches into row ends.
If the edge starts ruffling, remove some stitches.
If it puckers, add slightly more.
Repeat for the second armhole.
Finish the Back Opening
Work one round of sc around any exposed back edges.
At tight corners, placing two sc into the same point can help the edging turn cleanly.
Fasten Off
Cut your working yarn leaving approximately a 6-inch tail.
Pull the yarn through the final loop.
Tighten gently.
Weave In Ends
Thread the tail onto a yarn needle.
Run it underneath several stitches on the wrong side.
Change direction and weave through several additional stitches.
Trim only after the yarn feels secure.
Do not simply cut a tail close to the knot. Movement and washing can loosen it.
Block the Vest
Blocking is especially useful for a cotton garment.
Check the yarn label first.
For wet-blocking:
- Soak the garment gently in cool or lukewarm water.
- Press excess water out without twisting.
- Roll it in a clean towel.
- Lay it flat.
- Smooth the neckline, armholes, sides, and hem to the intended measurements.
- Allow it to dry fully.
Do not aggressively stretch the vest larger unless you intentionally planned for that change.
Quick Printable-Style Summary
Skill level: Easy / confident beginner
Yarn: CYC #3/light/DK cotton-rich yarn
Hook: 4.5 mm body; optional 4.0 mm edging
Main stitches: ch, sc, hdc, sl st, hdc2tog
Starting method: Crochet a neck band large enough to pass comfortably over the head.
Front: Work a centered hdc bib downward, increasing at both outer edges until it reaches the required front width.
Back: Crochet two matching shoulder sections from the rear neckline.
Underarms: Bridge front and back with equal chains.
Body: Work hdc continuously around the torso.
Shaping: Optional symmetrical hdc2tog decreases near side markers.
Length: Continue even rounds until desired length.
Hem: 3–4 rounds of sc or preferred simple edging.
Finishing: Edge openings, weave in ends, wash/block according to yarn-care instructions.
FAQ
Is a crochet halter vest pattern suitable for beginners?
Yes, provided you are comfortable making chains, single crochet, half double crochet, and simple increases or decreases.
The main new skill is garment construction rather than difficult stitches.
What yarn is best for a crochet halter vest?
For a summer vest, a light cotton-rich yarn is one of the easiest choices.
DK cotton-bamboo or cotton-acrylic produces good stitch definition without making the garment excessively heavy.
How much yarn do I need for a crochet halter vest?
A cropped small vest may require roughly 650–800 yards, while longer or larger garments can use 1,000 yards or more.
Always purchase extra yarn when possible, particularly if your dye lot matters.
Can I make this crochet halter vest longer?
Yes.
Once the shaping is finished, simply continue working even body rounds before adding the hem.
For a hip-length version, you may need a few increases as the fabric approaches the hips.
How do I make the armholes larger?
The easiest adjustment is to add more stitches to both underarm chains.
Make the exact same adjustment on both sides.
Why does my crochet halter vest flare at the bottom?
Common causes include loose tension, accidental increases, or a hem hook that is too large.
Count your stitches and consider using a smaller hook for the edging.
Can I use worsted-weight yarn?
Yes, but the fabric will be thicker and your gauge will change considerably.
Rather than following any sample stitch numbers, use the measuring checkpoints in this tutorial.
For hot-weather clothing, DK yarn usually creates a lighter result.
Conclusion
A crochet halter vest becomes much less intimidating when you think of it as a series of small construction decisions rather than one complicated garment.
First make a comfortable neckline. Build the front and shoulders. Check the fit. Connect the underarms. Then the remaining body is mostly straightforward crochet until you reach your preferred length.
The most important habit is to try the vest on while you work. Crochet fabric, body proportions, yarn fiber, and personal fit preferences vary too much for one number to be perfect for everyone.
Once you are happy with this basic version, the same construction can become a cropped festival vest, a longer layering piece, a striped summer top, or a textured halter vest simply by changing length, color, and stitch pattern.





