A small crossbody bag is one of those crochet projects that feels much more impressive than it actually is to make. You get a useful finished accessory, but you do not have to crochet large panels for days, install a complicated zipper, or learn difficult shaping techniques.
This crochet mini crossbody bag pattern is designed specifically to keep the construction manageable for a beginner. You will start with one foundation chain, crochet around both sides of it to create the bottom, and then continue upward in joined rounds. That means there are no side seams to sew.
The texture is intentionally straightforward too. Alternating rounds of half double crochet and back-loop single crochet create subtle horizontal definition without hiding where your stitches are.
Finish the bag with a simple button loop and a narrow reinforced crochet strap, and you have a lightweight mini purse sized for a phone, keys, cards, or other small essentials.
The reference photography research for this tutorial came from one Craft Passion crossbody-bag project because it provides an unusually complete photo sequence from foundation through finishing. The actual pattern below, however, uses different yarn, different stitch counts, different stitches, a different closure, and simplified construction.
What You’ll Learn
By the end of the tutorial, you will know how to:
- make a foundation chain without pulling it too tight;
- crochet around both sides of a chain;
- keep the stitch count consistent while working in joined rounds;
- make half double crochet;
- identify and work into the back loop only;
- create a simple textured crochet fabric;
- keep the sides of a small bag straight;
- add a firm top edge;
- make a button loop;
- crochet a less-stretchy crossbody strap;
- attach a strap securely;
- weave in and finish a small crochet bag neatly.
Finished Size
Approximately:
Width: 5.5 in / 14 cm
Height: 7 in / 18 cm
Strap: Customizable; approximately 46–50 in / 117–127 cm works well for many adult crossbody bags.
Your exact dimensions will depend on yarn, hook, and tension.
Materials You’ll Need
Use:
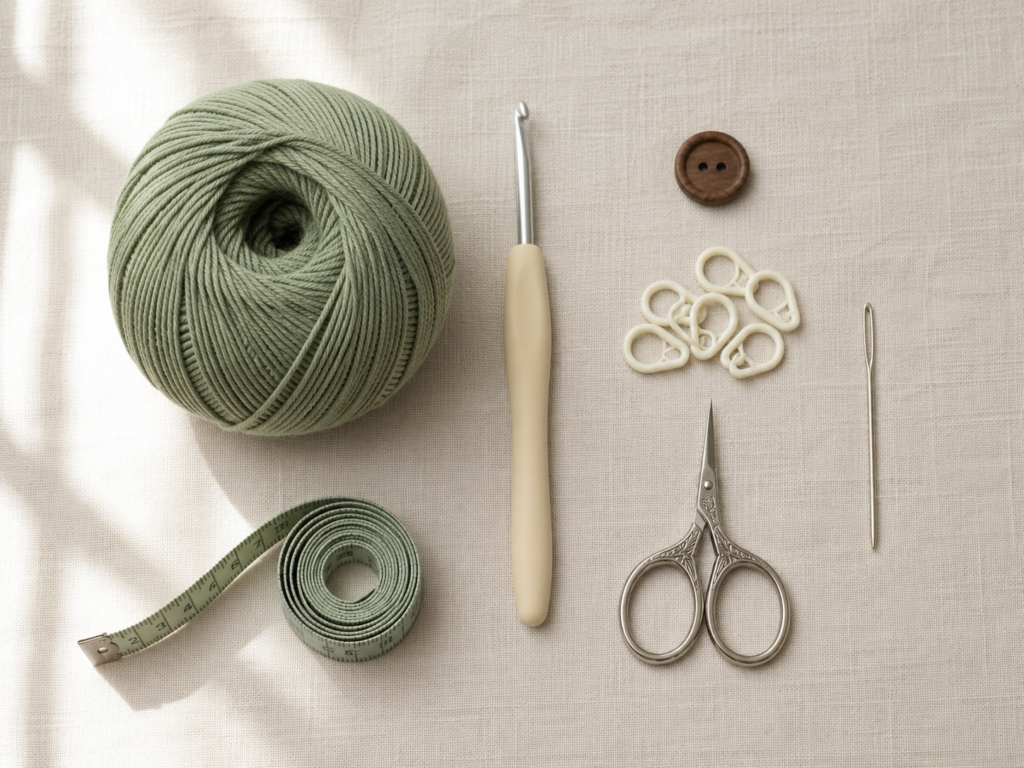
- approximately 100–130 yd / 90–120 m #3 DK cotton or cotton-blend yarn;
- 4.0 mm crochet hook;
- 18–22 mm wooden or washable button;
- scissors;
- tapestry needle;
- 1–2 stitch markers;
- measuring tape.
A smooth cotton yarn is particularly useful for a first bag because the stitches remain easy to identify and the finished fabric does not become excessively fuzzy.
The Craft Yarn Council classifies yarn by numbered weight categories and recommends using gauge—not merely the hook label—to determine whether a yarn/hook combination is producing the required fabric.
For this project, the 4 mm hook is deliberately used to produce a firm fabric rather than a loose, drapey one.
Crochet Abbreviations Used
This tutorial uses US crochet terminology.
- ch = chain
- sc = single crochet
- hdc = half double crochet
- sl st = slip stitch
- st/sts = stitch/stitches
- BLO = back loop only
- rep = repeat
- RS = right side
- WS = wrong side
These abbreviations correspond with the standardized terminology published by the Craft Yarn Council.
US/UK terminology note
Be careful if you normally follow UK patterns:
US single crochet = UK double crochet
US half double crochet = UK half treble crochet
The terminology difference is significant, so do not substitute UK stitches without converting the instructions.
Before You Start
Gauge
Aim for approximately:
18 sc × 20 rows = 4 in / 10 cm
Gauge is not as unforgiving here as it would be in a fitted garment, but it does determine whether your finished bag is genuinely “mini.”
If your fabric is substantially wider than expected, switch to a smaller hook.
If it feels extremely rigid and your hook is difficult to insert, use a hook 0.5 mm larger.
How to count stitches
After the first base round, this bag maintains 48 stitches around.
Place a marker in the first real stitch of each round.
Do not count:
- the beginning ch 1;
- the joining slip stitch.
That simple habit prevents many mysteriously widening crochet bags.
How to keep the sides straight
Once the bottom is complete, stop increasing.
Every later body round contains one stitch in each stitch from the preceding round.
If you accidentally place a stitch into the joining slip stitch as well as the first real stitch, the bag may gradually widen near the seam.
How to avoid curling
Some slight curling during the first few rounds is normal.
If the base twists dramatically, check that:
- your starting chain was not too tight;
- you worked into the correct unused loops on the second side;
- your first-round stitch count is correct;
- you did not add unnecessary increases in Round 2.
Color choice
A solid, light-to-medium color is easiest for a first version because you can see the top loops clearly.
Dark navy and black can make BLO placement frustrating for a beginner.
Step-by-Step Crochet Tutorial
Step 1: Make the Foundation Chain
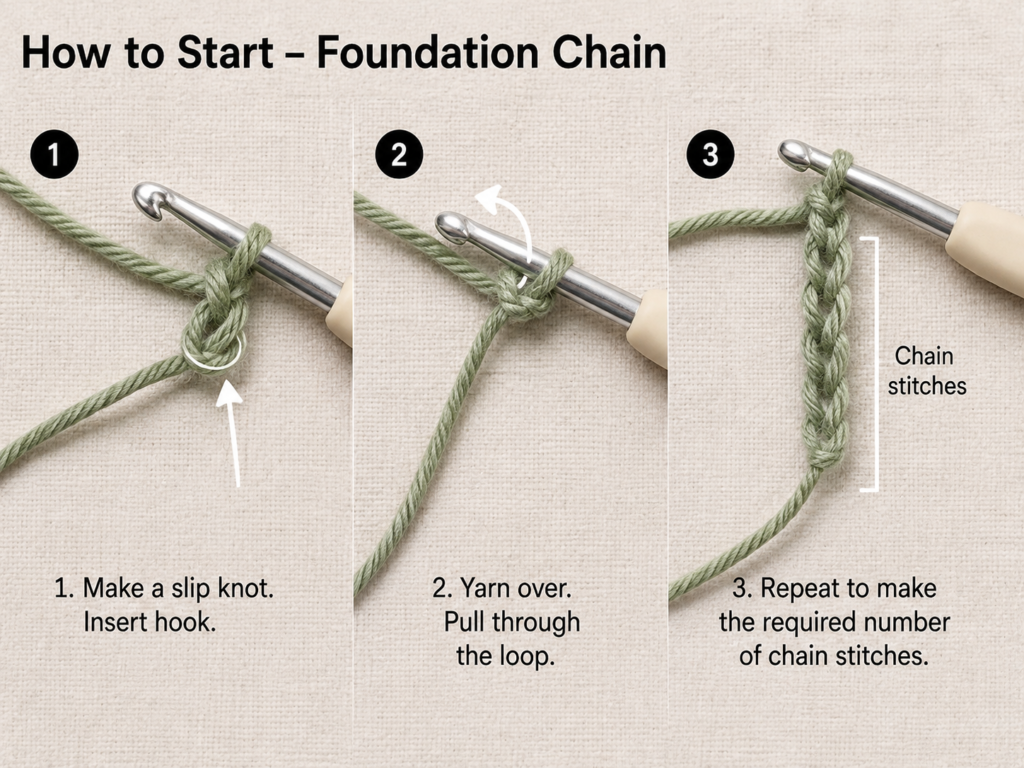
Make a slip knot.
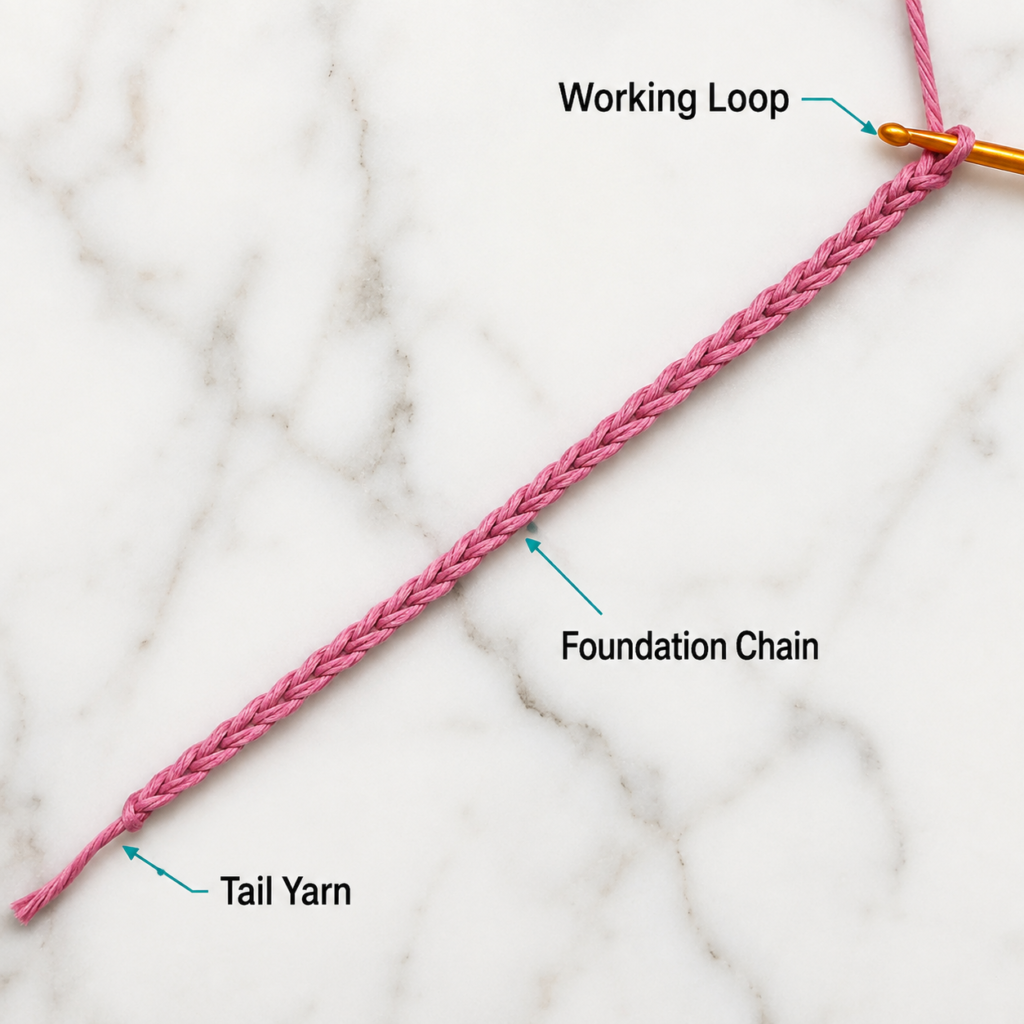
Ch 24.
Do not yank each chain tight against the hook. The hook needs enough space to enter those chains during the next step.
Try holding the chain horizontally when you finish. You should see 24 distinct V-shaped chains.
Beginner tip
If your foundation naturally curves into a tight crescent before you have even worked into it, loosen your tension slightly.
Common mistake to avoid
Do not count the working loop currently sitting on the hook as a chain stitch.
Step 2: Crochet Around the Chain to Create the Bag Bottom
Now you will turn the straight foundation into a narrow rounded base.
Base Round 1
Working into the second chain from the hook:
- Sc in the second ch from hook.
- Sc in each of the next 21 chains.
- Work 3 sc into the final chain.
- Rotate the work so the unused loops along the opposite side of the foundation face you.
- Sc in each of the next 21 unused chain loops.
- Work 2 additional sc into the same chain that contains your very first sc.
- Join with a sl st to the first sc.
Stitch count: 48 sc.
The groups at both ends round the corners naturally.
Beginner tip
Do not turn your work as if crocheting a flat row. Physically rotate the chain and continue along its underside.
Common mistake to avoid
Make sure you work into the unused loops of the same foundation chain. Do not accidentally crochet into the tops of the single crochets you just made.
Step 3: Stabilize the Base
Round 2
Ch 1. This chain does not count as a stitch.
Sc in the same stitch.
Sc once in every remaining stitch around.
Join with sl st to first sc.
48 sc.
Do not increase at either rounded end now.
This is the round where the piece begins transitioning from a flat base into a pouch.
Beginner tip
Count the stitches before continuing. Fixing 47 or 49 stitches now is considerably easier than discovering the problem ten rounds later.
Step 4: Begin the Textured Body
The body uses a simple two-round repeat.
Texture Round A
Ch 1.
Hdc in the same stitch.
Hdc in each stitch around.
Join with sl st to first hdc.
48 hdc.
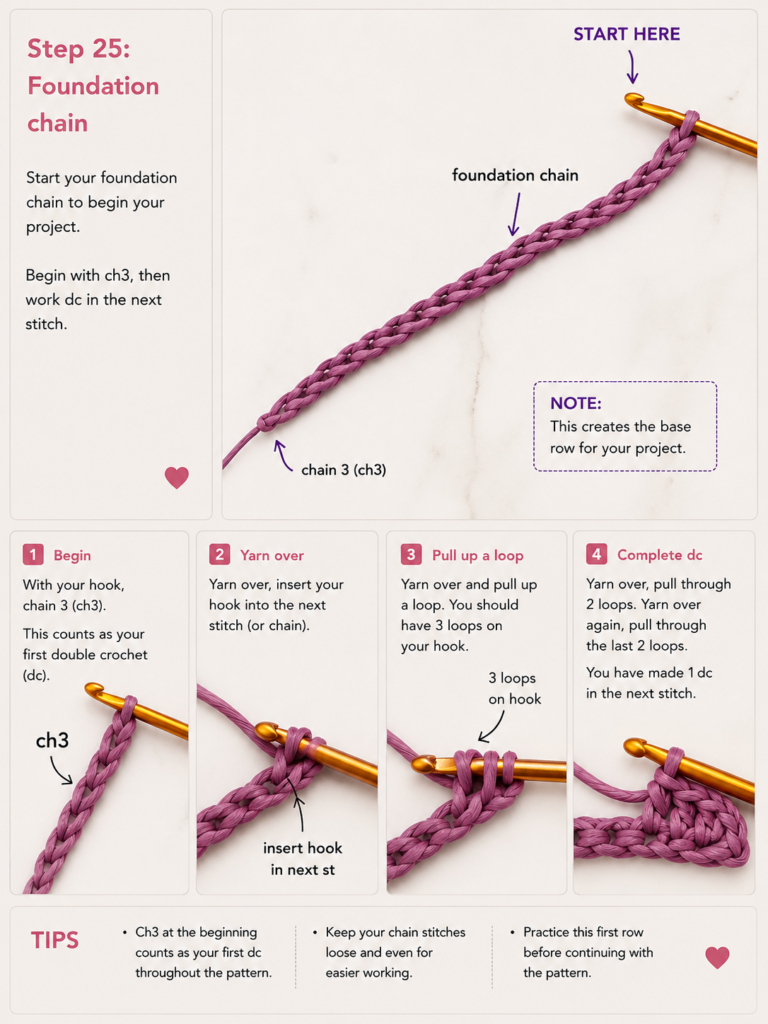
To make a half double crochet:
- yarn over;
- insert hook into stitch;
- yarn over and pull up a loop;
- yarn over;
- pull through all three loops.
Beginner tip
Do not accidentally pull through two loops first. That would begin a double crochet instead of an hdc.
Step 5: Add the Back-Loop Ridge
Texture Round B
Ch 1.
Sc in the back loop only of the same stitch.
Continue with 1 sc BLO in every stitch around.
Join with sl st to first sc.
48 sc BLO.
Each crochet stitch has two top loops.
When the right side of your work faces you:
- the loop closest to you is the front loop;
- the loop farther away is the back loop.
Working only through the back loop leaves the front loop unused, producing a subtle horizontal ridge.
Beginner tip
Tilt the upper edge toward you. The two loops become much easier to distinguish.
Common mistake to avoid
Do not insert your hook through the gap underneath the stitch. The hook should pass underneath the single upper loop farthest from you.
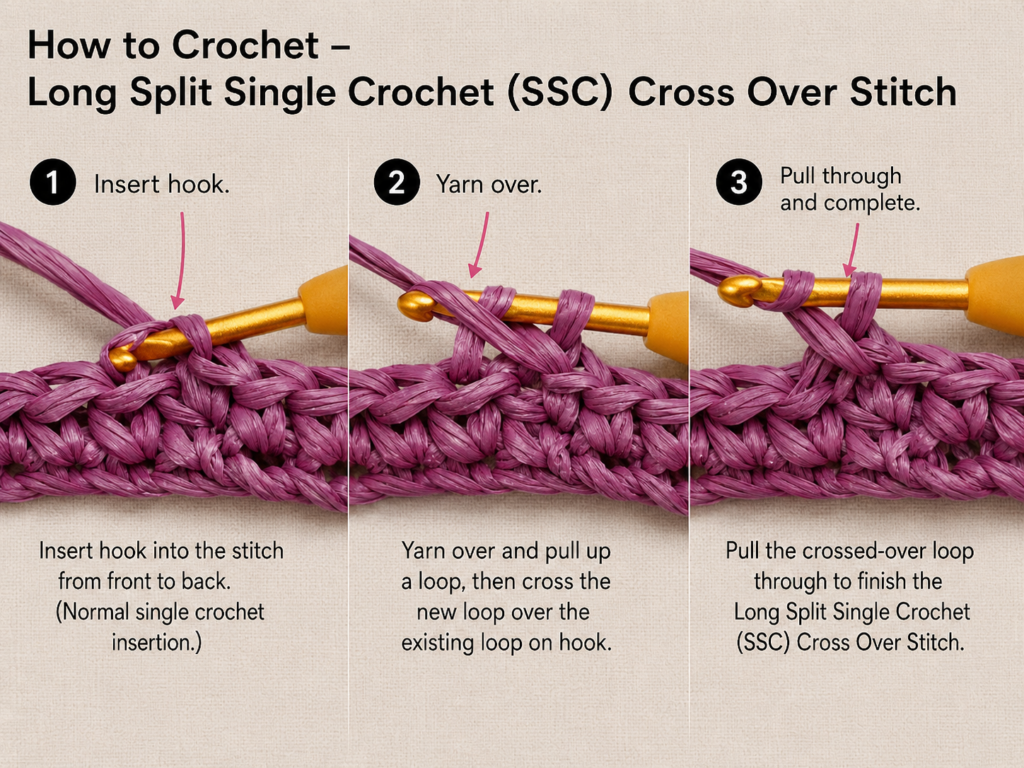
Step 6: Repeat the Body Pattern
Repeat:
Texture Round A: hdc in every stitch.
Texture Round B: sc BLO in every stitch.
Continue this two-round repeat until your bag measures approximately 6.5 inches / 16.5 cm from the bottom.
Try to finish after a BLO single crochet round.
The actual number of repeats matters less than the finished measurement because yarn and individual tension vary.
Keep 48 stitches in every round.
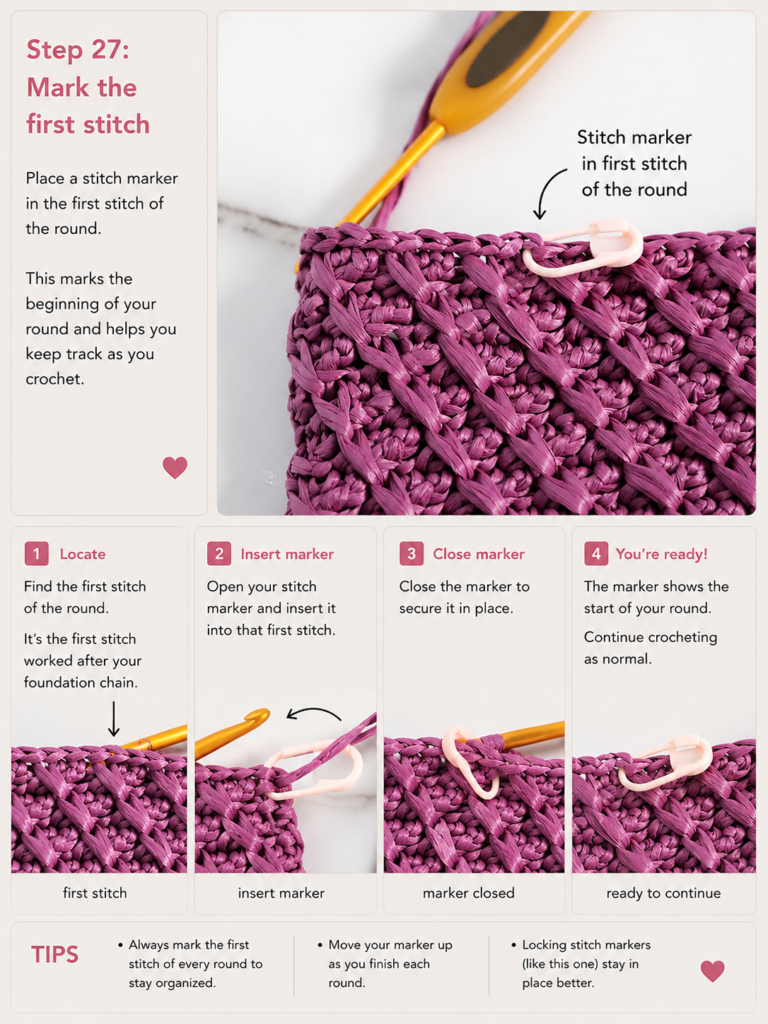
Beginner tip: Mark the first stitch
Move a stitch marker into the first real stitch of every round.
Remember:
ch 1 = not a stitch
joining sl st = not a stitch
Avoid the growing-seam mistake
When you reach the end of a round, join into the stitch containing your marker.
Do not work an additional crochet into the slip stitch from the previous round.
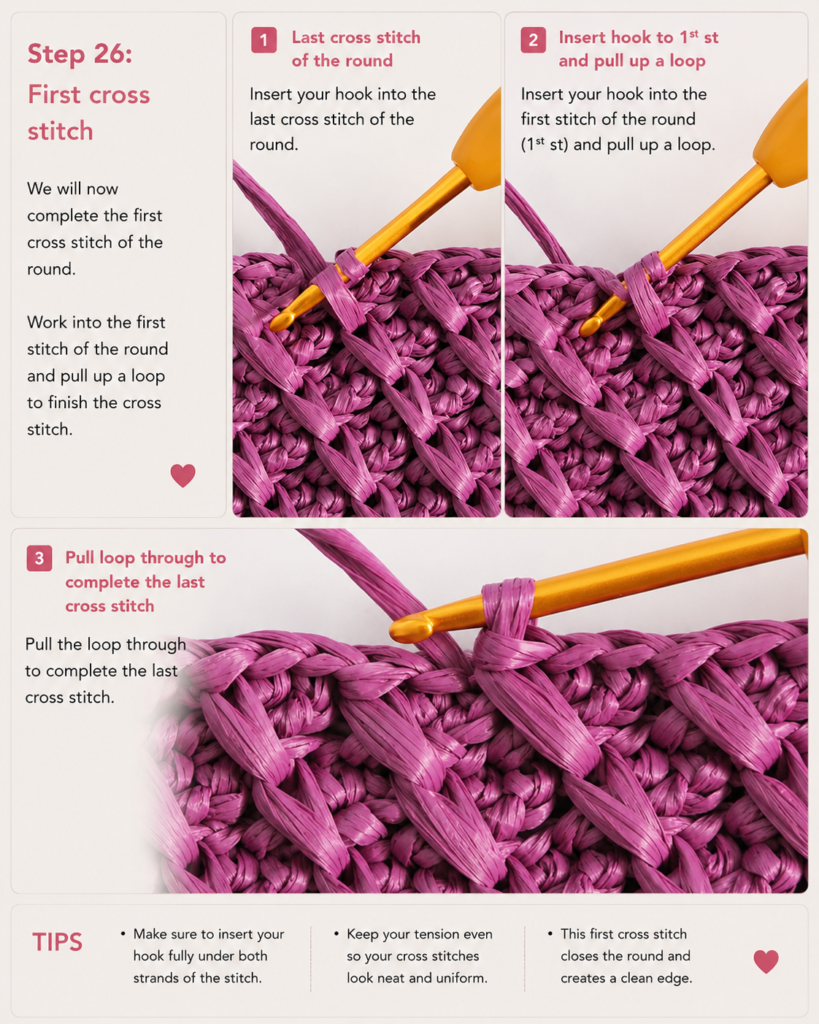
Check the bag shape
Lay the project flat periodically.
The bottom should naturally fold into the lower edge, while the sides rise vertically.
Your texture should alternate between:
- a slightly taller hdc band;
- a lower ridge created by sc BLO.
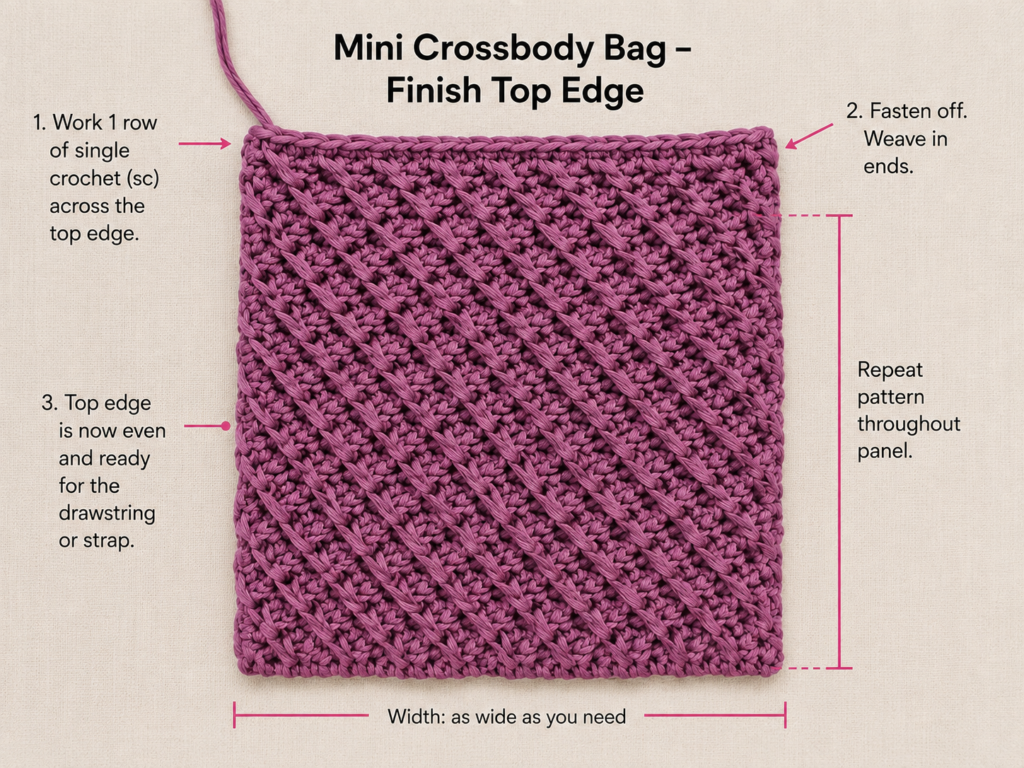
Step 7: Finish the Top Edge
Once your bag reaches approximately 6.5 inches, work one final stabilizing round.
Ch 1.
Sc under both loops of every stitch around.
Join with sl st.
48 sc.
Fasten off unless you intend to make the button loop immediately with the working yarn.
This all-loops round gives the opening a cleaner, firmer appearance than ending directly after a BLO round.
Common mistake to avoid
Do not work this final edge too tightly. If the opening suddenly pulls inward, loosen your tension or redo the round with a 4.5 mm hook.
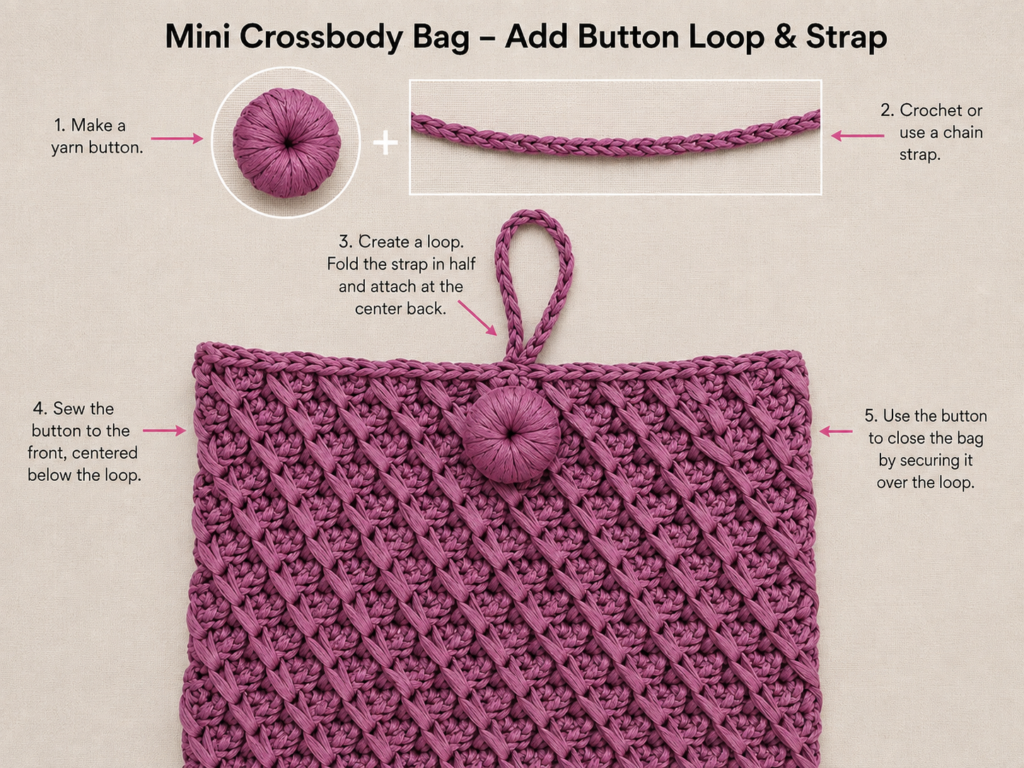
Step 8: Make the Button Loop
Lay the bag flat and identify the exact center of the back edge.
Join yarn at the center-back stitch.
Chain approximately 10–12 stitches.
Without twisting the chain, slip stitch into the next stitch beside your joining point to create a loop.
Fasten off.
Test the loop around your button before weaving in the tails.
If it is loose enough to fall off, shorten it.
If the button cannot pass through without stretching aggressively, add one or two chains.
Step 9: Sew on the Button
Fold the loop over the front of the bag.
Mark where the bottom of the loop naturally reaches.
Sew your wooden button at that point, usually about 3/4–1 inch below the upper edge.
Pass the sewing thread or yarn through the button multiple times and secure it well inside the bag.
The closure should hold the opening together without pulling the front panel upward.
Step 10: Crochet the Crossbody Strap
A plain chain by itself can stretch significantly, so reinforce it.
Leave a yarn tail approximately 10 inches / 25 cm long.
Chain until the strap measures approximately 46–50 inches / 117–127 cm, or your preferred crossbody length.
Do not rely on a fixed chain count because chain gauge varies substantially.
After reaching the desired length:
- turn;
- slip stitch into the second chain from the hook;
- work one slip stitch into every chain back to the beginning;
- fasten off, leaving another long sewing tail.
This produces a narrow cord-like strap without requiring an advanced stitch.
Strap-length tip
Before attaching it permanently, pin or temporarily tie the two ends to the bag and try it on.
A strap that looks extremely long on the table may sit correctly once it travels from the hip, over the opposite shoulder, and back down.
Step 11: Attach the Strap Securely
Position one strap end inside the upper left side of the bag.
Thread the long tail onto your tapestry needle.
Sew through several rows of the bag and through the strap end repeatedly.
Do not rely on a single pass.
Repeat at the opposite side.
Check that the strap is not twisted before completing the second attachment.
Beginner tip
Place both strap ends at the same depth inside the bag so the finished purse hangs level.
Pattern Notes or Stitch Notes
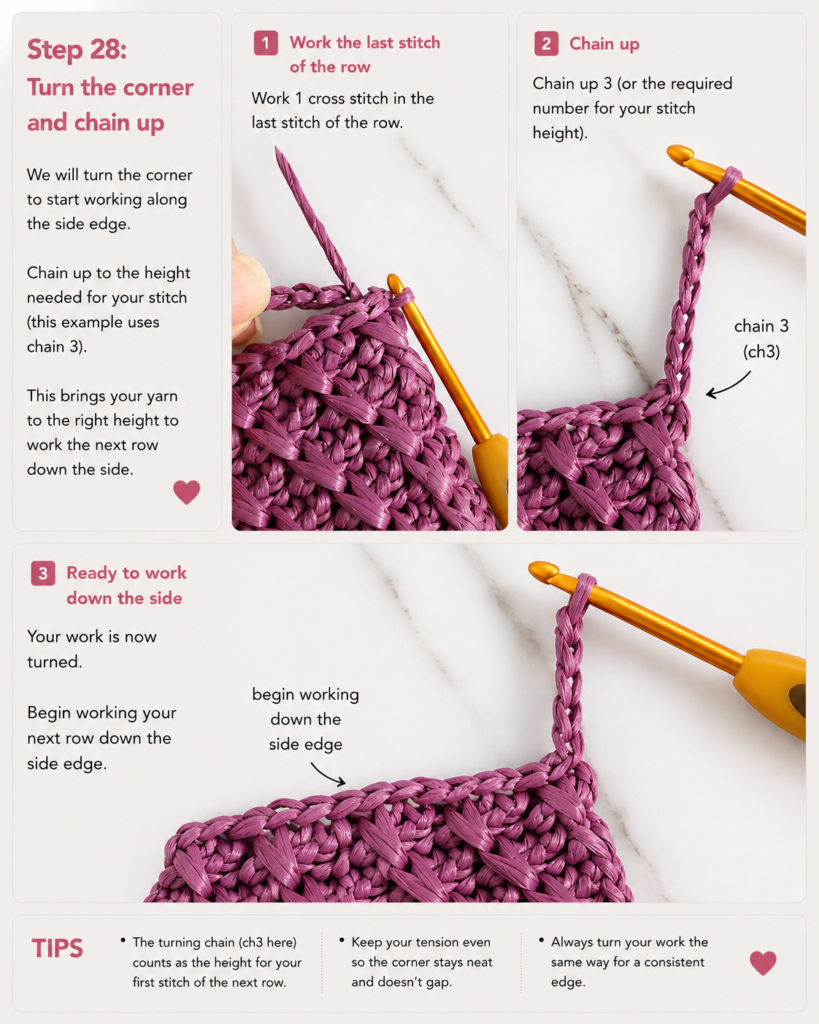
Turning chain rules
The ch 1 at the beginning of a round never counts as a stitch in this pattern.
Work the first actual sc or hdc into the same stitch from which the chain rises.
Stitch count
After completing the foundation round:
48 stitches around.
Maintain 48 stitches throughout the body and final edge.
Repeat pattern
Body repeat:
Round A: 48 hdc
Round B: 48 sc BLO
Repeat A and B until the desired height.
Right side / wrong side
The bag is worked with the right side facing outward throughout.
Do not turn between rounds.
Size adjustments
For a taller bag, simply crochet more A/B repeats.
For a shorter bag, stop earlier.
For a substantially wider bag, alter the foundation chain, but remember that the first round must be recalculated carefully. Beginners may find it easier to keep the given width for their first version.
Common Beginner Mistakes
1. The base forms a large ruffle
Cause: Too many stitches were added around the foundation.
Fix: Recount Base Round 1. You need 48 stitches.
2. The bag gets wider as you crochet upward
Cause: You are probably working into both the first stitch and the joining slip stitch.
Fix: Mark the first actual stitch. Ignore the slip stitch when beginning the next round.
3. The opening becomes narrower
Cause: The final single crochet round may be too tight, or stitches have been skipped.
Fix: Count 48 stitches and loosen your upper-edge tension.
4. BLO ridges disappear
Cause: You may be working through both loops.
Fix: Tilt the work toward you and insert only beneath the loop farthest from you.
5. One side has a visible diagonal seam
A slight seam is normal in joined rounds.
Keep it neater by joining consistently to the same marked first stitch rather than shifting one stitch each round.
6. The strap stretches too much
Cause: An unreinforced chain is quite elastic.
Fix: Slip stitch back through the chain as instructed, or replace the strap with a denser crochet cord.
7. The bag feels floppy
Possible causes: Hook is too large, yarn is very soft, or tension is loose.
Fix: Move down 0.5 mm in hook size or add a simple fabric lining.
How to Customize This Crochet Project
Change the yarn
For the first version, cotton or cotton-rich yarn is easiest.
You can later experiment with:
- cotton tape;
- recycled cotton;
- smooth raffia-style yarn;
- sturdy acrylic-cotton blends.
Avoid very fluffy yarn if you want the stitch ridges to remain visible.
Use two colors
An easy color plan is:
- main body in one color;
- final two rounds, loop, and strap in a contrast color.
Because the bag has a simple texture, even a small contrast detail stands out.
Make it into a phone bag
Before crocheting the full body height, place your phone against the work.
Stop when the bag is roughly 1/2–3/4 inch taller than the phone.
Add the edge and closure.
Add a flap
Instead of the small button loop, work a separate rectangular crochet flap from the center back edge and finish with a buttonhole.
That makes a useful follow-up project once you are comfortable with the basic bag.
Add a lining
A cotton fabric lining:
- keeps small objects from poking between stitches;
- reduces stretching;
- can make the bag feel more structured.
Add hardware
For a more polished version, sew D-rings at both upper sides and use a detachable purchased strap.
Texture options
After learning the basic construction, you could replace the body repeat with:
- moss stitch;
- waistcoat stitch;
- linked half double crochet;
- granny clusters;
- simple colorwork stripes.
Keep the finished stitch count stable.
Gift ideas
The mini size works particularly well as:
- a travel phone pouch;
- a festival bag;
- a teen gift;
- a small vacation purse;
- a handmade birthday gift;
- a lightweight dog-walking essentials bag.
Finishing Instructions
Fastening off
Cut the yarn approximately 6 inches / 15 cm from the final stitch.
Pull the tail completely through the active loop.
Tighten gently.
Do not cut immediately beside the knot.
Weaving in ends
Thread each yarn tail through a tapestry needle.
Weave through the dense backs of several stitches.
Change direction at least once before trimming.
Pay particular attention to:
- button-loop ends;
- both strap attachments.
Those areas experience more mechanical stress than ordinary decorative yarn ends.
Shaping
Lay the bag flat and straighten the side edges with your hands.
The base fold should sit centered.
Blocking
For cotton, light wet blocking usually works well:
- lightly dampen the bag;
- shape it to the desired dimensions;
- lay flat;
- allow it to dry completely.
Do not aggressively stretch the strap.
Washing and care
Always follow the yarn manufacturer’s care instructions.
If you use a wooden button, hand washing and prompt air drying are safer than repeatedly soaking untreated wood.
Quick Printable-Style Summary
Project: Crochet Mini Crossbody Bag
Skill level: Beginner / confident beginner
Finished size: Approx. 5.5 × 7 in / 14 × 18 cm
Yarn: #3 DK cotton or cotton blend
Hook: 4.0 mm
Notions: Button, tapestry needle, scissors, marker, measuring tape
Stitches: ch, sc, hdc, sl st, sc BLO
Starting method: Ch 24.
Base Round 1: Work around both sides of the foundation chain, increasing at both ends to obtain 48 sc.
Base Round 2: 48 sc without increases.
Body repeat:
Round A — 48 hdc.
Round B — 48 sc BLO.
Repeat until approximately 6.5 in high.
Top: 1 round of 48 sc through both loops.
Closure: Chain loop at center back + button at center front.
Strap: Chain to desired crossbody length, slip stitch back along chain, attach securely to opposite upper sides.
Finishing: Weave in all ends and lightly block.
FAQ
Is this crochet mini crossbody bag pattern suitable for complete beginners?
It is appropriate once you know how to make a chain and single crochet. Half double crochet and BLO placement are introduced within the tutorial.
If you have never held a crochet hook before, practice a small single crochet swatch first.
What is the best yarn for a crochet crossbody bag?
A smooth cotton or cotton-blend yarn is a strong starting point because it gives visible stitches and relatively stable fabric.
If you substitute yarn, prioritize a material that does not stretch excessively under the weight of a phone.
Can I make the bag bigger?
Yes. The easiest beginner adjustment is height: simply crochet additional body repeats.
Changing the width requires altering the foundation-chain length and recalculating the first round.
How long should a crochet crossbody strap be?
There is no universal ideal because torso height and preferred bag position vary.
Approximately 46–50 inches is a useful starting range, but temporarily attach the strap and try the bag on before sewing it permanently.
Why is my crochet bag widening?
The most common reason in this construction is accidentally crocheting into the joining slip stitch.
Maintain exactly 48 stitches per body round and mark the real first stitch.
Does the bag need a lining?
No.
A dense cotton fabric can function without one, but a lining provides additional structure and helps prevent keys or narrow items from pushing through the crochet fabric.
How can I make the strap less stretchy?
Reinforcing the foundation chain with slip stitches helps considerably.
For an even firmer upgrade, use a dense crochet cord, woven strap, or fabric-backed crochet strap.
Conclusion
A mini bag is an excellent place to learn crochet construction because you encounter several genuinely useful techniques in a relatively small project: crocheting around a foundation chain, maintaining a round stitch count, working BLO texture, shaping a firm opening, making a closure, and attaching a load-bearing strap.
Once you understand this construction, you can reuse it for phone pouches, festival bags, children’s purses, travel bags, and larger crossbody designs simply by changing proportions and details.
Save the tutorial before starting, and take a photograph after the foundation round and again after several body rounds. Comparing those stages is one of the easiest ways to catch an accidental increase before it changes the finished shape.





