A crochet football lovey is a fun alternative to a full-size baby blanket when you want something handmade, recognizable, and reasonably quick to finish.
This project combines two beginner-friendly ideas: a small square security blanket inspired by a football field and a soft stuffed football attached securely to the middle.
The result works especially well for football-themed nurseries, baby showers, fall baby gifts, game-day photographs, or handmade gifts for sports-loving families.
You do not need advanced amigurumi experience. If you can make chains, single crochet, double crochet, increases, and decreases, you can work through this project.
The tutorial is divided into manageable sections so you can crochet the blanket first, make the football separately, and then join the two pieces securely.
For reference, medium #4 yarn falls within the Craft Yarn Council’s medium yarn category, and hook size should ultimately be chosen according to the fabric and gauge you need rather than relying only on the letter printed on the hook. Craft Yarn Council
What You’ll Learn
By the end of this tutorial, you will know how to:
- crochet a simple square lovey blanket;
- keep square corners neat and flat;
- make an amigurumi-style football;
- increase gradually without creating bumps;
- change yarn colors cleanly;
- decrease the football symmetrically;
- stuff a crochet shape evenly;
- embroider football laces;
- securely sew a three-dimensional football to a lovey;
- customize the project using team colors.
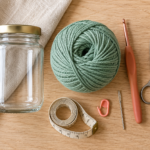
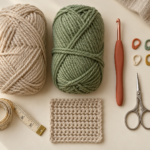
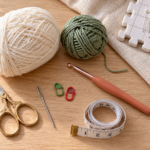
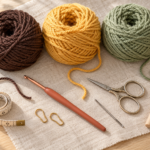
Materials You’ll Need
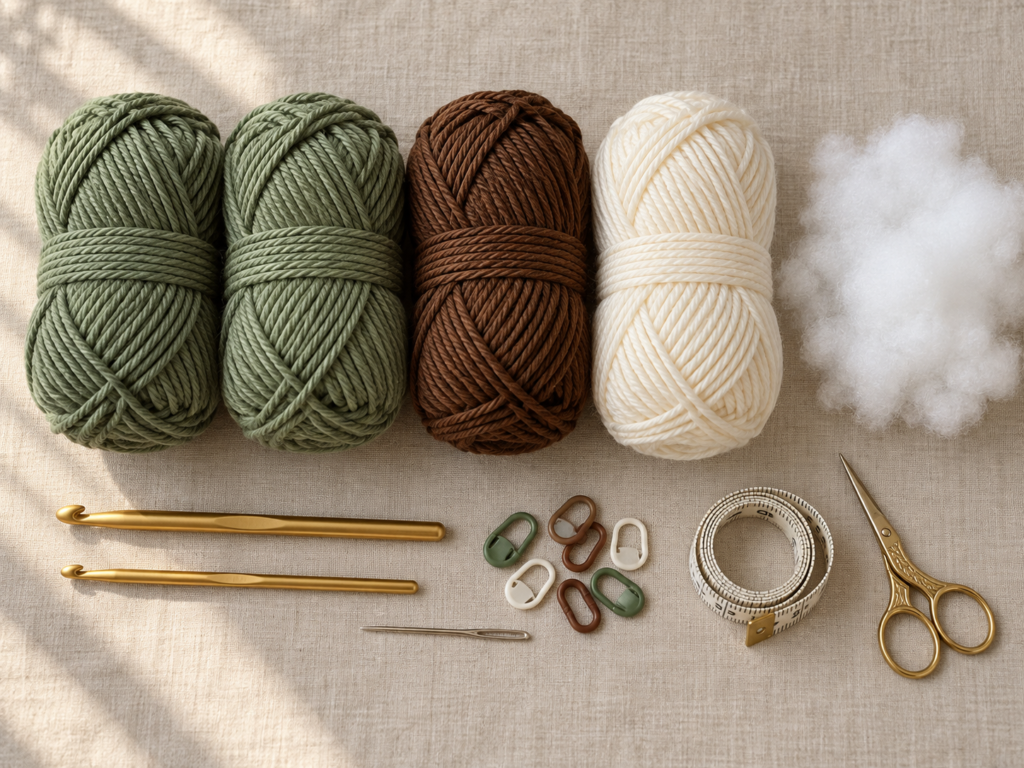
For an approximately 18–20 inch finished lovey, gather:
- 200–250 yards medium #4 sage green yarn;
- 50–75 yards medium #4 warm ivory yarn;
- approximately 40–60 yards medium #4 chestnut brown yarn;
- 5.0 or 5.5 mm crochet hook for the blanket;
- 4.0–4.5 mm crochet hook for the stuffed football;
- polyester fiberfill;
- locking stitch marker;
- blunt tapestry needle;
- small scissors;
- measuring tape.
A slightly smaller hook on the stuffed football helps produce a dense fabric so the filling is less likely to show between stitches.
Crochet Abbreviations Used
This tutorial uses US crochet terminology.
- ch = chain
- sc = single crochet
- dc = double crochet
- sl st = slip stitch
- st/sts = stitch/stitches
- inc = work 2 sc in the same stitch
- dec = single crochet 2 stitches together
- rep = repeat
- rnd = round
The Craft Yarn Council confirms that US single crochet corresponds to UK double crochet, while US double crochet corresponds to UK treble crochet. Craft Yarn Council
Before You Start
Gauge and tension
Exact gauge is not critical for a lovey, but consistency is.
Your blanket should feel soft enough to drape while the football needs tighter stitches.
Aim for:
- blanket: relaxed, flexible tension;
- football: firm, dense tension.
If large gaps appear between the football stitches after you add stuffing, switch to a smaller hook.
Counting stitches
Count after every increase and decrease round on the football.
Small counting mistakes become surprisingly visible because a football should be symmetrical from one end to the other.
Color choice
Traditional football colors are brown and white, but the blanket can use almost any combination.
Good options include:
- sage + ivory;
- forest green + white;
- navy + cream;
- burgundy + beige;
- team colors;
- neutral taupe + cream.
For a baby project, choose yarn that is washable and comfortable against skin.
Safety note
Because this lovey may be used around a baby, avoid:
- buttons;
- beads;
- loose tassels;
- removable decorations;
- loosely attached appliqués;
- long exposed yarn tails.
This tutorial uses embroidered yarn laces instead of plastic pieces.
The football should be sewn securely to the blanket at multiple points.
Step-by-Step Crochet Tutorial
Step 1: Crochet the Center of the Lovey Blanket
We will make an original solid-square blanket with simple double crochet.
Using sage yarn and your larger hook:
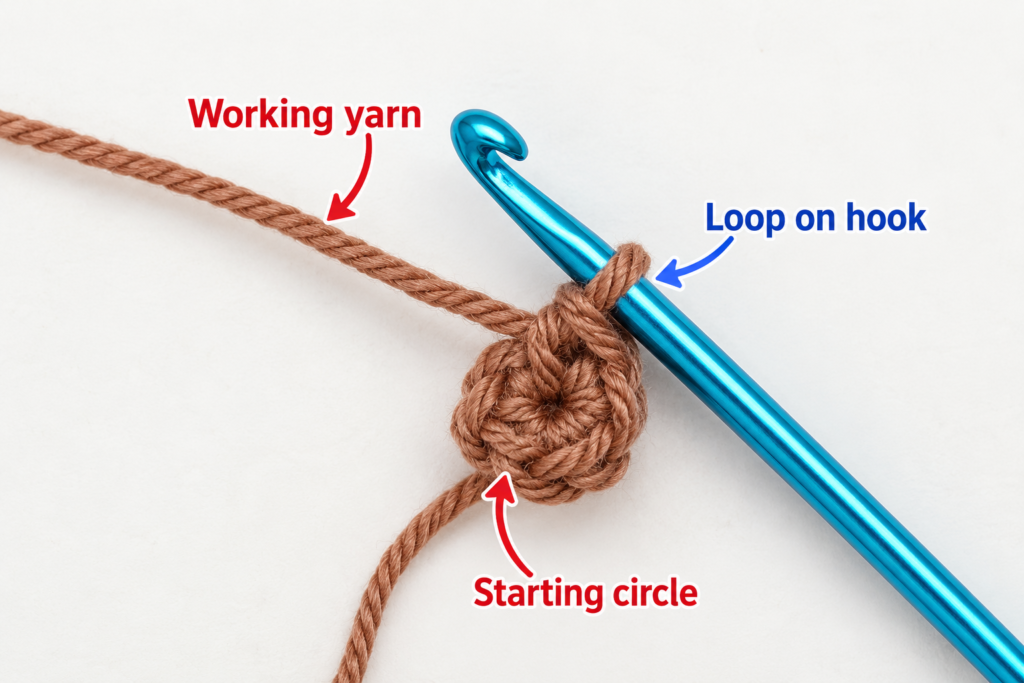
Round 1: Make a magic ring.
Ch 3. The chain counts as the first dc.
Work:
- 2 dc into ring,
- ch 2,
- 3 dc,
- ch 2,
- 3 dc,
- ch 2,
- 3 dc,
- ch 2.
Join to the top of beginning ch-3.
You now have four sides separated by four corner spaces.
Pull the center tail firmly closed.
Beginner tip
Place a stitch marker in the first corner if you have trouble identifying where each round begins.
Common mistake to avoid
Do not place ordinary side increases between the corners. The square grows because you add stitches at each corner.
Step 2: Grow the Solid Square
For the next rounds:
Ch 3.
Double crochet in every stitch until you reach a corner space.
In every corner work:
2 dc, ch 2, 2 dc
Then continue working 1 dc in each stitch along the next side.
Repeat around all four sides.
Join.
Continue this construction until the square measures approximately 15–16 inches before the border.
You do not need a specific number of rounds because yarn thickness and individual tension vary.
Beginner tip
Lay the blanket flat every few rounds.
The corners should form roughly 90-degree angles.
Common mistake to avoid
If you forget one corner increase, that side will begin pulling inward.
If the blanket becomes wavy, check that you have not accidentally added extra stitches along the straight sides.
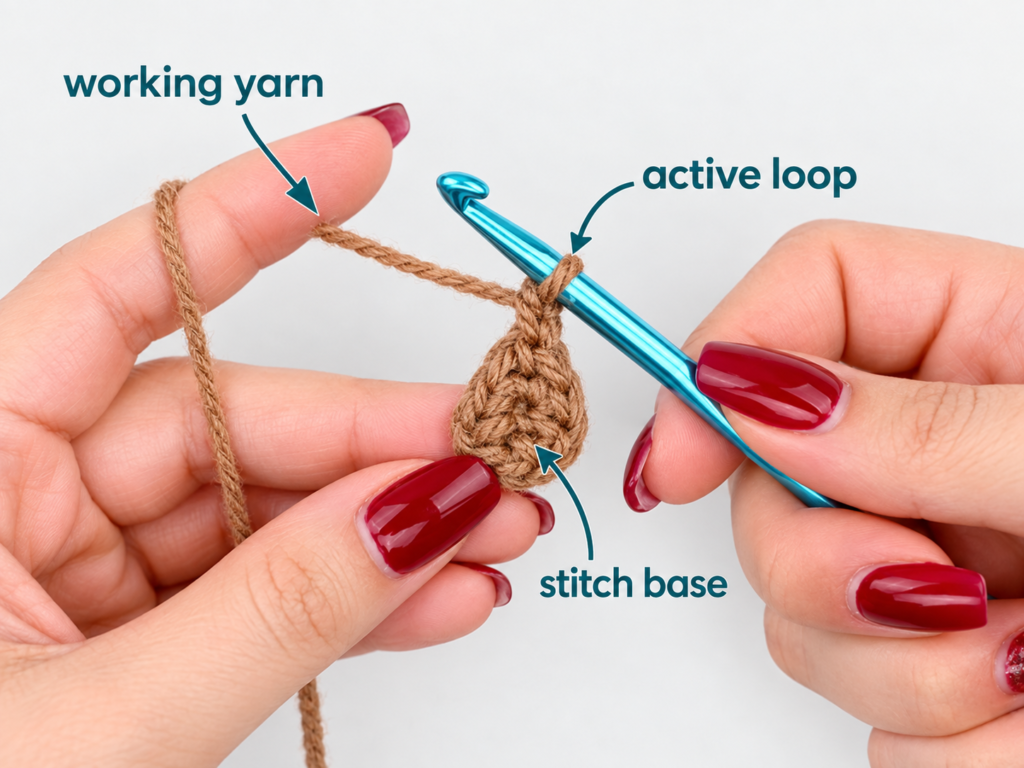
Step 3: Add Football-Field Stripes
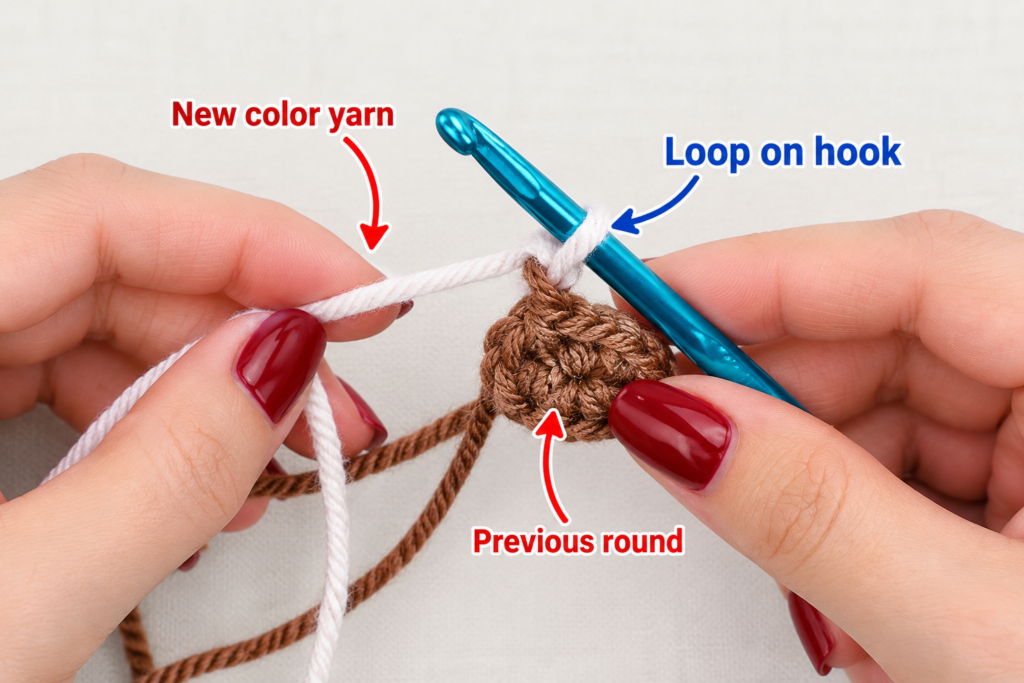
Once your green square is close to the desired size, add a simple ivory round.
Join ivory yarn in any corner.
Work:
- ch 3,
- dc evenly across each side,
- 2 dc, ch 2, 2 dc in every corner.
Complete one full ivory round.
Change back to sage and crochet another 1–2 rounds.
Then add one more ivory round.
This gives the lovey a subtle football-field effect without turning the blanket into a complicated graphghan.
Beginner tip
Complete color changes on the final yarn-over of the stitch before the new color begins.
Common mistake to avoid
Do not cut yarn tails too short. Leave enough yarn to weave securely through several stitches.
Step 4: Finish the Blanket Border
Switch to ivory.
Work one round of single crochet around the entire blanket.
Along the straight sides, place 1 sc in each stitch.
At each corner:
sc, ch 1, sc
into the corner space.
For a slightly firmer finish, work another sc round.
Fasten off.
Weave in all blanket ends before adding the football.
Set the blanket aside.
Make the Crochet Football
The public reference tutorial uses a compact football constructed from single crochet, gradual increases, straight center rounds, corresponding decreases, stuffing, and embroidered laces. Its finished version is slightly over four inches long. One Little Project
The football instructions below use a newly organized shaping sequence suitable for attaching to this lovey.
Step 5: Begin the First Football Point
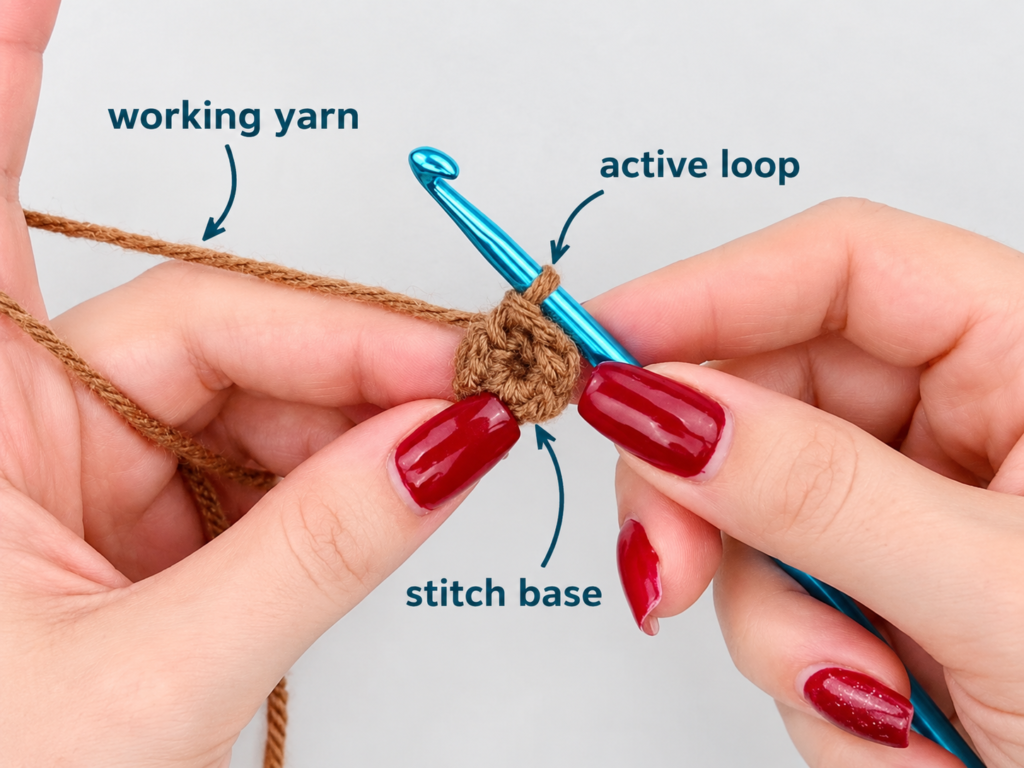
Using chestnut brown yarn and the smaller hook, make a magic ring.
Work 6 sc into the ring.
Do not stuff anything yet.
Mark the beginning of the round.
Beginner tip
Keep the center ring firm but do not pull so hard that the stitches disappear into one another.
Common mistake to avoid
Do not count the loop already on your hook as a stitch.
Step 6: Increase Gradually
Now widen the football.
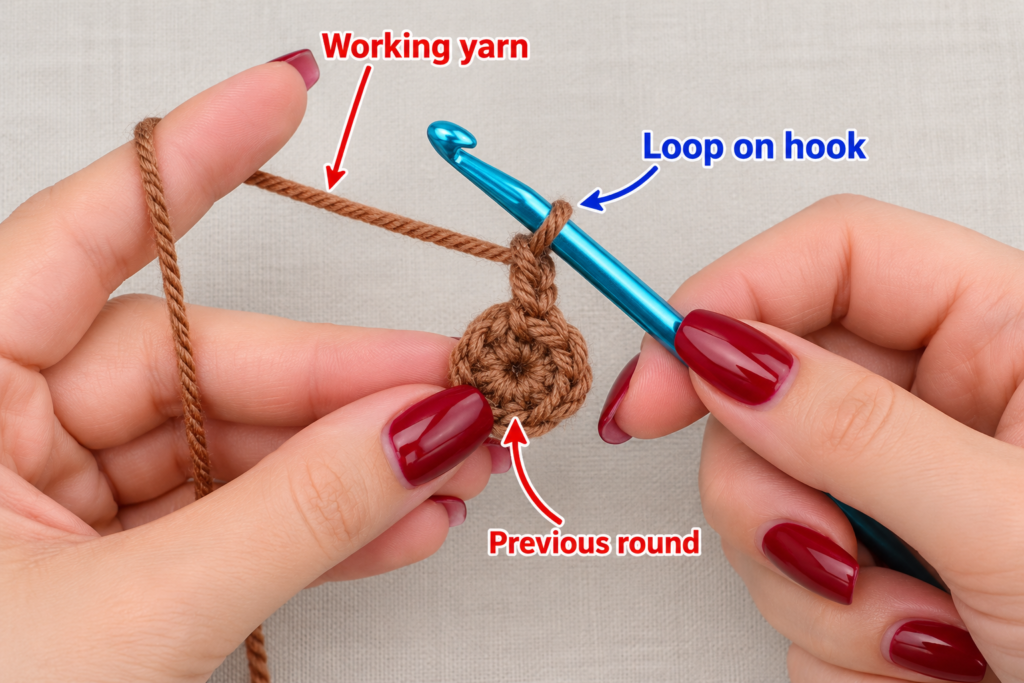
Round 2: Work an increase around strategically so the stitch count grows from 6 to approximately 9.
Round 3: Space another three increases evenly around.
Round 4: Add three more evenly spaced increases.
Continue until the circumference looks proportionate for an approximately 4–5 inch football.
The important principle is more useful than memorizing an arbitrary number:
spread increases evenly rather than stacking them directly above one another.
This keeps the football rounded instead of angular.
Beginner tip
Move your stitch marker at the start of every new round.
Common mistake to avoid
Do not make all increases next to one another. That creates a bulge on one side.
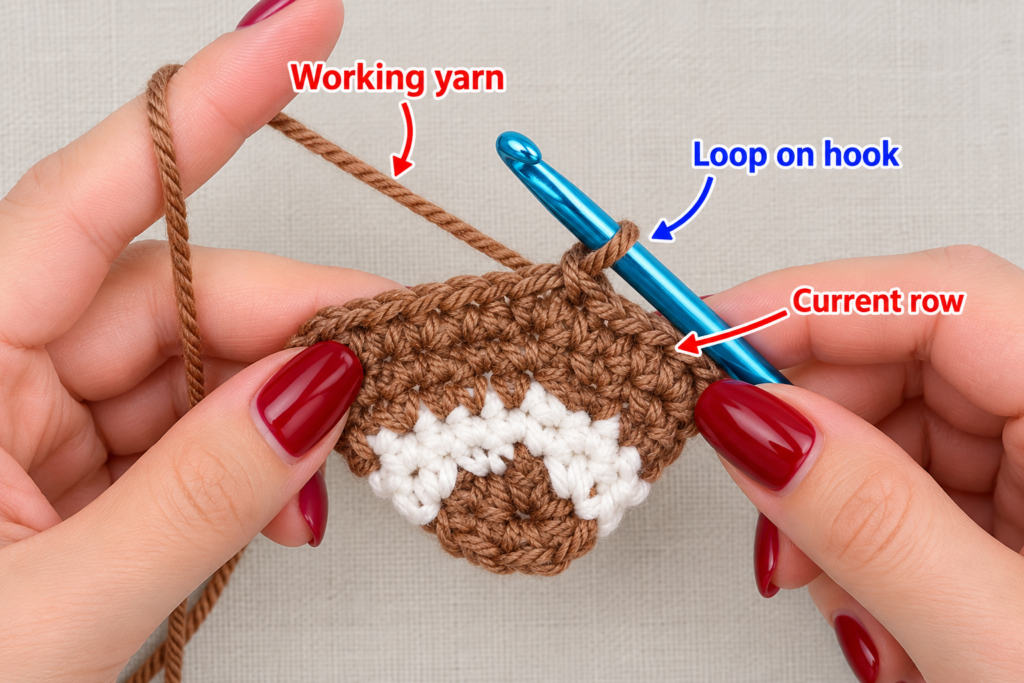
Step 7: Add the First Ivory Stripe
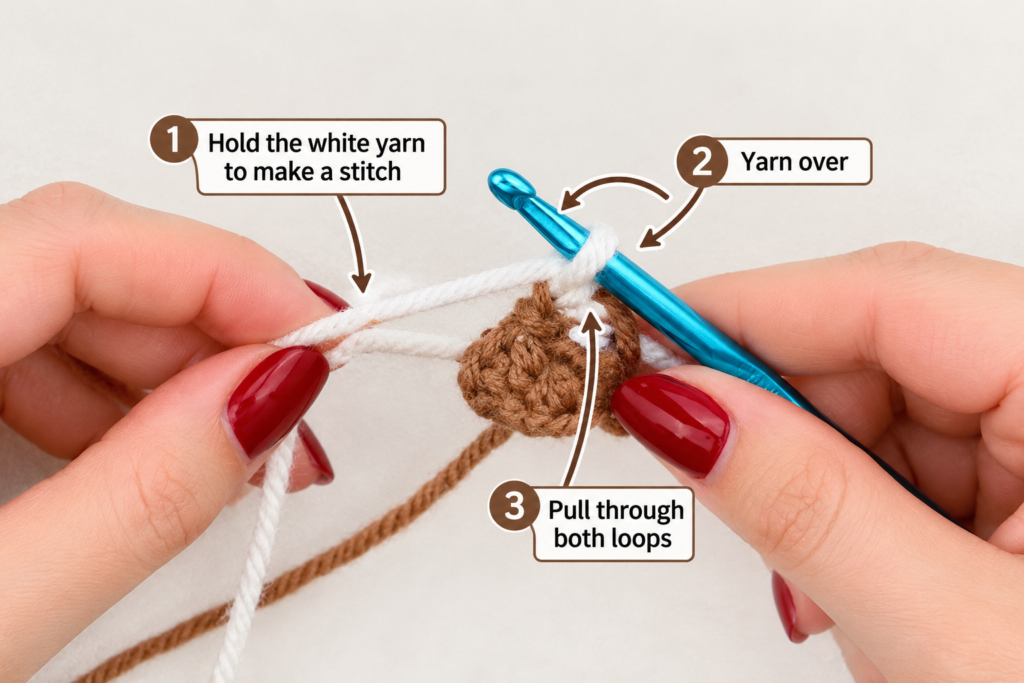
Before reaching the full center section, change to ivory yarn.
Crochet 1–2 rounds in ivory.
Keep your tension consistent with the brown section.
Change back to brown.
Beginner tip
Before finishing the last brown stitch, stop when two loops remain on the hook. Complete the final yarn-over with ivory.
That produces a cleaner transition.
Common mistake to avoid
Do not make the ivory stripe looser than the brown fabric. Uneven tension makes the stripe flare outward.
Step 8: Crochet the Football Center
Continue in brown without increasing for several rounds.
This straight section creates the football’s fullest area.
For a small lovey football, approximately 4–6 even rounds are usually enough, depending on your gauge.
Stop occasionally and hold the piece sideways.
You should see:
- pointed beginning;
- gradual widening;
- ivory stripe;
- rounded middle.
Beginner tip
If you prefer a longer football, add 1–2 extra straight rounds.
Common mistake to avoid
Do not continue increasing after reaching your intended maximum width or the shape will resemble a ball rather than a football.
Step 9: Begin the Decrease Section
Now reverse the widening process.
Instead of increases, work evenly spaced sc2tog decreases.
Reduce by approximately three stitches per shaping round.
Keep decreases evenly distributed.
After one decrease round, work another if necessary until the football begins narrowing clearly.
How to make sc2tog
Insert hook into the next stitch.
Yarn over and pull up a loop.
Insert hook into the following stitch.
Yarn over and pull up another loop.
Yarn over and pull through all loops.
Two stitches have now become one.
Beginner tip
Keep decreases slightly tighter than ordinary single crochet.
Common mistake to avoid
Do not simply skip a stitch. Skipping leaves a visible hole.
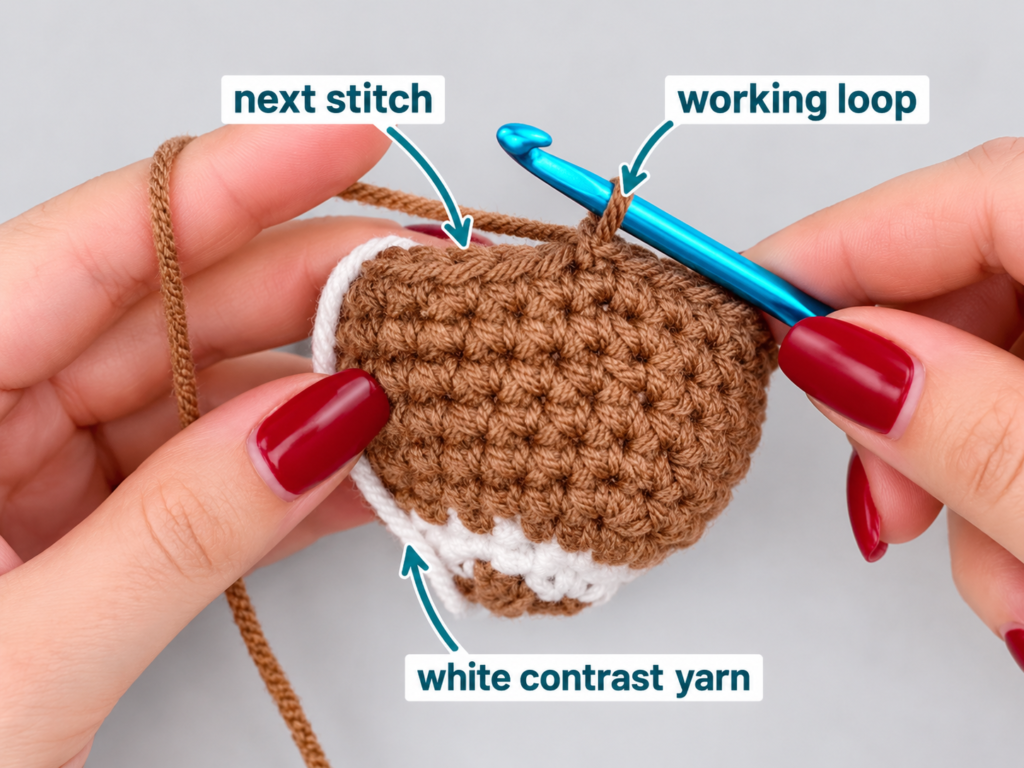
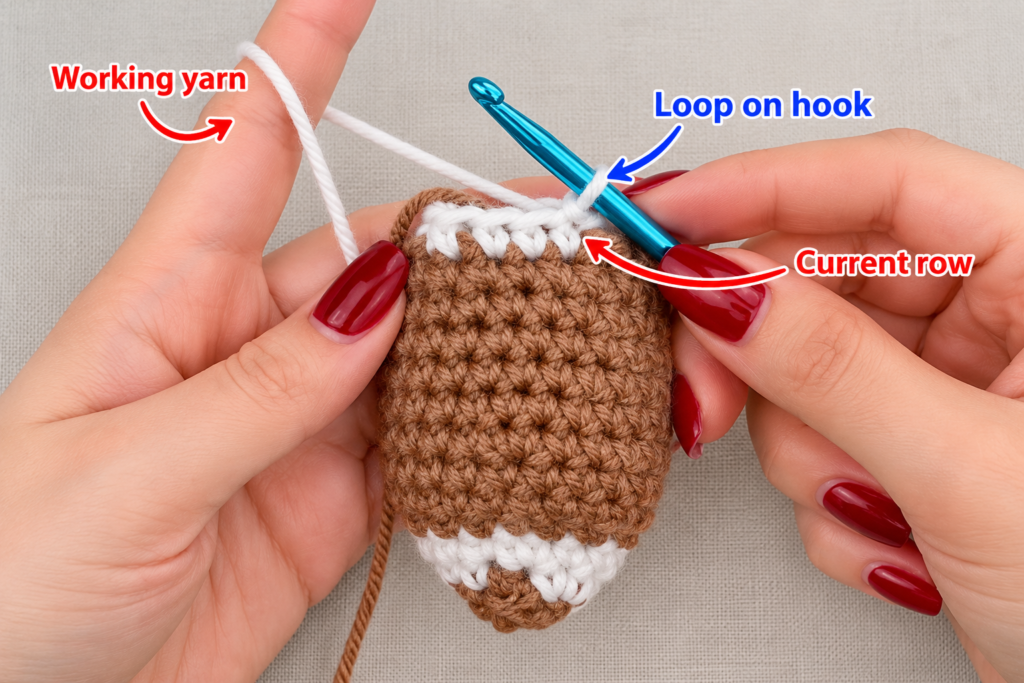
Step 10: Add the Second Ivory Stripe
When the second half approximately mirrors the point where you added the first stripe, change to ivory.
Work the same number of ivory rounds as before.
Then return to brown.
Compare both ends before continuing.
Beginner tip
Count the number of brown rounds between your first stripe and center. Use that as a visual guide for positioning the second stripe.
Common mistake to avoid
A stripe that sits much closer to one end than the other makes the football appear asymmetrical.
Step 11: Stuff the Football
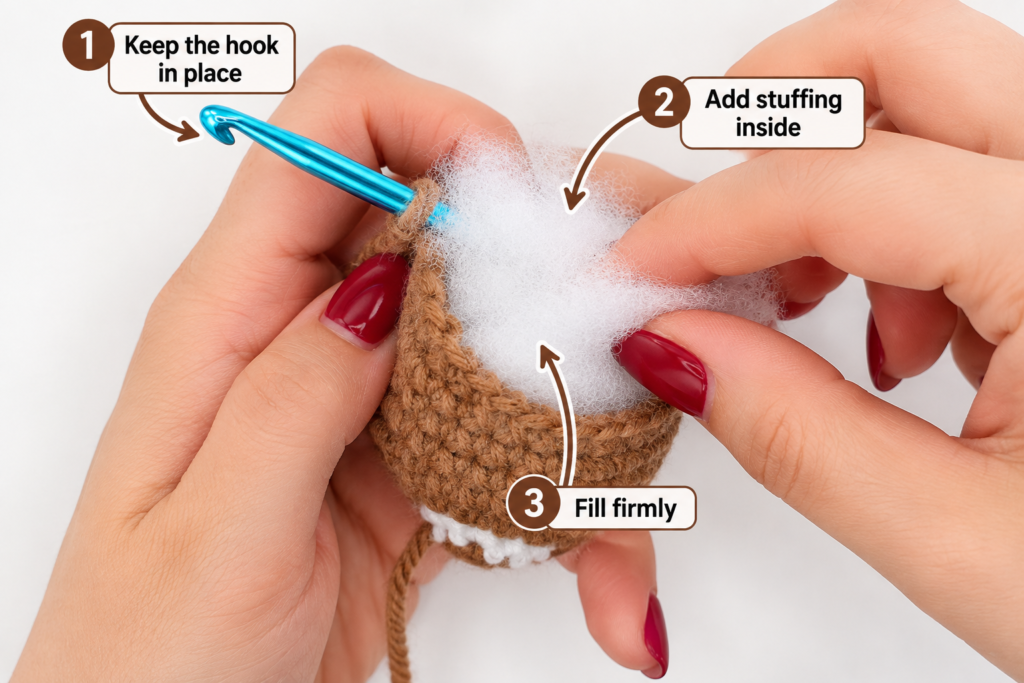
Before the opening becomes too small, pause.
Break polyester filling into small wisps rather than pushing in one large clump.
Add stuffing gradually.
Fill:
- the first point;
- the center;
- around both side walls.
The football should feel springy and hold its shape without becoming rock hard.
Beginner tip
Use the blunt end of your crochet hook or tapestry needle to move stuffing gently toward the first point.
Common mistake to avoid
Overstuffing stretches the stitches and can expose white fiber between them.
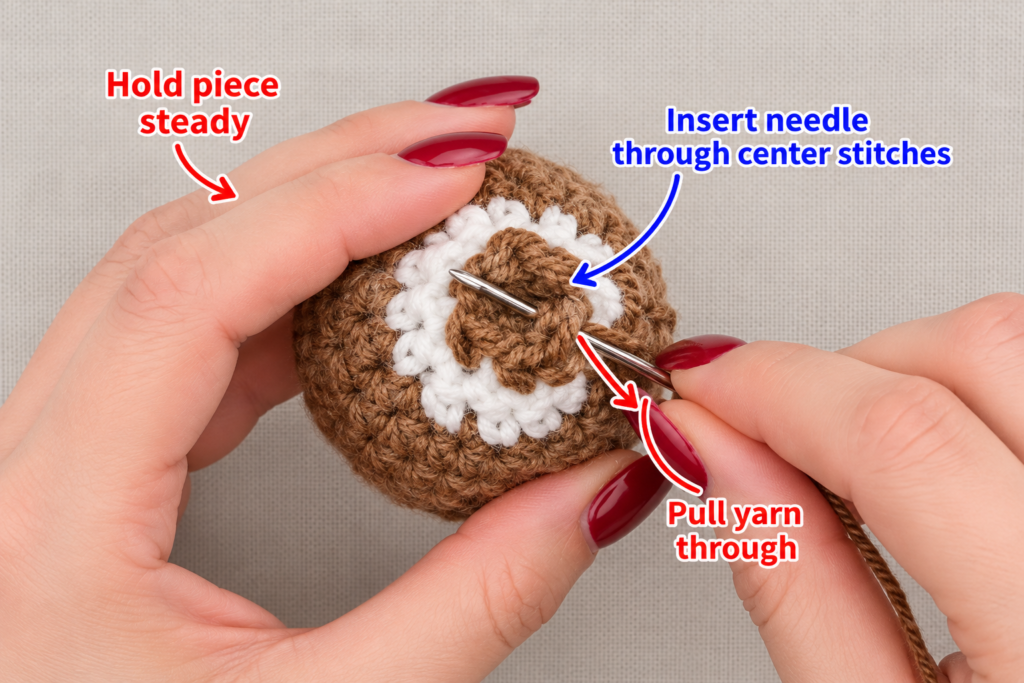
Step 12: Close the Final Point
Continue decreasing in brown until only a small opening remains.
Fasten off, leaving approximately 8 inches of yarn.
Thread the tail onto a tapestry needle.
Pass the needle through the front loops of the remaining stitches.
Pull gradually.
The opening should cinch closed.
Run the needle through the football a second time to secure the closing point.
Hide the remaining tail inside.
Beginner tip
Pull in stages rather than jerking the yarn tightly all at once.
Common mistake to avoid
Do not simply knot two loose tails together outside the football. A properly sewn closure is cleaner and more secure.
Step 13: Embroider the Football Laces
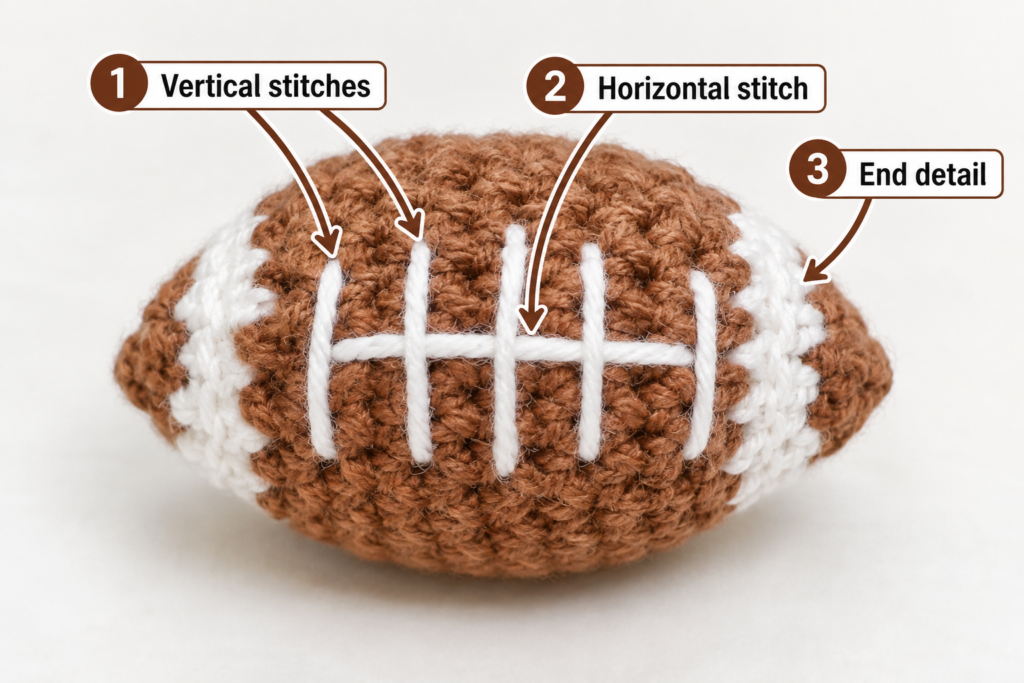
Thread approximately 18 inches of ivory yarn onto a tapestry needle.
On one long side of the football:
- sew one straight horizontal line;
- add four or five shorter perpendicular bars;
- pull the yarn firmly enough to sit against the surface but not enough to distort the stuffing.
Secure both ends inside the football.
The selected reference tutorial also finishes its football with sewn white laces rather than a hard embellishment. One Little Project
For a baby lovey, this is preferable to attaching buttons or plastic details.
Step 14: Attach the Football to the Blanket
Place the blanket flat with the right side facing upward.
Center the football.
For a secure lovey, do not attach the football at only one tiny point.
Thread a long strand of matching brown yarn through a tapestry needle.
Sew through the lower surface of the football and corresponding blanket stitches.
Work around an oval approximately 1½–2 inches long under the football.
Make several passes.
Your stitches should remain hidden beneath the football.
Gently tug the football after sewing.
It should not wobble loosely or pull away from the blanket.
Beginner tip
Pin the football temporarily with locking stitch markers before sewing.
Common mistake to avoid
Do not pierce only individual yarn strands. Pass your needle under complete crochet stitches for a stronger attachment.
Pattern Notes or Stitch Notes
Turning chain
The blanket is worked in joined rounds, so there is no conventional row turning.
The beginning ch-3 counts as a double crochet.
Blanket corner formula
At each square corner use:
2 dc, ch 2, 2 dc
This creates both additional width and a new corner space.
Football rounds
Use a stitch marker even if you choose to join each round.
A marker makes it much easier to verify symmetrical shaping.
Stitch counts
Exact football stitch counts are less important in this original adaptation than maintaining three rules:
- increases are evenly spaced;
- the center is worked even;
- decreases mirror the increase section.
For a precision-focused version, write down the stitch count after every football round and reverse the sequence after the center.
Right side / wrong side
Both sides of the square are usable, but choose the cleaner-looking side as the right side before attaching the football.
Size adjustments
For a smaller 14-inch lovey, stop the green square sooner.
For a 20-inch lovey, continue additional square rounds.
I would not make the stuffed football dramatically larger merely because the blanket is larger. Approximately 4–6 inches keeps it proportional to a lovey.
Common Beginner Mistakes
1. The blanket starts rippling
Cause: Too many stitches were added along the sides.
Fix: Work only one dc in each side stitch and reserve the extra stitches for the four corners.
2. One corner looks rounded instead of square
Cause: The corner chain space was missed.
Fix: Mark every corner with a locking marker until you can identify them easily.
3. Football stuffing shows between stitches
Cause: The hook is too large, tension is too loose, or the football is overstuffed.
Fix: Use a slightly smaller hook and add less filling.
4. The football looks like a round ball
Cause: Too many increase rounds or too few straight center rounds.
Fix: Stop widening sooner and extend the middle by one or two even rounds.
5. One football end is larger than the other
Cause: The decrease sequence does not mirror the increases.
Fix: Write down your increase counts before beginning the second half.
6. White stripes spiral
Cause: The beginning of the rounds is shifting.
Fix: Mark the beginning consistently and ensure color changes start at the same seam area.
7. The football moves around after attachment
Cause: It was sewn at only one small central point.
Fix: Attach it around a hidden oval underneath the football with several passes through sturdy blanket stitches.
How to Customize This Crochet Project
Change the team colors
The obvious customization is the blanket.
Keep the football brown and ivory and change the field to:
- navy;
- burgundy;
- royal blue;
- orange;
- purple;
- red;
- team-specific combinations.
You can also reverse the design and use a neutral blanket with colored border rounds.
Make a vintage version
Use:
- oatmeal;
- muted olive;
- dark chestnut;
- antique ivory.
This produces a softer handmade nursery aesthetic.
Change the blanket texture
Once you understand the construction, the square could be replaced with:
- moss stitch;
- granny stitch;
- lemon peel stitch;
- linen stitch;
- half double crochet;
- simple corner-to-corner fabric.
For a beginner project, solid double crochet remains one of the easiest options because stitch placement is highly visible.
Make the football flatter
If you want less bulk for a young baby, lightly stuff the football instead of filling it firmly.
Another option is a flat two-layer football appliqué sewn over a broad area, although that would require a different football construction.
Add initials
For nursery décor rather than unsupervised infant use, you could embroider initials directly into the blanket.
Avoid beads or separate letters that could loosen.
Turn it into a larger blanket
The same square structure can simply continue growing.
However, once you move beyond lovey size, I recommend treating the football as an appliqué rather than a cuddle attachment so the blanket remains comfortable for sleeping and folding.
Finishing Instructions
Inspect every yarn tail.
No tail should be loose enough to pull free.
Check:
- four blanket corners;
- ivory stripe changes;
- football closing seam;
- embroidered laces;
- football attachment.
Weave each end through several neighboring stitches, change direction, then weave through again.
Blocking
Acrylic loveys usually need little blocking.
If the square looks uneven:
- lay it flat;
- gently shape the sides;
- lightly steam from a safe distance if appropriate for your yarn.
Never press a hot iron directly against synthetic yarn.
For washable fibers, wet blocking is another option.
Washing
Follow the care instructions printed on the yarn label.
For a baby gift, washable yarn is particularly practical.
Place the lovey inside a mesh laundry bag if machine washing is permitted, especially because it includes a stuffed component.
Allow the football to dry completely through the center.
Quick Printable-Style Summary
Project: Crochet Football Lovey
Skill level: Advanced beginner
Finished size: Approximately 18–20 inches square
Yarn: Medium #4 washable yarn
Colors: Sage green, ivory, chestnut brown
Blanket hook: 5.0–5.5 mm
Football hook: 4.0–4.5 mm
Main stitches: ch, sc, dc, sl st, inc, dec
Blanket start: Magic ring / center square
Blanket repeat: 1 dc in each side stitch; 2 dc, ch 2, 2 dc in every corner
Football start: Magic ring
Football shaping: Increase → even center → decrease
Football decoration: Ivory stripes + embroidered laces
Finishing: Stuff football, close securely, attach firmly to center of blanket, weave all tails
FAQ
Is a crochet football lovey suitable for beginners?
Yes, especially for someone who already understands single crochet and double crochet.
The football introduces increases and decreases, making this an excellent first small amigurumi-style project.
What size should a football lovey be?
There is no single required lovey size.
Approximately 14–20 inches square works well for a small security blanket. One published football-lovey listing describes an approximately 18-inch finished blanket, which is a useful scale reference. Etsy
What yarn is best for a crochet football lovey?
Medium #4 yarn is convenient because it is readily available and produces a substantial but still flexible fabric. The Craft Yarn Council categorizes worsted and Aran yarns within the medium category. Craft Yarn Council
Choose a soft, washable yarn when the project is intended for a child.
Can I use cotton?
Yes.
Cotton gives excellent stitch definition, but it can create a heavier blanket.
A soft acrylic or acrylic/cotton blend tends to produce a lighter lovey.
How much should I stuff the football?
Enough for it to hold its football shape without stretching the stitches apart.
If filling becomes visible through the fabric, remove some stuffing.
Can I add safety eyes?
For this football lovey, I recommend leaving the football faceless.
The clean sports design does not need eyes, and embroidered yarn details eliminate additional detachable components.
Can I use my favorite team’s colors?
Absolutely.
Keep the basic football shape and customize the blanket, borders, stripes, or even football body with team colors.
That is one reason football loveys work particularly well as personalized baby shower gifts.
Conclusion
This crochet football lovey combines enough techniques to feel interesting without requiring an advanced pattern.
The square blanket builds repetitive double crochet practice, while the football introduces shaping, color changes, stuffing, embroidery, and assembly.
The most important part is not making every stitch absolutely perfect. Concentrate on consistent tension, symmetrical football shaping, neat color changes, and a very secure final attachment.
Once you have made the first one, the same construction can easily become a collection of team-color loveys for baby showers, fall markets, nursery gifts, or football-season crochet projects.