There’s something special about decorating a room with something you’ve made by hand. A little row of crocheted triangle flags can turn an ordinary shelf, nursery wall, party table, or craft corner into a cozy space without requiring much yarn or complicated stitching.
This crochet pennant banner pattern is an easy way to practice your basic crochet skills while making something useful and decorative. Each little flag is worked in simple rows, gradually narrowing into a pointed triangle. Once you’ve made enough flags, you’ll connect them with a crocheted cord to create your own handmade bunting.
The best part? You don’t need to know fancy stitches, follow a complicated chart, or make perfectly matching colors. If you can make a chain and single crochet, you’re already well on your way.
In this step-by-step tutorial, I’ll show you how to crochet a simple triangle pennant, shape the sides with easy decreases, add a tidy border, and join the finished flags into a beautiful banner.
You can make the entire garland in one color for a clean look, or use leftover yarn to create a cheerful collection of colorful flags.
What You’ll Learn
By the end of this tutorial, you’ll know how to:
- Crochet a flat triangle pennant using basic stitches.
- Shape a triangle with simple single crochet decreases.
- Keep your stitch counts correct as the triangle gets smaller.
- Make several pennants that match in size.
- Add a neat border and finish the pointed corners.
- Join multiple flags into one continuous banner.
- Customize the finished garland for different rooms, seasons, and celebrations.
This pattern works especially well for beginners who want to move beyond making scarves and washcloths.
Project Overview
| Detail | Pattern information |
|---|---|
| Skill level | Beginner |
| Construction | Flat rows, then joining |
| Finished pennant | Approximately 4–5 inches (10–13 cm) wide and tall |
| Sample banner | Six pennants |
| Approximate display span | 3–4 feet (90–120 cm), including ties |
| Yarn weight | DK / light worsted cotton |
| Crochet hook | 4.0 mm |
| Main stitch | US single crochet |
| Time | 25–40 minutes per pennant |
| Terminology | US crochet terms |
The measurements are approximate because the yarn, individual tension, edging, and blocking all affect the finished size. The written pattern determines the stitch counts; measure your first finished flag before planning the final banner length.
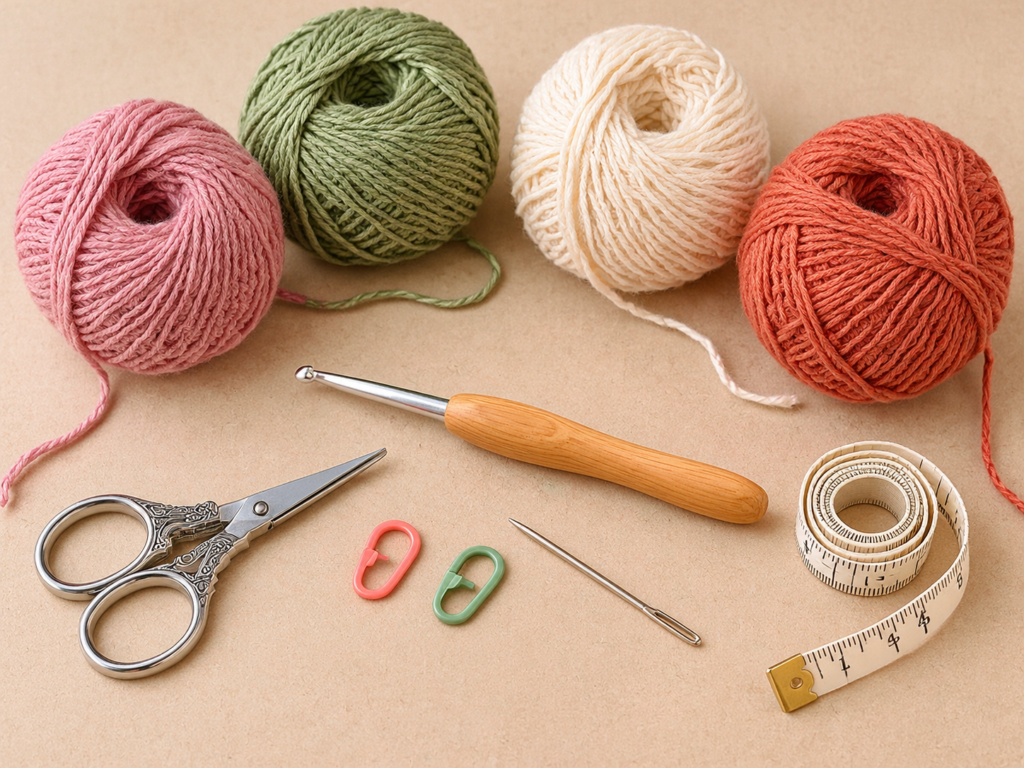
Materials You’ll Need
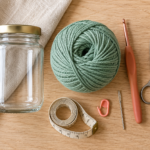
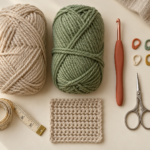
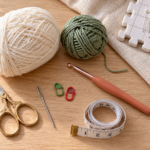
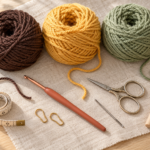
You don’t need a large collection of crochet supplies to get started. Most of the materials are items you may already have in your craft basket.
Yarn: Choose DK-weight cotton yarn in three or four colors. For this sample, use dusty rose, sage green, warm ivory, and muted terracotta.
A small amount of each color is usually enough for several miniature pennants, although total consumption will vary. Around 75–100 grams of DK cotton across all colors is a practical starting allowance for a six-flag project, with extra if you want a long cord or generous borders.
Crochet hook: A 4.0 mm hook is a comfortable starting point for DK cotton. If your yarn label recommends a different hook, start with that size and make a test triangle.
Scissors: Use a sharp pair to trim yarn ends.
Yarn needle: A blunt tapestry needle makes it easier to weave in loose ends.
Stitch markers: Optional, but helpful for marking the beginning of a row and identifying the foundation edge.
Measuring tape: Useful for checking the width of your first pennant and spacing the finished flags evenly.
Blocking supplies: Optional rustproof pins and a suitable blocking mat help straighten the triangle corners.
Choosing the right yarn
Cotton yarn is a good choice for decorative banners because it provides clear stitch definition and generally keeps its shape well.
Acrylic yarn also works, especially if you want to use leftovers. Just keep in mind that very stretchy or loosely spun yarn can create softer flags that may need more careful blocking.
For your first banner, I recommend avoiding fluffy, novelty, or heavily textured yarn. Smooth yarn will make it easier to see where to insert your hook and count stitches.
Crochet Abbreviations Used
This tutorial uses US crochet terms.
| Abbreviation | Meaning |
|---|---|
| ch | Chain |
| sc | Single crochet |
| sc2tog | Single crochet two together |
| sl st | Slip stitch |
| st / sts | Stitch / stitches |
| rep | Repeat |
| FO | Fasten off |
In UK terminology, the US single crochet is called a double crochet. If you’re used to British crochet patterns, keep this difference in mind.
How to make a single crochet decrease (sc2tog)
A single crochet decrease turns two stitches into one.
Insert your hook into the first stitch, yarn over, and pull up a loop. You should have two loops on your hook.
Insert your hook into the next stitch, yarn over, and pull up another loop. You should now have three loops on the hook.
Yarn over one more time and pull through all three loops.
You’ve completed one sc2tog, reducing the stitch count by one.
This technique is the key to creating the sloping sides of the pennant.
Before You Start
Check your gauge and tension
Unlike a fitted sweater, this decorative banner doesn’t require a strict gauge. However, your stitch tension should remain reasonably consistent across all the flags.
If your first triangle is much larger than expected, try a slightly smaller hook. If it looks stiff and the stitches are difficult to work into, try a slightly larger hook.
Don’t worry about matching an exact number of stitches per inch. The main goal is to make every pennant approximately the same size.
Learn to count your stitches
Single crochet stitches look like little V shapes along the top of the row. Each complete V counts as one stitch.
The turning chain used in this pattern does not count as a stitch.
This is particularly important when you begin the decrease rows. Accidentally working into the turning chain can create extra stitches and uneven edges.
Understand how the triangle is made
This pattern starts at the wide top edge of the pennant and works downward toward the pointed bottom.
The first row is the widest. Each decrease row removes one stitch from each end, reducing the width by two stitches. A plain row follows each decrease row so the triangle narrows gradually rather than too sharply.
The last row forms the tip.
Know which side is facing
Both sides of ordinary single crochet fabric can look attractive. For a decorative banner, you can choose the side you prefer as the front.
The most important thing is consistency. When joining your pennants, keep the chosen front side facing the same direction.
Keep your working yarn relaxed
If you pull the yarn too tightly after every stitch, your triangle can curl. This is especially noticeable along the foundation chain.
Try to maintain a gentle, steady tension. Your stitches should be firm enough to hold their shape but loose enough to insert the hook comfortably.
Step-by-Step Crochet Tutorial
The following is an original pattern for a simple solid triangle pennant. Work one complete test triangle before making all six.
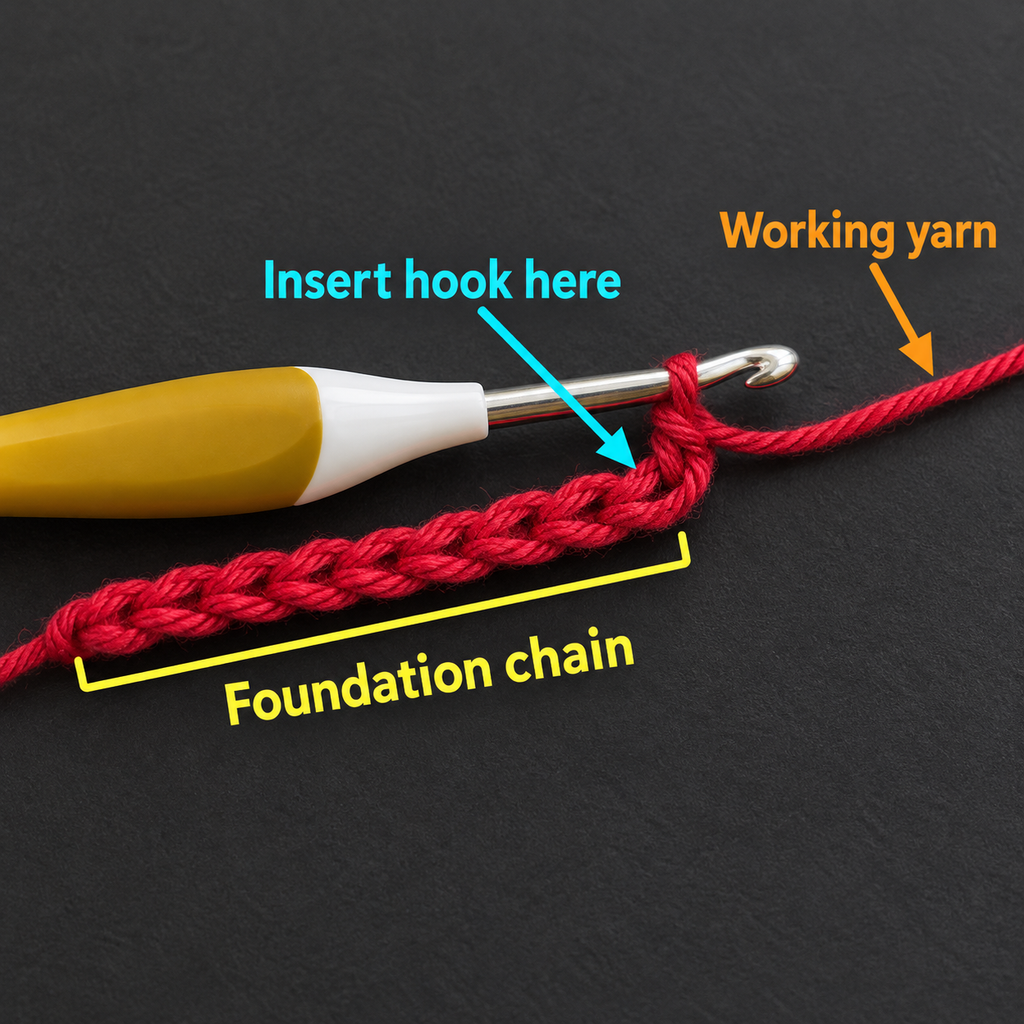
Step 1: Make the foundation chain
Start with your first yarn color. For this sample, we’ll use dusty rose.
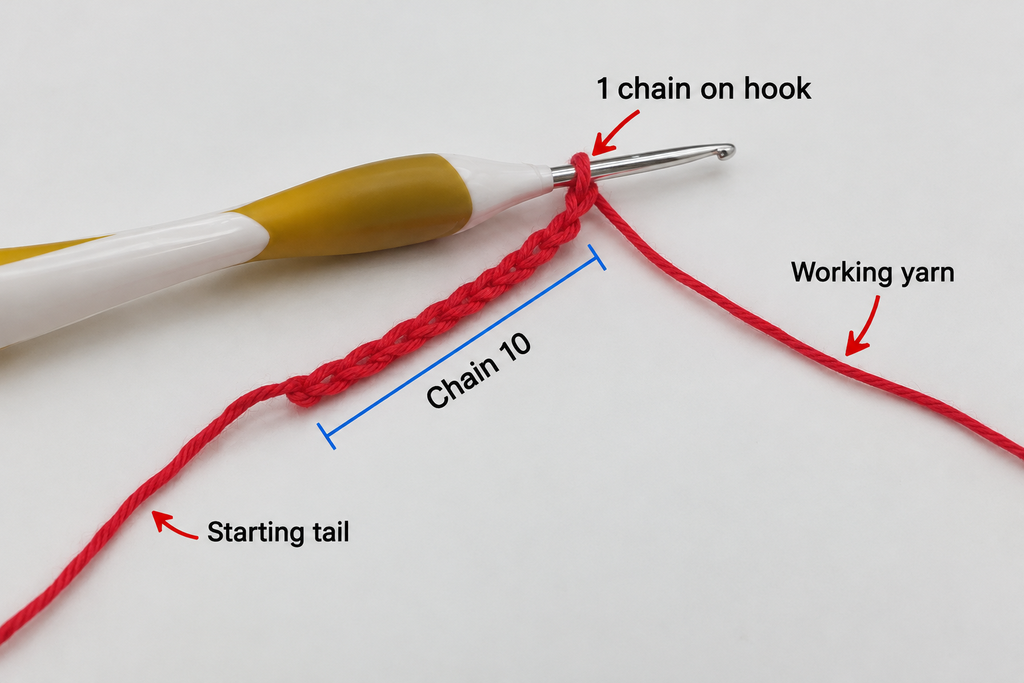
Make a slip knot and place it on your crochet hook.
Chain 23 stitches.
Try to keep the chains uniform without pulling them tight. The chain should rest comfortably on the tabletop without twisting.
This foundation will become the wide top edge of your triangle, so take a moment to make sure the stitches look even.
Beginner tip: If you frequently crochet your starting chain too tightly, use a hook 0.5 mm larger for the chain and switch back to your regular hook for Row 1.
Common mistake to avoid: Don’t count the slip knot or the working loop on your hook as a chain stitch.
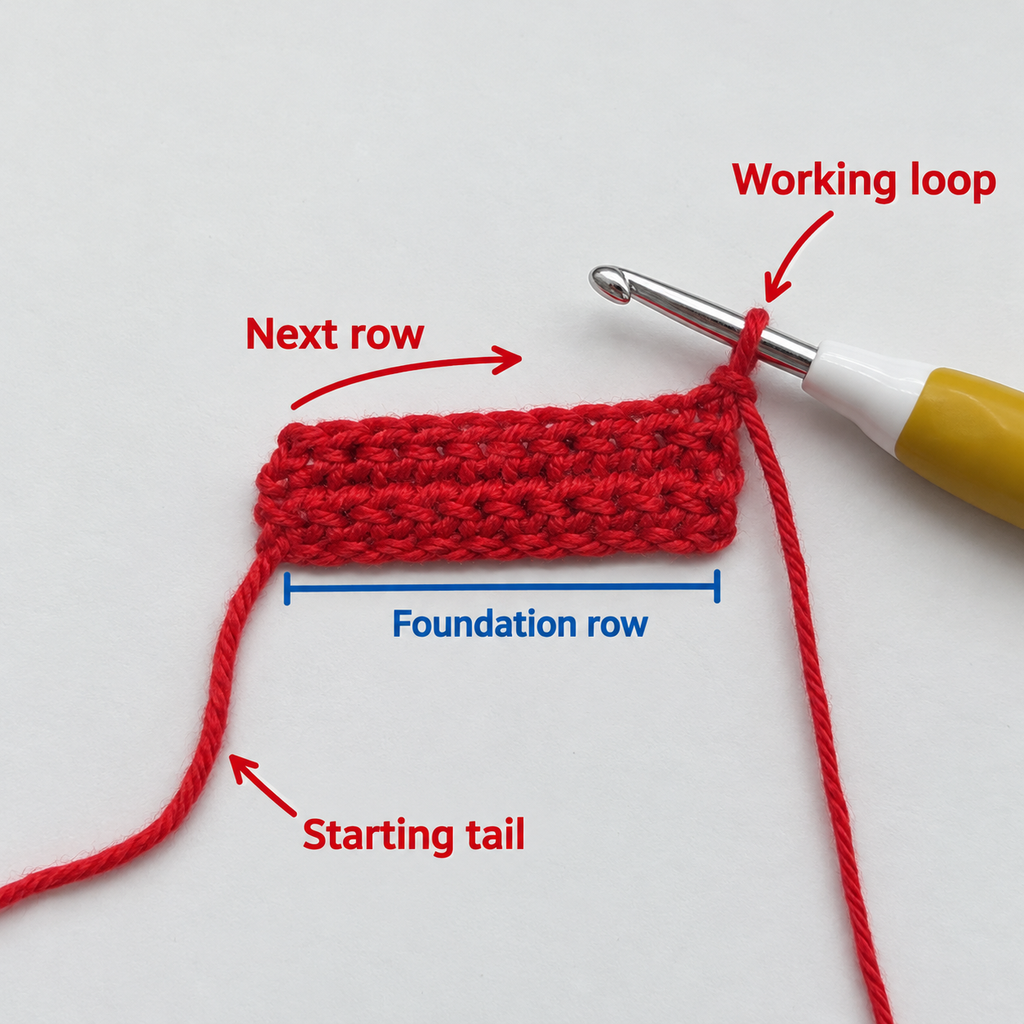
Step 2: Crochet the first row
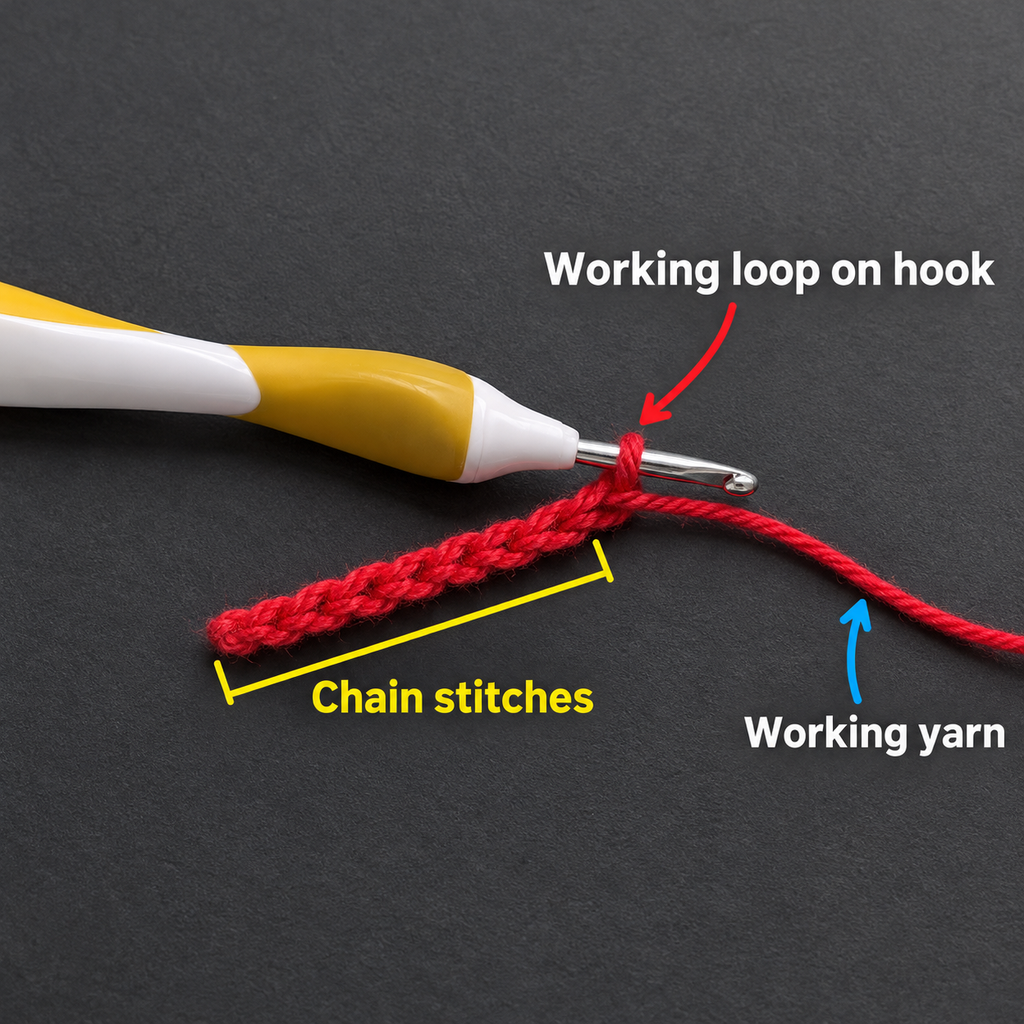
Now you’ll turn the foundation chain into a flat row of single crochet stitches.
Insert your hook into the second chain from the hook.
Yarn over and pull up a loop. Yarn over again and pull through both loops.
You’ve made your first single crochet stitch.
Continue making one single crochet in each remaining chain across the foundation.
When you reach the end, you should have 22 single crochet stitches.
Count them carefully before moving on.
This row becomes the top edge of the finished pennant. Later, you’ll attach the banner cord along this foundation edge.
Row 1: Sc in the second ch from hook and in each ch across. Turn. (22 sts)
Beginner tip: Lay the row flat and gently smooth it with your fingers. This helps you identify whether you missed a chain or accidentally worked into the same chain twice.
Common mistake to avoid: Starting in the first chain from your hook produces a different stitch count. Make sure you begin in the second chain.
Step 3: Make your first decrease row
This is where the triangle begins to take shape.
Chain 1 and turn your work. Remember, the turning chain does not count as a stitch.
Work a single crochet decrease across the first two stitches.
Next, make one single crochet in each of the following 18 stitches.
Finally, work another single crochet decrease across the last two stitches.
Your row should now contain 20 stitches.
Row 2: Ch 1, turn, sc2tog, sc in next 18 sts, sc2tog. (20 sts)
Take a look at the ends of the row. Both sides should have narrowed slightly.
By decreasing at the beginning and end, you create a balanced triangle with a point that remains centered as you continue.
Beginner tip: Place a removable stitch marker in the first completed stitch after turning. It helps you identify the beginning of the row.
Common mistake to avoid: Accidentally making a regular single crochet in the first stitch before your decrease. The decrease itself is the first stitch of the row.
Step 4: Work a plain row to maintain the shape
After the first decrease row, you’ll make a plain row without decreasing.
Chain 1 and turn.
Work one single crochet in each stitch across the row.
You should still have 20 stitches when you finish.
Row 3: Ch 1, turn, sc in each st across. (20 sts)
Why add a plain row?
If you decrease too quickly, the triangle can become very short and wide. Placing an even row between decrease rows helps create a longer, more traditional pennant shape.
Look at your work from a short distance. You should see a wide top edge with the beginning of two gently sloping sides.
Beginner tip: Count your stitches after every plain row, not just the decrease rows. It’s easier to correct a mistake immediately than to discover it near the bottom point.
Common mistake to avoid: Don’t make a decrease in this row. All 20 stitches should remain unchanged.
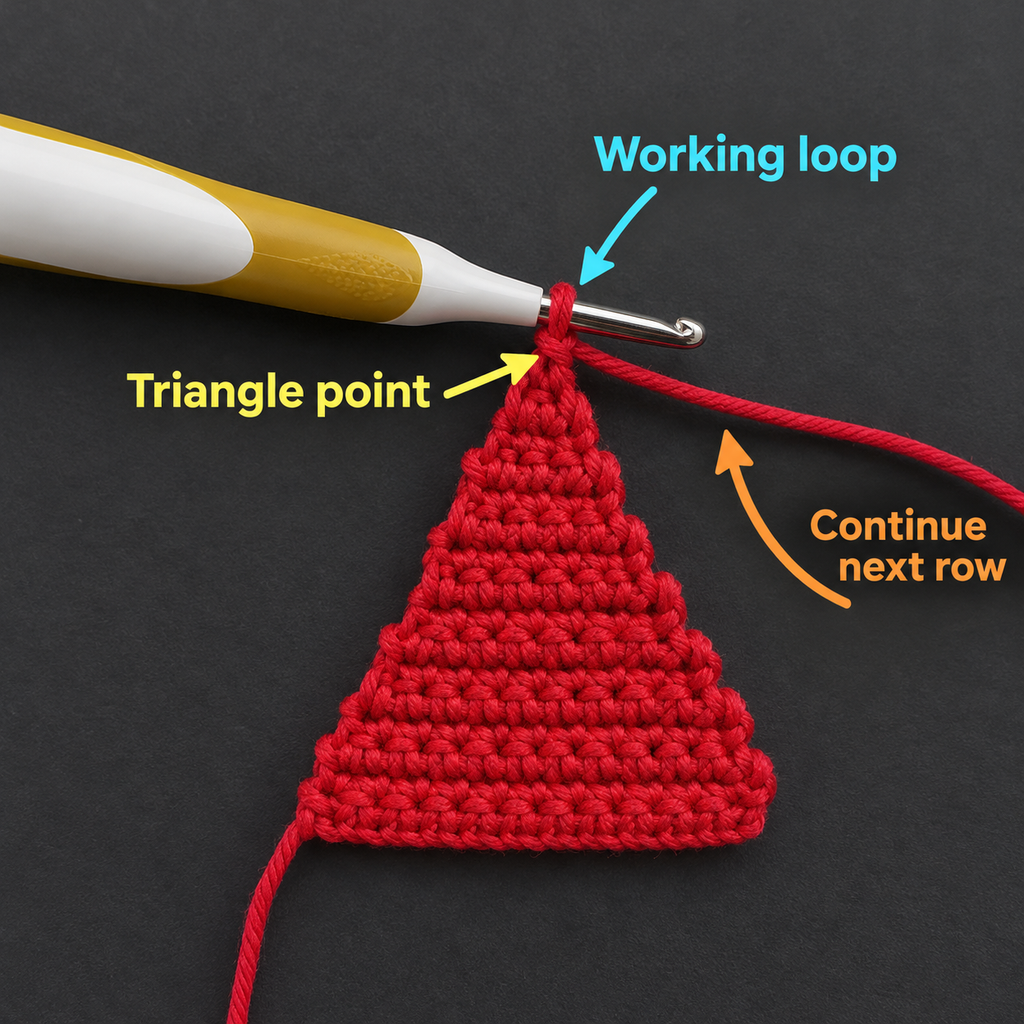
Step 5: Continue shaping the triangle
Now that you’ve practiced one decrease row and one plain row, you’ll repeat the same idea until the triangle becomes narrow.
On each decrease row, work sc2tog at the beginning and at the end, with regular single crochet stitches between them.
On the next row, work plain single crochet across without any decreases.
Here is the complete sequence for the middle and lower sections of your pennant.
| Row | Instructions | Stitch count |
|---|---|---|
| 4 | Ch 1, turn, sc2tog, sc 16, sc2tog | 18 |
| 5 | Ch 1, turn, sc across | 18 |
| 6 | Ch 1, turn, sc2tog, sc 14, sc2tog | 16 |
| 7 | Ch 1, turn, sc across | 16 |
| 8 | Ch 1, turn, sc2tog, sc 12, sc2tog | 14 |
| 9 | Ch 1, turn, sc across | 14 |
| 10 | Ch 1, turn, sc2tog, sc 10, sc2tog | 12 |
| 11 | Ch 1, turn, sc across | 12 |
| 12 | Ch 1, turn, sc2tog, sc 8, sc2tog | 10 |
| 13 | Ch 1, turn, sc across | 10 |
| 14 | Ch 1, turn, sc2tog, sc 6, sc2tog | 8 |
| 15 | Ch 1, turn, sc across | 8 |
| 16 | Ch 1, turn, sc2tog, sc 4, sc2tog | 6 |
| 17 | Ch 1, turn, sc across | 6 |
| 18 | Ch 1, turn, sc2tog, sc 2, sc2tog | 4 |
| 19 | Ch 1, turn, sc across | 4 |
| 20 | Ch 1, turn, sc2tog twice | 2 |
| 21 | Ch 1, turn, sc across | 2 |
At the end of Row 21, your triangle should have a narrow working edge containing just two stitches.
The overall shape should look reasonably symmetrical, with the tip directly below the middle of the foundation row.
Beginner tip: Write the row number on a small piece of paper as you crochet, or use a row counter. When rows become shorter, it’s easy to lose track of whether you should decrease or work evenly.
Common mistake to avoid: Never assume your count is correct just because the triangle looks reasonable. Missing a stitch early can make one side noticeably steeper.
Step 6: Finish the pointed tip
You’re almost finished crocheting your first triangle.
At this stage, only two stitches remain.
Chain 1 and turn your work.
Make one final sc2tog across those two stitches.
You should now have one stitch at the point.
Row 22: Ch 1, turn, sc2tog. (1 st)
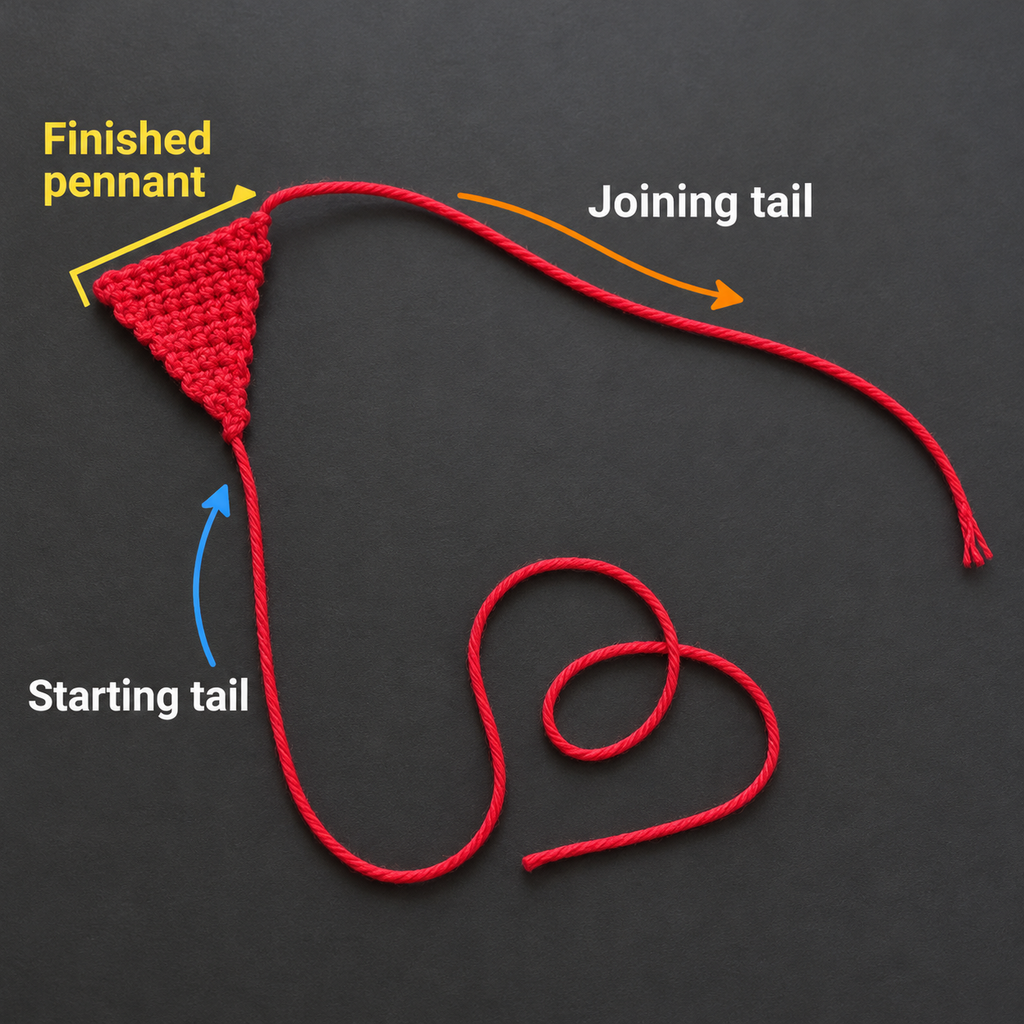
Cut your working yarn, leaving a tail of around 6 inches (15 cm).
Yarn over with the cut end and pull the tail completely through the remaining loop to secure the point.
Don’t pull so tightly that the tip bunches up. A small, neat final stitch creates a much cleaner triangle.
Lay the pennant on a flat surface and inspect the shape.
If the point looks slightly rounded, that’s normal before blocking. If one side is dramatically longer than the other, review your stitch counts.
Beginner tip: Use a yarn needle to guide the yarn tail through nearby stitches on the back of the triangle rather than pulling the final knot extremely tight.
Common mistake to avoid: Don’t add an extra single crochet after the final decrease. The completed decrease is the point.
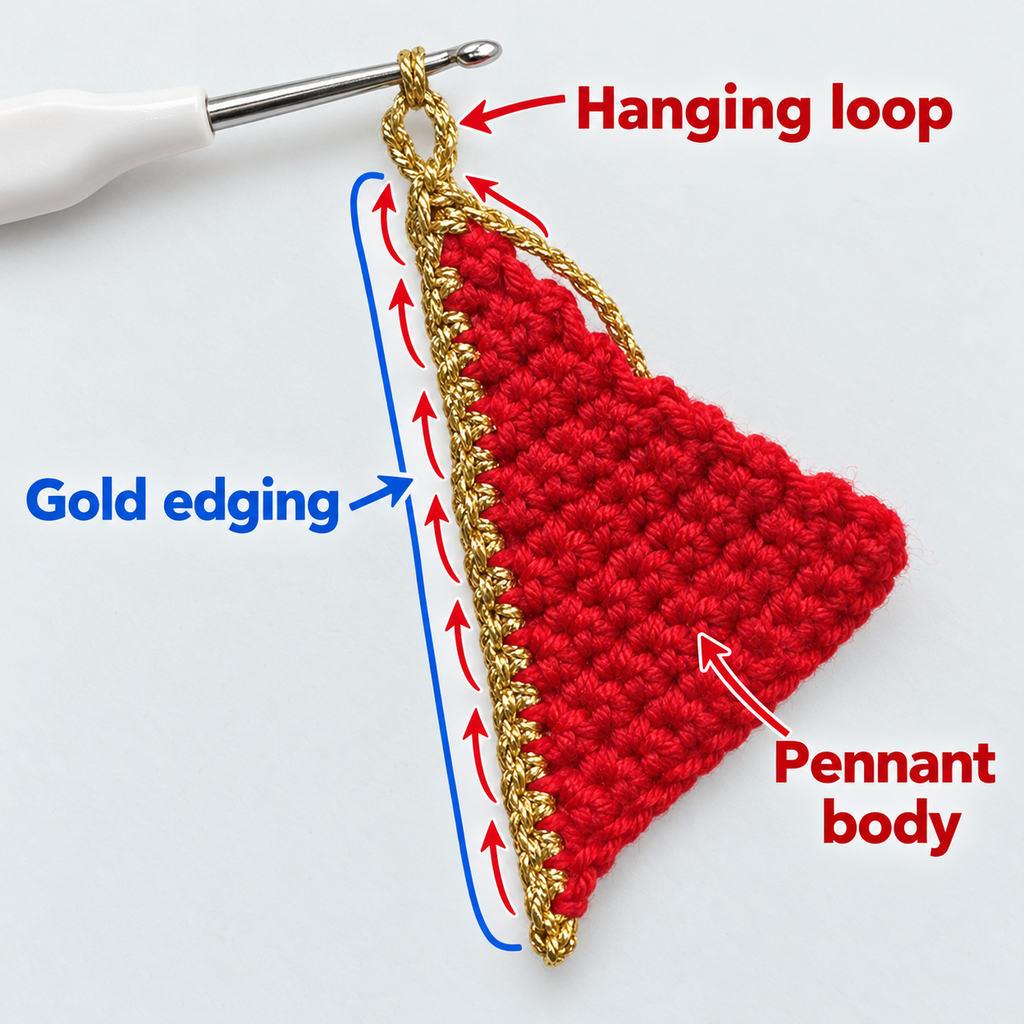
Step 7: Add a clean crochet border
A simple edging can make the pennant look more finished and help smooth any slight irregularities along its sides.
For this sample, use warm ivory cotton yarn to create a contrasting outline. You can also use the same color as the pennant if you prefer a subtle border.
Place your finished triangle on the table with its wide foundation edge at the top.
Join the ivory yarn at the upper left corner with a slip stitch.
Work single crochet stitches down the first sloping side, placing approximately one stitch into the end of each row.
Because row ends don’t always provide obvious stitch openings, insert your hook beneath secure yarn strands rather than splitting the yarn.
At the bottom point, work three single crochet stitches into the tip area. This gives the edging room to turn smoothly.
Continue up the opposite side, placing one single crochet into each row-end area.
At the upper right corner, fasten off and weave in the yarn ends.
Leave the foundation edge free for joining to the banner cord.
The border stitch count isn’t critical. What matters is that both sloping edges receive a similar number of stitches and lie flat.
If your edging ripples, you may have added too many stitches. If it pulls inward, add a little more space between stitches or loosen your tension.
Beginner tip: Make a trial border on your first triangle before edging the others. This gives you a repeatable approach for consistent sides.
Common mistake to avoid: Avoid squeezing several stitches into every side opening. Excess stitches cause the border to flare outward.
Step 8: Crochet more pennants
Once you’re happy with your first finished triangle, it’s time to make the remaining flags.
For a small decorative banner, six pennants are a good starting number.
You could make:
- Two dusty rose pennants.
- Two sage green pennants.
- One warm ivory pennant.
- One terracotta pennant.
Use exactly the same foundation chain, row instructions, and hook size for every flag.
Before attaching the borders, place the triangles beside one another and compare their dimensions.
A small difference is normal, especially with handmade work. However, if one pennant is noticeably larger, check whether its yarn is thicker or your tension became looser.
You can also make the flags in alternating colors for a more balanced look.
Beginner tip: Crochet all the pennants first, then add their borders in one sitting. Repeating the same finishing technique can help you maintain consistent tension.
Common mistake to avoid: Don’t change yarn weights between flags unless you deliberately want different pennant sizes.
Step 9: Join the pennants into a banner
Now comes the fun part: turning your individual triangles into one decorative garland.
For this project, use warm ivory yarn to make the connecting cord.
Start by making 40 chains. This becomes your first hanging tie.
Place your first pennant with the front facing you and its wide top edge pointing upward.
Hold the foundation edge next to your working chain.
Work one single crochet through each of the 22 foundation stitches across the top edge of the pennant, attaching it to the cord as you go.
When you reach the opposite corner, make 10 chains to create a small gap between the flags.
Attach the next pennant in the same way, crocheting across its 22 foundation stitches.
Repeat this process until all six pennants are attached.
After the final pennant, chain 40 more stitches to form the second hanging tie.
Fasten off and secure the ends.
For extra stability, you can work a return row of slip stitches along the chain sections and the top of the joined pennants, or carefully sew a reinforcing strand along the back if the garland feels too stretchy.
Be careful not to pull the cord too tightly, as this can cause the pennants to bunch together.
Beginner tip: Lay the flags in your preferred order before starting the cord. This avoids accidentally attaching two identical colors next to each other when you intended an alternating pattern.
Common mistake to avoid: Don’t attach the pennants by their pointed tips. The banner cord must run along the wide foundation edges so each triangle hangs downward.
Step 10: Shape and finish the banner
Before hanging the finished banner, take a few minutes to straighten the triangle flags.
If your pennants look a little wavy, blocking can help.
For suitable cotton yarn, lightly dampen each triangle using a fine mist of water. Lay it on a blocking mat and gently arrange the top edge so it’s straight.
Move the point into the center and smooth the sides.
If needed, secure the corners with rustproof pins.
Allow the pennants to dry completely before removing the pins.
Avoid stretching them excessively. Your goal is to improve the shape, not make the flags larger.
Once they’re dry, hang the finished garland and adjust the spacing so all the pennants fall naturally.
Step 11: Hang your finished crochet banner
Your crochet pennant banner is now ready to display.
Tie the ends to two secure hooks, hang it across a shelf, or position it over a small decorative wall area.
Try allowing the cord to curve gently rather than pulling it completely straight. A relaxed garland often gives a softer, more handmade appearance.
Keep the pointed tips facing downward and separate any flags that overlap.
For a special occasion, you could add more pennants to create a longer banner or use seasonal colors to match your decorations.
Pattern Notes and Stitch Counts
Turning chain rules
Every new row begins with one chain before turning.
The turning chain is for height only and is not counted as a single crochet stitch.
Always place the first stitch or decrease into the first actual stitch of the previous row.
Stitch count progression
Your pennant starts with 22 stitches in Row 1.
On each even-numbered decrease row from Row 2 through Row 20, you remove two stitches.
The following odd-numbered row keeps the same stitch count.
Row 22 decreases the final two stitches into one.
Here is the complete progression:
Pennant stitch-count progression
0612182412345678910111213141516171819202122
Plain rows hold the previous stitch count; decrease rows narrow the pennant.
Right side and wrong side
The pattern is worked back and forth in turned rows, so the appearance of the fabric is very similar on both sides.
Choose your preferred side as the front when joining the flags.
How to adjust the pennant size
For a wider flag, start with a longer foundation chain that produces an even number of single crochet stitches. Continue alternating decrease rows and plain rows until the point is formed.
For a narrower flag, start with fewer stitches.
To make a taller flag without increasing its width, work two plain rows between decrease rows rather than one.
Changing the number of plain rows will change the angle of the triangle, so make a test sample before crocheting an entire set.
Common Beginner Mistakes and How to Fix Them
Even simple crochet projects can produce a few surprises. The following problems are especially common when making triangles.
1. The triangle looks uneven
Problem: One side slopes more sharply than the other.
Cause: You may have missed a decrease or accidentally added a stitch along one edge.
Fix: Count each row, especially the decreases at both ends. If the error is recent, undo the affected rows and correct the count.
2. The foundation chain curls tightly
Problem: The top edge bends upward or rolls.
Cause: The foundation chain was probably made with tighter tension than the following rows.
Fix: Use a slightly larger hook for the foundation chain. Gentle blocking may help when the difference is small.
3. The triangle becomes too short
Problem: Instead of a decorative pointed pennant, you get a short, wide triangle.
Cause: Decreases were made on every row instead of alternating with plain rows.
Fix: Follow the decrease/plain-row sequence in the stitch-count table.
4. The pointed tip looks bulky
Problem: A large knot or thick yarn tail makes the bottom point look rounded.
Cause: The fastening-off loop was pulled too tightly or the tail was knotted repeatedly.
Fix: Fasten off neatly and weave the yarn tail into nearby stitches on the back rather than adding bulky knots.
5. The border ripples
Problem: The side edging develops waves.
Cause: Too many stitches were placed along the sloping edges.
Fix: Undo the border and spread the stitches more evenly. Aim for a flat edge rather than forcing multiple stitches into each row end.
6. The flags are different sizes
Problem: Some pennants appear larger or longer than others.
Cause: Variations in yarn thickness, hook size, or tension.
Fix: Use the same yarn weight and hook size throughout. Make one test pennant and compare the others to it as you work.
7. The banner sags too much
Problem: The connecting cord stretches and the middle of the banner droops.
Cause: The cord is too loose or the garland is too heavy.
Fix: Make the joining cord more firmly, reinforce it with a return row, or add an additional hanging point for a long display.
How to Customize This Crochet Project
Once you’ve learned the basic construction, you can create different looks without learning an entirely new pattern.
Try different yarn colors
Color is one of the easiest ways to change the mood of a crochet pennant banner.
For a soft nursery theme, choose ivory, light sage, blush pink, and pale yellow.
For autumn, try rust, mustard, olive, and cream.
For winter holidays, deep green, burgundy, and warm white look especially cozy.
A monochromatic version with different shades of one color can also be beautiful.
Make a longer banner
Want to decorate a wide wall or a party table?
Simply crochet more triangles and attach them using the same joining method.
To estimate the required number, measure the space where you want the banner to hang, then allow enough length for ties and gaps between flags.
Add a decorative border
The simple single crochet border in this tutorial is ideal for beginners.
If you’re comfortable experimenting, try a small picot detail at the pointed tip or use a contrasting color around the edges.
Avoid very heavy borders if you want your pennants to hang neatly.
Experiment with texture
You can replace the plain single crochet fabric with a textured stitch, provided you adjust the shaping instructions appropriately.
For example, a half-double crochet version would create a slightly taller stitch texture, although the row height and finished triangle proportions would change.
Beginners should master the original single crochet version before modifying the stitch construction.
Create seasonal banners
This pattern can be used throughout the year.
A spring banner with soft floral colors looks lovely near a window. A colorful birthday version can be reused for family celebrations.
You could also make a small Halloween garland with orange, black, and purple flags, or a winter banner in green and cream.
Add small embellishments
Tiny crochet flowers, embroidered initials, or carefully sewn decorative shapes can personalize individual flags.
If you’re making a banner for a child’s room, avoid detachable beads, loose buttons, or small embellishments that could become choking hazards. Install the banner securely and keep cords out of reach of babies and young children.
Finishing Instructions
Finishing can make the difference between a good handmade project and one that looks polished.
Start by weaving in every loose yarn end with a blunt tapestry needle. Work the tail through several stitches on the wrong side, changing direction at least once to help secure it.
Trim the excess yarn without cutting into the actual stitches.
Inspect the joining cord to make sure each pennant is attached securely and faces the same direction.
If you blocked the flags before joining, you may only need to smooth them lightly afterward.
If you prefer to block the completed banner, lay it flat and shape the individual pennants carefully without overstretching the connecting cord.
Washing and care
The best washing method depends on the yarn label.
Many cotton yarns can be washed gently, but a delicate handmade garland often benefits from careful hand washing in cool water.
Use a mild detergent, rinse thoroughly, and press out excess water with a towel.
Avoid wringing the flags, as this can distort the pointed corners.
Lay the banner flat to dry and reshape the triangles while they are still damp.
Store the garland loosely folded in a dry place to prevent tangles and unnecessary stretching.
Quick Printable-Style Summary
Beginner Crochet Pennant Banner — Quick Pattern
Skill Level: Beginner
Materials: DK cotton yarn, 4.0 mm crochet hook, scissors, tapestry needle.
Stitches: Ch, sc, sc2tog, sl st.
Starting chain: Ch 23.
Row 1: Sc in second ch from hook and across. (22)
Row 2: Ch 1, turn, sc2tog, sc 18, sc2tog. (20)
Row 3: Ch 1, turn, sc across. (20)
Rows 4–21: Alternate a decrease row, removing one stitch at each end, with a plain single crochet row. Continue until 2 stitches remain.
Row 22: Ch 1, turn, sc2tog. (1)
Finishing: Fasten off. Optional single crochet edging along the sloping sides, with 3 sc at the tip.
Assembly: Ch 40, sc through 22 top foundation stitches of first pennant, ch 10 between flags, repeat, then ch 40 after last pennant. Fasten off and weave in ends.
Make: Six pennants, or as many as needed.
Copy quick pattern
Frequently Asked Questions
Is a crochet pennant banner suitable for beginners?
Yes. This pattern uses only a few basic stitches and repeats the same shaping method throughout the triangle. If you know how to chain and single crochet, you can learn the decreases as you work. The stitch-count table also makes it easier to check your progress.
How much yarn do I need for a crochet pennant banner?
The exact amount depends on the yarn weight, the number of flags, and your finished measurements. A small six-flag garland can be made with leftover yarn in several colors. Starting with approximately 75–100 grams of DK cotton across all colors gives you a practical allowance, but it’s best to weigh your first completed pennant if you need a precise total.
What is the best yarn for crochet bunting?
DK-weight cotton is a reliable choice because it creates neat, visible stitches and a relatively stable fabric. Acrylic can also work well, especially for lightweight decorations. Avoid extremely stretchy or bulky yarn when making your first banner.
How many pennants should I crochet?
Six flags make a small decorative banner suitable for a shelf, craft area, or narrow wall. For a larger area, measure the intended display width and calculate how many triangles and gaps will fit comfortably.
Can I make a crochet pennant banner without decreasing?
Yes, there are other ways to construct triangular crochet pieces, including working from a point outward with increases or crocheting triangular motifs in rounds. This tutorial uses decreases because they are easy to count and produce a solid, flat pennant.
How do I stop my crochet triangles from curling?
Try maintaining even tension and avoiding a foundation chain that is too tight. Using smooth cotton yarn and blocking the finished pennants can also help. If the curl is severe, consider changing your hook size before making more flags.
Can I use this crochet pennant banner outdoors?
You can display a handmade crochet banner outdoors temporarily for an event, provided the weather is dry and the banner is securely attached. Cotton can absorb moisture, while sunlight may fade some yarn colors over time. Bring the banner indoors after the event and let it dry thoroughly if it becomes damp.
Conclusion
A handmade crochet pennant banner is one of those projects that proves you don’t need complicated stitches to create something lovely.
With a little cotton yarn, a crochet hook, and a few simple decreases, you can make colorful triangle flags that add a personal touch to your home.
Start with one pennant and focus on making the stitches even. Once you’re comfortable with the shaping, crochet the remaining flags, choose your favorite color arrangement, and join everything into a beautiful little garland.
Whether you make it for a birthday, a nursery, a seasonal decoration, or simply to use leftover yarn, this easy crochet pennant banner pattern is a project you can return to again and again.
Save this tutorial for your next relaxing crochet session, and try matching your banner with a set of simple crochet coasters or mini crochet flower decorations.