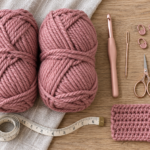
A tiny cheerleader with a bright uniform, a bouncy ponytail, and two fluffy pom-poms makes a charming handmade gift. And the best part? You can crochet your own using just a few basic stitches.
This crochet cheerleader doll pattern is designed for adventurous beginners who want to try amigurumi without learning complicated stitches or difficult shaping methods.
We’ll make the doll one piece at a time, starting with a rounded head, then working on the legs, body, arms, uniform, hair, and little cheerleading accessories. Each section includes stitch counts, practical explanations, and planned close-up tutorial images to help you understand what the stitches should look like.
Our doll wears a dusty rose pink skirt, an ivory top, matching little shoes, and a chestnut brown ponytail. You can personalize the colors, hairstyle, and facial details to make your own original character.
The pattern below is newly composed for this tutorial, not transcribed from the reference website. The stitch counts are internally checked, but the finished design has not been physically sample-crocheted and measured. Treat the dimensions as estimates and make a test sample before publishing it as a tested pattern.
What You’ll Learn
By following this project, you’ll learn how to:
- Make a magic ring and crochet in continuous spiral rounds.
- Increase and decrease stitches to shape a doll’s head.
- Crochet two matching legs and create simple shoe details.
- Build a tapered amigurumi body.
- Crochet narrow arms and attach them securely.
- Make a small cheerleader skirt with a contrasting border.
- Attach yarn hair and create a high ponytail.
- Craft two soft yarn pom-poms.
- Assemble and finish a doll neatly.
You don’t need experience making complicated dolls, but it helps to know how to make a single crochet stitch and recognize the front and back loops of a stitch.
Project Details
| Detail | Information |
|---|---|
| Pattern type | Amigurumi doll |
| Skill level | Advanced beginner |
| Estimated time | 5–8 hours |
| Finished height | Approximately 18–22 cm |
| Yarn weight | DK / Light #3 |
| Hook size | 2.75 mm |
| Construction | Separate crocheted pieces, sewn together |
| Main technique | Single crochet in continuous rounds |
| Terminology | US crochet terms |
Materials You’ll Need
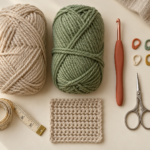
You can make this cheerleader doll with small amounts of yarn, making it a practical project for using leftovers from previous amigurumi projects.
Yarn
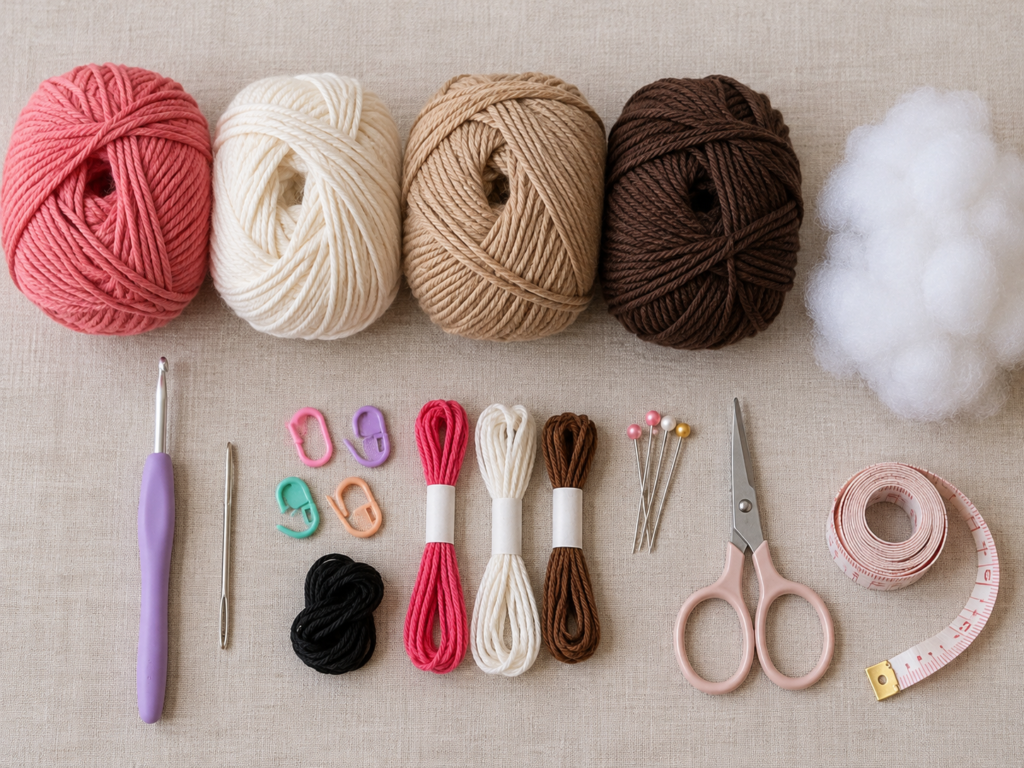
Choose smooth DK-weight cotton or cotton-acrylic yarn in the following colors:
- Caramel beige: Approximately 35–45 g for the head, body, legs, and arms.
- Dusty rose pink: Approximately 15–20 g for the skirt, shoe trim, sleeves, hair bow, and pom-poms.
- Ivory: Approximately 10–15 g for the uniform top, shoes, skirt hem, and pom-poms.
- Chestnut brown: Approximately 10–15 g for the ponytail and hairline.
- Dark brown embroidery thread: A small amount for the eyes, eyebrows, and mouth.
These amounts are estimates. Yarn consumption varies with your tension, doll proportions, and hairstyle.
Crochet Tools
You’ll also need:
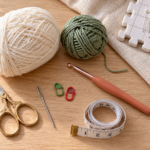
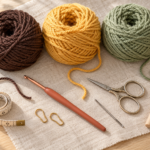
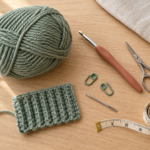
- 2.75 mm ergonomic crochet hook.
- Blunt-tipped yarn needle.
- Small sharp scissors.
- Locking stitch markers.
- Polyester fiberfill.
- Measuring tape.
- Sewing pins for temporary positioning.
- Optional 3.0 mm hook if your stitches are too tight.
For an embroidered face, use dark embroidery thread instead of plastic safety eyes.
Crochet Abbreviations Used
This pattern uses US crochet terminology.
| Abbreviation | Meaning |
|---|---|
| MR | Magic ring |
| ch | Chain |
| sc | Single crochet |
| dc | Double crochet |
| sl st | Slip stitch |
| st / sts | Stitch / stitches |
| inc | Increase: 2 sc in the same stitch |
| dec | Invisible decrease over 2 stitches |
| BLO | Back loop only |
| FLO | Front loop only |
| rep | Repeat |
| FO | Fasten off |
| R | Round |
US/UK note: A US single crochet is called a double crochet in UK terminology. A US double crochet is a UK treble crochet.
When the instructions say (2 sc, inc) × 6, work one single crochet in each of the next two stitches, then two single crochets into the following stitch. Repeat that sequence six times.
Numbers in parentheses at the end of a round tell you how many stitches you should have after completing that round.
Before You Start
Understanding amigurumi construction
Traditional amigurumi is usually crocheted in a continuous spiral. This means you work around and around without joining every round with a slip stitch.
The result is a smooth surface without a noticeable vertical seam.
To keep your place, insert a stitch marker into the first stitch of every new round. Move it upward each time you complete a round.
Unlike flat crochet projects, the beginning of each round gradually shifts around the shape. This is normal.
Getting your tension right
Amigurumi works best when the stitches are close enough together to hide the stuffing.
You should be able to gently squeeze the crocheted fabric without seeing large spaces between stitches.
If you notice holes, try a smaller hook or slightly firmer tension. If you struggle to insert the hook into the stitches, try relaxing your grip.
A precise gauge is less important for this decorative doll than creating a consistent, firm fabric. However, all parts should be made using the same yarn weight and hook size to maintain their proportions.
How to count stitches
Look at the top of a single crochet stitch. It resembles a small V.
Count each V as one stitch.
When making increases, two stitches occupy the same base stitch. When decreasing, two stitches become one.
Count every round before moving to the next one, particularly when shaping the head and skirt.
How to avoid curling and uneven edges
A small crochet circle may curl naturally while forming a three-dimensional shape. That isn’t always a mistake.
However, severe puckering in a section that should be flat may mean that you’ve missed an increase or tightened your magic ring excessively.
For the skirt, use relaxed tension and spread the stitches gently as you work.
Choosing your doll’s colors
You don’t have to copy a school uniform to make a cheerleader-inspired character.
A simple combination of two complementary colors is enough. Keep one dominant color for the skirt and accessories, then use a lighter color for the shirt and trim.
For this tutorial, dusty rose is the main uniform color and ivory is the accent.
Using a limited color palette makes the doll look coordinated, even with very simple stitches.
Step-by-Step Crochet Tutorial
Step 1: Start the Doll’s Head With a Magic Ring
We’ll begin with the head because it’s the largest and most recognizable part of the doll.
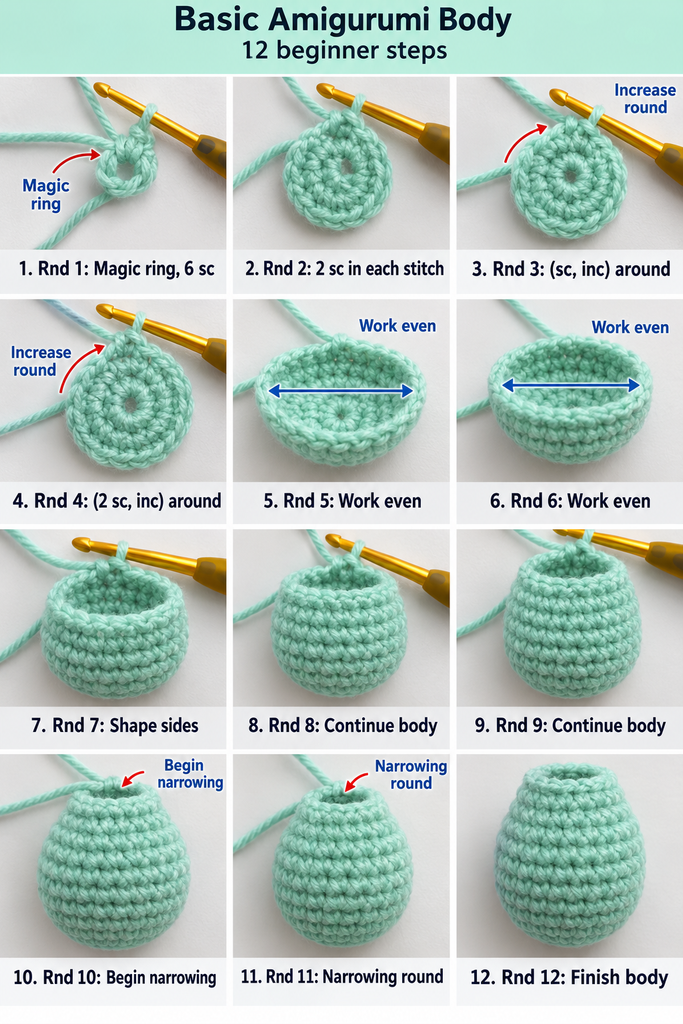
Take your caramel beige yarn and make a magic ring.
Hold the ring gently between your thumb and index finger. Insert your crochet hook through the center, pull up a loop, and work six single crochet stitches into the ring.
Once you’ve completed all six stitches, pull the starting tail until the central opening closes.
Don’t pull so aggressively that the stitches become distorted.
Head Pattern — Starting Rounds
| Round | Instructions | Stitch Count |
|---|---|---|
| R1 | 6 sc in MR | 6 |
| R2 | inc in each st around | 12 |
| R3 | (1 sc, inc) × 6 | 18 |
| R4 | (2 sc, inc) × 6 | 24 |
| R5 | (3 sc, inc) × 6 | 30 |
| R6 | (4 sc, inc) × 6 | 36 |
After Round 6, you should have a small, gently curved circle with 36 stitches around the outside edge.
Beginner tip: Put your stitch marker into the first stitch of each round immediately, rather than waiting until you finish counting.
Common mistake to avoid: Don’t accidentally work into the slip knot or pull the magic-ring tail while still forming the first six stitches. That can make the ring difficult to close.
Step 2: Shape the Rounded Amigurumi Head
Now that the beginning circle is complete, we’ll add height to turn it into a rounded doll head.
The easiest way to do this is to crochet several rounds without increasing.
Continue the Head
| Round | Instructions | Stitch Count |
|---|---|---|
| R7–R12 | sc in each st around | 36 each round |
| R13 | (4 sc, dec) × 6 | 30 |
| R14 | (3 sc, dec) × 6 | 24 |
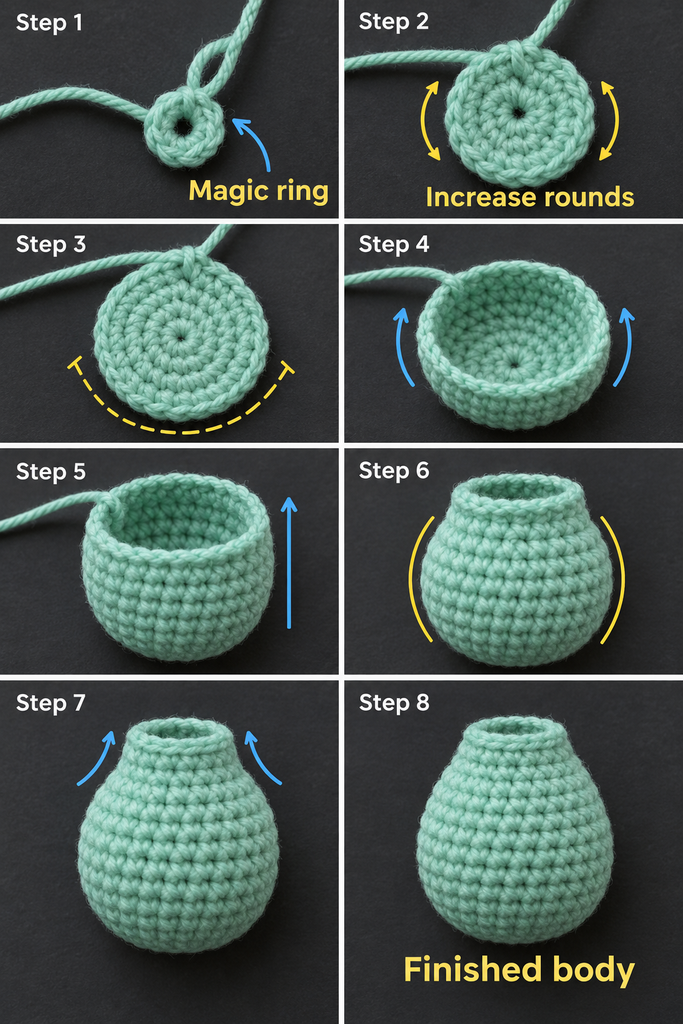
Work Rounds 7 through 12 slowly. You should notice the crochet fabric curving upward, forming the sides of a sphere.
This is exactly what you want.
When you reach Round 13, begin decreasing to form the bottom of the head.
For an invisible decrease, insert the hook through the front loop of each of the next two stitches. Yarn over and pull through both front loops, then yarn over and pull through the two loops on your hook.
This reduces two stitches to one while keeping the outside fabric neat.
Adding the Face
Before closing the head, decide where the face will sit.
For this doll, position two small embroidered eyes approximately between Rounds 10 and 11, spaced about five or six stitches apart.
You can embroider them now, while the inside of the head is accessible, or after closing the head using a long needle.
A simple face is often more expressive than one with lots of small details. Two dark embroidered eyes, a small smile, and optional eyebrows are enough.
Beginner tip: Mark the desired eye positions with temporary contrasting yarn before embroidering.
Common mistake to avoid: If one eye is higher than the other, the face may look tilted. Check the position from the front before securing the embroidery thread.
Step 3: Stuff and Finish the Doll’s Head
Once your head is shaped, it’s time to add a little stuffing.
Take a small amount of polyester fiberfill and gently separate it with your fingers.
Add it in several small pieces rather than forcing a large handful inside the head.
This helps create a smooth, rounded shape without visible lumps.
Before closing the head, make sure the upper portion is firm and the bottom is supported.
Finish the Head
| Round | Instructions | Stitch Count |
|---|---|---|
| R15 | (2 sc, dec) × 6 | 18 |
| R16 | (1 sc, dec) × 6 | 12 |
| R17 | sc in each st around | 12 |
After Round 17, fasten off and leave a long sewing tail.
Do not close the 12-stitch opening. We’ll use it to attach the head to the narrow neck of the doll’s body.
Make sure the stuffing stays inside the head and doesn’t protrude through the opening.
Beginner tip: Roll the stuffed head gently between your hands to even out the fiberfill.
Common mistake to avoid: Overstuffing can stretch the crochet fabric and expose the white stuffing. Use enough to give the head shape, but stop before the stitch gaps widen.
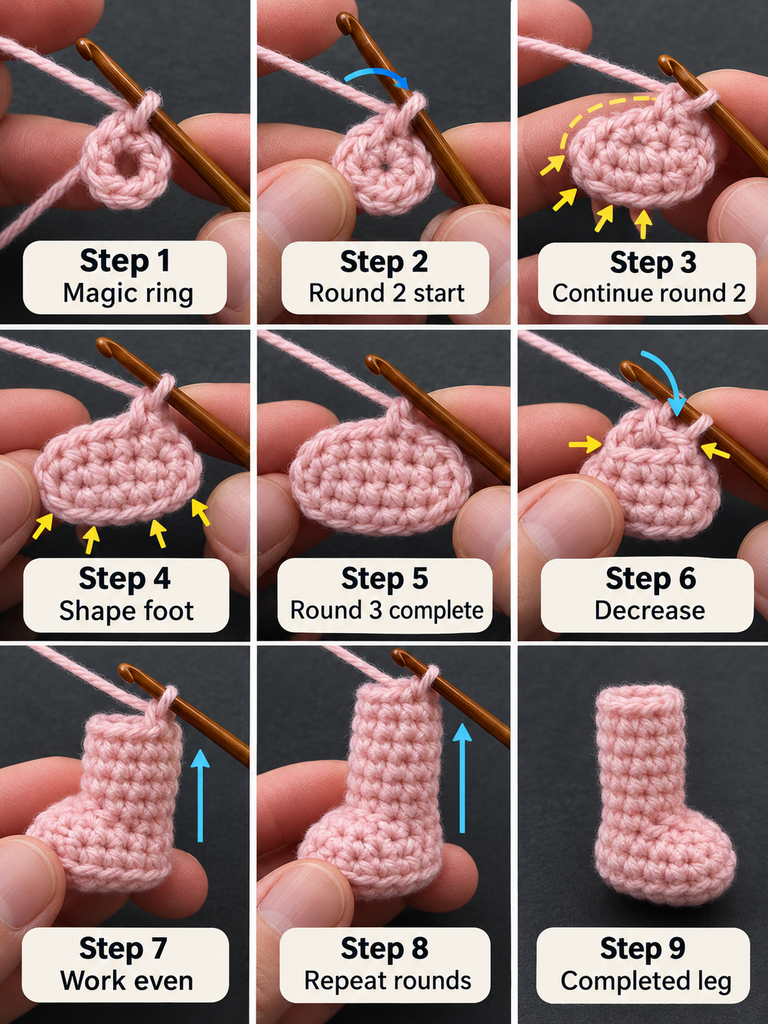
Step 4: Crochet Two Legs and Little Cheerleader Shoes
Next, we’ll make two matching legs.
The legs start with ivory yarn, creating small rounded shoes. Then we switch to caramel beige for the legs themselves.
The design is intentionally simple so beginners don’t need to learn complicated shoe shaping.
Leg Pattern — Make Two
With ivory yarn:
| Round | Instructions | Stitch Count |
|---|---|---|
| R1 | 6 sc in MR | 6 |
| R2 | inc in each st | 12 |
| R3 | sc around in BLO | 12 |
| R4–R5 | sc in each st around | 12 |
The back-loop-only round helps define the edge of each shoe.
Change to dusty rose for Round 6.
| Round | Instructions | Stitch Count |
|---|---|---|
| R6 | sc around in dusty rose | 12 |
Change to caramel beige.
| Round | Instructions | Stitch Count |
|---|---|---|
| R7–R15 | sc in each st around | 12 each round |
Fasten off, leaving a 25 cm sewing tail.
Stuff the shoes and lower legs lightly, then leave the upper portion softer so the doll can sit naturally.
Repeat the pattern for the second leg.
Check that both legs have the same number of rounds.
Optional Shoe Decoration
Using dusty rose yarn and a needle, embroider a tiny horizontal stripe across the front of each ivory shoe.
Keep the stitches shallow and tidy.
You can also leave the shoes plain for a cleaner, minimalist look.
Beginner tip: Crochet both legs during the same session. This makes it easier to maintain consistent tension.
Common mistake to avoid: Don’t stuff one leg firmly and the other loosely. Uneven stuffing can make the doll lean or sit awkwardly.
Step 5: Crochet the Doll’s Body
The body provides the foundation for the uniform and gives the finished doll its shape.
We’ll use a rounded lower body that gradually narrows toward the neck.
Start with caramel beige yarn.
Body Pattern
| Round | Instructions | Stitch Count |
|---|---|---|
| R1 | 6 sc in MR | 6 |
| R2 | inc around | 12 |
| R3 | (1 sc, inc) × 6 | 18 |
| R4 | (2 sc, inc) × 6 | 24 |
| R5–R9 | sc around | 24 each round |
| R10 | (2 sc, dec) × 6 | 18 |
| R11–R13 | sc around | 18 each round |
| R14 | (1 sc, dec) × 6 | 12 |
| R15–R16 | sc around | 12 each round |
The bottom begins as a flat circle, while the middle becomes cylindrical.
The decrease rounds bring the width inward, making a narrow shoulder and neck section.
Before finishing, stuff the body firmly enough to hold its shape but not so tightly that the fabric stretches.
Fasten off, leaving the 12-stitch neck opening unclosed.
We’ll attach the head after fitting the clothing.
Checking the Shape
Lay the body flat on your table.
The bottom should be wider than the neck, with no dramatic bends or bulges.
If the shape looks lopsided, count the stitches on the last few rounds. An accidental increase can cause one side to protrude.
Beginner tip: If you’re new to invisible decreases, practice a few on a small sample before beginning the narrowing rounds.
Common mistake to avoid: Don’t accidentally close the neck opening; it needs to line up with the head’s 12-stitch opening.
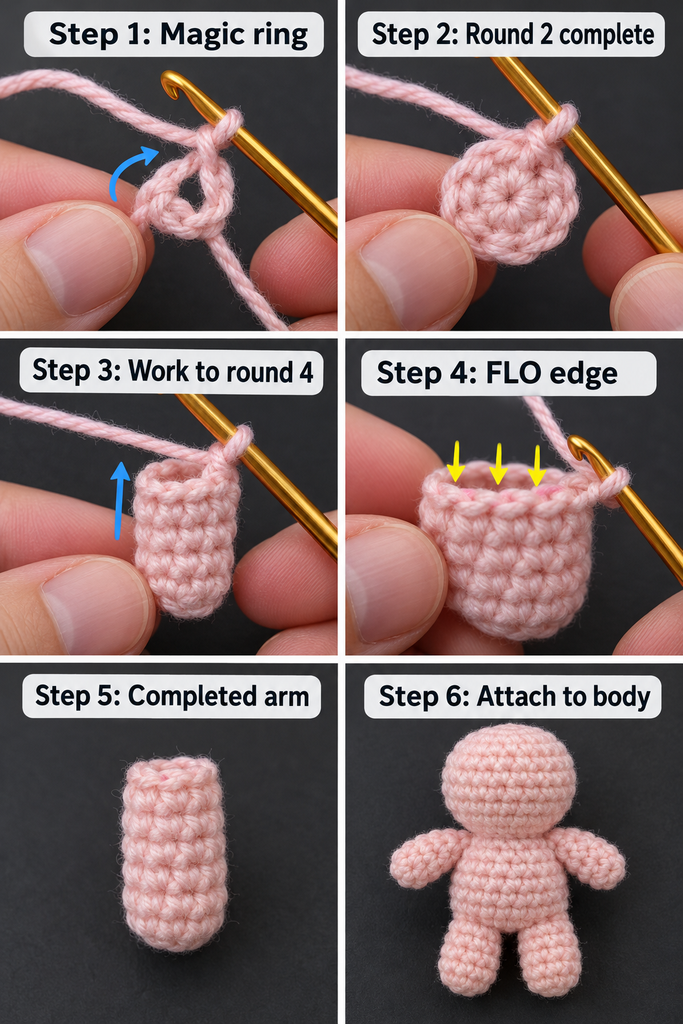
Step 6: Crochet the Arms
Now we’ll make two simple arms.
These arms are small cylinders, which makes them an excellent exercise for beginners learning to crochet narrow amigurumi pieces.
Start each arm with caramel beige yarn.
Arm Pattern — Make Two
| Round | Instructions | Stitch Count |
|---|---|---|
| R1 | 6 sc in MR | 6 |
| R2 | (2 sc, inc) × 2 | 8 |
| R3–R12 | sc around | 8 each round |
For Round 2, work one single crochet in each of the next two stitches, then an increase. Repeat that sequence once more.
After Round 12, flatten the upper opening gently.
You can leave the arms unstuffed for a flexible appearance, or add a tiny amount of fiberfill near the lower end.
Fasten off, leaving a long tail for sewing.
Make the second arm exactly the same way.
Optional Sleeve Details
For a simple cheerleading look, embroider a thin ivory stripe around each upper arm once the arms are attached.
Another option is to add two or three small surface slip stitches in dusty rose to suggest a sleeve border.
This is decorative and doesn’t affect the construction of the arm.
Beginner tip: Use the same stitch marker position in both arms to help keep their rounds consistent.
Common mistake to avoid: Narrow tubes can turn inside out while crocheting. Keep the right side facing outward so the stitches match the appearance of the head and torso.
Step 7: Crochet the Cheerleader Uniform and Skirt
Here’s where the doll begins to look like a cheerleader.
Instead of making an elaborate removable outfit, we’ll use a simple fitted top and a flared skirt.
The top is represented by an ivory crocheted fabric band and decorative embroidery, while the skirt is a separate circular piece that sits around the waist.
Part A: Crochet the Ivory Top Band
With ivory yarn, make a chain of 25.
Starting in the second chain from the hook, work 24 single crochets across.
Fasten off, leaving a long tail.
Place this strip horizontally across the front of the torso, just below the shoulders, and wrap it around the body.
Because the strip is crocheted flat, it can be adjusted slightly when attached.
Sew the ends together at the back, taking care not to tighten the band so much that the body compresses.
For a more secure finish, tack the top edge to the body with a few small hidden stitches.
Add a simple rose-colored horizontal embroidery line across the front of the ivory band.
Part B: Crochet the Skirt
With dusty rose yarn, chain 24 and join the first and last chains with a slip stitch, taking care not to twist the chain.
This creates the skirt’s foundation ring.
Work the first round directly into the 24 chain stitches.
| Round | Instructions | Stitch Count |
|---|---|---|
| R1 | sc in each chain around | 24 |
| R2 | (3 sc, inc) × 6 | 30 |
| R3 | (4 sc, inc) × 6 | 36 |
| R4–R6 | sc around | 36 each round |
| R7 | dc around | 36 |
For Rounds 1–6, continue working in a spiral.
For Round 7, chain two at the beginning (not counted as a stitch), make one double crochet into each stitch around, and join to the first double crochet with a slip stitch.
The double crochet round gives the bottom of the skirt a soft, slightly flowing edge.
Part C: Add the Ivory Hem
Change to ivory yarn.
Work one single crochet into each of the 36 stitches around the skirt edge, then join with a slip stitch.
Fasten off and weave in the ends.
You should now have a miniature circular skirt with a slightly flared shape.
Fitting the Skirt
Because the doll has a narrower upper torso, slide the skirt over the neck area before attaching the head.
Bring it down until the waistband sits comfortably above the widest part of the body.
Adjust the position until the skirt looks balanced.
If the waistband is a little loose, use several hidden stitches to secure it.
If it’s too tight, remake the starting chain with slightly looser tension or a hook one size larger, adjusting the first round to maintain the intended stitch count.
Beginner tip: Try the skirt on the unfinished body before fastening it permanently. Small yarn-tension differences can noticeably affect miniature garments.
Common mistake to avoid: Don’t increase randomly around the skirt. Keeping the increases evenly spaced produces a smoother, more symmetrical flare.
Step 8: Add the Doll’s Hair and High Ponytail
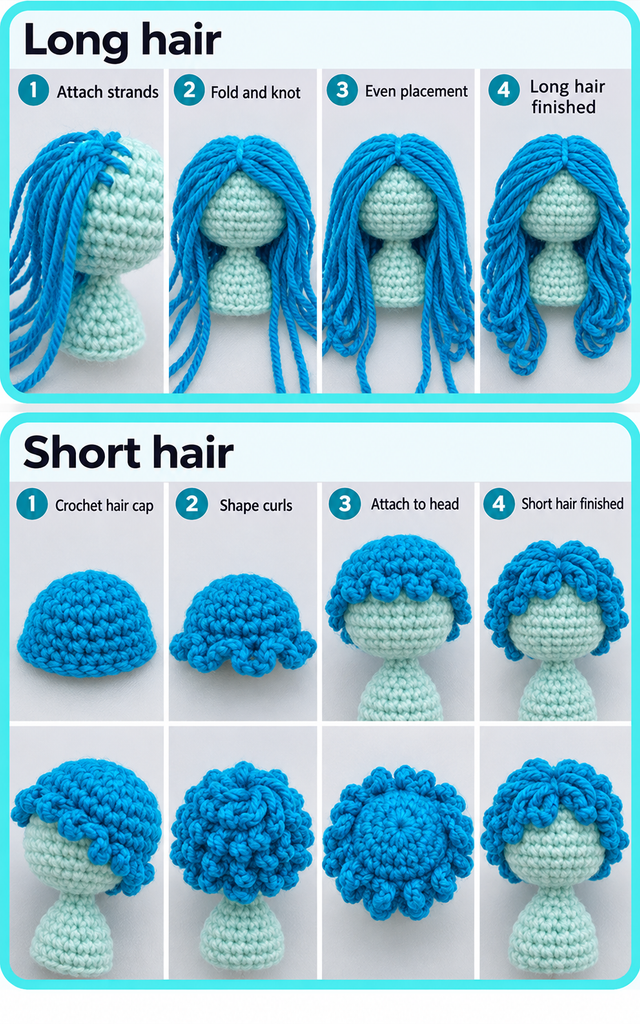
A simple high ponytail gives this crochet cheerleader doll a playful personality without requiring a complicated wig pattern.
We’ll attach strands of chestnut brown yarn directly to the head.
Prepare the Hair Strands
Cut approximately 25–35 strands of chestnut brown yarn, each about 18–22 cm long.
Fold one strand in half.
Insert your hook or a blunt yarn needle beneath a stitch near the top of the head. Pull the folded center through to make a small loop, then pass the two loose ends through the loop.
Pull gently to secure the strand.
Repeat around the upper portion of the head, placing additional strands where necessary to provide enough coverage.
You don’t need to fill every stitch. Concentrate on the areas visible around the forehead, crown, and sides.
Create a Natural Hairline
Work a few shorter strands along the front hairline.
Arrange them so they sweep toward the crown.
Keep the embroidered eyes visible, and avoid bringing too many strands over the face.
The hairline doesn’t need to be perfectly straight. A slightly curved shape often looks more natural.
Form the Ponytail
Gather the longer strands toward the top-back of the head.
Wrap a separate strand of brown yarn around the bundle several times, then tie it securely.
Use dusty rose yarn to make a small bow around the base of the ponytail.
Trim the ends carefully so the hairstyle looks balanced.
If you want a fuller ponytail, add a few more strands to the crown before tying the bundle.
Beginner tip: Before cutting every strand, attach one folded test strand to check the resulting hair length.
Common mistake to avoid: Avoid pulling the hair knots too tightly. This can distort the stitches of the head or change the face shape.
Step 9: Make Two Miniature Cheerleading Pom-Poms
Pom-poms are what make this little doll instantly recognizable as a cheerleader.
Rather than crocheting large round accessories, we’ll create two small soft yarn bundles. They’re lightweight, easy to make, and can be attached directly to the doll’s hands.
Cut the Yarn
Take your dusty rose and ivory yarn.
For each pom-pom, cut approximately 30–40 short strands, each about 6–7 cm long.
Mix the two colors evenly.
Lay the strands in a neat stack, making sure their ends are approximately aligned.
Tie the Center
Cut an additional 20 cm length of strong matching yarn.
Place it beneath the center of the stacked strands.
Bring both ends upward and tie a tight double knot around the bundle.
The center knot will become the attachment point for the doll’s hand.
Shape and Trim
Hold the bundle by its center.
Gently spread the strands outward to create a fluffy shape.
Trim any particularly long ends with scissors.
For a slightly fuller appearance, separate the strands with your fingers. Avoid aggressively brushing cotton yarn because it may fray or lose its defined texture.
Repeat the process to make the second pom-pom.
Attach the Pom-Poms
Thread the long center-tie tails through a yarn needle.
Pass the needle through the end of the doll’s hand and back through the center of the pom-pom.
Repeat the attachment several times, then tie and hide the ends securely.
Both pom-poms should sit at approximately the same height when the doll’s arms are raised.
Beginner tip: Make the second pom-pom before trimming the first completely. It’s easier to compare their sizes side by side.
Common mistake to avoid: Loose center knots can cause strands to fall out. Secure the center tightly, and use multiple stitches to attach each pom-pom. These fringe-style accessories are best reserved for decorative dolls rather than toys intended for very young children.
Step 10: Assemble the Crochet Cheerleader Doll
You’ve finished the main crochet pieces. Now we’ll turn them into a complete doll.
Take a few minutes to arrange everything on the table before sewing.
You should have a head with hair and facial details, a stuffed torso, two legs, two arms, an ivory top band, a skirt, and two pom-poms.
Attach the Legs
Turn the body so the bottom faces you.
Position both legs evenly against the lower part of the torso, with the shoes pointing forward.
Use sewing pins or stitch markers to temporarily hold them in place.
Thread a yarn needle with the long yarn tail from one leg.
Sew through the upper edge of the leg and the lower body, working around the attachment area several times.
Repeat with the second leg.
Check the doll from the front to make sure the shoes face in the same direction.
Attach the Uniform
Fit the ivory band around the upper torso and stitch it neatly into position.
Slide the completed skirt down over the open neck, positioning the waistband at the doll’s waist.
Secure the skirt with small stitches around the waistband so it doesn’t move upward.
Attach the Head
Align the head’s 12-stitch opening with the body’s 12-stitch neck opening.
Use the long sewing tail and a yarn needle to stitch through corresponding edge stitches.
Work all the way around the neck, checking that the face points forward.
For extra stability, make a second pass through the connection.
The head should remain upright without leaning significantly.
If it feels loose, add more securing stitches rather than inserting wire or hard internal supports.
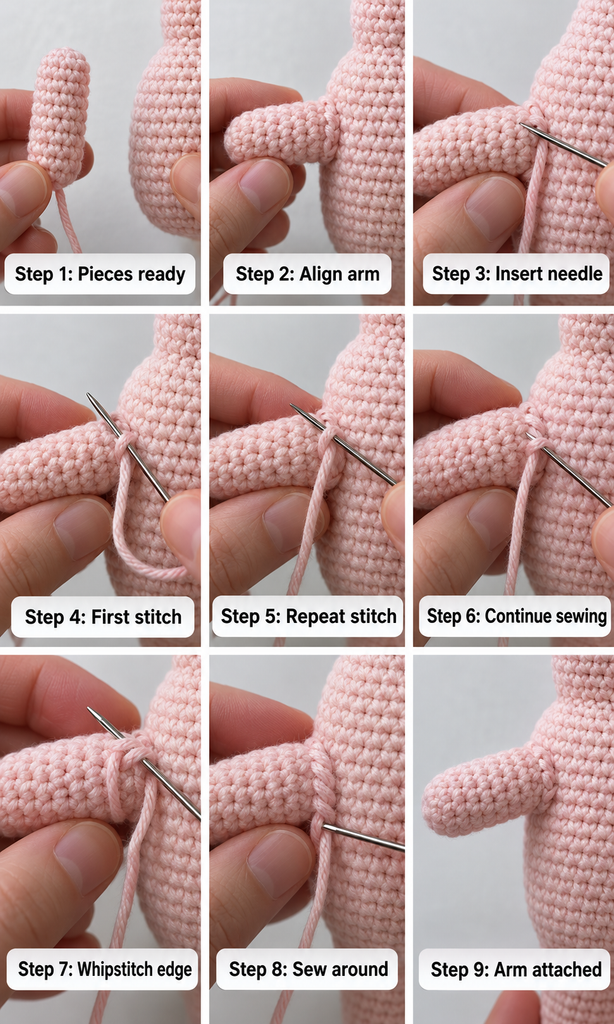
Attach the Arms
Place the arms on the sides of the upper torso, slightly below the head.
Angle them upward to create a cheerful pose.
Pin both arms temporarily.
Look at the doll from the front and make any adjustments before sewing.
Once you’re happy with the positioning, stitch each arm firmly to the body.
Attach the pom-poms if you haven’t already done so.
Beginner tip: Take a photograph of the doll with the pieces pinned in position. It’s often easier to notice uneven placement in a photograph than while holding the pieces.
Common mistake to avoid: Don’t rely on just one or two loose stitches to secure the arms or head. Use several well-anchored stitches and conceal the tails inside the doll.
Pattern Notes and Stitch Notes
Working in Spiral Rounds
Most of this pattern is worked continuously without joining each round.
The exception is the skirt’s double crochet round and final edging, which are joined with a slip stitch.
Mark the first stitch of every spiral round so you can keep accurate counts.
Turning Chains
The doll’s head, torso, arms, and legs don’t require turning chains.
The uniform band is made in a single flat row.
For the skirt’s double crochet round, chain two to bring the yarn to the correct height. The chain two does not count as a stitch in this pattern.
Right Side and Wrong Side
The right side of an amigurumi piece is generally the side with the neat, outward-facing V-shaped stitches.
Make sure the right side faces outward when stuffing the head and torso.
For the skirt, choose the cleaner-looking side as the outside before sewing it onto the body.
Stitch Count Reminders
The head grows to 36 stitches before decreasing to a 12-stitch neck opening.
The body grows to 24 stitches and decreases to a 12-stitch neck opening.
Each leg contains 12 stitches around, while each arm contains eight.
The skirt starts with a 24-stitch waistband and expands to 36 stitches at the lower edge.
Size Adjustments
For a slightly larger doll, try using a thicker yarn and a suitable hook while maintaining the original stitch counts.
This scales the entire project without requiring a new pattern.
For a smaller doll, use finer yarn and a smaller hook.
For a longer skirt, repeat Round 6 one or two additional times before working the double crochet edge.
Always check that the waistband still fits around the torso.
Common Beginner Mistakes and How to Fix Them
1. The magic ring leaves a hole
Problem: There’s a visible opening at the center of the head or body.
Fix: Pull the starting tail firmly after finishing the first round, then secure the yarn tail on the inside. If the ring won’t close, check that you’ve crocheted into the loop rather than around the tail incorrectly.
2. The stuffing shows between stitches
Problem: White fiberfill is visible through the crochet fabric.
Fix: Try a slightly smaller hook and use less stuffing. Amigurumi fabric should have a compact texture.
3. The head looks uneven
Problem: One side of the head is wider or flatter.
Fix: Check that increases and decreases were worked evenly. Gently redistribute the stuffing before attaching the head.
4. One arm is longer than the other
Problem: The doll appears unbalanced after assembly.
Fix: Count rounds on both arms before fastening off. If the difference is noticeable, remake the shorter or longer arm rather than compensating during sewing.
5. The skirt curls upward
Problem: The skirt doesn’t fall smoothly around the waist.
Fix: Check the increase rounds and avoid excessively tight tension. Gently shape the skirt with your fingers. Don’t stretch the fabric aggressively.
6. The doll’s head wobbles
Problem: The head leans to one side.
Fix: Add another round of secure sewing around the neck connection. Make sure the head and body openings are evenly aligned.
7. The face looks asymmetrical
Problem: The eyes or smile appear crooked.
Fix: Use temporary yarn markers to plan the facial features before embroidering. Small adjustments in eye placement can make a significant difference.
8. The pom-poms lose their shape
Problem: Loose yarn strands fall out or bunch together.
Fix: Use a firm center tie and secure the bundle with multiple stitches. Make both pom-poms from approximately the same number and length of strands.
How to Customize This Crochet Cheerleader Doll
Try Different Uniform Colors
Dusty rose and ivory create a soft, classic look, but you can choose nearly any coordinated palette.
Lavender and white make a delicate pastel doll, while navy and cream create a traditional athletic look.
You can also make a miniature set of cheerleader dolls using different colors for each character.
Change the Hairstyle
A high ponytail isn’t your only option.
Try two small pigtails, short curls, braided yarn strands, or a simple bun.
For a beginner-friendly variation, make two low pigtails by dividing the yarn hair into equal sections.
Add Decorative Uniform Details
Small surface stitches can make the outfit look more detailed.
Try a narrow stripe across the top, a contrasting skirt border, or a tiny embroidered star on the uniform.
Avoid licensed sports logos or copied mascots if you plan to sell the finished dolls.
Change the Doll’s Size
Yarn weight has a major effect on amigurumi size.
A thinner yarn produces a smaller, more delicate doll. A thicker yarn produces a larger project with more visible stitches.
When changing yarn sizes, make sure the hook still creates a firm fabric that conceals the stuffing.
Make the Doll More Gift-Friendly
Attach a small handwritten gift tag, crochet a simple carrying pouch, or create matching uniform colors for a cheerleading-themed celebration.
For a display piece, place the doll on a shelf with a small handmade crochet star or a miniature pennant.
For child-focused gifts, omit detachable decorations and replace fringe pom-poms with securely sewn, solid crocheted accessories.
Finishing Instructions
Finishing is what gives your doll a polished, professional appearance.
Fasten Off Securely
After your final stitch, cut the yarn while leaving a long enough tail to weave in.
Pull the tail completely through the last loop and tighten gently.
For sewn-on pieces, don’t cut the remaining tail until you’re finished attaching the component.
Weave In Loose Ends
Thread each loose yarn tail through a blunt needle.
Pass the needle beneath several stitches on the inside of the doll or garment.
Change direction once or twice to help prevent the end from slipping out.
Trim the remaining yarn carefully.
Shape the Doll
Gently press the head, torso, and shoes into their intended shapes using your hands.
Adjust the skirt so the hem sits evenly.
Arrange the hair and straighten the ponytail bow.
Fluff the pom-poms with your fingers.
Blocking and Washing
Amigurumi dolls generally don’t need traditional flat blocking.
If the skirt edge is uneven, lightly dampen it and shape it by hand while keeping the stuffed body dry.
For cleaning, gently spot-clean with mild detergent and cool water.
Avoid twisting or wringing the doll. Let it air-dry completely before storing or displaying it.
Always follow the care instructions for the yarn you’ve selected.
Toy Safety
This project uses sewn-on parts, yarn hair, and small accessories.
For display dolls, these details are decorative. For toys intended for young children, they require additional consideration because strands and attachments can become choking, strangulation, or entanglement hazards.
Use embroidered features instead of plastic eyes for young children’s toys, eliminate loose fringe, avoid detachable accessories, and reinforce all seams.
A handmade doll should not be considered suitable for an infant or toddler solely because it uses soft yarn. If you intend to sell it as a children’s toy, check applicable toy-safety requirements and testing standards.
Quick Printable-Style Pattern Summary
Crochet Cheerleader Doll — Quick Reference
SKILL LEVEL
Advanced beginner
TIME
5–8 hours
HOOK
2.75 mm
YARN
DK cotton blend
Main stitches: MR, sc, inc, dec, ch, dc, sl st, BLO.
Head: Begin with 6 sc in MR, increase to 36 sts, work even, decrease to a 12-stitch opening.
Legs: Make two 12-stitch tubes, beginning with ivory shoes and changing to beige.
Body: Start with 6 sc, increase to 24 sts, work even, decrease to a 12-stitch neck.
Arms: Make two 8-stitch tubes, 12 rounds each.
Uniform: Make a 24-stitch ivory top band and a separate skirt that expands from 24 to 36 sts.
Hair: Attach brown yarn strands and tie into a high ponytail.
Accessories: Make two small rose-and-ivory yarn pom-poms.
Finishing: Stuff, sew pieces securely, weave in ends, shape the skirt, and adjust the hair. Copy quick summary
Frequently Asked Questions
1. Is this crochet cheerleader doll pattern suitable for beginners?
Yes, it’s designed for advanced beginners who can make a magic ring, work single crochet stitches, and follow simple round counts.
The doll is constructed from individual pieces, so you can practice each shape separately before assembly.
If you’re completely new to crochet, practice single crochet increases and invisible decreases first.
2. What is the best yarn for a crochet cheerleader doll?
Smooth DK-weight cotton or cotton-acrylic yarn is a practical choice.
It makes the stitches easy to see and produces a firm, defined texture when worked with a slightly smaller hook.
Avoid very fuzzy yarn for your first amigurumi doll because the stitch positions can be difficult to identify.
3. How long does it take to make this amigurumi cheerleader?
Allow approximately five to eight hours for the full project.
More experienced crocheters may finish sooner, while beginners might prefer to spread the work across several sessions.
The head, torso, and limbs are generally straightforward. Sewing, hair, and decorative details often take the most time.
4. Can I make the cheerleader doll without plastic safety eyes?
Yes. Embroidered eyes are a good alternative and are recommended here.
Using dark brown or black embroidery thread, make two small horizontal stitches or compact eye shapes.
You can add tiny eyebrows and a short curved smile to give the doll a friendly expression.
5. How do I make the crochet skirt longer?
Work additional single crochet rounds after Round 6 and before the double crochet hem.
Keep the stitch count at 36 for each additional round.
One or two extra rounds can create a longer skirt, depending on your yarn and tension.
If you want a more dramatic flare, the skirt can be redesigned with additional evenly distributed increases.
6. Can I make the pom-poms entirely with crochet?
Yes. You can substitute small crocheted spheres for the fringe-style pom-poms.
Make two small stuffed balls using single crochet rounds, then sew them securely to the hands.
This option produces a more solid accessory without loose yarn fringe, although all attachments still need to be checked for safety.
7. Can I sell dolls made from this pattern?
This tutorial is intended to provide an original project design that readers can customize.
If you make physical dolls for sale, use your own branding and original product photography, and avoid unauthorized team logos or licensed character elements.
If the dolls are intended for children, follow the toy-safety requirements applicable to your market.
Conclusion
Making a crochet cheerleader doll is a rewarding way to practice amigurumi construction while creating something full of personality.
The rounded head, simple arms and legs, fitted uniform, and miniature pom-poms all use approachable techniques. By working through each section separately, you can focus on getting the stitches right without feeling overwhelmed.
Once you’ve finished your first doll, experiment with another uniform color, a different hairstyle, or a new facial expression. Small changes can create a completely different handmade character.
Save this crochet cheerleader doll pattern for your next amigurumi project, and try making a matching crochet mascot or miniature school-spirit accessory afterward.