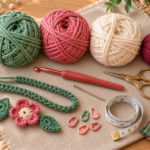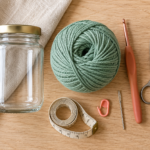
That empty jam jar sitting in your kitchen might be the beginning of your next favorite crochet project.
Instead of throwing away a perfectly good glass jar, you can give it a completely new purpose with a little leftover yarn and a few basic crochet stitches.
One of my favorite things about simple crochet upcycle ideas is that you don’t need to buy expensive supplies or spend an entire weekend making something useful. Sometimes the prettiest handmade projects start with ordinary things you already own.
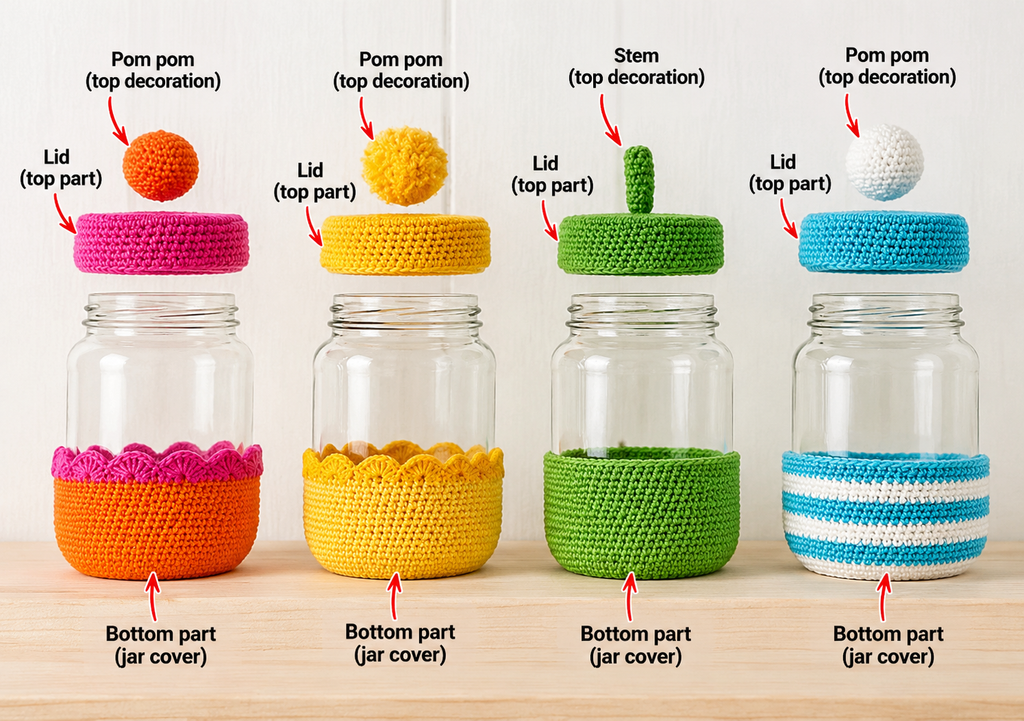
For this beginner-friendly tutorial, we’re transforming a clean glass jar into a charming crochet-covered organizer.
The finished jar is perfect for holding crochet hooks, pencils, buttons, small craft supplies, or even a tiny plant pot.
And the best part?
You only need to know how to make a few basic stitches.
We’ll start by crocheting a flat circular base, gradually build the sides, and finish with a neat, removable cover that fits around the jar.
Whether you’re learning to crochet or searching for creative ways to use leftover yarn, this project is a lovely place to begin.
What You’ll Learn
By the end of this tutorial, you’ll know how to:
- Turn an empty glass jar into useful handmade storage.
- Make a crochet circle using basic increases.
- Measure your crochet work to fit an existing container.
- Create straight, even sides using single crochet.
- Work into the back loop for a defined bottom edge.
- Customize the size, color, and finishing details.
- Secure your yarn ends for a neat, reusable finished project.
This is also a wonderful introduction to crocheting in the round, a technique you’ll use again for baskets, bags, coasters, and many other projects.
Why This Is One of the Easiest Crochet Upcycle Ideas
Some upcycling projects require sewing machines, complicated patterns, glue, or special tools.
This one doesn’t.
An ordinary glass jar is already a strong, functional container. Your crochet work only needs to give it a soft decorative cover.
That means you don’t have to worry about making a basket stand upright by itself. The glass supports the yarn and helps the finished project keep its shape.
It’s especially helpful when you’re still practicing even tension or learning to work in continuous rounds.
You can also make several matching jars using different leftover yarn colors. A set of three looks beautiful arranged on a craft-room shelf.
And because the crochet sleeve is removable, you can wash it separately or change the look whenever you want.
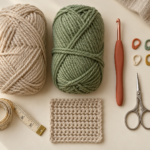
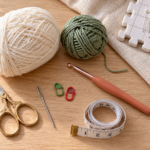
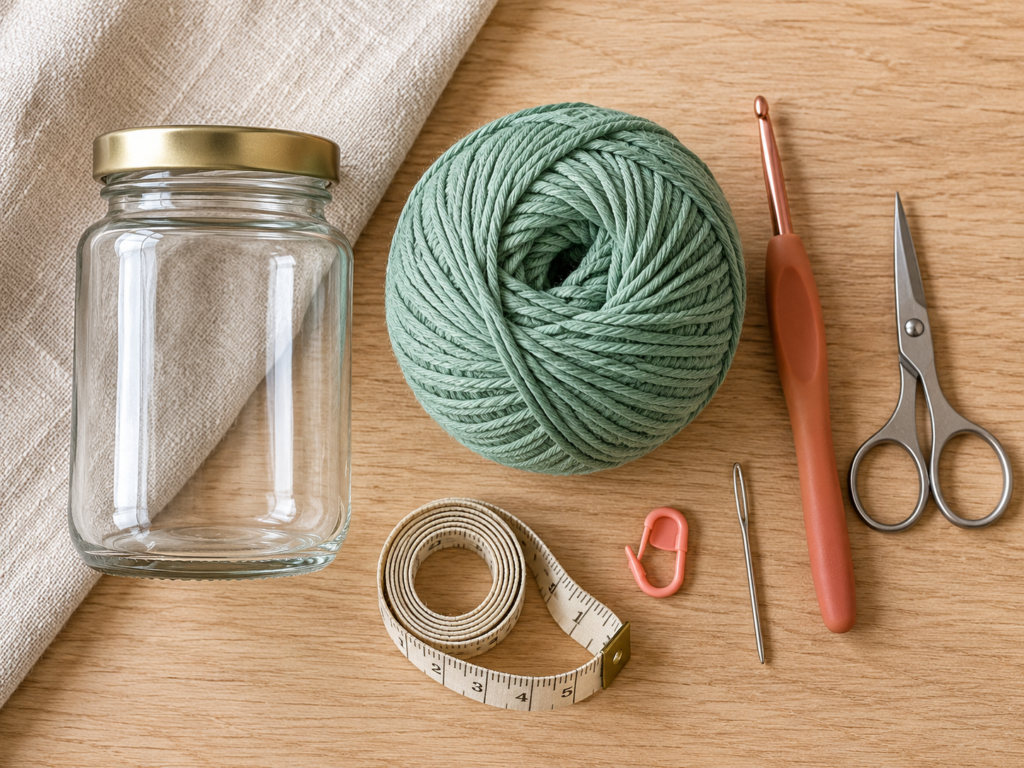
Materials You’ll Need
For one medium-sized crochet jar cover
| Material | Recommendation |
|---|---|
| Glass jar | One clean, undamaged cylindrical jar |
| Yarn | Approximately 30–60 g of DK cotton yarn, depending on jar size |
| Crochet hook | 3.5 mm (E/4) |
| Scissors | Small craft scissors |
| Yarn needle | Blunt tapestry needle |
| Stitch marker | One removable marker |
| Measuring tape | Flexible tape or small ruler |
| Optional decoration | Spare yarn for edging or a small decorative tag |
Choosing the right yarn
Cotton yarn is a particularly good choice for crochet storage projects because it has relatively little stretch, gives good stitch definition, and is available in many soft colors.
For this project, I recommend dusty sage, oatmeal, terracotta, warm cream, or muted rose.
You can also combine leftover yarn from several projects, provided the yarns have similar thicknesses.
Avoid highly fluffy or fuzzy yarn while learning. Smooth yarn makes it much easier to recognize individual stitches.
If your leftover yarn is slightly thinner than DK, try a smaller crochet hook. If it’s thicker, choose a larger hook and adjust the number of rounds to fit your jar.
Preparing the glass jar
Before you start crocheting, wash the jar thoroughly with warm water and dish soap.
Remove any paper labels and adhesive residue, then dry the jar completely.
Check the rim and base for cracks or sharp edges. Don’t use damaged glass.
For an easy beginner project, choose a jar with relatively straight sides and a flat bottom. Curved or tapered jars are attractive, but they require a little more attention when sizing the cover.
Crochet Abbreviations Used
This tutorial uses US crochet terminology.
| Abbreviation | Meaning |
|---|---|
| ch | Chain |
| sc | Single crochet |
| sl st | Slip stitch |
| st / sts | Stitch / stitches |
| rnd | Round |
| inc | Increase — work 2 sc into the same stitch |
| BLO | Back loop only |
| rep | Repeat |
Important US/UK terminology note: A US single crochet is called a UK double crochet. This article consistently uses US terminology to avoid confusion.
How to make a single crochet stitch
Insert your hook into the next stitch.
Wrap the working yarn over the hook and pull up a loop.
You should now have two loops on your hook.
Wrap the yarn over again and pull through both loops.
That’s one single crochet.
Take your time with this movement because you’ll repeat it throughout the project.
Before You Start
Understanding gauge and tension
Gauge describes how large your crochet stitches are.
For fitted garments, matching gauge is very important. For a jar cover, the actual jar becomes your sizing guide.
You don’t need to match a fixed gauge perfectly.
Instead, crochet your circle and regularly compare its diameter with the bottom of the jar.
Aim for a fabric that feels firm but flexible.
If your stitches are extremely loose, the cover may stretch or slide off easily.
If your stitches are too tight, fitting it over the jar may become difficult.
Try to keep your tension comfortable and consistent.
How to count stitches
Every single crochet stitch has a small V-shaped top.
When counting, look for these V shapes around the edge of your crochet work.
Place a stitch marker into the first stitch of each round so you always know where the round begins.
After finishing a round, move the marker into the first stitch of the next round.
This simple habit prevents many beginner mistakes.
Why we’ll use continuous rounds
Our jar cover is worked in a spiral rather than joining and turning after every round.
This creates a smoother appearance without an obvious vertical joining seam.
Because we won’t join most rounds, the stitch marker is essential.
How to keep your work flat
The circular base needs evenly spaced increases.
If you don’t add enough stitches, the circle may begin to curl upward before you’re ready.
If you add too many, the edge may become wavy.
The increasing instructions below will help you make a reasonably flat circle. Small variations are normal, particularly with different yarn and hook combinations.
Step-by-Step Crochet Tutorial
Step 1: Make a Magic Ring
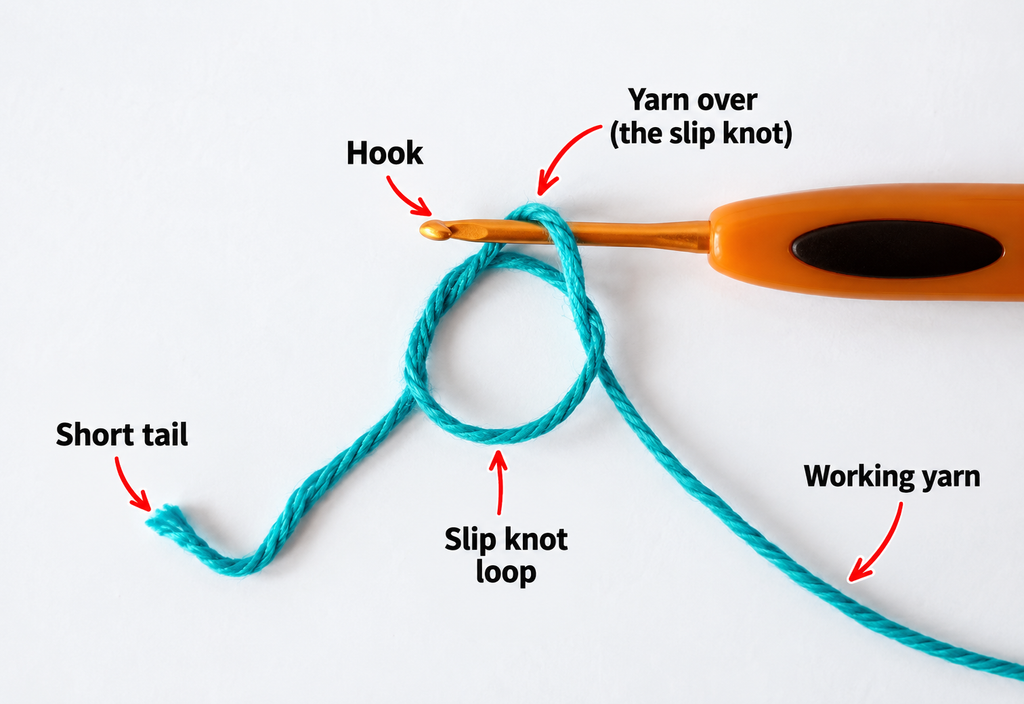
We begin with a magic ring, sometimes called a magic circle.
This technique creates an adjustable loop that you crochet your first stitches into.
Hold your working yarn in one hand, leaving a tail approximately 5–6 inches (13–15 cm) long.
Wrap the yarn around your fingers to create a crossed loop.
Insert the crochet hook underneath the loop, catch the working yarn, and pull up a new loop.
Chain one to secure the starting loop.
You now have an adjustable ring ready for your first round.
Don’t pull the ring closed yet.
Keep the center opening large enough to work your first stitches comfortably.
Beginner tip: Practice making the magic ring a few times with your hook and yarn before continuing. It may feel awkward initially, but it becomes easier with repetition.
Common mistake to avoid: Don’t accidentally work your stitches around only one strand when the starting loop needs to remain adjustable.
If the magic ring feels too difficult, use an alternative start: chain two, then work six single crochet stitches into the second chain from the hook.
Step 2: Crochet the First Round
Now we’ll make the center of our circular base.
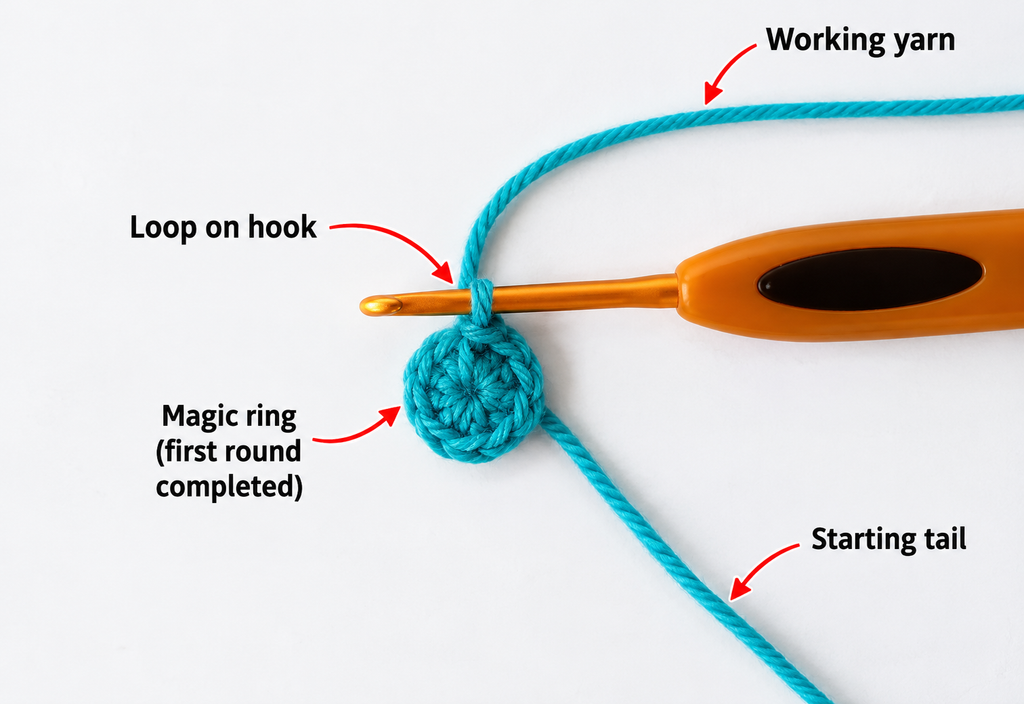
Work six single crochet stitches into the magic ring.
To do this, insert the hook through the center of the ring.
Yarn over and pull up a loop.
Yarn over again and pull through both loops.
Repeat until you have six single crochet stitches.
Once all six stitches are complete, gently pull the yarn tail until the center opening closes.
Try not to pull so hard that the stitches become distorted.
Place your stitch marker into the first single crochet stitch.
Your first round is complete.
Round 1: 6 sc into magic ring. (6 sts)
The small circle might look more like a tiny flower at this stage. That’s perfectly normal.
Beginner tip: Count all six stitches before moving on. Your starting chain does not count as a stitch.
Common mistake to avoid: If the magic ring refuses to close, check that the stitches were worked into the adjustable ring and that you haven’t trapped the tail incorrectly.
Step 3: Increase to Create a Flat Circle
The next few rounds will make the bottom of our jar cover wider.
An increase means making two single crochet stitches into the same stitch.
This adds stitches to the round without creating a hole.
We’ll use six evenly spaced increases in every increase round.
Follow these instructions:
| Round | Instructions | Total stitches |
|---|---|---|
| 1 | 6 sc into magic ring | 6 |
| 2 | 2 sc in every st | 12 |
| 3 | (1 sc, inc) repeat 6 times | 18 |
| 4 | (2 sc, inc) repeat 6 times | 24 |
| 5 | (3 sc, inc) repeat 6 times | 30 |
| 6 | (4 sc, inc) repeat 6 times | 36 |
| 7 | (5 sc, inc) repeat 6 times | 42 |
| 8 | (6 sc, inc) repeat 6 times | 48 |
These are instructions for our new beginner project, not a transcription of the reference pattern.
Continue increasing only until your circle approaches the size of your chosen jar base.
A very small jar may require fewer rounds, while a larger jar may need additional rounds.
For each extra increase round, add one more ordinary single crochet stitch between the six increases.
For example, after Round 8, the next increase round would be (7 sc, inc) repeated six times, ending with 54 stitches.
Notice how the circle gradually becomes wider while staying relatively flat.
Beginner tip: If the increases make visible corners, stagger their positions slightly in later rounds. You can redistribute the six increases evenly while keeping the same final stitch count.
Common mistake to avoid: Don’t increase in every stitch after Round 2. That adds far too many stitches and causes ruffling.
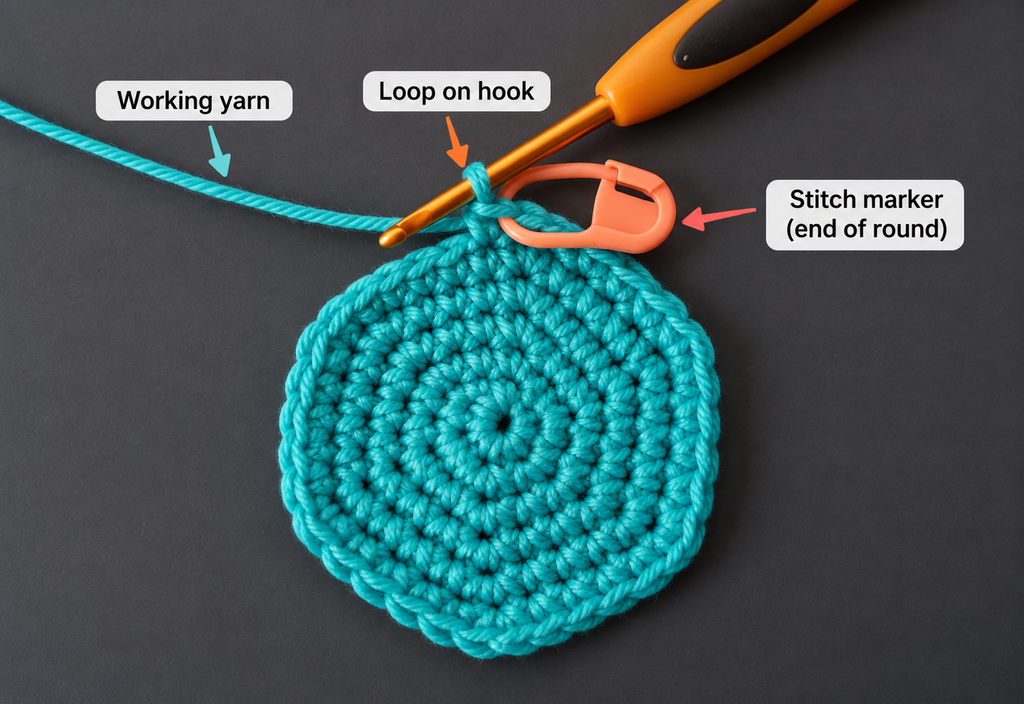
Step 4: Measure the Crochet Circle Against Your Jar
Before building the sides, it’s important to check the size.
Place the jar on your work surface.
Lay the crocheted circle flat beside it and compare their diameters.
For a removable cover that fits neatly, the base should be close to the jar’s bottom diameter.
Because crochet fabric stretches slightly, a very small difference is usually manageable.
However, a base that’s much too wide can make the finished cover loose and baggy.
A base that’s much too small may pull uncomfortably against the glass.
If your crochet circle is too small, continue with another increase round.
If it’s too large, undo the last increase round and compare again.
You can also change your hook size if your stitches seem unusually loose or tight, but remember that changing hooks partway through the project may create a visible difference in texture.
Beginner tip: Measure with the piece resting naturally, without pulling or stretching it.
Common mistake to avoid: Don’t assume two jars from the same brand have identical dimensions. Measure each jar, especially if you’re making a matching set.
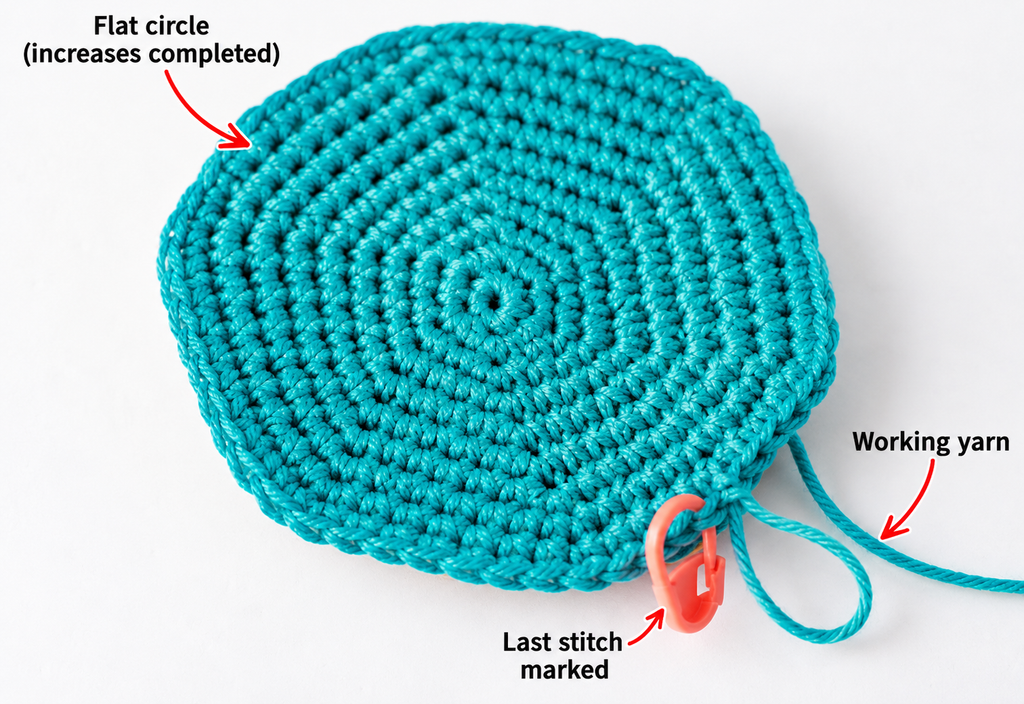
Step 5: Turn the Base Into the Sides
Now comes the part that makes this project look like a real storage cover.
Instead of continuing to increase the circle, we’re going to change the direction of the fabric.
We’ll do this using a back-loop-only round.
Look at the top of a crochet stitch.
You’ll see two strands forming a little V.
The strand closest to you is the front loop.
The strand farther away is the back loop.
Insert your hook under only the back loop of the next stitch.
Make a single crochet as usual.
Continue crocheting one single crochet into the back loop of every stitch around.
If you finished your base with 48 stitches, you’ll still have 48 stitches after this round.
Turning round: sc BLO in every stitch around. (48 sts for the sample)
This creates a subtle ridge where the flat base meets the vertical sides.
The ridge helps the sides turn upward more neatly.
It may not stand upright immediately. That’s normal. Once a few additional rounds are worked, the shape becomes more obvious.
Beginner tip: Work the first few stitches slowly. Back loops can be harder to see than ordinary stitch tops.
Common mistake to avoid: Don’t accidentally crochet into both loops during this round if you want a clearly defined bottom edge.
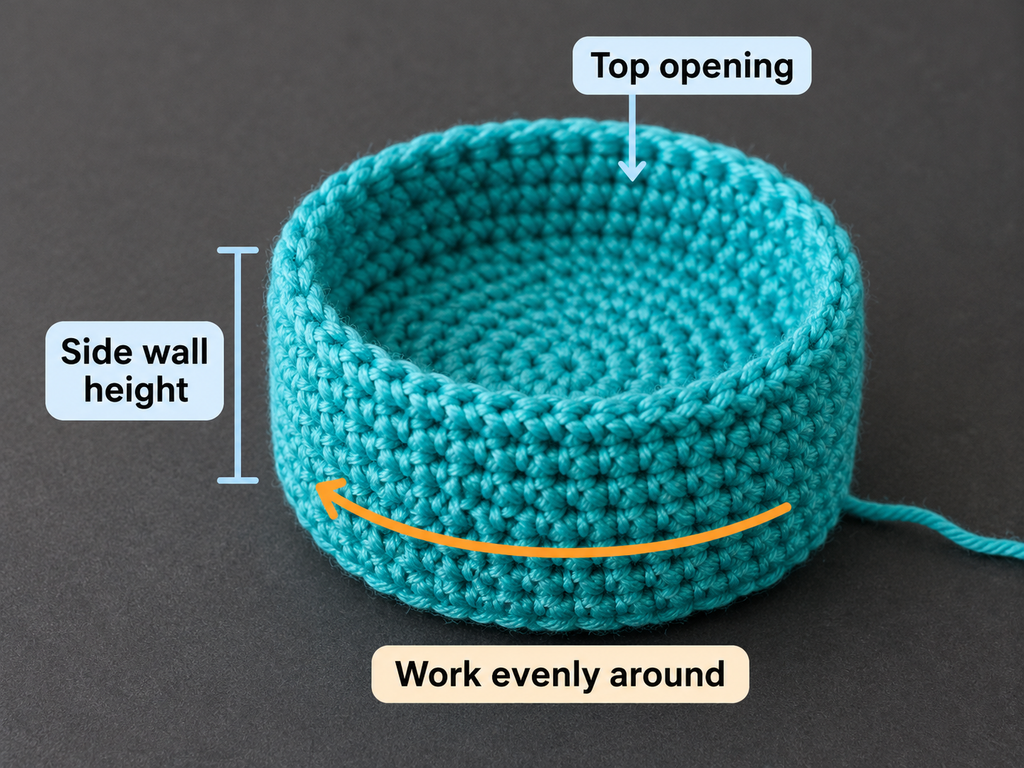
Step 6: Crochet the Side Walls
With the base complete, we’ll build the sides of our cover.
From now on, no increases are necessary for a straight-sided cylindrical jar.
Work one single crochet into each stitch around, inserting the hook under both loops.
Continue in spiral rounds.
For the sample with 48 stitches, every side round should contain 48 single crochet stitches.
As you complete more rounds, the circular fabric will begin to grow upward.
At first, it may look like a shallow bowl.
After several rounds, you’ll see a more recognizable cylindrical shape.
Keep crocheting until the sleeve reaches about half the height of your jar.
Don’t worry if it looks slightly shorter while relaxed. The shape may adjust when fitted onto the glass.
Beginner tip: After every two or three rounds, lay your work flat and check that the stitches look even. Count the stitches periodically.
Common mistake to avoid: Watch the stitch directly after your marker. If you accidentally skip a stitch at the beginning of a round, the sides can gradually become narrower.
For the cleanest appearance, use a similar amount of tension throughout.
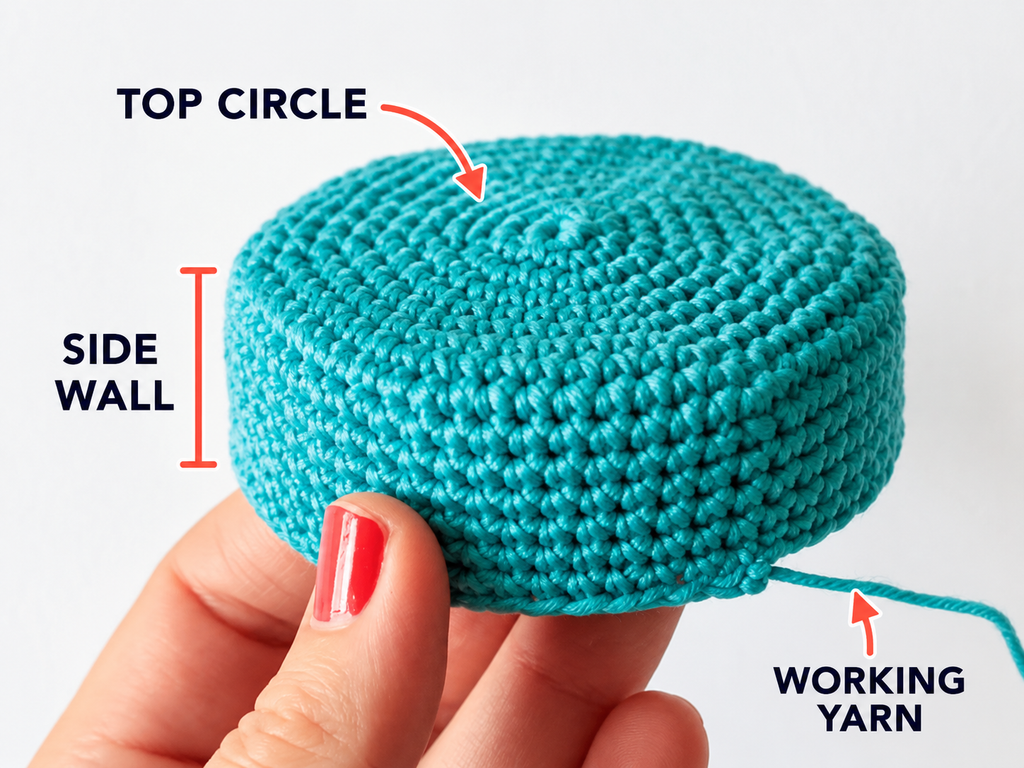
Step 7: Try the Cover on Your Jar
Once you have several side rounds finished, it’s time to test the fit.
Place the glass jar upright on your table.
Carefully slide the unfinished crochet sleeve over the bottom of the jar.
It should fit fairly snugly without requiring excessive force.
If the cover stretches a little, that’s fine.
But if the yarn is pulled so tightly that the stitches become distorted, you may need to add width.
If the cover slides off very easily or gathers into folds, the base may be too large.
Remove the sleeve and make any necessary adjustments.
When you’re happy with the fit, continue crocheting the sides until the cover reaches your desired height.
For a crochet hook holder, covering the bottom half or two-thirds of the jar often looks particularly attractive.
Leaving some glass visible at the top creates a light, practical design.
Beginner tip: Choose the height according to how you plan to use the jar. A shorter cover works beautifully for small containers. A taller cover makes a stronger visual statement.
Common mistake to avoid: Don’t crochet over the jar itself if doing so makes it difficult to rotate your work. Use the jar for periodic fitting tests and crochet separately.
Step 8: Finish the Top Edge
When your sleeve reaches the height you want, complete the current round.
Now we’ll make the top edge neat and secure.
For a simple finish, work one final round of single crochet without increasing or decreasing.
Try to maintain the same tension as the previous rounds.
Once the round is complete, work a slip stitch into the next stitch to smooth the ending.
Cut your yarn, leaving a tail approximately 6 inches (15 cm) long.
Pull the tail completely through the final loop and tighten gently.
The yarn is now fastened off.
For an even smoother-looking finish, you can use an invisible join with your yarn needle. This is optional and not necessary for a successful first project.
Beginner tip: Before cutting the yarn, check the cover’s height on the jar one final time.
Common mistake to avoid: Don’t pull the final slip stitch so tightly that it creates a noticeable indentation in the rim.
Your crochet sleeve should now be fully formed.
Step 9: Weave in the Yarn Ends
A neat finish makes even a simple beginner project look more polished.
Turn your crochet sleeve inside out.
Thread the yarn tail through a blunt tapestry needle.
Weave the needle through several nearby stitches on the wrong side of the work.
Change direction once and weave through a few more stitches to help secure the yarn.
Avoid pulling so tightly that the crochet surface puckers.
Trim the remaining yarn tail close to the fabric without cutting any stitches.
Repeat for the starting tail.
Turn the sleeve right side out again and gently shape it with your hands.
If your crochet base appears slightly uneven, place it flat on a table and smooth the edges.
Beginner tip: Weave the tails through the backs of several stitches rather than simply cutting them short. A short, unsecured end can eventually come loose.
Common mistake to avoid: Don’t use sharp scissors too close to the stitch structure.
Step 10: Place the Finished Cover on the Jar
Your handmade jar cover is complete!
Take your clean, dry glass jar and carefully slide the finished crochet sleeve into place.
Adjust the bottom so the crochet circle sits neatly beneath the glass.
Smooth the sides gently with your fingers.
Check that the top edge sits evenly around the jar.
If the cover is removable and fits comfortably, you’re ready to start using your newly upcycled container.
Try filling it with crochet hooks, scissors with protective covers, pens, or other small crafting essentials.
The dusty sage yarn adds a soft handmade touch while the visible glass keeps the finished piece feeling light and modern.
And you’ve created something useful without needing a complicated pattern or buying a brand-new storage container.
Pattern Notes and Stitch Counts
This project is designed to be adjusted to your own jar.
Foundation and increases
Start with six single crochet stitches.
Add six stitches per increase round until the base reaches the desired diameter.
The number of increase rounds depends on the jar size, hook, yarn, and individual tension.
Side rounds
Once the base is wide enough, work one back-loop-only round with no increases.
Continue making one single crochet in every stitch for each remaining side round.
Turning chains
Because the sample uses continuous spiral rounds, no turning chain is needed between rounds.
Right side and wrong side
Keep the same side of the crochet facing outward throughout the project.
The smoother, more regular-looking side can become the outside of your jar cover.
Repeat pattern
The side-wall repeat is simple:
1 sc in each stitch around; repeat until desired height.
Stitch count
If the last increase round contains 48 stitches, every straight side round should also contain 48 stitches.
This count remains constant unless you intentionally reshape the sleeve for a tapered jar.
Adjusting the size
For a smaller jar, stop increasing earlier.
For a larger jar, continue the six-increase system until the base fits.
For a taller jar, simply work more straight side rounds.
These adjustments make the design useful for many common container sizes.
Common Beginner Crochet Mistakes and How to Fix Them
Even a simple crochet project can come with a few surprises.
The good news is that most beginner mistakes are easy to correct.
1. The crochet circle becomes wavy
This usually means the circle has too many stitches for its size or your tension.
Check whether you’ve accidentally made extra increases.
If necessary, undo the last round and work the correct number of evenly spaced increases.
A slightly wavy edge may settle when the piece is shaped, but pronounced ruffling usually needs correction.
2. The crochet circle curls upward too early
You may have missed increases, used a very small hook, or crocheted too tightly.
Count your stitches and compare the result with the pattern.
If the stitch count is correct but the fabric feels unusually stiff, try a slightly larger hook.
3. The sides become narrower as you work
Missing stitches is a common cause.
This often happens near the beginning of a round, especially if the first stitch isn’t clearly marked.
Move your stitch marker carefully and count after every few rounds.
4. The finished cover is too loose
A loose cover may be caused by a base that’s too wide or yarn that stretches more than expected.
The best correction is usually to undo the wall rounds and reduce the base diameter before rebuilding the sides.
A smaller hook can help with future versions, but it won’t always correct an oversized base.
5. The cover is too tight
If the cover barely fits over the jar, the base circumference may be too small.
Undo the turning round, work another properly spaced increase round, and try again.
Remember that cotton can relax a little with use, but you shouldn’t have to force the sleeve over the glass.
6. The stitches look uneven
Uneven stitches usually come from inconsistent yarn tension.
Try holding the yarn in the same way throughout the project.
Work slowly and avoid suddenly pulling the yarn tighter after each stitch.
Some handmade variation is completely normal.
7. The magic ring opens again
If the center begins to loosen, the starting yarn tail may not have been secured sufficiently.
Tighten it gently and weave the tail through several stitches on the wrong side.
Changing weaving direction helps keep it in place.
How to Customize This Crochet Project
Once you’ve made one jar cover, you’ll probably start seeing possibilities everywhere.
The basic construction can be used for many different styles.
Try different yarn colors
A collection of neutral jars looks lovely on a minimalist craft shelf.
Use cream, dusty sage, warm taupe, and oatmeal for a calm coordinated palette.
For a cheerful craft room, try mustard, coral, sky blue, or lavender.
Using leftover yarn makes each cover unique and helps use small quantities from previous projects.
Add simple stripes
Change color at the beginning of a side round.
Work two or three rounds in one color, then switch back to the main shade.
For the neatest transition, pull the new color through the last two loops of the final stitch before the color change.
Weave in the tails carefully when finished.
Make a shorter cover
A short sleeve around the bottom of a jar creates a simple decorative accent.
This style works especially well for pencil holders and small vases.
Make a taller cover
For a more enclosed storage look, continue the side rounds until the cover reaches just below the jar’s rim.
Avoid extending the crochet over a sharp or damaged rim.
Add a contrasting border
Instead of using only one color, work the final round with a contrasting cotton yarn.
A cream border against dusty sage can create a lovely handmade finish.
If you prefer a flatter, simpler appearance, keep the entire sleeve in one color.
Experiment with texture
After you’re comfortable with single crochet, you can try alternating rounds of ordinary single crochet and back-loop-only single crochet on the walls.
This creates subtle horizontal ridges.
Remember that changing stitches may affect the cover’s flexibility and measurements, so check the fit as you work.
Create useful handmade gifts
Fill a finished jar with wrapped candies, decorative buttons, or craft supplies.
Add a little handmade gift tag tied around the glass neck.
For an especially thoughtful gift, make a matching pair of jars—one for pencils and another for crochet hooks.
Avoid using the crocheted fabric where it could become contaminated by uncovered food.
More crochet upcycle ideas to try next
Once you’ve mastered this jar cover, the same beginner skills can inspire other useful projects:
- A simple single crochet cover for a clean metal pencil tin.
- A tiny coaster made from leftover cotton yarn.
- A soft crochet sleeve for a reusable plant container.
- A colorful granny-square patch sewn onto an old tote bag.
- A small basket made with homemade T-shirt yarn.
These projects give you opportunities to practice familiar stitches while extending the life of materials you already have.
Finishing Instructions and Care
The final step is making sure your project stays beautiful and useful.
First, check that every yarn tail is securely woven in.
Next, place the sleeve on the jar and adjust its shape.
You can gently smooth the sides with your hands.
For a cotton cover that needs extra shaping, lightly dampen the crochet fabric and arrange it around the clean jar, provided the yarn care instructions allow this. Let it dry fully before storing anything in the jar.
Heavy blocking isn’t usually necessary for a simple sleeve.
How to wash your crochet jar cover
Remove the crochet sleeve from the jar.
Follow the care instructions on your yarn label.
For washable cotton, gentle hand washing in cool or lukewarm water is a reasonable choice.
Avoid twisting or stretching the fabric aggressively.
Press excess water out gently with a towel.
Lay the cover flat or shape it over an appropriate clean container to air-dry completely.
Don’t place a damp sleeve onto a jar that will hold moisture-sensitive supplies.
Safety notes
Always inspect reused glass jars for chips and cracks.
Avoid using ordinary glass jars for hot liquids unless they are specifically designed for that purpose.
If you’re creating a decorative candle holder, use a flameless LED light rather than placing crochet yarn near an open flame.
For a plant pot cover, keep moisture from collecting between the container and the crocheted sleeve, since prolonged dampness may cause staining or odors.
Your Finished Crochet Upcycle Jar
Take a moment to appreciate what you’ve made.
You started with an empty container and a small amount of yarn.
Now you have a pretty, reusable piece of storage that adds personality to your desk, shelf, or craft corner.
And because the pattern is adjustable, you can make several versions without having to learn a completely new technique.
Quick Printable-Style Crochet Pattern Summary
Easy Upcycled Glass Jar Cover
ORIGINAL BEGINNER PATTERN — US CROCHET TERMS
Skill Level: Beginner
Estimated Time: 1–2 hours
Materials: Clean jar, DK cotton yarn, 3.5 mm crochet hook, stitch marker, scissors, yarn needle, measuring tape.
Stitches: Magic ring, sc, inc, BLO sc, sl st.
Starting Method: Magic ring with 6 sc.
Pattern:
- Rnd 1: 6 sc into magic ring. (6)
- Rnd 2: Inc in each stitch. (12)
- Rnd 3: (1 sc, inc) × 6. (18)
- Rnd 4: (2 sc, inc) × 6. (24)
- Rnd 5: (3 sc, inc) × 6. (30)
- Rnd 6: (4 sc, inc) × 6. (36)
- Rnd 7: (5 sc, inc) × 6. (42)
- Rnd 8: (6 sc, inc) × 6. (48)
Adjustable sizing: Stop increasing when the base fits your jar, or continue with six increases in each additional round.
Turning Round: Sc BLO in every stitch.
Side Repeat: Sc in every stitch around until desired height.
Finishing: Sl st into next stitch, fasten off, weave in ends, and fit onto jar.
Note: Work in continuous rounds, using a stitch marker. The 48-stitch example is not guaranteed to fit every jar; fit is determined by actual measurements.
Frequently Asked Questions About Crochet Upcycle Ideas
1. What can I upcycle with crochet?
Many everyday household items can be transformed using crochet.
Glass jars can become decorative storage containers, clean tins can become pencil holders, old fabric can be repurposed into yarn, and leftover yarn can become coasters or small accessories.
Beginners should choose sturdy items that need only a simple crochet cover.
2. Is a crochet jar cover suitable for beginners?
Yes. This is an excellent beginner project if you know basic single crochet and are ready to practice crocheting in the round.
The cover uses a repetitive stitch pattern and doesn’t require complicated shaping.
The jar also supports the finished fabric, so you don’t need to create a perfectly rigid structure.
3. What is the best yarn for crochet upcycling projects?
Cotton yarn is a versatile option for covers, coasters, reusable cloths, and small storage accessories.
It provides clear stitch definition and usually stretches less than many soft synthetic yarns.
However, different projects benefit from different yarns. For example, a chunky basket may work better with recycled T-shirt yarn.
4. Can I make a crochet jar cover without a magic ring?
Yes.
You can chain two and work the first six single crochet stitches into the second chain from the hook.
This alternative may leave a slightly different center, but it works well for a simple covered jar base.
5. How do I make the crochet cover bigger or smaller?
Adjust the number of increase rounds in the circular base.
For a smaller jar, stop increasing sooner.
For a larger jar, continue increasing evenly until the circular base matches the jar bottom.
Then crochet the side walls without additional increases.
6. Can I use leftover yarn for this project?
Absolutely.
Using leftover yarn is one of the main advantages of crochet upcycling.
Small amounts of cotton yarn can be combined into stripes, borders, or decorative details.
Try to use yarn of similar thickness so the fabric remains even.
7. Can crochet jar covers be washed?
Most covers can be washed according to their yarn’s care instructions.
Removable cotton sleeves are particularly convenient because you can clean the glass separately.
Always dry the crocheted cover thoroughly before putting it back onto the jar.
Conclusion
There’s something especially satisfying about turning an ordinary household item into something handmade and useful.
This simple glass jar project shows that crochet upcycle ideas don’t need to be complicated.
With a few basic stitches, some leftover cotton yarn, and an empty container, you can create beautiful storage while practicing essential crochet skills.
The more comfortable you become with circular bases and straight side rounds, the easier it will be to experiment with other sizes, textures, and colors.
Save this tutorial for your next relaxing crochet afternoon, and keep an eye out for other everyday objects that could become your next handmade creation.