A classroom can feel completely different when it includes a few handmade details. One small crochet decoration can soften a bulletin board, brighten a reading corner, welcome children back to school, or give a teacher’s door a personal touch without covering the room in disposable seasonal decorations.
For this beginner-friendly tutorial, we are turning a simple crochet apple motif into a complete five-apple classroom garland.
Each apple is worked as a flat appliqué. You begin with a simple circular center, add a contrasting outer border, shape a subtle indentation at the top, crochet a stem and leaf, embroider two small seeds, and finally connect several finished apples to a long crochet chain.
The finished decoration works particularly well:
- Across a bulletin board.
- Above a classroom door.
- On the front of a teacher’s desk.
- Around a reading corner.
- Over a classroom bookshelf.
- As a back-to-school photo backdrop.
- On a homeschool learning wall.
- As a handmade teacher gift.
The project uses basic stitches plus a small amount of sewing. According to the Craft Yarn Council’s general skill-level framework, projects based mainly on basic stitches and uncomplicated shaping fall toward the lower end of crochet difficulty classifications.
This version is designed specifically for beginners who want a real finished décor project rather than another practice swatch.
What You’ll Learn
By completing this crochet classroom decoration, you will practice how to:
- Begin crocheting with a magic ring.
- Work flat circular rounds.
- Make simple increases.
- Count stitches accurately.
- Change yarn colors.
- Shape a flat circle into a recognizable apple.
- Crochet a small stem.
- Make a two-sided leaf around a foundation chain.
- Add surface embroidery.
- Sew appliqué pieces securely.
- Repeat motifs consistently.
- Create a crochet garland cord.
- Arrange multiple motifs with even spacing.
- Block a flat crochet project.
Materials You’ll Need
For a five-apple classroom garland measuring approximately 42–48 inches long, gather:
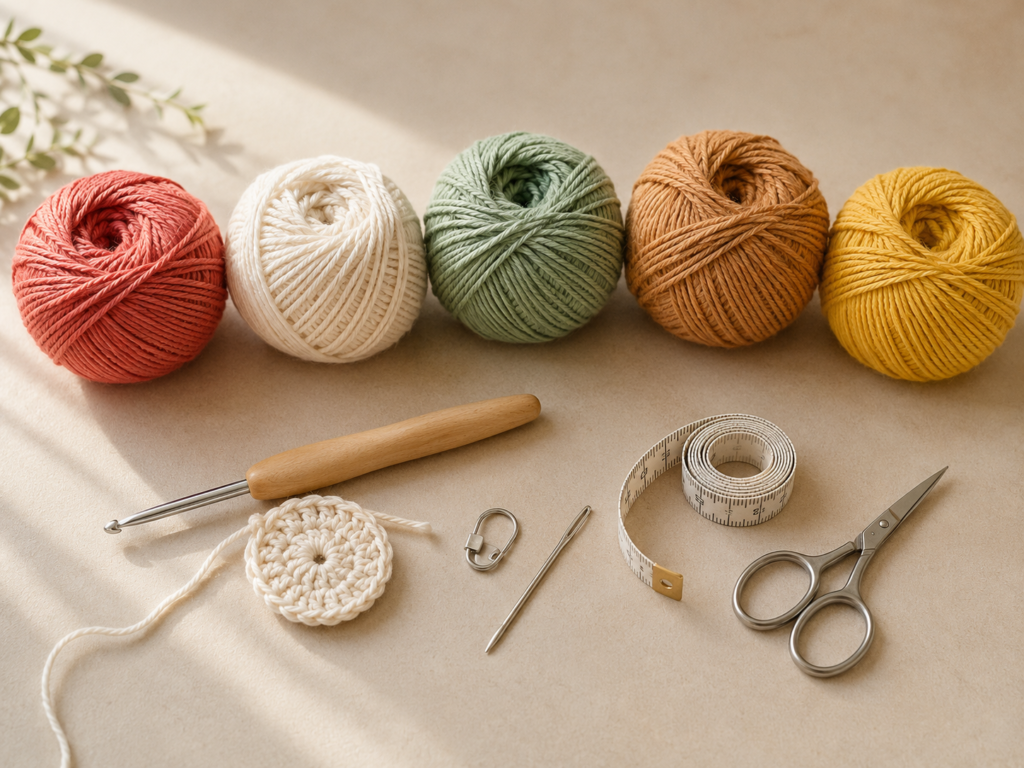
- DK/light worsted cotton or cotton-blend yarn in warm ivory
- DK/light worsted yarn in muted coral red
- Small amount of sage-green yarn
- Small amount of golden-tan yarn
- Optional mustard or alternate red yarn for color variations
- 3.5 mm / E-4 crochet hook
- Locking stitch marker
- Blunt tapestry needle
- Small embroidery scissors
- Measuring tape
- Rustproof blocking pins
- Optional blocking mat
A DK or light-worsted yarn falls within the light yarn-weight category in the Craft Yarn Council system, though individual yarns can vary in thickness and recommended hook size.
The Craft Yarn Council’s hook-size chart identifies 3.5 mm as a U.S. E-4 crochet hook.
Approximate yarn amounts
For five motifs:
- Ivory: 60–80 yards.
- Coral red: 35–50 yards.
- Sage green: 10–15 yards.
- Golden tan: 8–12 yards.
- Garland cord: approximately 15–25 yards, depending on length.
Exact yardage varies with yarn thickness, tension, motif size, and desired garland length.
Finished Size
Using DK yarn and a 3.5 mm hook:
Each apple motif: Approximately 4–4.5 inches / 10–11.5 cm across.
Five-apple garland: Approximately 42–48 inches / 107–122 cm long, depending on the length of your hanging chain and spaces between apples.
The exact dimensions are not critical because this is a decorative project.
Crochet Abbreviations Used
This tutorial uses U.S. crochet terminology:
- ch = chain
- sc = single crochet
- hdc = half double crochet
- dc = double crochet
- tr = treble crochet
- sl st = slip stitch
- st/sts = stitch/stitches
- rep = repeat
- inc = increase
- RS = right side
- WS = wrong side
These abbreviations are consistent with the Craft Yarn Council’s standardized crochet terminology.
U.S./U.K. terminology note
This pattern is written in U.S. terms. Be particularly careful when using a U.K. stitch guide because the names differ. For example, a U.S. single crochet is not called a single crochet in standard U.K. terminology.
Before You Start
Gauge and tension
Exact gauge is not essential for a decorative garland, but all five apples should be reasonably similar in size.
The best strategy is to crochet the first apple completely and use it as your master sample.
Lay every new motif on top of the first one. The edges should approximately align.
A small difference of a few millimeters is normal and adds handmade character. A difference of an inch usually indicates a major change in tension or stitch count.
How to count stitches
Count only completed stitches.
The chain used to begin a round does not count as a stitch in this original pattern.
Place a stitch marker in the first real stitch of each round when necessary.
How to keep the apple flat
A flat circular motif depends on consistent increases.
This original apple center grows as follows:
- Round 1: 12 stitches.
- Round 2: 24 stitches.
- Round 3: 36 stitches.
Do not add random extra stitches to correct apparent gaps. First complete the entire round, lay the motif flat, and then assess its shape.
How to avoid curling
If your apple forms a small bowl, you may be crocheting very tightly.
Try one or more of these fixes:
- Relax your yarn tension.
- Use a 4 mm hook instead of 3.5 mm.
- Steam-block lightly after completion if the yarn permits.
- Confirm that you have not missed an increase.
How to choose classroom colors
A classic apple palette uses red, cream, green, and brown. For a more modern classroom, try:
- Rust + oatmeal + olive.
- Mustard + cream + forest green.
- Dusty pink + ivory + sage.
- Navy + pale blue + tan.
- Rainbow apples with consistent green leaves.
Keeping the leaf and stem colors consistent helps a multicolor garland feel coordinated.
Step-by-Step Crochet Tutorial
Step 1: Crochet the Ivory Apple Center
Begin with warm ivory yarn.
Make a magic ring.
Round 1
Ch 2. This beginning chain does not count as a stitch.
Work 12 hdc into the magic ring.
Pull the yarn tail gently to close the center.
Join with a sl st to the first hdc.
Stitch count: 12
Round 2
Ch 2.
Work 2 hdc in each stitch around.
Join with a sl st to the first hdc.
Stitch count: 24
Round 3
Ch 2.
Work:
*1 hdc in next st, 2 hdc in next st; repeat from * around.
Join with a sl st to the first hdc.
Stitch count: 36
Fasten off the ivory yarn.
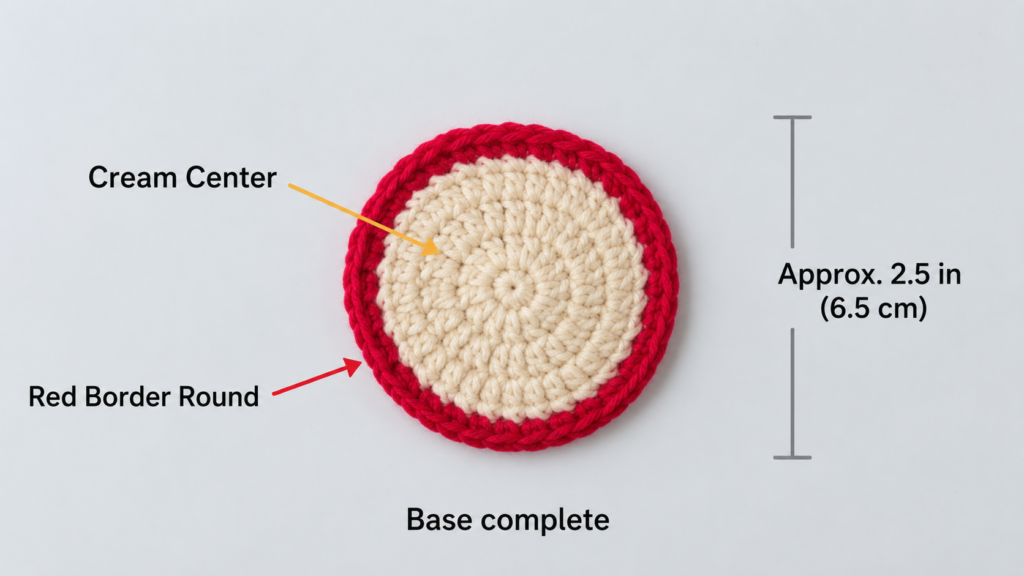
At this stage, your piece should look like a reasonably flat circular coaster.
Beginner tip:
Place a stitch marker after each completed group of six stitches while learning. This divides the round into smaller sections and makes counting less frustrating.
Common mistake to avoid:
Crocheting into the slip-stitch join as though it were another stitch.
After joining a round, begin the next round in the first actual hdc, not in the slip stitch.
Step 2: Add the Red Apple Edge and Shape the Top
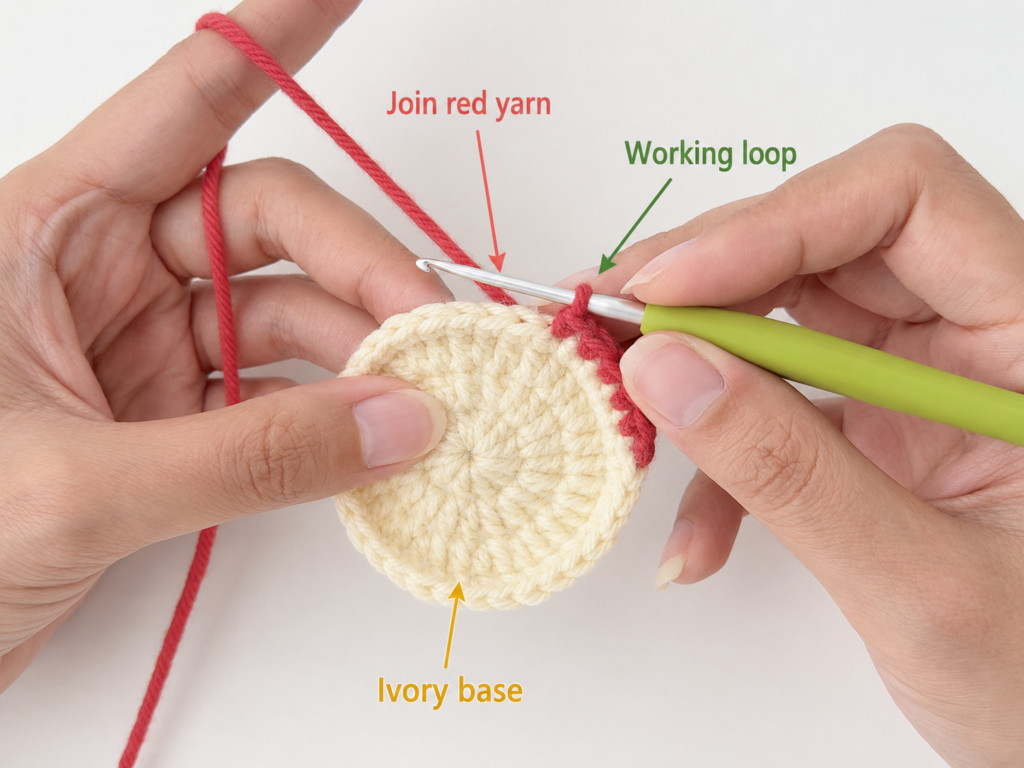
Join muted coral-red yarn in any stitch from Round 3.
Ch 1.
Work 1 sc in each stitch around.
Join with a sl st to the first sc.
Stitch count: 36
Fasten off, but leave approximately a 10-inch yarn tail.
Now place the apple flat with the yarn tail positioned at approximately 12 o’clock.
Thread the tail onto your tapestry needle.
To create a subtle top indentation:
- Insert the needle through the wrong side of one red border stitch near the top.
- Move across approximately two adjacent stitches.
- Pass the needle back through the border toward the wrong side.
- Pull very gently until the upper edge dips inward.
- Secure the yarn on the wrong side.
Do not pull aggressively. The apple needs only a small indentation.
The exact shape will vary slightly between handmade motifs, and that is completely acceptable.
Beginner tip:
Shape all five apples after crocheting them so you can compare the depth of each indentation.
Common mistake to avoid:
Pulling the shaping yarn so tightly that the cream center folds.
You want a gentle dip, not a deep pleat.
Step 3: Crochet the Apple Stem
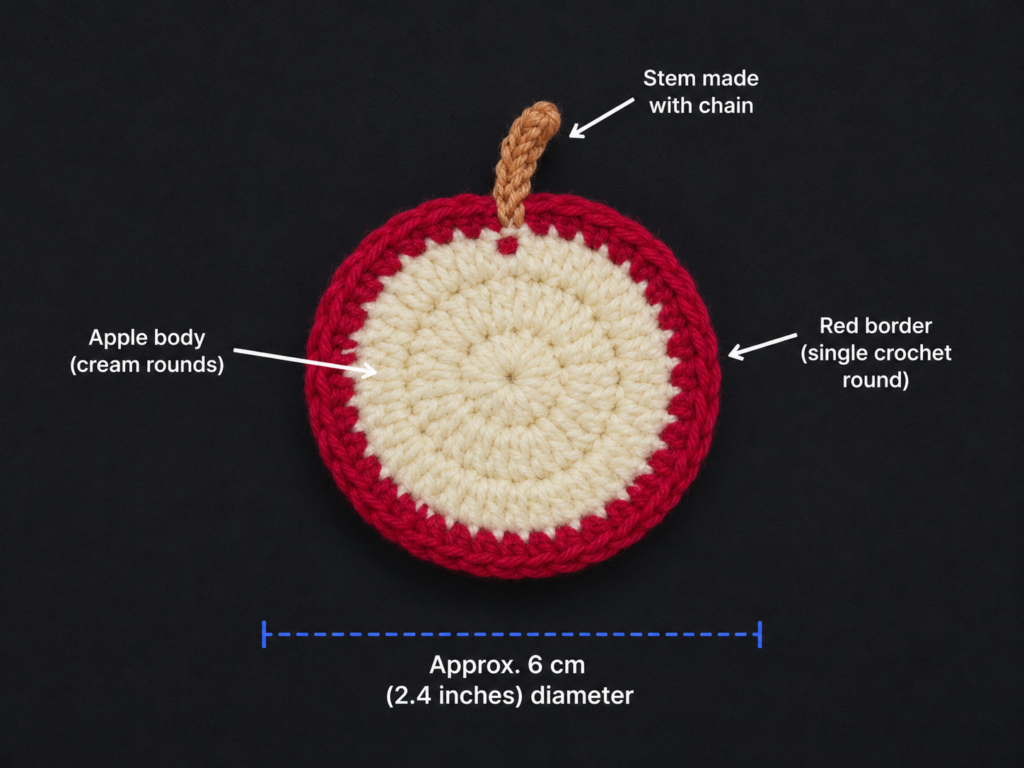
With golden-tan yarn:
Ch 9.
Starting in the second chain from the hook:
Sl st in each of the next 8 chains.
Fasten off, leaving a long tail for sewing.
The stem should be slightly flexible rather than stiff.
You may shorten it by one or two chains for smaller apples.
Beginner tip:
Keep your slip stitches relaxed. Very tight slip stitches can make the stem curl severely.
Common mistake to avoid:
Using the same tension as a tight foundation chain.
Allow the hook to move comfortably through every chain.
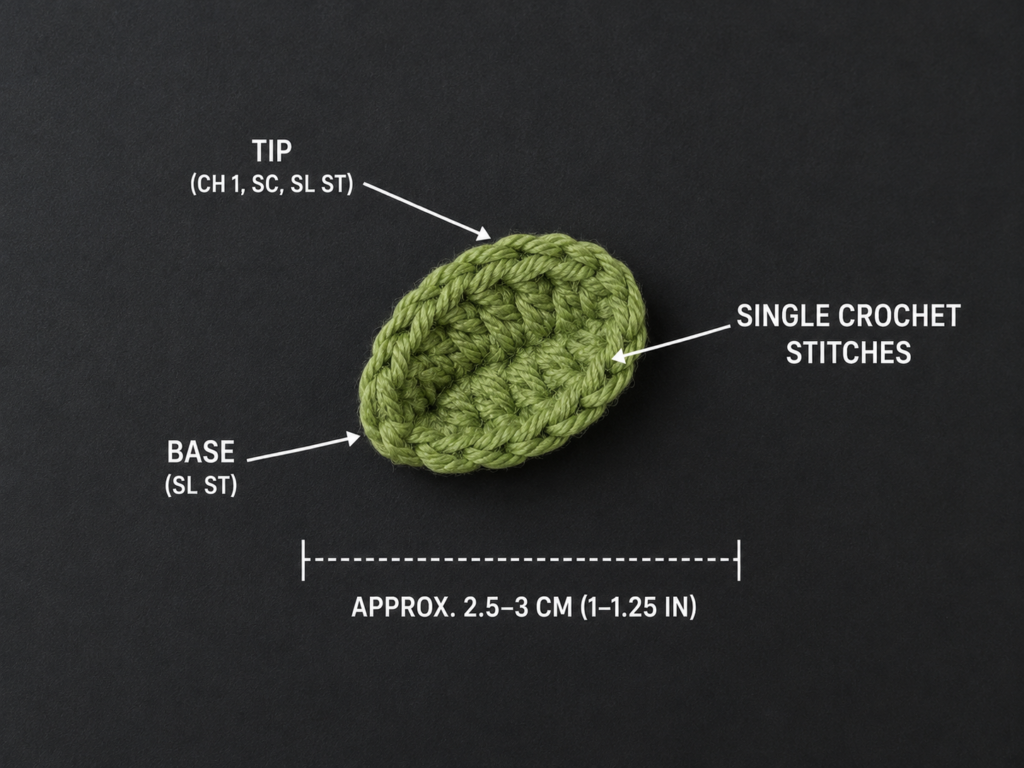
Step 4: Crochet the Sage-Green Leaf
With sage-green yarn:
Ch 8.
Beginning in the second chain from the hook, work:
- 1 sc.
- 1 hdc.
- 1 dc.
- 1 tr.
- 1 dc.
- 1 hdc.
- 1 sc.
You have now worked along one side of the foundation chain.
Ch 1.
Rotate the piece so you can work along the unused loops on the opposite side of the chain.
Work:
- 1 sc.
- 1 hdc.
- 1 dc.
- 1 tr.
- 1 dc.
- 1 hdc.
- 1 sc.
Join with a sl st near the beginning of the leaf.
Fasten off, leaving a long sewing tail.
The different stitch heights create the leaf’s curved shape: shorter stitches sit near the ends, while the treble stitches add width at the center.
Beginner tip:
Before fastening off, gently flatten the leaf between your fingers. Check that both sides look reasonably balanced.
Common mistake to avoid:
Missing the unused loops on the second side of the foundation chain.
Rotate the chain slowly. You should see a clear line of unused loops where the second half of the leaf is worked.
Step 5: Embroider Two Apple Seeds
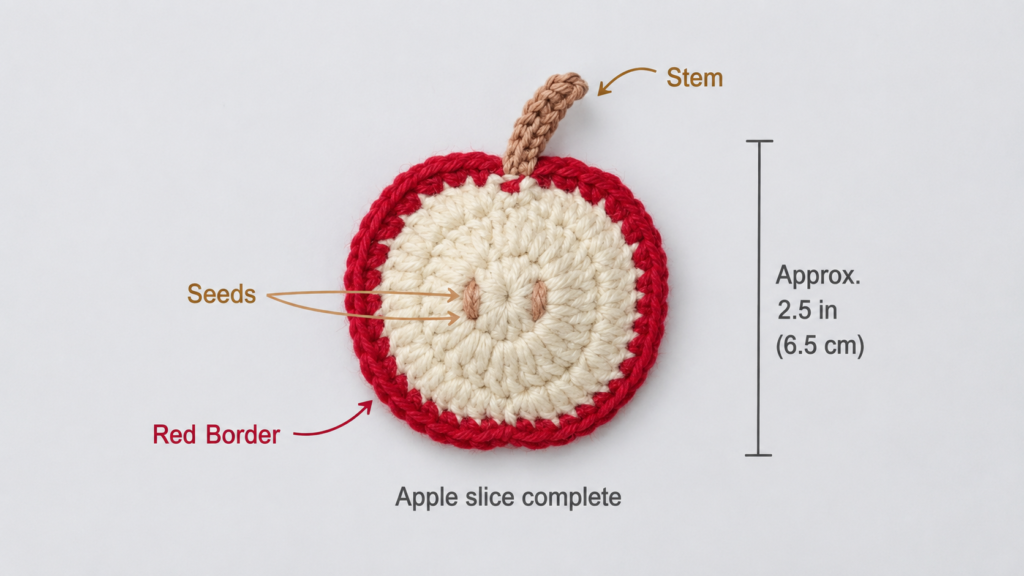
Thread approximately 12 inches of golden-tan yarn onto your tapestry needle.
From the wrong side of the apple, bring the needle through the cream center approximately one inch below the middle.
Make one short vertical straight stitch.
Move approximately half an inch to the side and make a second matching stitch.
Secure the yarn on the wrong side.
The seeds should be small and subtle.
They do not need to be perfectly identical.
Beginner tip:
Before pulling the embroidery yarn completely through, place both seed positions mentally and check their spacing.
Common mistake to avoid:
Making very long stitches.
Large seed stitches can dominate the small apple. Keep them proportional to the motif.
Step 6: Sew the Stem and Leaf onto the Apple
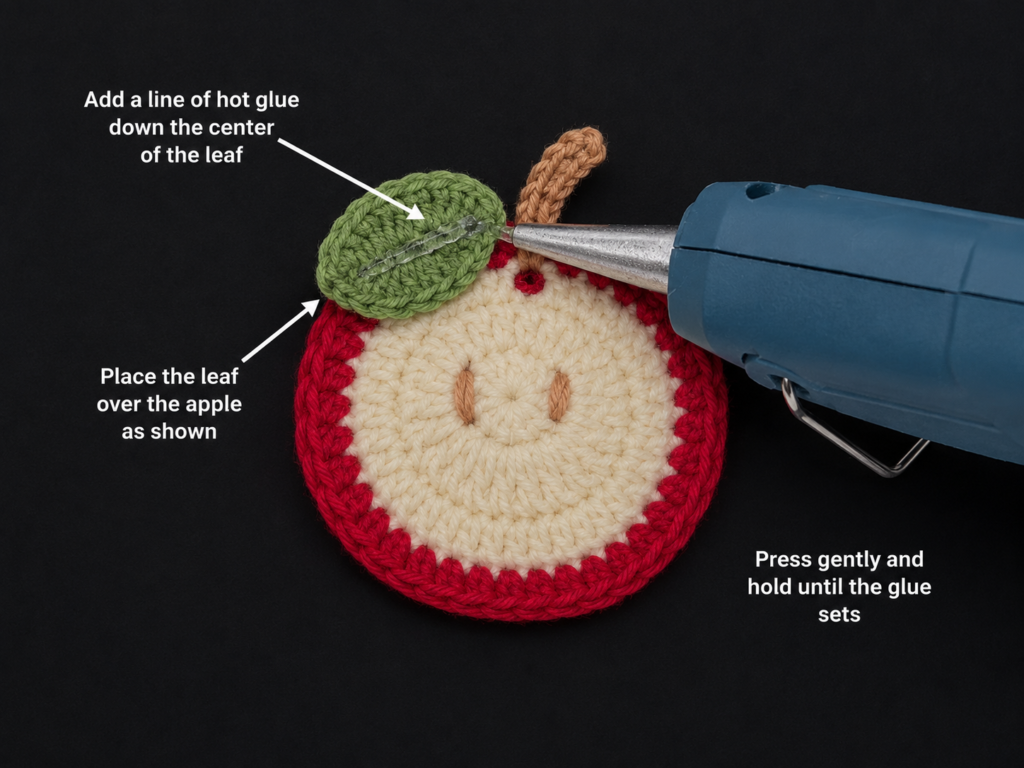
Position the stem behind the upper indentation.
Approximately one-third of the stem should overlap the back of the apple.
Using its long yarn tail, sew through several upper border stitches until the stem feels secure.
Weave in the remaining tail on the wrong side.
Now position the sage leaf at a slight diagonal beside the stem.
Instead of centering it perfectly, angle the pointed end toward one side. This makes the apple look more natural.
Use the leaf’s sewing tail and tapestry needle to secure:
- The lower end of the leaf.
- One or two stitches along the center.
- Optionally, a tiny point near one side if the leaf curls too much.
Avoid stitching around the complete perimeter. Leaving the pointed end slightly free creates more dimension.
Beginner tip:
Arrange the stem and leaf without sewing first. Photograph the placement with your phone so you can reproduce approximately the same arrangement on the remaining apples.
Common mistake to avoid:
Sewing through only one strand of yarn.
Pass through sturdy crochet stitches rather than fuzzy surface fibers so the pieces remain secure.
Step 7: Repeat Until You Have Five Apples
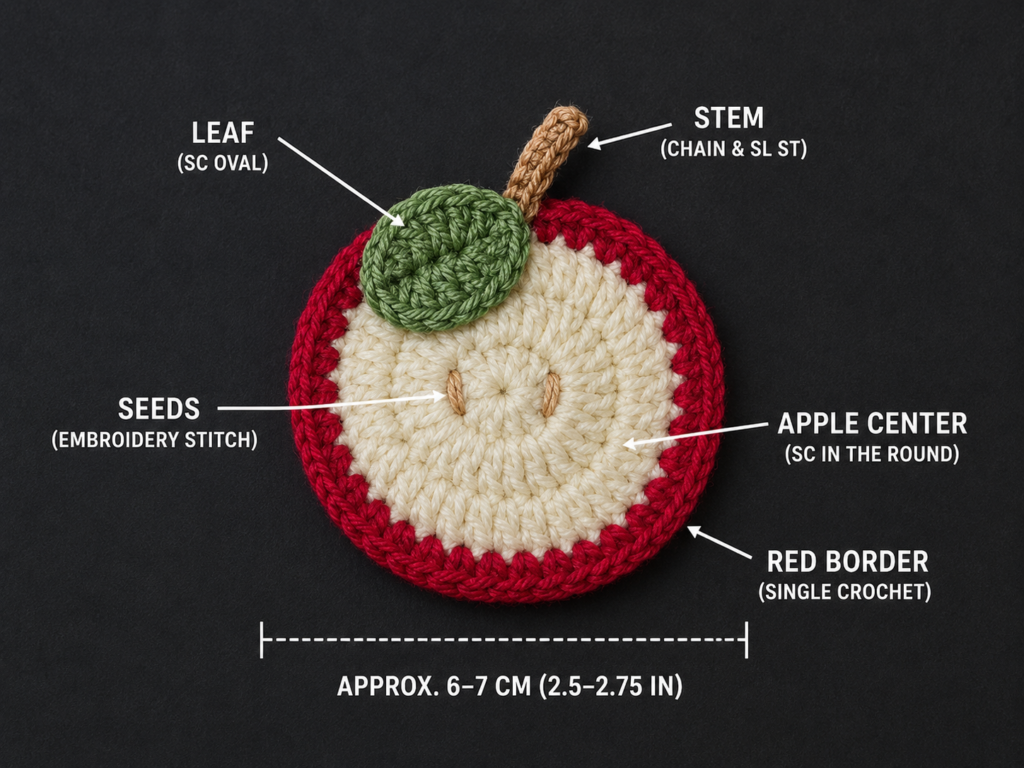
Complete four additional motifs using exactly the same process.
For a cohesive traditional garland, make all five apples identical.
For a more colorful classroom display, try:
- Coral red.
- Mustard.
- Dusty rose.
- Deep red.
- Soft orange.
Keep the ivory centers, green leaves, and tan stems consistent to visually connect the collection.
Before making the garland cord, arrange all five apples on a flat surface.
Check:
- Approximate size.
- Leaf direction.
- Stem length.
- Seed placement.
- Overall color balance.
Small handmade differences are completely acceptable.
Beginner tip:
Create all five centers first, then all five borders, then all stems, and finally all leaves. Working in batches can make repeated motifs faster and more consistent.
Common mistake to avoid:
Changing hook size between motifs.
Even a 0.5 mm difference can visibly affect finished dimensions.
Step 8: Crochet the Garland Cord
With ivory, sage, or another coordinating color:
Ch 170, or continue chaining until the cord reaches your preferred finished length.
The sample chain is intentionally adjustable because crochet tension affects chain length considerably.
Lay the chain flat without stretching it.
Fold approximately 4 inches at one end into a loop.
Using the yarn tail, sew the folded section to itself to form a hanging loop.
Repeat at the other end.
Now lay the cord above your five apples.
Arrange the apples evenly.
A practical layout is:
- Leave approximately 5–6 inches before the first apple.
- Leave approximately 3–4 inches between motifs.
- Leave 5–6 inches after the final apple.
Pin or clip everything temporarily before sewing.
Step 9: Attach the Apples to the Garland
Thread your tapestry needle with coral yarn.
Position the first apple so the garland cord runs directly behind its upper edge.
Sew through:
- One red border stitch.
- The chain cord.
- A neighboring red border stitch.
Repeat two or three times.
Secure the yarn on the wrong side.
The apple should hang securely without rotating excessively.
Repeat for all five apples.
Lift the complete garland by both end loops before trimming your final tails. This is the easiest time to notice uneven spacing.
Adjust any motif that sits too close to another.
Pattern Notes or Stitch Notes
Turning-chain rules
The beginning ch 2 used for the circular apple-body rounds does not count as a stitch.
The ch 1 used before the red border also does not count as a stitch.
Apple stitch count
- Round 1: 12 hdc.
- Round 2: 24 hdc.
- Round 3: 36 hdc.
- Red border: 36 sc.
Repeat pattern
For Round 3:
*1 hdc in next st, 2 hdc in next st; rep from * around.
Row and round notes
The apple body is worked in joined rounds.
The stem is worked in one short row.
The leaf is crocheted along both sides of one foundation chain.
Right side and wrong side
Keep the attractive side of the apple facing forward.
Secure knots and woven ends on the wrong side.
Size adjustments
For a smaller apple:
- Use sport-weight yarn.
- Try a 3 mm hook.
- Stop after fewer body rounds if redesigning the pattern carefully.
For a larger apple:
- Use worsted-weight yarn.
- Try a 4–5 mm hook.
- Maintain the same stitch counts and allow the heavier yarn to increase dimensions.
The Craft Yarn Council notes that yarn categories and hook sizes function as general guidelines; actual gauge can vary by yarn and crocheter.
Common Beginner Mistakes
1. The apple center turns into a bowl
Likely cause: Tight tension or a missed increase.
Fix: Count every round. If the count is correct but the motif remains deeply cupped, try a slightly larger hook.
2. The circle becomes wavy
Likely cause: Too many increases.
Fix: Verify the stitch counts of 12, 24, and 36.
Do not add extra stitches simply because a small gap appears between stitches.
3. The red border looks uneven
Likely cause: Accidentally placing two single crochets in one stitch or skipping a stitch.
Fix: Count 36 red single crochets before joining.
4. The top indentation is too deep
Likely cause: Pulling the shaping yarn aggressively.
Fix: Release the shaping stitch and redo it with gentle tension.
5. The leaf curls severely
Likely cause: Tight foundation chains or uneven tension.
Fix: Block the finished leaf gently or remake the starting chain more loosely.
6. The apples are different sizes
Likely cause: Changes in tension, hook size, yarn thickness, or stitch count.
Fix: Use the first completed apple as a physical template for every later motif.
7. The apples rotate on the garland
Likely cause: Each motif is attached at only one tiny point.
Fix: Secure the garland cord across two or three neighboring top-edge stitches.
How to Customize This Crochet Project
Change the yarn
Cotton provides good stitch definition and creates relatively crisp flat motifs.
Acrylic also works and can be useful when you want access to a wider range of colors.
Avoid extremely fuzzy yarn for your first version because it makes stitch counting more difficult.
Change the apple colors
Try an entire classroom color palette rather than using only traditional red.
Ideas include:
- Rainbow apples.
- Primary colors.
- Muted Montessori-inspired shades.
- Pastel classroom décor.
- Autumn colors.
- School colors.
Make a longer garland
Repeat more apple motifs.
Good options include:
- 3 apples for a small teacher desk.
- 5 apples for a reading corner.
- 7 apples for a bulletin board.
- 9 or more apples for a wide classroom wall.
Adjust the cord length before permanently sewing the motifs in place.
Add letters
For a more personalized decoration, add one simple felt or embroidered letter to each apple.
Possible words include:
- READ
- LEARN
- CREATE
- WELCOME
Be sure the number of letters suits the number of motifs.
Add a border variation
Instead of coral-red single crochet, try:
- Crab stitch for texture.
- Surface slip stitches.
- A two-color edge.
- A subtle picot at selected points.
Beginners should complete the basic version first before introducing complicated edging.
Change the motif
The same garland concept can later be adapted into other classroom-themed crochet decorations:
- Pencils.
- Crayons.
- Books.
- Stars.
- Numbers.
- Alphabet letters.
- School buses.
- Rainbows.
Use a consistent yarn palette to combine different motifs without making the display look visually chaotic.
Gift ideas and use cases
A finished crochet apple garland makes a thoughtful handmade gift for:
- Teachers.
- Homeschool families.
- Librarians.
- Preschool classrooms.
- Daycare spaces.
- School counselors.
- Reading specialists.
It can also be packed away and reused each back-to-school season.
Finishing Instructions
Fastening off
After every component, cut the yarn leaving enough length for weaving or sewing.
Pull the cut end completely through the final loop.
Do not trim immediately.
Weaving in ends
With a tapestry needle:
- Pass the yarn tail beneath several stitches on the wrong side.
- Change direction.
- Pass through several more stitches.
- Trim close to the fabric.
Avoid weaving very dark yarn directly behind a light cream section when the yarn may show through.
Blocking
Lay all apples face up on a blocking mat or folded towel.
Gently shape each motif.
Pay attention to:
- Circular symmetry.
- Top indentation.
- Leaf angle.
- Stem direction.
Pin lightly if needed.
Use the care method appropriate for your yarn fiber.
Do not apply excessive heat, particularly to synthetic yarn.
Washing and care
Follow the washing instructions printed on the specific yarn label you used.
For a decoration with multiple sewn pieces, gentle washing and flat drying are usually the safest approach.
Store the garland flat or loosely rolled rather than crushing it tightly into a small box.
Quick Printable-Style Summary
Project: Crochet Apple Classroom Garland
Skill level: Beginner to Easy
Finished apple size: Approximately 4–4.5 inches
Garland size: Approximately 42–48 inches, adjustable
Yarn: DK/light worsted cotton or cotton blend
Hook: 3.5 mm / E-4
Main stitches: Ch, sl st, sc, hdc, dc, tr
Apple body
Round 1: 12 hdc into magic ring. Join.
Round 2: 2 hdc in every stitch. 24 sts.
Round 3: *1 hdc, 2 hdc in next; repeat around. 36 sts.
Border: 1 sc in each stitch around. 36 sts.
Shape a gentle indentation at the top.
Stem
Ch 9.
Sl st in second chain from hook and each remaining chain.
Leaf
Ch 8.
Work along first side:
sc, hdc, dc, tr, dc, hdc, sc.
Ch 1 and work the same sequence along the opposite side.
Seeds
Add two small straight stitches with tan yarn.
Repeat
Make five apples.
Garland cord
Ch approximately 170 or to desired length.
Add hanging loops.
Arrange and securely sew five apples to the cord.
Finishing
Weave in all ends, shape, block lightly, and hang.
FAQ
Are crochet classroom decor patterns suitable for beginners?
Some are. Flat appliqués and garlands are particularly approachable because they use relatively small amounts of yarn and allow beginners to practice basic stitches on a manageable scale. This apple project primarily uses standard stitches and simple shaping.
What is the best yarn for crochet classroom decorations?
Cotton and cotton blends work particularly well for flat decorations because they generally provide visible stitch definition and hold their shape reasonably well. Acrylic can also work, especially when a wider color selection is important.
Can I make this crochet apple garland without using a magic ring?
Yes. Ch 3 or 4, join with a slip stitch to form a small ring, and work the first-round stitches into that ring.
The center hole may be slightly more visible.
How many apples should I crochet for a classroom garland?
Five is a good starting point for a medium decoration, but three, seven, nine, or more can work depending on the display area.
Measure your bulletin board, door, bookshelf, or desk before deciding.
How do I keep all my crochet apples the same size?
Use:
- The same yarn.
- The same hook.
- The same stitch counts.
- Similar tension.
Keep the first finished apple nearby and physically compare each later motif to it.
Can I use this pattern for a teacher gift?
Yes. A smaller three-apple garland can decorate a teacher’s desk, while a five- or seven-apple version can work for a classroom door, reading corner, or bulletin board.
Can I turn one apple into something other than a garland?
Yes. An individual motif could be used as:
- A classroom ornament.
- A bag appliqué.
- A bookmark decoration.
- A handmade card embellishment.
- A bulletin-board accent.
- A gift-tag decoration.
For items that will be handled frequently, sew all components firmly and consider the durability requirements of the intended use.
Conclusion
Among crochet classroom decor patterns, small repeated motifs are especially practical because you can easily adjust the project to fit the available space.
One apple can become a small teacher gift. Three can decorate a desk. Five create a useful beginner garland. Seven or nine can span a larger bulletin board.
The most important part is not perfect uniformity. Handmade apples naturally vary slightly in leaf angle, stitch tension, and shape. What matters is maintaining consistent yarn, hook size, stitch counts, and general proportions so the complete garland feels coordinated.
Start with one apple. Check the shape. Make the next four in batches. Then arrange everything before sewing the motifs permanently onto the cord.
The result is a reusable crochet classroom decoration that works for back-to-school season, reading corners, teacher gifts, homeschool spaces, and cheerful everyday classroom displays.





