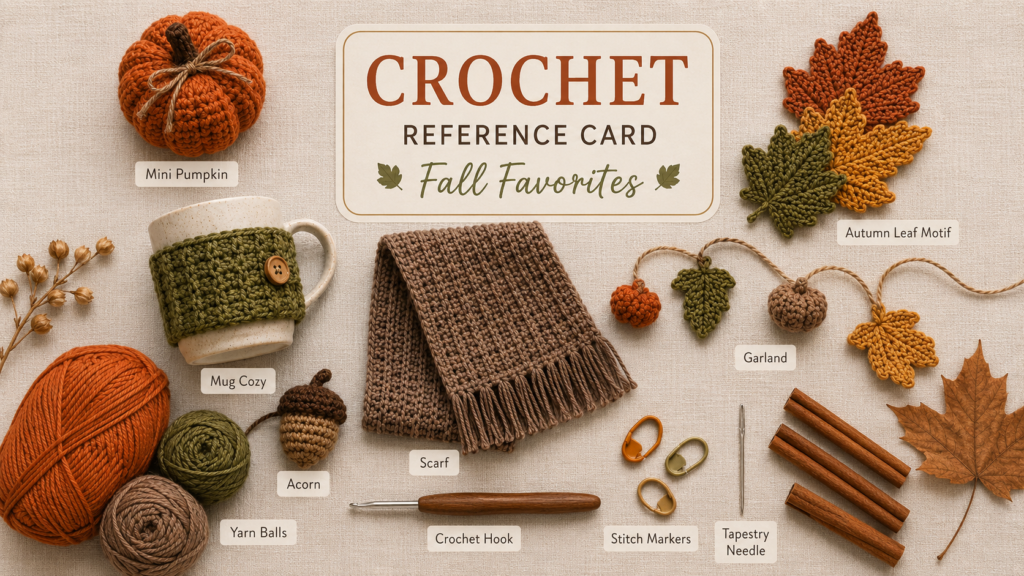
There is something satisfying about a fall crochet project that changes the atmosphere of a room almost immediately. A single handmade pumpkin can sit on a bookshelf, brighten a dining table, soften a mantel display, or become part of a larger autumn centerpiece—and unlike real pumpkins, you can bring it back year after year.
This easy crochet pumpkin is a particularly good place to begin because you do not need to crochet complicated shaping in continuous rounds. You will first make a simple ribbed rectangle. Then you will join its two short edges to form a tube, gather the bottom, add stuffing, close the top, and finish everything with a small handmade stem.
The general rectangle-to-pumpkin construction is well suited to a step-by-step photo tutorial because every major transformation can be clearly seen: chain, row, textured rectangle, tube, gathered base, stuffed body, closed pumpkin, and stem. The selected visual source follows precisely this kind of coherent process from beginning to end.
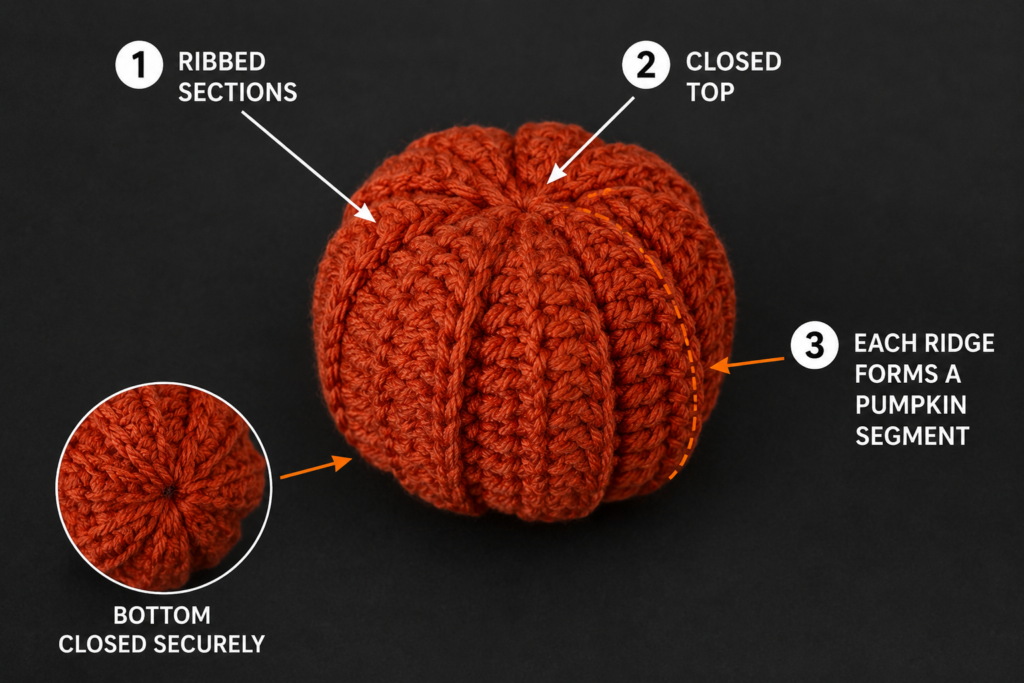
This original version uses back-loop-only half double crochet, which creates soft vertical ribs once the rectangle is assembled sideways. The texture gives the finished pumpkin natural-looking sections without requiring complicated increases or decreases.
What You’ll Learn
By the end of this tutorial, you will know how to:
- Make a relaxed foundation chain.
- Work a basic half double crochet stitch.
- Identify the back loop of a stitch.
- Crochet in the back loop only to create ribbing.
- Keep the sides of a rectangle straight.
- Measure your work before assembly.
- Join two short edges with slip stitches.
- Sew a running stitch around an opening.
- Cinch crochet fabric securely.
- Add fiberfill without creating lumps.
- Shape a three-dimensional crochet pumpkin.
- Make a small crocheted stem.
- Sew the stem securely in place.
- Adjust the pattern for different pumpkin sizes.
Materials You’ll Need
For one medium pumpkin measuring approximately 5–5.5 inches wide and 4 inches high without the stem, gather:
- Approximately 80–100 yards of medium-weight cotton-blend or acrylic yarn in dusty burnt orange.
- Approximately 10 yards of medium-weight yarn in muted olive green for the stem.
- 4.0 mm / G-6 crochet hook.
- Approximately 1.5–2 ounces of polyester fiberfill.
- Blunt tapestry needle.
- Small scissors.
- Measuring tape.
- Optional locking stitch marker.
The Craft Yarn Council lists 4.0 mm as the metric equivalent commonly associated with a U.S. G-6 crochet hook.
Its Standard Yarn Weight System is useful when choosing substitute yarns, although yarns within one weight category are not necessarily identical in gauge, hand, or drape.
Finished Size
Using medium-weight yarn and a 4 mm hook, the sample is designed to finish at approximately:
Width: 5–5.5 inches / 12.5–14 cm
Pumpkin height: Approximately 4 inches / 10 cm
Total height with stem: Approximately 5 inches / 12.5 cm
Exact size will vary with your yarn, tension, amount of stuffing, and final shaping.
Gauge and Tension
Exact gauge is not critical for this decorative project.
However, your fabric should be dense enough that the white fiberfill does not show clearly between the stitches.
A useful approximate gauge is:
16 half double crochet stitches × 13 rows = 4 inches / 10 cm in back-loop-only ribbing.
Do not become overly concerned if your gauge differs slightly. Instead, focus on creating a fabric that is:
- Flexible enough to gather.
- Dense enough to contain the stuffing.
- Even enough to form consistent pumpkin ribs.
The Craft Yarn Council advises using a gauge swatch when accurate dimensions matter and notes that hook choice may need to change to achieve the desired gauge.
Crochet Abbreviations Used
This tutorial uses standard U.S. crochet terminology:
- ch = chain
- hdc = half double crochet
- hdc BLO = half double crochet in back loop only
- sl st = slip stitch
- st/sts = stitch/stitches
- rep = repeat
- BLO = back loop only
- RS = right side
- WS = wrong side
These abbreviations correspond with the Craft Yarn Council’s standard crochet abbreviation system.
U.S./U.K. terminology note
This pattern is written in U.S. terminology.
Be aware that stitch names differ between U.S. and U.K. crochet instructions. Use the stitch actions described in this article rather than substituting a similarly named U.K. stitch.
Before You Start
How this pumpkin is constructed
The project begins as a flat rectangle.
The short sides determine the pumpkin’s height. The long direction determines its circumference.
After the rectangle is finished:
- Join the short edges.
- Gather one end.
- Turn right side out.
- Add stuffing.
- Gather the second end.
- Shape the pumpkin.
- Add the stem.
The selected primary visual source demonstrates the same broad transformation from a flat ribbed rectangle into a tube, gathered pumpkin body, stuffed form, and completed stemmed pumpkin.
How to count stitches
Each row in this original pattern contains:
20 half double crochet stitches.
The turning chain does not count as a stitch.
Count your stitches every few rows. If one edge suddenly starts narrowing inward, you probably skipped the final stitch.
How to keep the edges straight
The last stitch of a row can be difficult to see.
Before turning, count all 20 stitches.
A stitch marker can be placed in the first and final stitch while you are learning.
How to avoid curling
A small amount of curling in back-loop-only ribbing is normal.
Severe curling may mean:
- The foundation chain is too tight.
- Your turning chain is being pulled too firmly.
- Your overall tension is extremely tight.
Relax your hands and allow the yarn to move smoothly.
Choosing fall colors
Traditional orange works beautifully, but fall crochet patterns do not need to stay within one narrow palette.
Try:
- Dusty burnt orange.
- Mustard.
- Rust.
- Cinnamon.
- Cream.
- Oatmeal.
- Sage.
- Olive.
- Deep burgundy.
- Muted terracotta.
A collection of three pumpkins usually looks especially cohesive when you vary the body colors but keep all the stems in one consistent shade.
Step-by-Step Crochet Tutorial
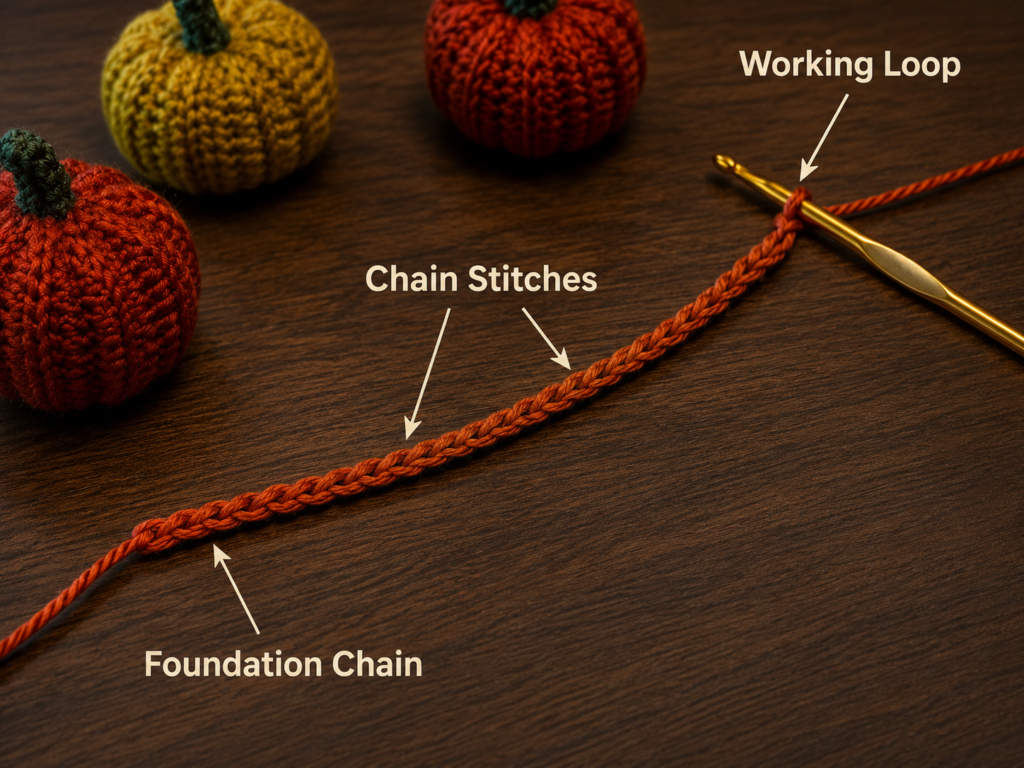
Step 1: Make a Relaxed Foundation Chain
With dusty burnt-orange yarn:
Ch 21.
Do not count the active loop on the hook as a chain.
Lay the chain gently on your work surface. It should look flexible and relaxed rather than tightly twisted.
The finished foundation chain will determine the approximate height of your pumpkin.
Beginner tip:
Hold the yarn lightly. Your hook should slide through each chain without forcing or scraping.
Common mistake to avoid:
Making an extremely tight foundation chain.
A tight chain can pull the bottom edge inward and make the first row difficult to work.
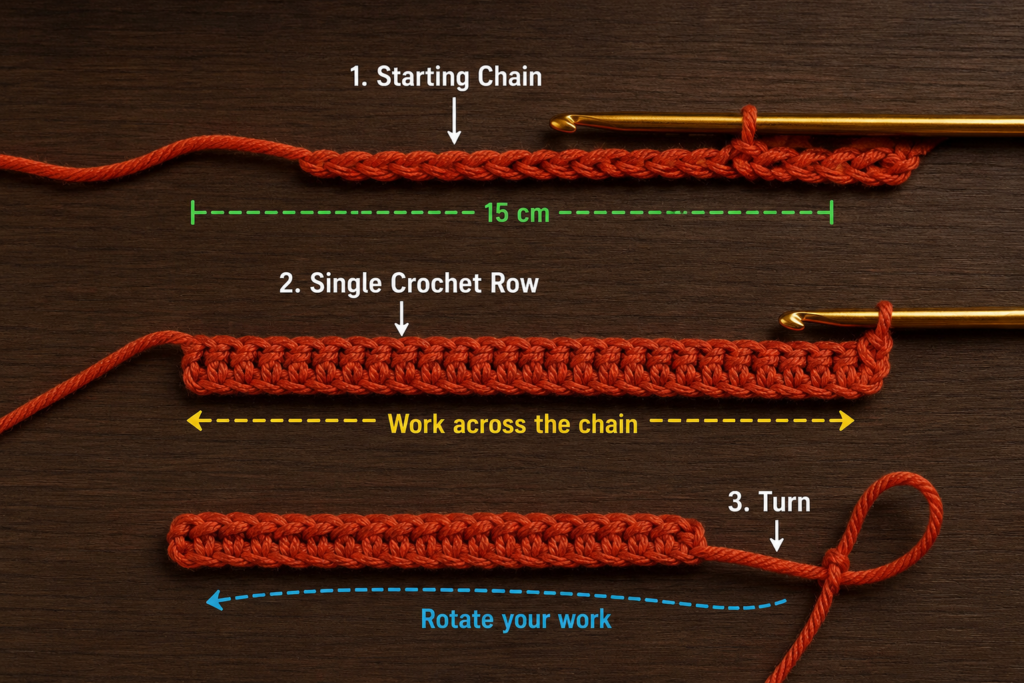
Step 2: Crochet the First Row
Starting in the second chain from the hook:
Work 1 hdc in each chain across.
You should have:
20 hdc.
To make one half double crochet:
- Yarn over.
- Insert the hook into the next chain.
- Yarn over.
- Pull up a loop. You should now have three loops on the hook.
- Yarn over again.
- Pull through all three loops.
Continue until every available chain has been worked.
Beginner tip:
Count your stitches before turning. You should have exactly 20.
Common mistake to avoid:
Working into the first chain directly under the hook.
The first working stitch goes into the second chain from the hook.
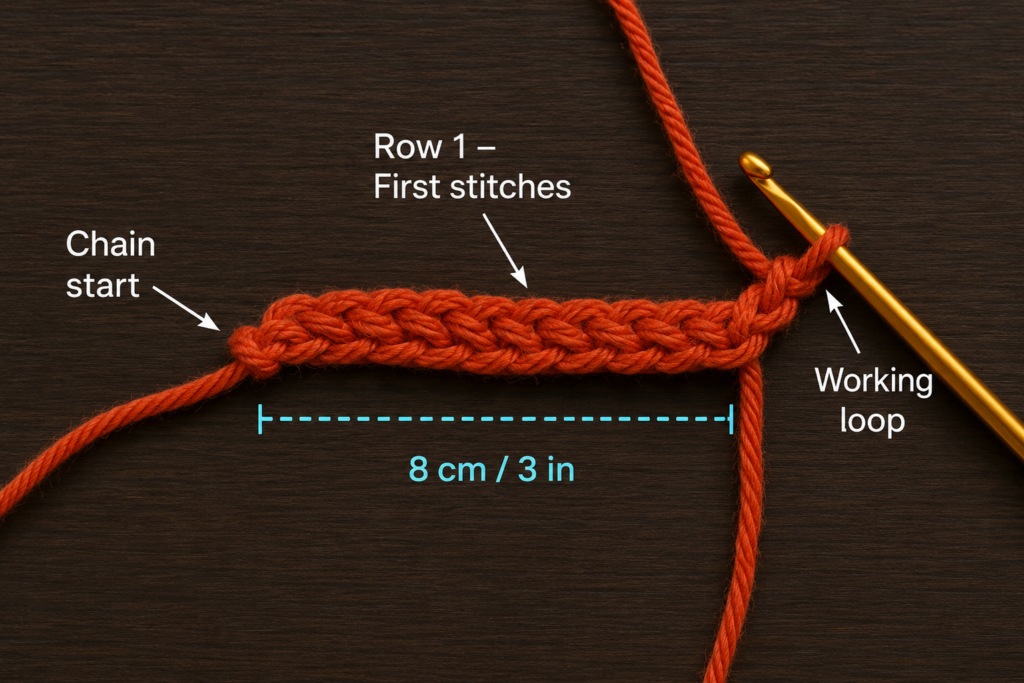
Step 3: Begin the Back-Loop-Only Ribbing
At the end of Row 1:
Ch 1 and turn.
The ch 1 does not count as a stitch.
Look at the top of the first stitch. You will see two horizontal loops forming a small V.
The loop closest to you is the front loop.
The loop farther away is the back loop.
For Row 2:
Hdc BLO in each of the 20 stitches across.
Ch 1 and turn.
Beginner tip:
After making three or four stitches, look back at the row. A horizontal ridge should remain visible on the front of the fabric because the front loops were left unworked.
Common mistake to avoid:
Accidentally inserting through both loops.
That will still form a valid hdc, but it interrupts the ribbed texture.
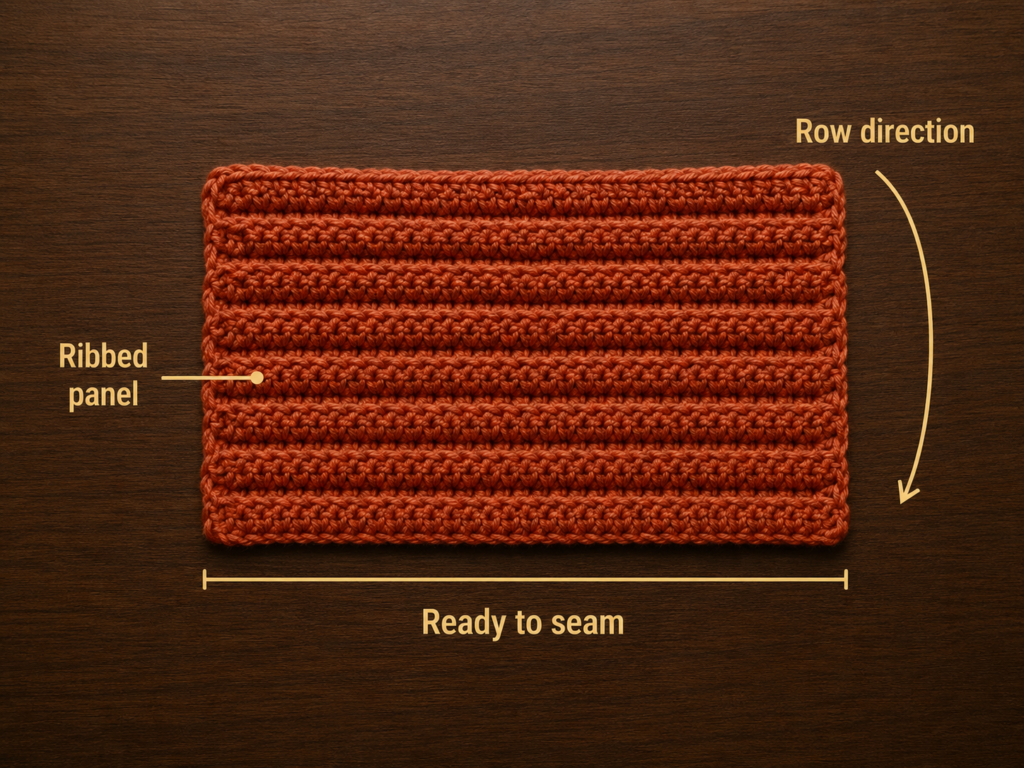
Step 4: Continue Until You Have a Ribbed Rectangle
Repeat the following row:
Hdc BLO in each of 20 sts across. Ch 1, turn.
Continue until you have completed:
30 rows total.
Your fabric should now form a flexible rectangle with strong horizontal ridges while lying flat. Once the piece becomes a pumpkin, these ridges will run vertically.
The target measurements are approximately:
5 inches high × 11 inches long.
Do not worry if yours differs slightly.
A useful general proportion for this original design is for the rectangle length to be approximately 2.1–2.3 times its height.
For example:
- 4-inch height → about 8.5–9 inches long.
- 5-inch height → about 10.5–11.5 inches long.
- 6-inch height → about 13 inches long.
Beginner tip:
Measure the rectangle without stretching it.
Common mistake to avoid:
Stopping based only on the row count when your yarn is much thicker or thinner.
Use the proportions as your main guide.
Step 5: Join the Rectangle into a Tube
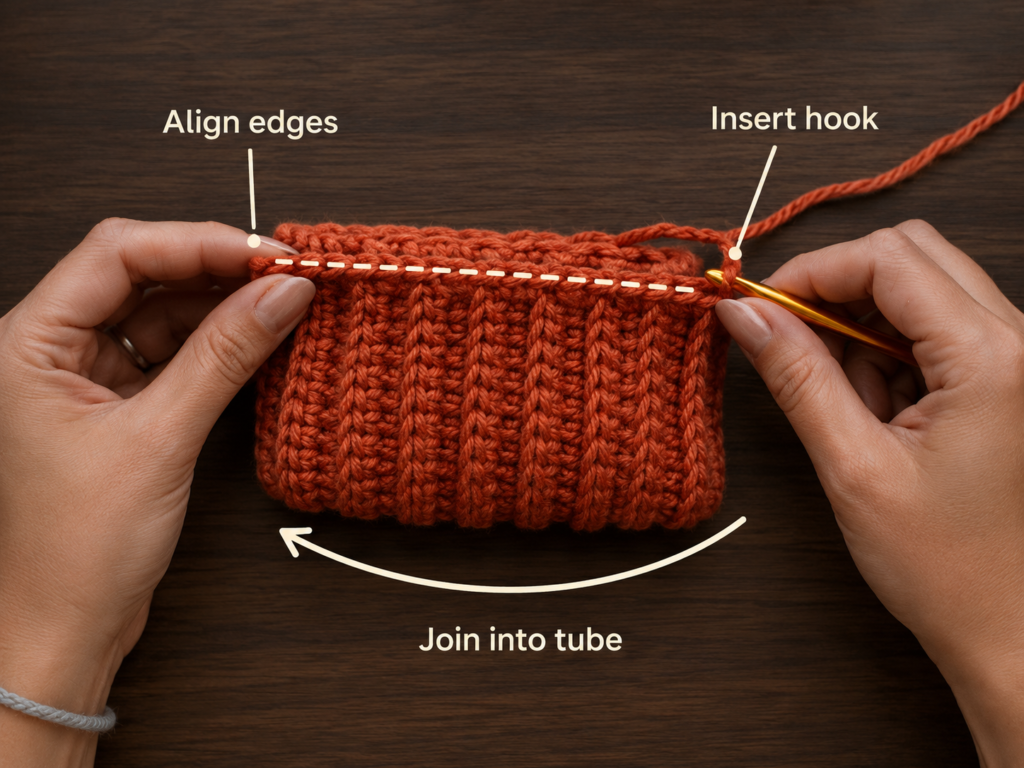
Do not fasten off.
Fold the rectangle so the two short edges meet.
Make sure the ridges are aligned.
You can join the seam using the crochet hook:
- Insert the hook through one loop from each short edge.
- Yarn over.
- Pull through the edges and the active loop to make a slip stitch.
- Continue across the complete seam.
Keep the slip stitches relaxed.
You now have a ribbed crochet tube with an opening at both ends.
Beginner tip:
Before seaming, use two stitch markers to temporarily hold the first and last corners together.
Common mistake to avoid:
Twisting the rectangle before joining.
Lay it flat, align both short edges carefully, and check that no twist exists.
Step 6: Gather and Close the Bottom
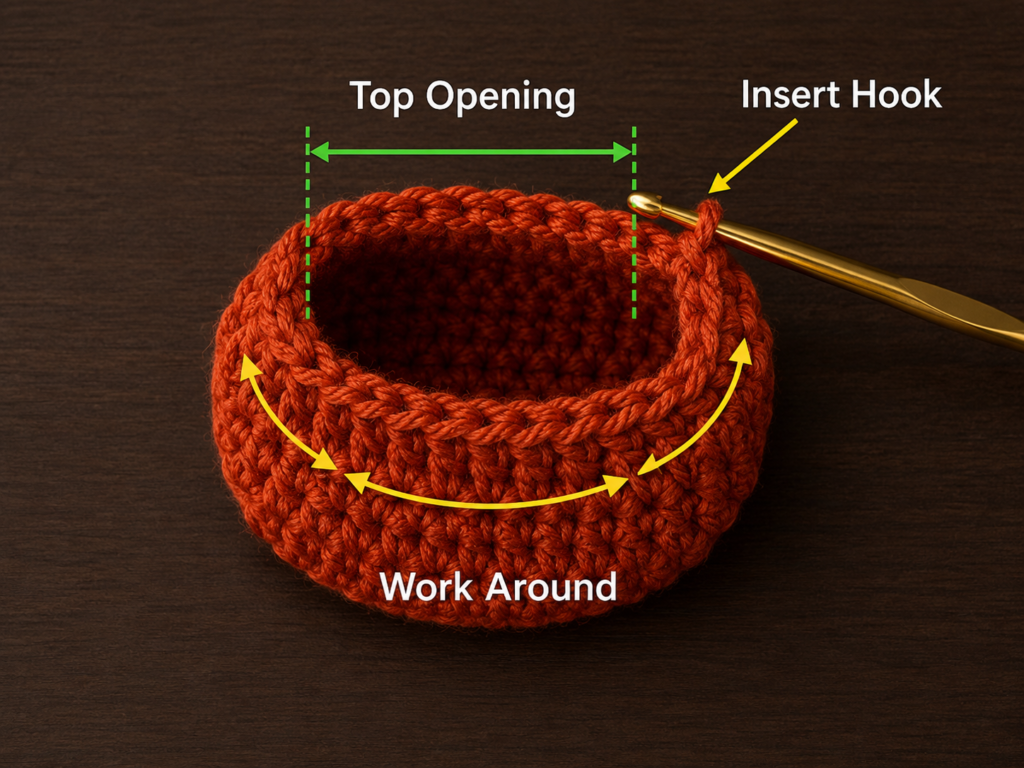
Fasten off, leaving a yarn tail approximately 24 inches long.
Thread the tail onto your tapestry needle.
Choose one opening to become the bottom.
Using a running stitch:
- Insert the needle through the fabric close to the outer edge.
- Move over approximately one rib.
- Bring the needle back through.
- Continue in and out all around the opening.
Once you reach the starting point, pull the yarn gradually.
The opening will begin gathering toward the center.
Pull firmly until the hole is as small as possible.
Pass the needle through opposite sides several times to reinforce the closure.
Secure the yarn.
Beginner tip:
Gather slowly rather than pulling violently in one movement. This distributes the fabric more evenly.
Common mistake to avoid:
Taking extremely large stitches around the edge.
Smaller, evenly spaced running stitches create a neater closure.
Step 7: Turn Right Side Out and Add Stuffing
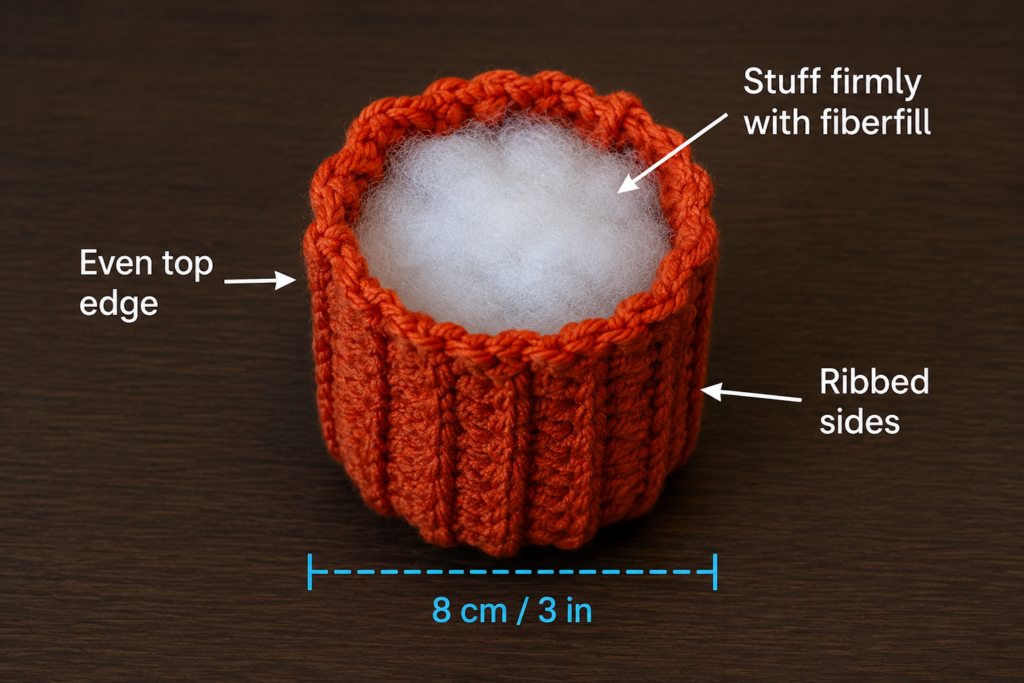
Turn the tube right side out.
The seam should now be largely hidden.
Add polyester fiberfill a little at a time.
Push stuffing gently toward the lower edges before adding more.
Continue until the pumpkin feels:
- Plump.
- Even.
- Soft but supportive.
- Firm enough to hold a rounded shape.
Avoid forcing a very large lump of stuffing into the center.
How much stuffing is enough?
Press the pumpkin gently.
It should spring back while still allowing you to shape it with your hands.
If it feels hard like a ball, you may have overstuffed it.
If it collapses easily, add more fiberfill.
Beginner tip:
Use several small handfuls rather than one large piece.
Common mistake to avoid:
Packing the fiberfill into hard lumps.
Fluff each piece before inserting it.
Step 8: Close the Top and Shape the Pumpkin
Thread another long burnt-orange yarn tail onto the tapestry needle.
Repeat the running-stitch process around the open upper edge.
Pull gradually until the opening closes.
Before securing the yarn permanently, inspect the stuffing.
Add a small amount if necessary.
Once satisfied:
- Pull the opening firmly closed.
- Sew through opposite sides of the center several times.
- Secure the yarn.
Now shape the pumpkin with your hands.
Press gently around the ribs to distribute the stuffing evenly.
For a deeper center indentation, use a long strand of matching yarn:
- Insert the needle through the top center.
- Push it through the pumpkin to the bottom center.
- Pull gently.
- Return through the pumpkin in the opposite direction.
- Repeat until the center is slightly compressed.
- Secure discreetly.
Do not pull so hard that the pumpkin becomes flattened.
Beginner tip:
Turn the pumpkin slowly while shaping it. Check every side instead of correcting only the front.
Common mistake to avoid:
Trying to hide severe overstuffing through aggressive shaping.
Remove some fiberfill instead.
Step 9: Crochet the Pumpkin Stem
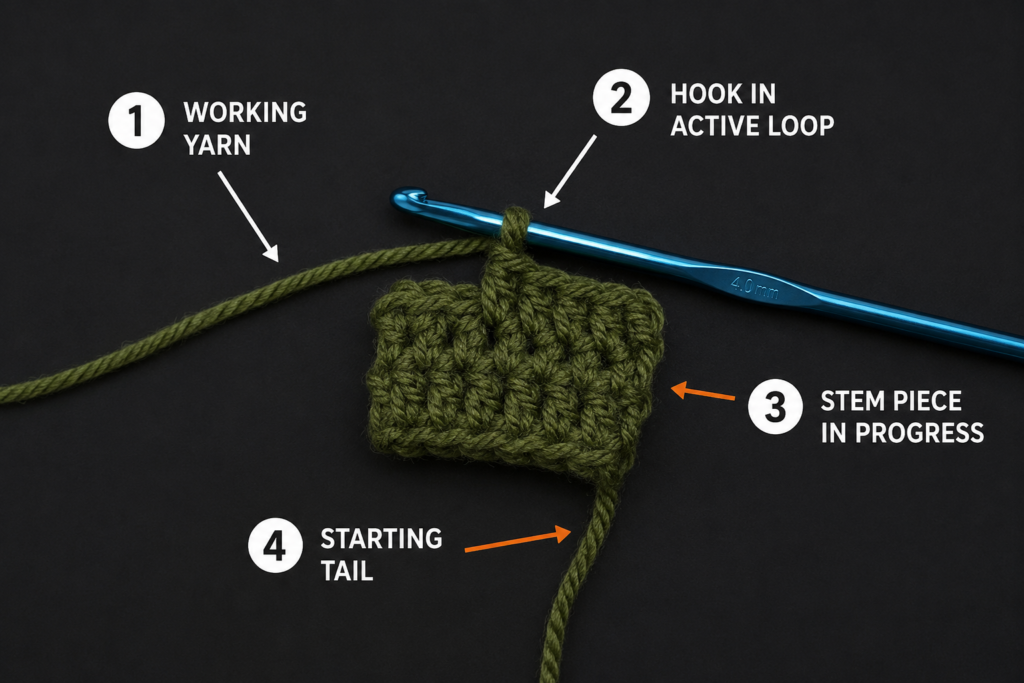
With muted olive-green yarn:
Ch 7.
Starting in the second chain from the hook:
Sc in each chain across.
You should have:
6 sc.
Ch 1 and turn.
Work:
Sc in each of the 6 sts across.
Repeat for one more row.
You now have a small rectangle measuring approximately 1.5–2 inches tall, depending on your yarn and tension.
Fasten off, leaving a long tail.
Beginner tip:
Keep the stem fabric relatively dense. A stem with large gaps may collapse.
Common mistake to avoid:
Making the stem too wide.
A small stem usually looks more proportional than a bulky one on a medium pumpkin.
Step 10: Shape and Attach the Stem
Fold the small olive rectangle lengthwise.
Using the long yarn tail and tapestry needle, sew the long edges together.
This creates a narrow stem tube.
You can leave it straight or curve it gently between your fingers.
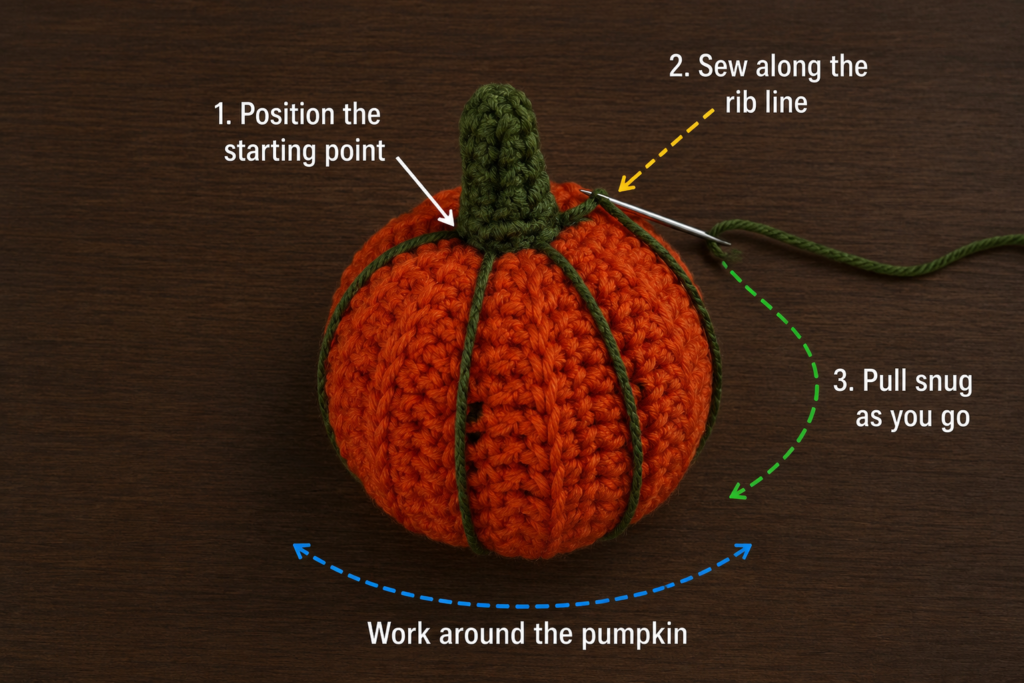
Position the stem over the gathered upper center of the pumpkin.
Sew through:
- The base of the stem.
- Dense stitches around the pumpkin center.
- The opposite side of the stem base.
Repeat several times.
The stem should feel firmly attached when you lift it gently.
Do not attach it through only one loose yarn strand.
Beginner tip:
Rotate the pumpkin while sewing so you can secure the stem evenly from several directions.
Common mistake to avoid:
Attaching the stem only at one tiny point.
That allows it to wobble or lean excessively.
Pattern Notes or Stitch Notes
Turning-chain rule
The ch 1 at the end of each rectangle row does not count as a stitch.
Always begin the next row in the first actual stitch.
Stitch count
Every pumpkin-body row contains:
20 hdc.
Every stem row contains:
6 sc.
Main repeat
For Rows 2–30:
Hdc BLO in each of 20 sts across. Ch 1, turn.
Right side and wrong side
Because the body consists of reversible ribbing, both faces are visually similar.
After seaming the tube, turn it so the neater side of the seam faces inward.
Size adjustments
The simplest way to change the size is to adjust both dimensions of the rectangle.
For a smaller pumpkin:
- Use a shorter starting chain.
- Crochet fewer rows.
- Use less stuffing.
For a larger pumpkin:
- Increase the foundation chain.
- Continue until the rectangle is roughly 2.1–2.3 times as long as it is high.
- Add stuffing gradually.
Example:
A rectangle approximately 6 inches high can be crocheted until it reaches about 13 inches long.
Common Beginner Mistakes
1. The rectangle becomes narrower
Cause: The final stitch of one or more rows was skipped.
Fix: Count 20 stitches before turning.
A stitch marker in the final stitch can make the edge easier to recognize.
2. The rectangle edges flare outward
Cause: An extra stitch is accidentally being added, often by crocheting into the turning chain.
Fix: Remember that the turning chain does not count as a stitch in this pattern.
3. The ribbing disappears in places
Cause: You worked through both loops rather than the back loop only.
Fix: Before inserting the hook, identify the small V at the top of the stitch and use only the loop farther away from you.
4. White stuffing shows through the pumpkin
Cause: Loose tension, a hook that is too large for the yarn, or excessive stuffing.
Fix: Use a smaller hook, reduce the stuffing slightly, or choose a denser yarn.
5. The bottom will not close completely
Cause: Running stitches are too widely spaced or the yarn tail is not strong enough.
Fix: Make smaller gathering stitches and reinforce the center by sewing across opposite sides.
A tiny opening is usually hidden once the pumpkin rests upright.
6. The pumpkin looks tall and cylindrical
Cause: The original rectangle was too short relative to its height or the pumpkin was overstuffed.
Fix: Make a longer rectangle or reduce the stuffing.
7. The pumpkin looks flat
Cause: Too little stuffing or a very long rectangle.
Fix: Add more fiberfill gradually and shape the center.
8. The seam creates one very obvious flat section
Cause: The edges were joined too tightly.
Fix: Use relaxed slip stitches and make sure corresponding edge loops are aligned evenly.
How to Customize This Crochet Project
Change the yarn
For a rustic pumpkin:
- Wool blend.
- Tweed yarn.
- Heathered yarn.
- Rustic cotton.
For a plush modern pumpkin:
- Chenille.
- Velvet yarn.
- Bulky acrylic.
Remember that changing yarn thickness changes the finished size even if you use the same stitch counts. The Craft Yarn Council’s yarn-weight system is useful for identifying categories, but it cautions that yarns within one category are not automatically interchangeable.
Change the color
Make a complete fall collection in:
- Dusty orange.
- Mustard.
- Burnt sienna.
- Cream.
- Olive.
- Taupe.
- Burgundy.
- Dark forest green.
For contemporary neutral décor, try cream, oatmeal, mushroom taupe, and muted sage.
Make a pumpkin trio
A set of three different sizes creates an easy centerpiece.
Try:
- Small mustard pumpkin.
- Medium burnt-orange pumpkin.
- Large cream pumpkin.
Keep all three stems olive green or taupe for cohesion.
Add deeper pumpkin sections
The ribbed texture already suggests natural sections.
For deeper grooves, thread a long strand of matching yarn through the center and wrap it around the exterior between selected ribs.
Pull gently.
Repeat around the pumpkin.
Do not pull too tightly or the crochet may distort.
Change the stem
Instead of a crochet stem, you can create an original variation using:
- A short cinnamon stick.
- A clean natural twig.
- A small piece of rolled felt.
- A tightly crocheted cord.
For a washable project, a fully crocheted stem is generally the most practical.
Add a leaf
Crochet a simple green leaf and sew it beside the stem.
A small leaf can add another color without distracting from the ribbed pumpkin body.
Add a bow
Tie a narrow piece of:
- Raffia.
- Velvet ribbon.
- Jute.
- Contrasting yarn.
around the base of the stem.
Avoid heavy decorations that make the pumpkin tip over.
Gift ideas and uses
This fall crochet pumpkin can be used as:
- Mantel décor.
- Thanksgiving table decoration.
- Autumn centerpiece.
- Teacher gift.
- Housewarming gift.
- Craft-fair product.
- Bookshelf accent.
- Desk decoration.
- Place-card holder with an added tag.
Finishing Instructions
Fastening off
After the final stitch, cut the yarn leaving an appropriate tail.
Pull the cut yarn completely through the active loop.
For assembly pieces, leave enough yarn to sew securely.
Weaving in ends
With a tapestry needle:
- Pass the tail beneath several nearby stitches.
- Change direction.
- Pass through additional stitches.
- Trim the excess.
Place visible tails on the inside whenever possible.
Final shaping
Place the completed pumpkin on a flat surface.
Rotate it slowly.
Adjust:
- The stuffing distribution.
- Rib spacing.
- Top indentation.
- Bottom stability.
- Stem angle.
The pumpkin does not need perfect geometric symmetry. Small differences make handmade décor look natural.
Blocking
Traditional blocking is usually unnecessary after the pumpkin is fully stuffed.
However, before assembly, you may lightly block the rectangle if it is severely curled.
Always use a method appropriate for the yarn fiber.
Avoid excessive heat on synthetic yarn.
Washing and care
Follow the care instructions provided on the yarn label.
Because this is a stuffed decorative object, spot cleaning is often the simplest option.
If full washing becomes necessary, ensure all seams are secure and dry the pumpkin thoroughly so moisture does not remain trapped inside the stuffing.
Quick Printable-Style Summary
Project: Easy Ribbed Fall Crochet Pumpkin
Skill level: Beginner to Easy
Finished size: Approximately 5–5.5 inches wide and 4 inches high, excluding stem.
Yarn: Medium-weight cotton-blend or acrylic.
Hook: 4.0 mm / G-6.
Main stitches: Ch, hdc, hdc BLO, sl st.
Pumpkin body
Ch 21.
Row 1: Hdc in second ch from hook and every remaining chain. 20 hdc.
Rows 2–30: Ch 1, turn. Hdc BLO in each of 20 sts.
Do not fasten off immediately.
Fold the short edges together and slip stitch the seam to form a tube.
Fasten off with a long tail.
Gather one opening with a running stitch.
Cinch securely.
Turn right side out.
Stuff evenly.
Gather and close the second opening.
Shape the pumpkin.
Stem
With olive yarn:
Ch 7.
Row 1: Sc in second ch from hook and across. 6 sc.
Rows 2–3: Ch 1, turn. Sc in each of 6 sts.
Fasten off with a long sewing tail.
Fold lengthwise, seam into a small stem, and sew securely onto the pumpkin.
FAQ
Are crochet pumpkins good fall crochet patterns for beginners?
Yes. Rectangle-based pumpkins are especially accessible because the crocheter can practice straight rows first and complete the three-dimensional shaping during assembly. The Craft Yarn Council describes lower skill-level projects as those using basic stitches with minimal or simple shaping.
What stitch is best for a beginner crochet pumpkin?
Back-loop-only half double crochet works well because it produces visible ribbing while remaining relatively quick to work.
Single crochet can also work but creates shorter stitches and may require more rows.
Can I use a different yarn weight?
Yes, but the finished size and fabric density will change.
Use a hook appropriate for your chosen yarn and aim for a fabric dense enough to contain stuffing. Yarn-weight categories provide a helpful reference, but individual yarns within a category may behave differently.
How do I make a larger crochet pumpkin?
Increase the foundation chain to create a taller rectangle, then continue crocheting until the rectangle is approximately 2.1–2.3 times as long as it is high.
Use more stuffing accordingly.
Why can I see the stuffing through my stitches?
Your hook may be too large for the yarn, your tension may be loose, or the pumpkin may be overstuffed.
Try reducing the hook size slightly or removing some stuffing.
Do I need a magic ring for this pumpkin?
No.
The body is made entirely from a flat rectangle, and the stem starts with a standard foundation chain.
Can I use a cinnamon stick instead of crocheting a stem?
Yes, for a decorative pumpkin that does not need to be fully washable.
A crochet stem is preferable when you want every component to be soft, sewn, and washable according to the yarn’s care requirements.
Conclusion
Among fall crochet patterns, a ribbed pumpkin is an especially satisfying beginner project because the construction looks far more complicated than it actually is.
You begin with one foundation chain.
You practice the same back-loop-only half double crochet row repeatedly until you have a rectangle.
Then the entire piece changes character: the rectangle becomes a tube, the tube becomes a stuffed form, the openings are gathered, and the vertical ribs naturally create the appearance of pumpkin sections.
Your first pumpkin can stay simple in dusty orange and olive. The second might be cream. The third could be mustard, rust, burgundy, or taupe.
Once you understand the basic construction, you can vary the yarn, rectangle size, stem, stuffing, color, and degree of shaping to create an entire handmade pumpkin patch for autumn.





