Crocheting your first baby blanket can feel like a big commitment. There are dozens of rows to make, two long edges to keep straight, and enough stitches that one missed loop can seem disastrous.
The good news is that a first blanket does not need complicated shaping, advanced stitches, or a difficult chart.
This beginner crochet baby blanket uses only chains, single crochet, and double crochet. After completing the foundation and setup rows, you repeat the same simple row until the blanket reaches your preferred length. The result is a soft, textured fabric that looks more detailed than the technique actually is.
For this original version, we’ll use soft sage-green bulky yarn and a 6.5 mm crochet hook. The sample size is approximately 31 x 35 inches after the border, making it useful for supervised cuddles, stroller outings, tummy time, gifting, or nursery décor.
The most important goal of this tutorial is not speed. It is helping you understand exactly where each stitch goes, how to count your rows, and how to prevent your edges from accidentally becoming narrower.
What You’ll Learn
By the end of this tutorial, you’ll know how to:
- Choose beginner-friendly yarn for a crochet baby blanket.
- Make a foundation chain without pulling it too tight.
- Work a complete single-crochet foundation row.
- Make a simple textured stitch using single and double crochet.
- Identify the correct stitch for each repeating cluster.
- Keep the stitch count consistent from row to row.
- Recognize and fix common edge problems.
- Adjust the blanket’s width and length.
- Add a simple three-round single-crochet border.
- Fasten off and weave in yarn ends securely.
Project Details at a Glance
Skill level: Beginner
Finished size: Approximately 31 x 35 inches, depending on tension
Estimated time: Approximately 10–14 hours for a beginner
Construction: Worked flat from the bottom upward
Yarn weight: #5 bulky/chunky
Hook size: 6.5 mm / K-10.5
Main stitches: Chain, single crochet, double crochet
Pattern style: One-row repeat after setup
Terminology: US crochet terms
Materials You’ll Need
For the sample blanket, gather:
- Approximately 850 yards of soft, washable #5 bulky or chunky yarn.
- One 6.5 mm / K-10.5 crochet hook.
- Scissors.
- Blunt tapestry or yarn needle.
- Two locking stitch markers.
- Measuring tape.
- Blocking mats and rust-resistant pins, optional.
Choose a yarn that feels comfortable against sensitive skin and can tolerate practical washing. A yarn with clear stitch definition is especially helpful when you’re learning because the tops of stitches are easier to identify.
Avoid choosing extremely fuzzy, eyelash-style, or very dark yarn for your first blanket. Those yarns can make individual stitches difficult to see.
Crochet Abbreviations Used
This tutorial uses US crochet terminology:
- ch = chain
- dc = double crochet
- rep = repeat
- sc = single crochet
- sk = skip
- sl st = slip stitch
- st = stitch
- sts = stitches
- yo = yarn over
US and UK crochet terminology are not always equivalent. For example, a US single crochet is called a double crochet in UK terminology, while a US double crochet is a UK treble crochet. The Craft Yarn Council maintains a standardized comparison chart.
Before You Start
Gauge and Tension
Aim for approximately:
12 stitches and 8 rows = 4 inches in the main stitch pattern.
This does not need to be perfect to the millimeter, but a significantly different gauge changes the finished dimensions and yarn requirements.
A common point of confusion is how to adjust your hook:
- If your swatch is too small and your stitches feel tight, try a larger hook.
- If your swatch is too large and very loose, try a smaller hook.
The Craft Yarn Council classifies bulky yarn as weight category 5 and gives 6.5–9 mm as a general crochet-hook range, although the specific pattern gauge should always take priority.
How to Count Your Stitches
Your foundation row will contain 91 single crochet stitches.
After every major row, check that you still have 91 stitches. You do not necessarily need to stop after every row once you’re comfortable, but beginners should count frequently during the first several repeats.
The easiest way to protect your edges is to place a locking stitch marker in the top of the beginning chain two. That chain becomes important when you finish the following row.
How to Keep the Edges Straight
Most beginner blankets become narrower for one reason: the final edge stitch gets missed.
At the end of every repeating row, you will skip two double crochets and place the final single crochet into the top of the previous row’s chain-two turning chain.
That little chain can hide.
Mark it.
A five-second stitch marker can prevent having to unravel five rows later.
How to Avoid Curling
A little movement at the edge of a new crochet fabric is normal. Severe curling usually points to one of these issues:
- The foundation chain is too tight.
- Your hook is too small for your personal tension.
- You have accidentally changed the stitch count.
- Your tension is much tighter on later rows than on the first row.
Make your starting chain relaxed rather than rigid. If necessary, make only the foundation chain with a hook 0.5–1 mm larger, then switch to the 6.5 mm hook for the rest of the blanket.
Choosing Colors
A solid color is easiest for a first blanket because there are fewer yarn ends and no color-change decisions.
Soft sage, cream, dusty blue, pale rose, warm oatmeal, muted lavender, and light gray can all showcase this texture beautifully.
For a striped version, change color only at the end of a complete row and keep stripe widths predictable—for example, every four, six, or eight rows.
Beginner Note
Do not judge your blanket by its first two rows.
The full raised texture becomes much easier to see after several repeats. Give the fabric time to develop before deciding whether you like the stitch.
Step-by-Step Crochet Tutorial
Step 1: Make the Foundation Chain
Using your 6.5 mm crochet hook and sage bulky yarn, make a slip knot.
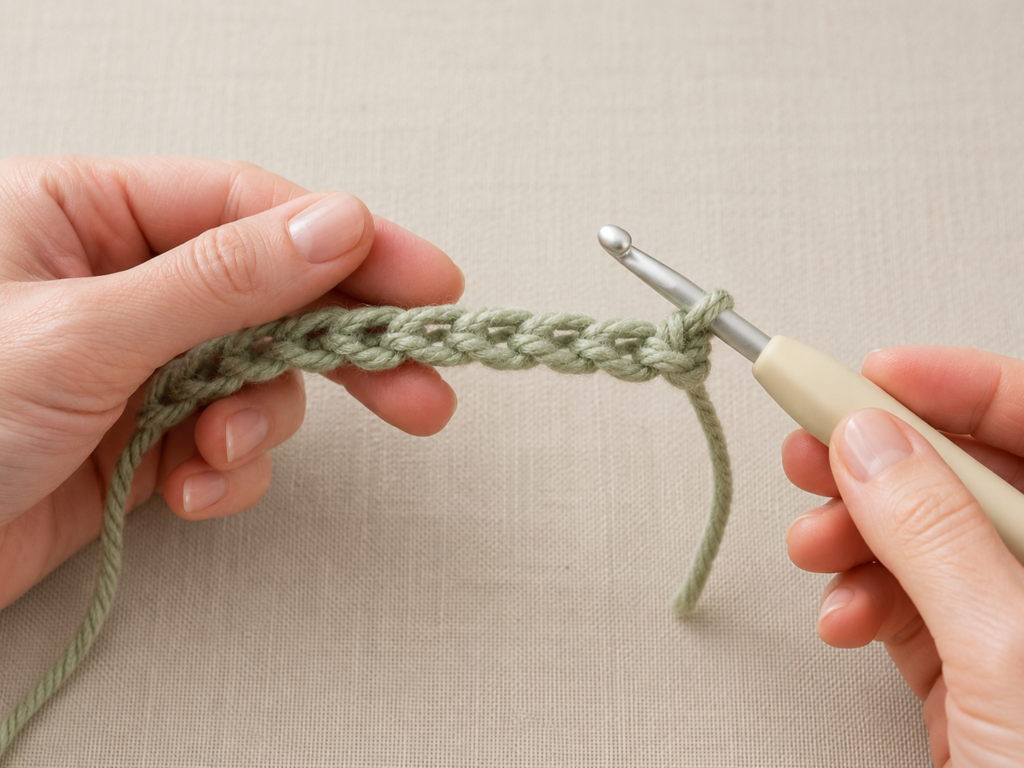
Chain 92.
Try to keep every chain approximately the same size. The loops should move comfortably along the shaft of your hook.
Do not pull each new chain tightly against the previous one. A rigid starting chain can cause the bottom of the blanket to pull inward.
Beginner tip:
Count the chains in groups of ten. Place a stitch marker after every twentieth chain while counting if you easily lose your place.
Common mistake to avoid:
Do not count the active loop on your hook as one of the 92 chains.
Step 2: Crochet the Foundation Row
Turn the chain so you can clearly see its individual loops.
Insert your hook into the second chain from the hook.
Work one single crochet:
- Insert your hook.
- Yarn over.
- Pull up a loop. You now have two loops on the hook.
- Yarn over again.
- Pull through both loops.
Continue by making one single crochet in every remaining chain across.
At the end of the row, you should have:
91 single crochet stitches.
Count now. This is one of the best moments to catch an error before the textured rows begin.
Beginner tip:
Your first row may feel slower than every other row because working into a starting chain requires more attention. That is normal.
Common mistake to avoid:
Do not accidentally work twice into one foundation chain. After making a stitch, gently slide your fingers to the next unused chain before inserting the hook again.
Step 3: Begin the Blanket-Stitch Setup Row
Turn your work.
Chain 2.
For this tutorial, that chain two counts as the first stitch of the row.
Place a locking stitch marker in the top chain. You’ll need to find this location easily when working back across the next row.
Now work 2 double crochets into the very first single crochet at the base of the chain two.
To make one double crochet:
- Yarn over.
- Insert the hook into the stitch.
- Yarn over and pull up a loop. Three loops are on the hook.
- Yarn over and pull through two loops.
- Yarn over again and pull through the final two loops.
Repeat once more in that same stitch.
Your beginning group now consists of the turning chain, which counts as one stitch, plus two double crochets.
Beginner tip:
Before moving on, spread the fabric with your fingers and identify the exact stitch that holds both double crochets. Learning to recognize this group makes the repeat much easier.
Common mistake to avoid:
Do not insert the two double crochets into the second stitch of the row. They belong in the first single crochet, directly at the base of the turning chain.
Step 4: Build the Main Stitch Repeat
You are ready for the repeating section of the setup row.
The repeat is:
Skip the next 2 stitches. Work 1 single crochet and 2 double crochets into the following stitch.
Think of it as:
Skip 2 → group of 3 → skip 2 → group of 3.
The “group of 3” always consists of:
- 1 single crochet.
- 2 double crochets.
All three are worked into the same target stitch.
Continue this sequence across the row.
Beginner tip:
Before inserting your hook into the target stitch, physically count:
“One skipped, two skipped, work here.”
This simple habit is faster than correcting a misplaced cluster later.
Common mistake to avoid:
Do not work the single crochet into one stitch and the two double crochets into another. All three stitches in the group go into the same stitch.
Step 5: Finish the Setup Row Correctly
Continue the established repeat until only 3 stitches remain.
Then:
- Skip the next 2 stitches.
- Work 1 single crochet into the final stitch.
Turn your work.
Count your stitches. You should still have:
91 stitches.
Do not panic if counting the textured row feels different from counting the foundation row. Each three-stitch group still contains three individual stitches: one short single crochet and two taller double crochets.
Beginner tip:
When counting, touch each stitch with the tip of your yarn needle or hook. Visual counting alone can become confusing when the fabric is textured.
Common mistake to avoid:
Missing that final single crochet will immediately reduce your stitch count and make the blanket narrower.
Step 6: Work the One-Row Repeat
This is the row you will repeat for the body of the blanket.
Turn your work and chain 2. The chain two counts as the first stitch.
Work 2 double crochets into the first single crochet at the base of the chain two.
Now repeat across:
Skip the next 2 double crochet stitches. Work 1 single crochet and 2 double crochets into the next single crochet.
Continue until three stitches remain.
Then:
- Skip the next two double crochet stitches.
- Work one single crochet into the top of the previous row’s beginning chain two.
- Turn.
You should still have:
91 stitches.
After a few repeats, the pattern becomes much easier to read visually. Each new three-stitch group settles into the single crochet that anchored a group in the previous row.
Beginner tip:
Look for the short single crochet between the taller double crochet stitches. That short stitch is your target.
Common mistake to avoid:
Do not place the next group in the first or second double crochet of the previous cluster. Skip both double crochets and work into the following single crochet.
Step 7: Protect the Edge Stitch
The middle of this pattern is easy once you understand the repeat. The edges deserve more attention.
At the beginning of every row, the chain two counts as your first stitch.
At the end of the following row, you must work your final single crochet into the top of that chain two.
This is the stitch most likely to be missed.
For your first ten rows, use a locking marker in the top of every new turning chain. After crocheting the final single crochet into it on the following row, remove the marker and move it to the new turning chain.
Beginner tip:
Stop every five rows and lay the blanket flat. Both sides should remain approximately parallel.
Common mistake to avoid:
If one edge suddenly steps inward, you probably missed the previous turning chain. Count your stitches before continuing.
Step 8: Continue Until the Blanket Reaches Full Length
Continue repeating the same textured row until you have approximately:
68 total rows, including the foundation and setup rows.
Alternatively, stop when the main blanket body measures about 33½–34 inches long, before adding the border.
Measurements are often more reliable than row numbers when yarn substitutions are involved.
Every ten rows or so:
- Count 91 stitches.
- Check that the edges remain straight.
- Measure the width.
- Look for accidental holes caused by a misplaced repeat.
- Check that your working tension still feels comfortable.
Beginner tip:
Write your row count on paper, use a physical row counter, or add a note to your phone. Do not rely on memory after putting the project aside overnight.
Common mistake to avoid:
Do not keep crocheting solely because you’ve reached the suggested row number if your personal gauge gives you a dramatically different length. Measure the actual fabric.
Step 9: Add the Simple Border
Once the main blanket body reaches the desired length, do not cut your yarn.
This version uses a simple three-round single-crochet border.
Border Round 1
After finishing the final body row:
- Do not turn.
- Chain 1. This does not count as a stitch.
- Work 2 single crochets in the first corner.
- Work single crochet stitches evenly down the first side edge.
There is no universal exact stitch number for the side because your personal row height affects the ideal spacing.
The goal is a flat edge.
If the border ruffles outward, you probably have too many side stitches.
If it pulls the blanket inward, you probably have too few.
At the bottom corner, work 3 single crochets.
Continue with one single crochet in each foundation stitch across the bottom.
Work 3 single crochets in the next corner.
Single crochet evenly up the second side.
Work 3 single crochets in the final corner.
Single crochet across the top.
Join to the first single crochet with a slip stitch.
Border Round 2
Chain 1.
Work one single crochet in each stitch around, placing 3 single crochets in the center stitch of each corner group.
Join with a slip stitch.
Border Round 3
Repeat Border Round 2.
Check your blanket on a flat surface before fastening off.
The border should lie smoothly without waves or puckering.
Beginner tip:
Lay the blanket flat after the first border round. Correct side-edge spacing before adding more rounds.
Common mistake to avoid:
Do not force a fixed number of single crochets along the row ends if that number makes your border flare or pull. Even spacing and flat fabric are more important.
Step 10: Fasten Off and Finish
After completing the final border round:
- Cut the yarn, leaving a tail approximately 6–8 inches long.
- Yarn over and pull the tail completely through the active loop.
- Tighten gently.
- Thread the tail onto a blunt tapestry needle.
- Weave it through the back of several nearby stitches.
- Change direction at least once before trimming the excess.
Repeat for every remaining yarn tail.
Do not simply cut a tail close to the knot. Yarn ends can loosen during washing and normal use.
Pattern Notes and Stitch Notes
Turning Chain Rule
The chain two at the beginning of each main-pattern row counts as the first stitch.
Mark its top with a locking marker until you’re comfortable identifying it.
Stitch Count
Maintain:
91 stitches after every complete main-pattern row.
When you change the width, your number will be different, but it should remain constant throughout.
Main Repeat
After the setup row, the central repeat is:
Skip 2 double crochets; work 1 single crochet and 2 double crochets into the next single crochet.
Row Construction
The blanket is worked flat from the bottom upward.
Turn the fabric after every main body row.
Right Side and Wrong Side
This texture is attractive on both sides, so strict right-side and wrong-side labeling is not critical for the main body.
Size Adjustment
The stitch repeat requires a foundation-row stitch count of:
A multiple of 3, plus 1 additional stitch.
Because Row 1 begins in the second chain from the hook, your starting-chain count should be a multiple of 3, plus 2.
Examples:
- Chain 77 → 76 foundation stitches.
- Chain 92 → 91 foundation stitches.
- Chain 107 → 106 foundation stitches.
- Chain 122 → 121 foundation stitches.
Always make a swatch and measure rather than assuming a specific chain count will produce exactly the same dimensions with every yarn.
Common Beginner Mistakes
1. Making the Foundation Chain Too Tight
Problem: The lower edge pulls inward like a crescent.
Fix: Remake the chain more loosely or use a slightly larger hook for the foundation chain only.
2. Losing the Last Stitch
Problem: The blanket gradually becomes narrower.
Fix: Place a locking marker in the top of each turning chain and count regularly.
3. Working the Stitch Group Into the Wrong Stitch
Problem: The texture becomes irregular or unexpected holes appear.
Fix: On repeat rows, skip both double crochets and work the next group into the following single crochet.
4. Separating the Three-Stitch Group
Problem: The stitch texture looks flatter and less organized.
Fix: Remember that one single crochet and two double crochets all belong in the same target stitch.
5. Changing Tension Halfway Through
Problem: One section of the blanket is narrower or wider.
Fix: Relax your hands periodically. Do not pull each completed stitch tight against the hook shaft.
6. Adding Too Many Border Stitches
Problem: The border becomes wavy or ruffled.
Fix: Remove the round and use fewer single crochets along the side edges.
7. Adding Too Few Border Stitches
Problem: The border pulls the main fabric inward.
Fix: Add slightly more evenly spaced side stitches.
8. Skipping the Swatch When Changing Yarn
Problem: You run out of yarn or get an unexpected size.
Fix: Make a small swatch in the actual stitch pattern before committing to a substitute yarn.
How to Customize This Crochet Baby Blanket
Change the Yarn
A #5 bulky yarn makes the project quick and helps the stitch texture stand out.
You can use a different weight, but expect the dimensions, drape, hook size, stitch count, and yardage to change.
A lighter yarn generally creates a thinner, more flexible blanket and requires more stitches to reach the same width.
Change the Color
Try:
- One peaceful solid color.
- Wide two-color stripes.
- A neutral body with contrasting border.
- Three nursery colors repeated in sequence.
- A gentle tonal gradient.
For beginners, avoid changing colors every row unless you enjoy weaving in many ends.
Change the Size
To change the width, use a starting chain that follows:
Multiple of 3 + 2 chains.
To change the length, simply continue the repeat row until the blanket reaches your preferred measurement.
Try a Different Border
Easy options include:
- One round of single crochet for a minimal edge.
- Three rounds of single crochet as written here.
- Half double crochet.
- Reverse single crochet for a corded appearance.
- A simple shell edge for a more decorative finish.
Add Texture Without Changing the Pattern
Use a heathered, lightly marled, or subtle tonal yarn. The yarn itself creates visual variation while you continue using the same beginner stitch repeat.
Gift Ideas and Uses
A handmade baby blanket can be given as:
- A baby-shower gift.
- A new-parent gift.
- A stroller blanket.
- A tummy-time blanket.
- A nursery keepsake.
- A photography prop used with direct adult supervision.
- A handmade charity donation when the receiving organization’s material and size requirements are followed.
Finishing Instructions
Once every yarn end has been woven in, inspect the blanket carefully.
Check:
- Are any ends still loose?
- Are the corners flat?
- Is the border smooth?
- Have any stitches been accidentally stretched?
- Are all optional attachments secure?
Blocking
Blocking is optional for this project.
If your edges need minor straightening:
- Check the yarn label before exposing the fiber to water, steam, or heat.
- Arrange the blanket on clean blocking mats.
- Gently shape it to the desired dimensions.
- Pin where appropriate without overstretching.
- Allow it to dry completely.
Never apply high heat to an unknown synthetic fiber.
Washing and Care
Always follow the instructions on your specific yarn label.
For a frequently used baby blanket, washable yarn is practical. Secure every yarn tail carefully before the first wash.
Important Baby-Use Safety Note
Do not attach loose buttons, beads, poorly secured pom-poms, or other detachable decorations to a blanket intended for a baby.
Also remember that a handmade baby blanket is not a substitute for current infant safe-sleep recommendations. The CDC advises keeping soft bedding, including loose blankets, out of an infant’s sleep area. Use the blanket only in ways appropriate for the child’s age, circumstances, and current safety guidance.
Quick Printable-Style Summary
Skill level: Beginner
Finished size: Approximately 31 x 35 inches after border, depending on gauge.
Yarn: Approximately 850 yards of #5 bulky/chunky washable yarn.
Hook: 6.5 mm / K-10.5.
Other materials: Scissors, tapestry needle, two stitch markers, measuring tape.
Stitches: Chain, single crochet, double crochet, slip stitch.
Gauge: Approximately 12 stitches and 8 rows = 4 inches in the main pattern.
Starting chain: Chain 92.
Foundation row: Single crochet in the second chain from the hook and every chain across. 91 stitches.
Setup: Chain two, work two double crochets in the first stitch; then repeat by skipping two stitches and working one single crochet plus two double crochets in the next stitch.
Main repeat: Skip the next two double crochets; work one single crochet and two double crochets in the following single crochet.
Length: Continue until approximately 68 total rows or until the main body is approximately 33½–34 inches long.
Border: Three rounds of single crochet with three single crochets in each corner.
Finishing: Fasten off securely, weave in every end, and block only if necessary.
FAQ
Is this crochet baby blanket pattern suitable for a complete beginner?
Yes, provided you already know—or are prepared to learn—how to make a chain, single crochet, and double crochet. The Craft Yarn Council describes basic-level projects as those using fundamental stitches and potentially simple increases or decreases.
What is the easiest crochet stitch for a baby blanket?
There is no single best stitch for every beginner, but simple repeating combinations of basic stitches work particularly well. This tutorial uses only single and double crochet after the foundation chain.
How many chains do I need for a beginner baby blanket?
For this specific original pattern, chain 92.
For a different width, use a starting-chain count following a multiple of 3 + 2.
Remember that a different yarn weight, hook size, or personal tension changes the final width.
Can I make this blanket with worsted-weight yarn instead?
Yes, but you will need to recalculate the width, probably make more foundation chains, use a hook suitable for that particular yarn, and expect a different yardage requirement.
Make a swatch first.
Why is my crochet blanket getting narrower?
The most common reason in this particular pattern is missing the final single crochet at the edge. That final stitch belongs in the top of the previous chain-two turning chain.
Use a stitch marker there.
Why is my crochet blanket border wavy?
You probably worked too many stitches along one or both side edges. Remove the border round and space the side stitches more sparingly.
If the border pulls inward instead, you may need more stitches.
Should I block a crochet baby blanket?
Not always. If the blanket already lies flat with even edges, blocking may be unnecessary.
Blocking can help even out minor shape differences, but the correct technique depends on the fiber content. Always check the yarn label first.
Conclusion
Your first crochet baby blanket should help you become more comfortable with crochet—not bury you under complicated instructions.
This design is intentionally repetitive. Once the foundation row and first textured row are complete, you work the same straightforward sequence again and again: skip two taller stitches, place one single crochet and two double crochets into the next single crochet, and protect that final turning-chain stitch at the edge.
That repetition is where confidence develops.
By the time your blanket reaches full length, you’ll have practiced foundation chains, single crochet, double crochet, stitch counting, turning chains, edge control, border spacing, fastening off, and weaving in ends—all in one practical project.
Save the tutorial before you begin, keep a stitch marker in that important edge chain, and let the rows build gradually. A blanket is simply one well-made row followed by another.





