A library trip has a way of turning one book into five.
That makes a crochet library tote one of those handmade projects that is both enjoyable to make and genuinely useful afterward. This version is designed specifically with books, notebooks, planners, and everyday library essentials in mind. Instead of an open mesh fabric that can stretch around book corners, the tote uses a dense crochet base, solid lower walls, a decorative but still supportive center section, and wide single-crochet handles.
The finished bag is approximately 14 inches wide and 13 inches tall, with enough room for several average-size books. The construction is worked mostly in the round, so there are no large side seams to sew at the end.
The pattern below is an original beginner-friendly design. The photo references listed throughout the tutorial are provided only to show the type of instructional photography needed for each stage.
What You’ll Learn
- How to turn a foundation chain into an elongated crochet tote base.
- How to use stitch markers to control increases.
- How to create a clean fold from the base to the sides.
- How to crochet a strong solid lower tote body.
- How to change colors neatly.
- How to work crossed double crochet.
- How to keep a bag from becoming too stretchy.
- How to position two balanced handles.
- How to adjust the tote for more or fewer books.
- How to reinforce and finish crochet handles.
Finished Size
Approximately:
- Width: 14 in / 35.5 cm
- Height without handles: 13 in / 33 cm
- Base depth: 4–4.5 in / 10–11.5 cm
- Handle length: approximately 22 in / 56 cm from attachment to attachment
- Handle width: approximately 2 in / 5 cm
The exact size will vary with yarn, hook size, and tension.
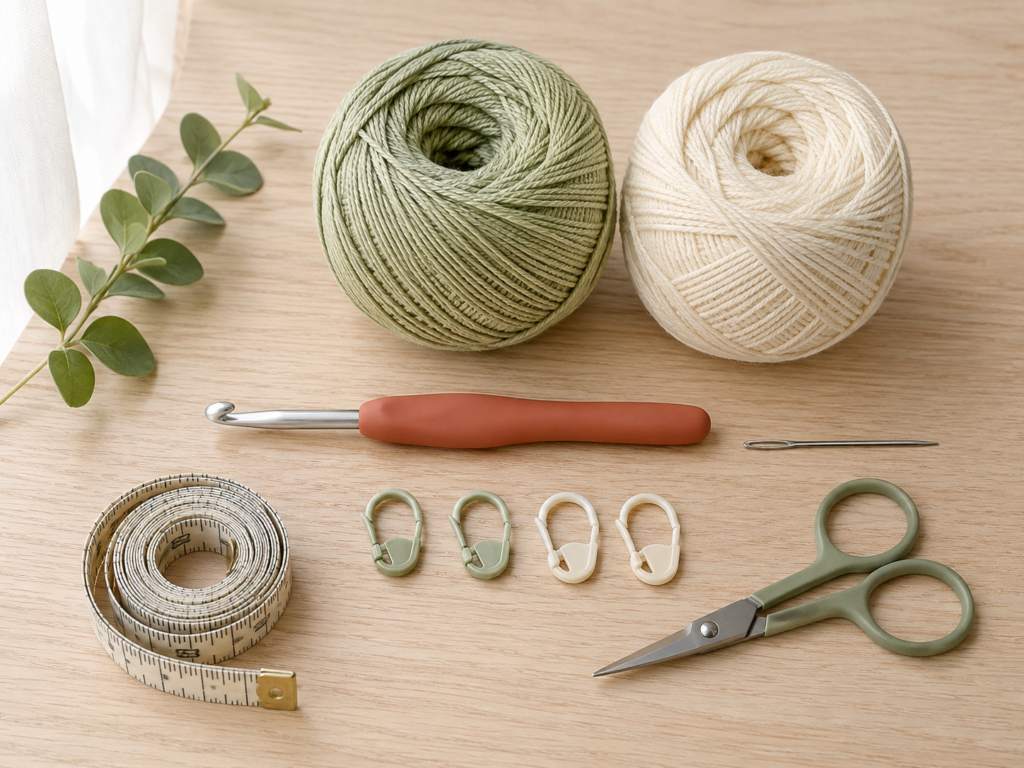
Materials You’ll Need
Use a yarn that can tolerate weight without becoming excessively elastic.
For this sample:
- Color A: approximately 280–320 yd muted sage green #4 cotton yarn
- Color B: approximately 140–170 yd warm cream #4 cotton yarn
- 5.0 mm crochet hook
- Four locking stitch markers
- Tapestry needle
- Scissors
- Measuring tape
- Optional additional yarn for reinforcing handle joins
- Optional cotton or canvas lining
A medium #4 yarn commonly falls within a crochet-hook range that includes approximately 4.5–5.5 mm, making a 5.0 mm hook a practical starting point, although individual tension still matters.
Crochet Abbreviations Used
This tutorial uses US crochet terminology.
- ch = chain
- sc = single crochet
- hdc = half double crochet
- dc = double crochet
- sl st = slip stitch
- st/sts = stitch/stitches
- rep = repeat
- BLO = back loop only
- inc = increase, usually two stitches worked into one stitch
The Craft Yarn Council publishes standardized crochet abbreviations and also notes the terminology differences between US and UK patterns. For example, a US single crochet is called a double crochet in UK terminology.
Before You Start
Gauge
For a tote bag, exact garment-style gauge is not critical, but fabric density matters.
Aim for approximately:
15 sc x 16 rounds = 4 in / 10 cm
If your fabric feels loose enough for book corners to poke through, switch to a smaller hook.
If the base becomes extremely stiff and difficult to crochet, go up 0.5 mm.
How to Count Stitches
The “V” at the top of each crochet stitch counts as one stitch.
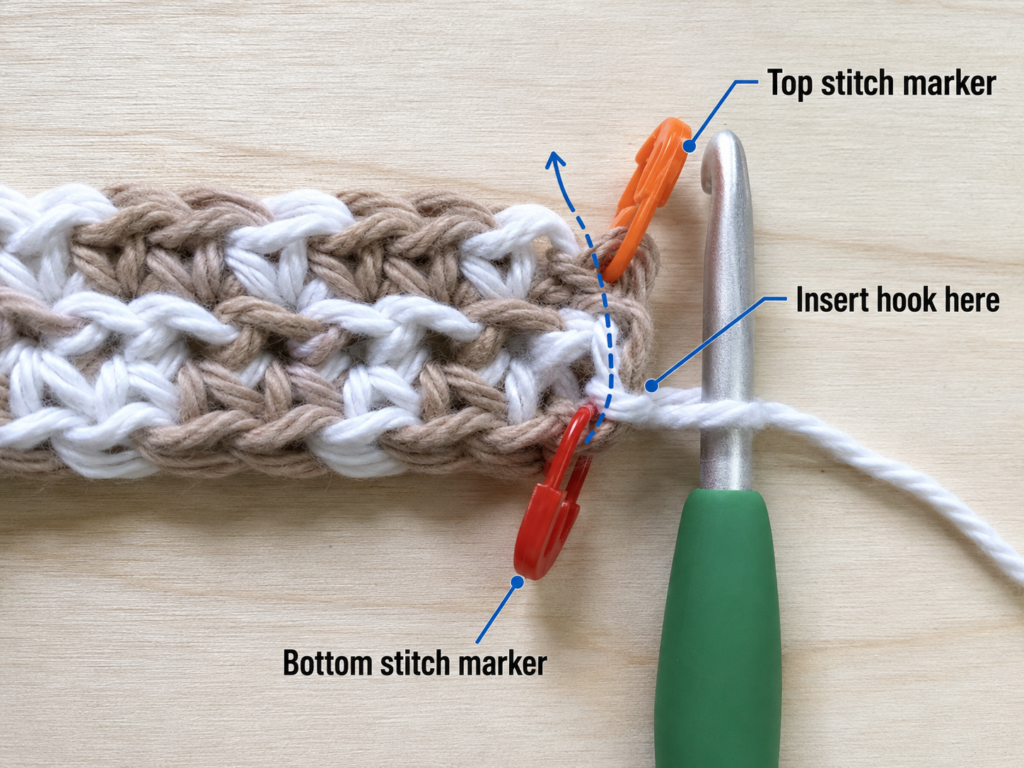
When working continuously, place a stitch marker into the first stitch of every round. Move the marker upward each time you reach it.
Do not count the active loop on your hook as a stitch.
Keeping the Tote Straight
Book totes show leaning seams and accidental increases more clearly than soft market bags.
Count frequently.
After the base is complete, every ordinary body round should contain the same number of stitches unless the pattern specifically says otherwise.
Preventing Curling
A slightly cupped base during the first round is normal.
A severely ruffled base usually means too many increases.
A bowl-shaped base usually means too few increases or very tight tension.
Beginner Note
If the crossed double crochet feels confusing, practice four or six stitches on a small swatch first. The rest of the tote uses very familiar stitches.
Step-by-Step Crochet Tutorial
Step 1: Make the Foundation Chain
With Color A, muted sage, make a slip knot.
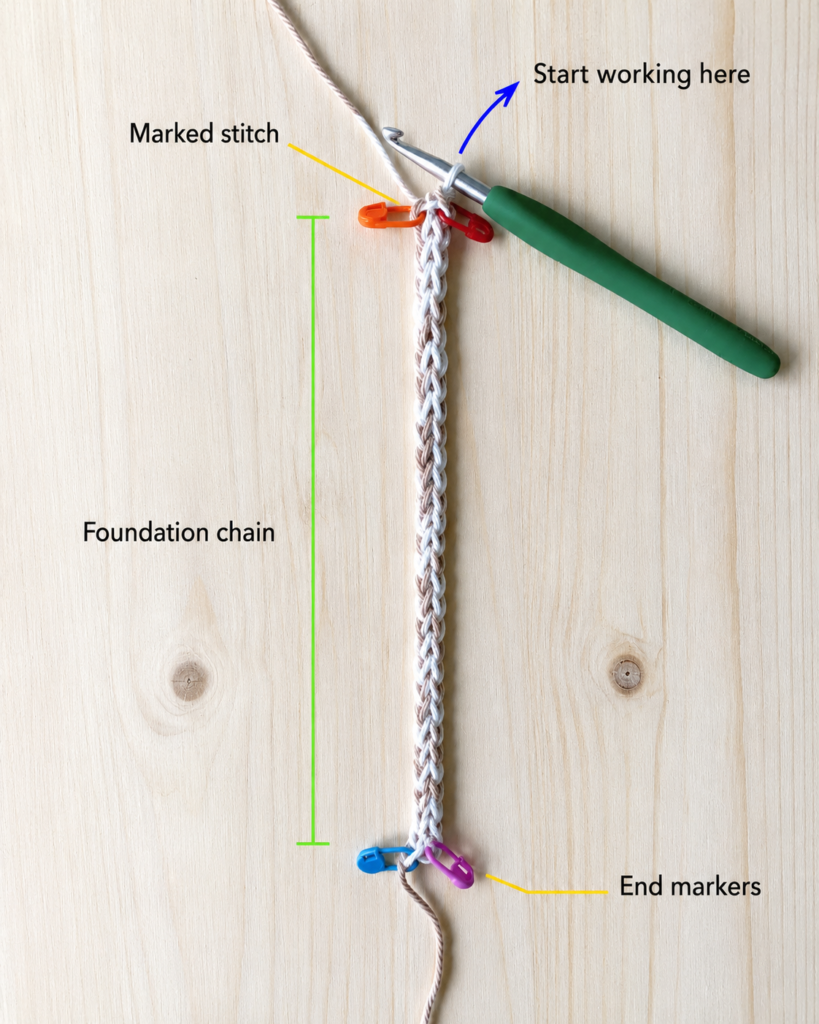
Ch 34.
Try not to make the chain tighter than your normal crochet tension. A tight starting chain can cause the center of an oval base to pull inward.
For a cleaner bottom edge, you can crochet into the back bumps of the chain. Beginners may instead work through the normal top loops.
Beginner tip: Count the chain twice before continuing. The loop currently on the hook is not included in your chain count.
Common mistake to avoid: Do not deliberately make the chain extremely tight because you want a sturdy bag. Strength should come from the finished fabric, not from an inflexible foundation chain.
Step 2: Crochet Around Both Sides of the Chain
The foundation chain becomes the center line of the tote bottom.
Base Round 1
Sc in the second chain from the hook and continue with one sc in each of the next 31 chains.
Work 3 sc into the final chain.
Instead of turning the work as you would for a flat row, rotate it so the unused side of the foundation chain faces you.
Work one sc into each of the next 31 available chain loops on the opposite side.
Work 2 additional sc into the same beginning chain that already contains your first sc.
You should now have three stitches curving around each end.
Stitch count: 68 sts.
Place a marker into the first stitch.
Beginner tip: Think of the construction as crocheting a racetrack rather than crocheting rows back and forth.
Common mistake to avoid: Do not insert the hook into the same side of the chain twice. After reaching the end, physically rotate the piece and work along the unused side.
Step 3: Mark the Increase Zones
The rounded ends need controlled increases.
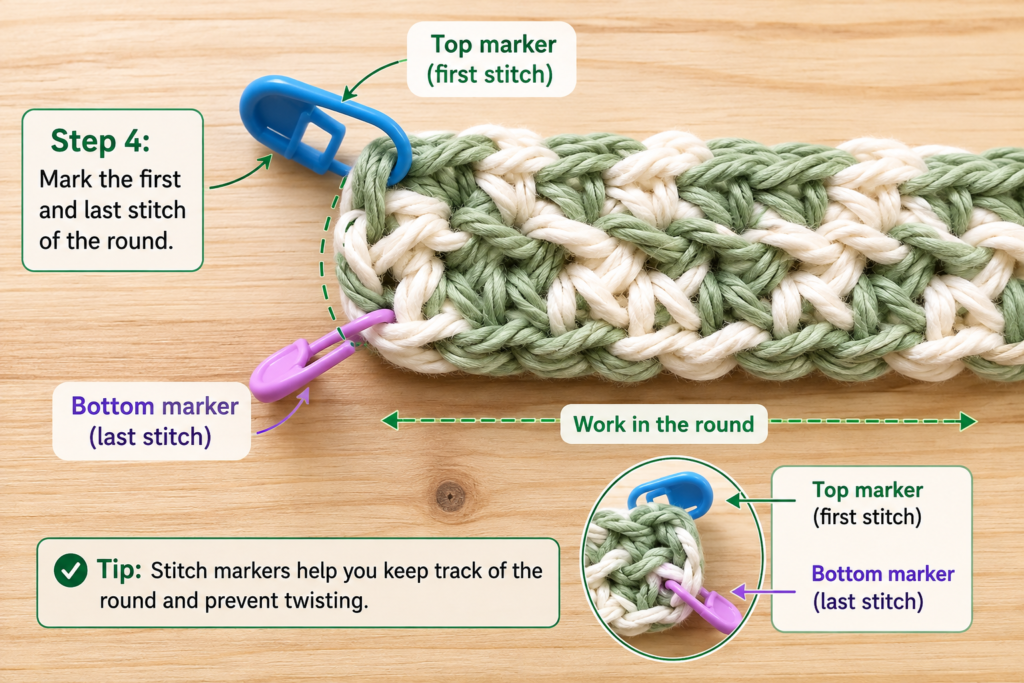
Instead of trying to memorize where each curve begins, place markers around the three-stitch turning group on each end.
Base Round 2
Sc evenly along each straight side.
At each rounded end, work:
2 sc in each of the 3 end stitches.
That creates six increases across the whole round.
Stitch count: 74 sts.
Move the beginning-of-round marker when you reach it.
Beginner tip: Different-colored markers can help. Use one color for the first stitch of the round and another for the curved sections.
Common mistake to avoid: Accidentally increasing on only one end will make the base twist to one side.
Step 4: Expand the Base
Now spread the increases farther apart so the ends stay smooth.
Base Round 3
On each rounded end:
[Sc in next st, 2 sc in next st] 3 times.
Work one sc into every straight-side stitch.
Stitch count: 80 sts.
Base Round 4
On each rounded end:
[Sc in next 2 sts, 2 sc in next st] 3 times.
Sc normally across the straight sections.
Stitch count: 86 sts.
Lay the base on a flat table.
It should resemble a long capsule or shallow oval rather than a circle.
Beginner tip: Smooth the piece gently with your fingers before judging the shape.
Common mistake to avoid: If the edge ripples badly, check whether you accidentally placed two increases into a straight-side stitch.
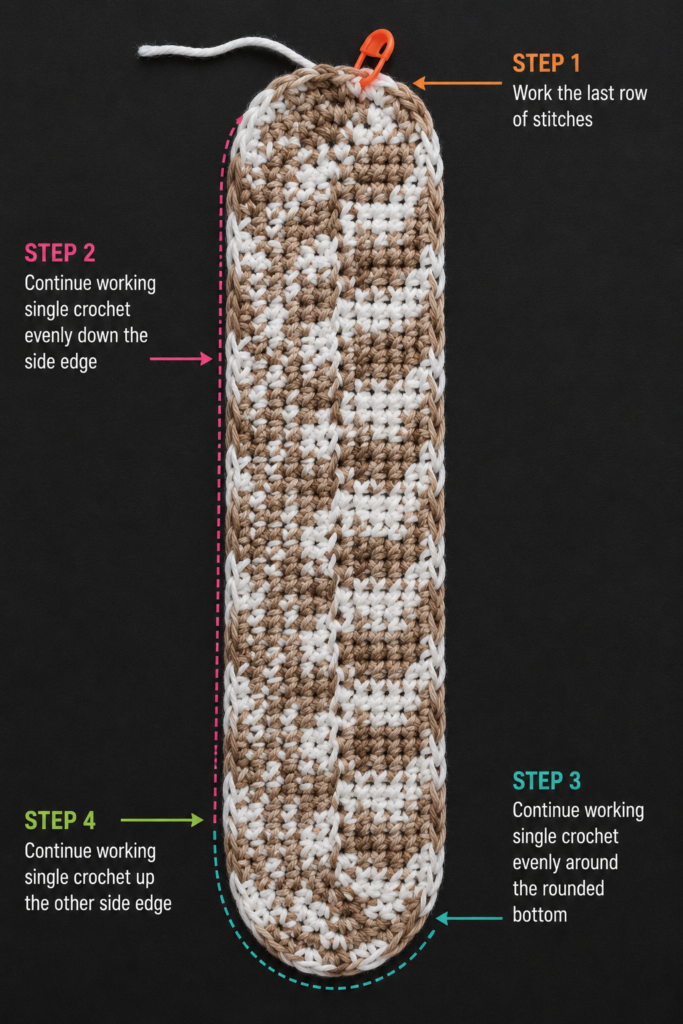
Step 5: Check the Finished Base
After Round 4, the base should measure roughly:
13–14 inches long x 4–4.5 inches wide.
Your measurements may differ slightly.
This is a good point to customize the bag.
If you want a wider bottom, add another increase round using:
[Sc in next 3 sts, 2 sc in next st] around each curved end.
If you are happy with the size, stop increasing.
Beginner tip: Place one average paperback or hardcover above the base. The book should fit comfortably without hanging far over either end.
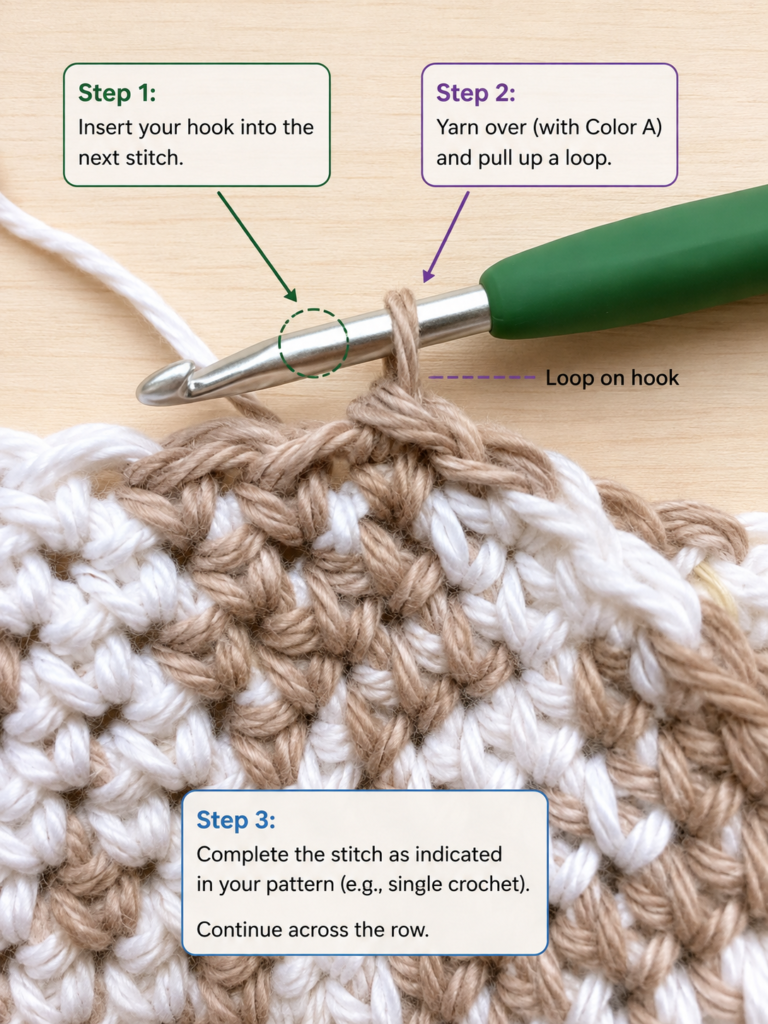
Step 6: Turn the Base Into Side Walls
The next round establishes a crisp transition.
Round 5
Work 1 sc BLO in every stitch around.
86 sts.
BLO means inserting the hook under only the back loop of the stitch.
This leaves the unused front loop visible as a horizontal ridge around the base.
Rounds 6–10
Work 1 sc in every stitch around.
Continue in uninterrupted rounds and keep your beginning marker in place.
86 sts each round.
The fabric should now begin standing vertically.
Beginner tip: Do not add any more increases once you start the walls.
Common mistake to avoid: If the tote keeps spreading outward instead of standing up, check that you have stopped increasing.
Step 7: Build the Lower Body and Change to Cream
Continue with Color A.
Round 11
Sc in every stitch.
At the end of this round, sl st into the first stitch to finish the continuous section neatly.
Fasten off Color A or carry it discreetly if you prefer.
Join Color B, warm cream.
From this point through the textured section, work in joined rounds.
Joined rounds make it easier to keep the decorative stitch rows level.
Beginner tip: Join the cream yarn at one narrow side of the bag rather than in the center of the front.
Common mistake to avoid: Do not tie a bulky knot at the color change. Leave tails long enough to weave securely through several stitches later.
Step 8: Crochet the Textured Center
Round 12
Ch 1, hdc in the first stitch and every stitch around.
Join with a sl st.
86 hdc.
Round 13 — Crossed Double Crochet
Ch 2. The chain does not count as a stitch.
Skip the first stitch.
Dc in the second stitch.
Now bring your hook back to the skipped stitch and work a dc into it, allowing the two stitch posts to cross.
Continue:
*Skip next st, dc in next st, dc back into skipped st; rep from * around.
Join to the first dc.
Because the tote has an even stitch count, you should finish with complete crossed pairs.
Beginner tip: Keep the second dc slightly loose. If you pull it too tightly, the fabric contracts.
Common mistake to avoid: Do not accidentally crochet into the same stitch twice. The crossed pair uses two different stitches.
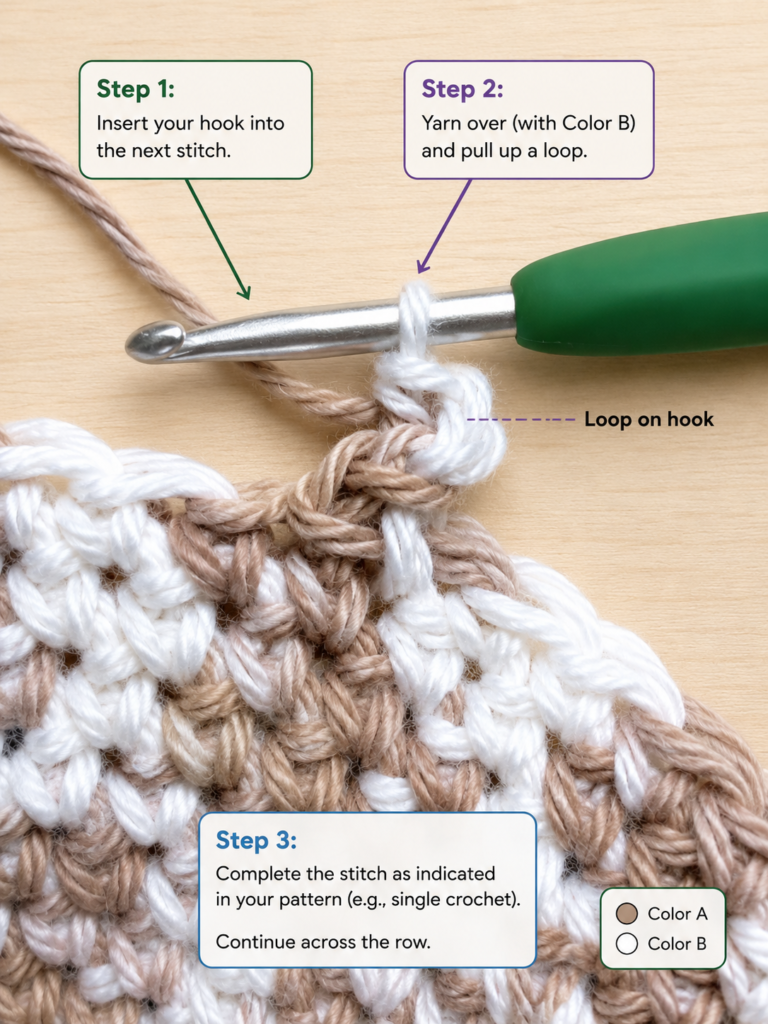
Step 9: Repeat the Texture Band
Continue in Color B.
Round 14
Sc in every stitch.
Rounds 15–16
Hdc in every stitch.
Round 17
Repeat the crossed-double-crochet round.
Round 18
Sc around.
Rounds 19–20
Hdc around.
Round 21
Repeat the crossed-double-crochet round.
Round 22
Sc around.
Round 23
Hdc around.
The center panel now contains three decorative crossed rows separated by denser stitches.
This gives the bag visual texture without creating the large holes of a traditional market-bag mesh.
Beginner tip: After every crossed round, hold the bag at eye level. If one section looks compressed, gently stretch the stitches horizontally before starting the next round.
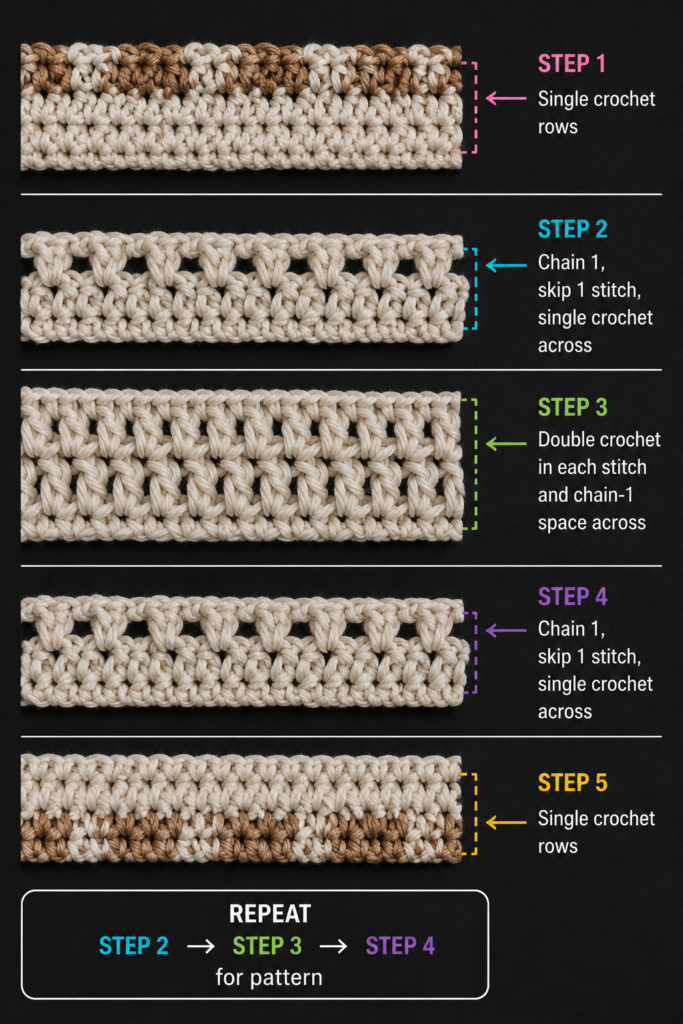
Step 10: Crochet the Upper Section
Change back to Color A, sage.
Rounds 24–30
Ch 1 and sc in every stitch around.
Join each round with a sl st.
86 sts per round.
These dense upper rounds are important because the handles will pull against this area.
If your books are usually large or heavy, add another two sc rounds before beginning the handles.
Position the Handle Anchors
Lay the tote flat naturally.
You should have approximately 43 stitches across the front and 43 across the back.
On the front face, mark:
- 6-stitch side margin
- next 8 sts = first handle anchor
- next 15 sts = center gap
- next 8 sts = second handle anchor
- remaining 6 sts = side margin
Repeat on the back face.
Check the placement visually before crocheting.
The handles should line up vertically.
Step 11: Crochet the First Handle
Join Color A at the first marked eight-stitch anchor group.
Handle Row 1
Sc across the 8 marked stitches.
Turn.
Handle Row 2
Ch 1, sc in each of the 8 stitches.
Turn.
Repeat Handle Row 2 until the strap measures approximately 22 inches / 56 cm, or until it gives your preferred shoulder drop.
For most crocheters this may require roughly 80–90 rows, but measure rather than relying only on row count.
A strap naturally stretches after use.
If in doubt, make it slightly shorter rather than longer.
Beginner tip: Count all eight stitches every few rows. Accidentally dropping an edge stitch will make the strap taper.
Common mistake to avoid: Do not work loosely. The handles carry more tension than almost any other part of the tote.
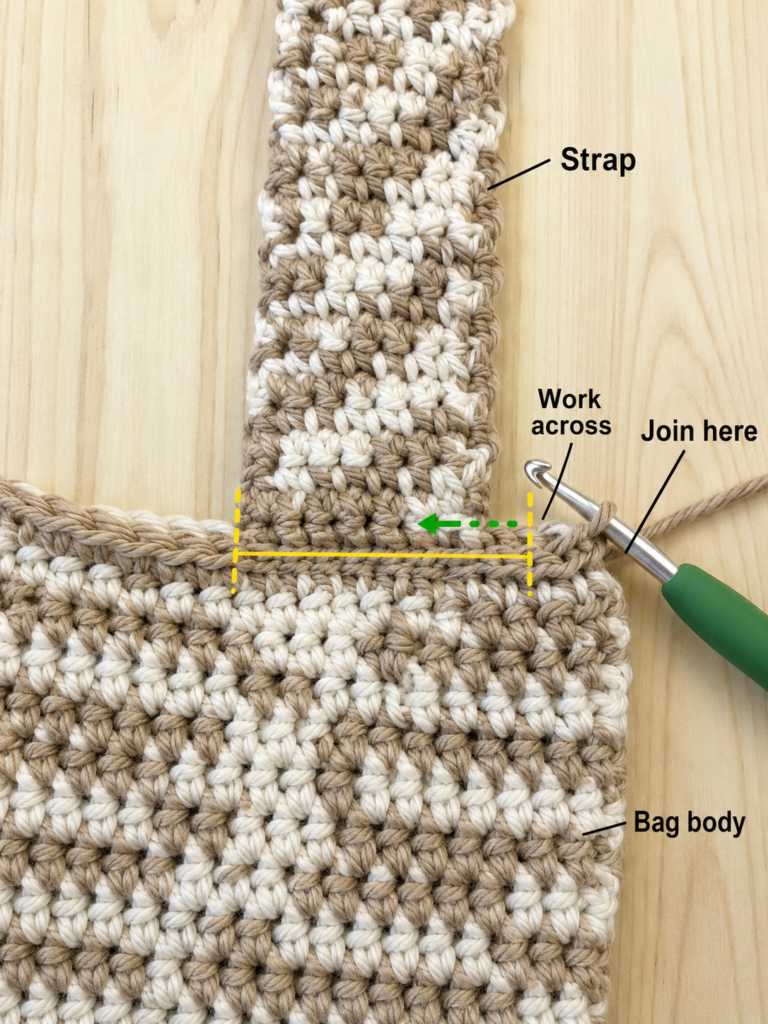
Step 12: Attach the First Handle
Lay the tote flat.
Bring the free end of the strap to the second eight-stitch anchor on the same face.
Before attaching, run your fingers from the first end of the strap all the way to the free end.
Make sure the strap has zero twists.
Place the strap end directly against the marked stitches.
Slip stitch through both the strap and tote-edge stitches across all eight positions.
For extra strength, cut a long tail and whipstitch across the attachment once more with a yarn needle.
Now repeat the entire handle process on the back face.
Try to match the length of both handles before attaching the second strap.
Beginner tip: Measure the first finished handle and write the measurement down. Do not simply count rows unless your tension stayed completely consistent.
Common mistake to avoid: A twisted handle is surprisingly easy to miss while the tote lies flat. Check before making the first attachment stitch.
Pattern Notes or Stitch Notes
Turning Chains
For the handles, ch 1 does not count as a stitch.
For joined hdc rounds, the starting chain does not count as an hdc.
For crossed-double-crochet rounds, the initial ch 2 is only used to bring the hook to working height and does not count as a dc.
Stitch Counts
Base:
- Round 1: 68 sts
- Round 2: 74 sts
- Round 3: 80 sts
- Round 4: 86 sts
Body:
- Maintain 86 sts unless deliberately resizing.
If your count changes unexpectedly, find the mistake before continuing. A one-stitch discrepancy near the base can become much more noticeable near the handles.
Right Side and Wrong Side
Most of the tote is worked with the right side facing outward.
The handle rows turn after each row, so both sides of the crochet fabric naturally appear.
Size Adjustments
Wider Tote
Add foundation chains.
Each additional chain lengthens the bag by approximately one stitch-width.
Deeper Base
Work an extra oval increase round before starting the BLO transition.
Taller Tote
Add sc or hdc rounds before the handle section.
Shorter Tote
Remove ordinary sc rounds rather than removing the base or handle reinforcement rounds.
Common Beginner Mistakes
1. The Base Is Ruffling
Cause: Too many increases.
Fix: Check whether you increased in straight-side stitches accidentally.
A gentle wave can often be blocked out. Strong ruffling usually requires unraveling to the incorrect increase.
2. The Base Is Curling Into a Bowl
Cause: Too few increases or unusually tight tension.
Fix: Recount the curved-end increases. If the count is correct but the fabric remains very tight, increase your hook by 0.5 mm.
3. The Body Keeps Getting Wider
Cause: Continuing to increase after the base is finished.
Fix: Once the BLO side-wall round begins, work exactly one stitch into each previous stitch.
4. The Crossed Stitches Look Tight
Cause: Pulling the backward-working dc too firmly.
Fix: Leave slightly more height in the first loop before completing the second dc of the pair.
5. The Beginning of the Rounds Leans
Cause: Marker drift or accidentally crocheting into a joining slip stitch.
Fix: Mark the actual first stitch, not the sl st or starting chain.
6. One Handle Is Longer
Cause: Comparing only row counts even though tension changed.
Fix: Measure the first strap in inches or centimeters before making the second.
7. The Tote Stretches Too Much Under Books
Cause: Loose gauge, very elastic yarn, narrow handles, or excessive load.
Fix: Use cotton, tighten the gauge slightly, reinforce the strap attachments, and consider a fabric lining.
How to Customize This Crochet Project
Yarn Changes
Cotton is an excellent option because it creates a defined stitch and generally produces a more structured fabric than very springy fibers.
You can also use:
- Cotton-linen blend
- Recycled cotton
- Cotton-acrylic blend
- Firm braided cotton yarn
Avoid extremely soft, loosely spun yarn if your goal is to carry heavy books regularly.
Color Changes
Try:
- Forest green + cream for an academic look
- Burgundy + oatmeal for fall
- Navy + parchment for a classic library palette
- Terracotta + natural cotton
- Dusty blue + warm ivory
- One solid neutral color for a minimalist tote
You can also make only the crossed-dc rows contrast instead of changing the entire center section.
Size Changes
For a child’s library tote, reduce:
- Foundation chain
- Body height
- Strap length
For a larger bookstore tote, add:
- 4–8 foundation chains
- One extra base increase round
- Several extra upper body rounds
Border Options
The tote already has a dense upper edge, but you can add:
- One round of reverse single crochet
- One round of slip stitch
- A contrasting sc border
Avoid floppy decorative borders around the handle anchors.
Texture Options
If you do not want crossed double crochet, substitute equal-height rounds of:
- Hdc
- Moss stitch
- Linen stitch
- Extended sc
Remember that a substitute stitch may affect the finished height.
Gift Ideas and Uses
This bag works especially well as:
- Teacher gift
- Librarian gift
- Book-club gift
- College tote
- School reading bag
- Bookstore tote
- Planner bag
- Crochet-project bag
For a book-lover gift, place a paperback, handmade bookmark, and small notebook inside the finished tote.
Finishing Instructions
Fasten Off
After both handles are attached and reinforced, cut the yarn leaving at least a 6-inch tail.
Pull the tail through the final loop.
Weave In Ends
Use a tapestry needle.
Weave each tail through the reverse side of several stitches, change direction, and weave through another section.
Pay special attention to:
- Color-change tails
- Handle starting tails
- Handle attachment tails
Do not simply trim a knot close to the fabric.
Blocking
Cotton bags generally need only light shaping.
Lay the tote flat.
Shape the base and sides by hand.
If needed, lightly dampen the fabric and allow it to dry flat.
Avoid stretching the handles while wet.
Optional Lining
A fabric lining is particularly useful for a library tote because books are heavier than groceries such as bread or produce.
Choose medium-weight cotton canvas or another stable woven fabric.
A lining can:
- Reduce stretch
- Protect crochet stitches from sharp book corners
- Add an inside pocket
- Help the tote keep its rectangular shape
Washing and Care
Always follow the yarn manufacturer’s care instructions.
Yarn labels use standardized care symbols that indicate appropriate washing, drying, ironing, and other treatments.
For a cotton tote, reshaping while damp is particularly helpful.
Avoid hanging a heavily wet crochet bag from its handles because the weight can stretch them.
Quick Printable-Style Summary
Skill level: Easy / advanced beginner
Finished size: Approx. 14 in wide x 13 in tall
Yarn: #4 medium 100% cotton, approximately 420–490 yd total
Hook: 5.0 mm
Main stitches: ch, sc, BLO sc, hdc, dc, crossed dc, sl st
Starting method: Ch 34, crochet around both sides of foundation chain
Base counts: 68 → 74 → 80 → 86 sts
Body repeat: Maintain 86 sts while building side walls
Accent: Three crossed-double-crochet rounds separated by solid rounds
Handle: 8 sts wide, worked in sc until approximately 22 in long
Finishing: Attach both handles securely, reinforce joins, weave ends, lightly block
Optional: Add a cotton canvas lining for carrying heavier books
FAQ
Is cotton yarn best for a crochet library tote?
Cotton is one of the strongest choices because it creates clear stitches and a relatively firm fabric. A cotton blend can also work. The most important factor is avoiding a fabric that becomes excessively stretchy under book weight.
How much yarn do I need for a crochet library tote?
For this approximately 14-inch tote, plan for around 420–490 yards of worsted-weight yarn.
Buy a little extra if you intend to make longer handles, enlarge the tote, or add a decorative border.
Can a beginner make this crochet tote?
Yes, provided you already know basic chains, single crochet, half double crochet, and double crochet.
The crossed double crochet is the only slightly unusual stitch, and it can be replaced with normal hdc if necessary.
Can I make the bag without the crossed stitch?
Yes.
Replace each crossed-dc round with one ordinary hdc or dc round.
The resulting tote will be simpler but equally usable.
How do I stop crochet tote handles from stretching?
Use dense stitches, keep the handle fairly wide, crochet with firm tension, and reinforce the attachment points.
For very heavy use, you can also sew cotton twill tape to the wrong side of the handles.
Should I line a crochet book tote?
It is optional, but a lining is particularly useful if you regularly carry several hardcovers.
It limits stretching and protects the crochet fabric.
How do I make a larger library tote?
Increase the initial chain length, then work the same style of rounded base.
You may also add another increase round to deepen the bottom.
Always keep the final body stitch count even if you intend to use the crossed-dc pattern.
Conclusion
A good crochet library tote should be attractive, but it also needs to survive the reason you made it: carrying books.
The dense sage base gives this tote structure, the cream center adds enough texture to make the project visually interesting, and the broad crochet handles distribute the weight more comfortably than thin straps.
Once you understand the oval foundation and handle placement, the same construction can be adapted into school bags, bookstore totes, teacher gifts, project bags, and everyday crochet shoppers.
Save the pattern for your next book haul, and consider making a matching crochet bookmark from the leftover cream or sage yarn.





