A reusable water bottle is useful until you have to carry it through a long walk, festival, market, school trip, or afternoon of errands. This crochet water bottle holder solves that small problem with a simple circular base, a lightweight mesh body, and a comfortable strap that leaves your hands free.
The project is suitable for a confident beginner who can make chains and single crochet stitches. You will practice crocheting a flat circle, working in continuous and joined rounds, building chain-space mesh, counting repeats, and sewing on a sturdy strap.
Unlike a tightly crocheted bottle sleeve, the open mesh section uses less yarn and stretches gently around bottles of slightly different shapes. The lower section remains solid to support the weight of the bottle, while the upper band gives you a secure place to attach the strap.
The instructions below are written in US crochet terms and produce a holder for a standard bottle approximately 2.75–3 inches in diameter. You can adjust the base, height, and strap before fastening off.
What You’ll Learn
- How to crochet a flat circular bottle-holder base
- How to stop increasing and create vertical sides
- How to make an evenly spaced chain-loop mesh
- How to measure the project directly against your bottle
- How to convert open mesh back into a solid rim
- How to make a wider strap that resists excessive stretching
- How to attach the strap securely and hide the yarn ends
- How to resize the pattern for wider or taller bottles
Finished Size
The standard sample is designed to measure approximately:
- Base diameter: 2.75–3 inches
- Body height: 8–8.5 inches
- Body circumference: Approximately 9 inches unstretched
- Crossbody strap: Approximately 40–44 inches after finishing
- Shoulder strap option: Approximately 24–28 inches
Measurements can vary with yarn, hook size, and tension. Test the holder with the intended bottle throughout the project rather than relying only on numerical measurements.
Materials You’ll Need
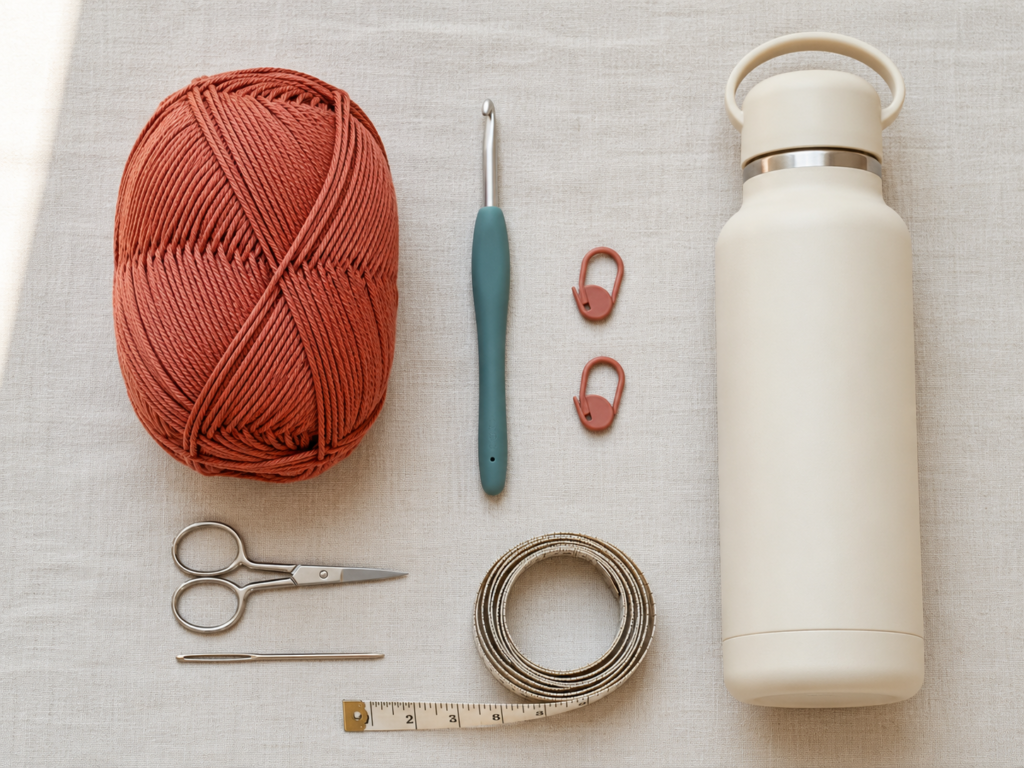
- 90–110 yards of category 4 medium-weight cotton yarn
- US G/6, 4.0 mm crochet hook
- Two locking stitch markers
- Blunt tapestry needle
- Small scissors
- Flexible measuring tape
- The water bottle you want the holder to fit
Cotton is recommended because it creates a defined, practical fabric. A smooth cotton or mercerized cotton also makes it easier for a beginner to identify stitch tops and chain spaces.
Avoid very soft chenille, loosely spun roving, or heavily textured novelty yarn for your first holder. Those yarns make stitch counting more difficult and can create a strap that stretches unpredictably.
Crochet Abbreviations Used
- BLO = back loop only
- ch = chain
- ch-sp = chain space
- inc = increase by working two single crochet stitches into one stitch
- MR = magic ring
- rep = repeat
- sc = single crochet
- sk = skip
- sl st = slip stitch
- sp = space
- st/sts = stitch/stitches
Before You Start
Crochet terminology
This tutorial uses US crochet terminology. In UK terminology, the US single crochet stitch is called double crochet.
Gauge and tension
Exact row gauge is not critical because the project can be fitted directly around a bottle. Base size is more important.
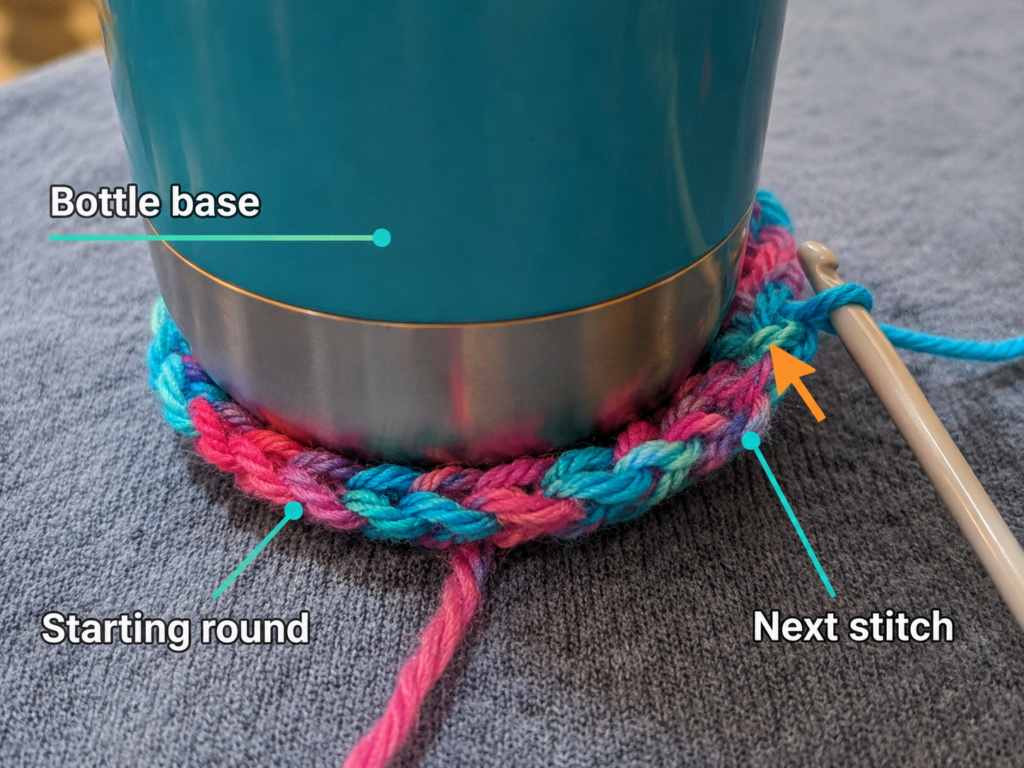
After completing the standard four increase rounds, the circle should measure approximately 2.75–3 inches across. It should be just slightly smaller than or approximately equal to the flat bottom of your bottle.
If the circle is too small, add another increase round or use a larger hook. If it is noticeably larger than the bottle, remove one round or use a smaller hook.
How to count stitches
Place a stitch marker in the first stitch of every continuous round. Move it upward whenever you begin a new round.
Look for the two horizontal loops forming a small “V” at the top of each single crochet. Each V counts as one stitch.
How to prevent a ruffled base
A ruffled edge usually means the circle has too many increases or your tension has become much looser. Confirm that each round contains the correct stitch count before continuing.
How to prevent a cupped base
A base that curves upward too soon may have too few increases or very tight tension. Check your stitch count and relax your grip on the working yarn.
Choosing colors
A single solid color gives the clearest stitch definition. To use scraps, change color at the beginning of a solid round rather than in the middle of the mesh. This keeps the joins less noticeable.
Step-by-Step Crochet Tutorial
Step 1: Make the Magic Ring and First Round
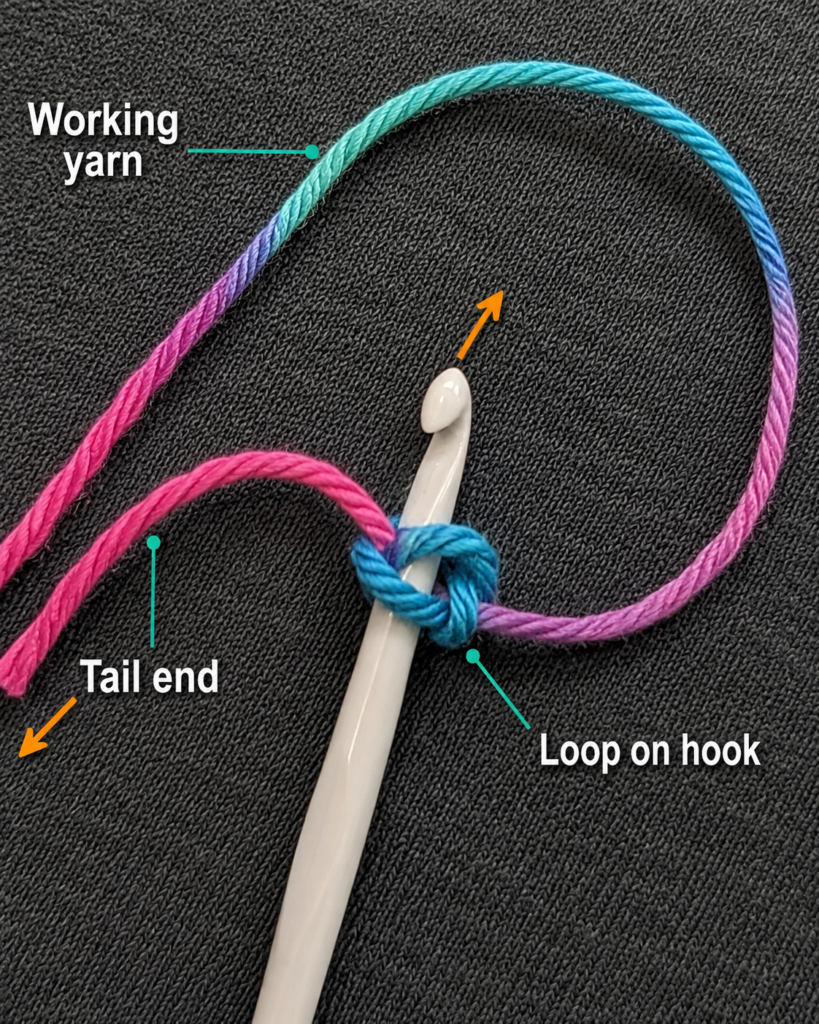
Create a magic ring, leaving a tail at least 5 inches long.
Work 8 single crochet stitches into the ring. Pull the starting tail carefully until the center closes. Place a locking stitch marker in the first single crochet.
Do not join the round. The base is worked in a continuous spiral, which avoids a visible joining seam underneath the bottle.
Round 1: 8 sc into MR. [8 sts]
Beginner tip
After tightening the magic ring, hold the center between your thumb and index finger while beginning the second round. This keeps the small circle from twisting.
Common mistake to avoid
Do not count the active loop on the hook as a stitch. Only count the completed V-shaped stitch tops around the ring
Step 2: Increase the Flat Circular Base
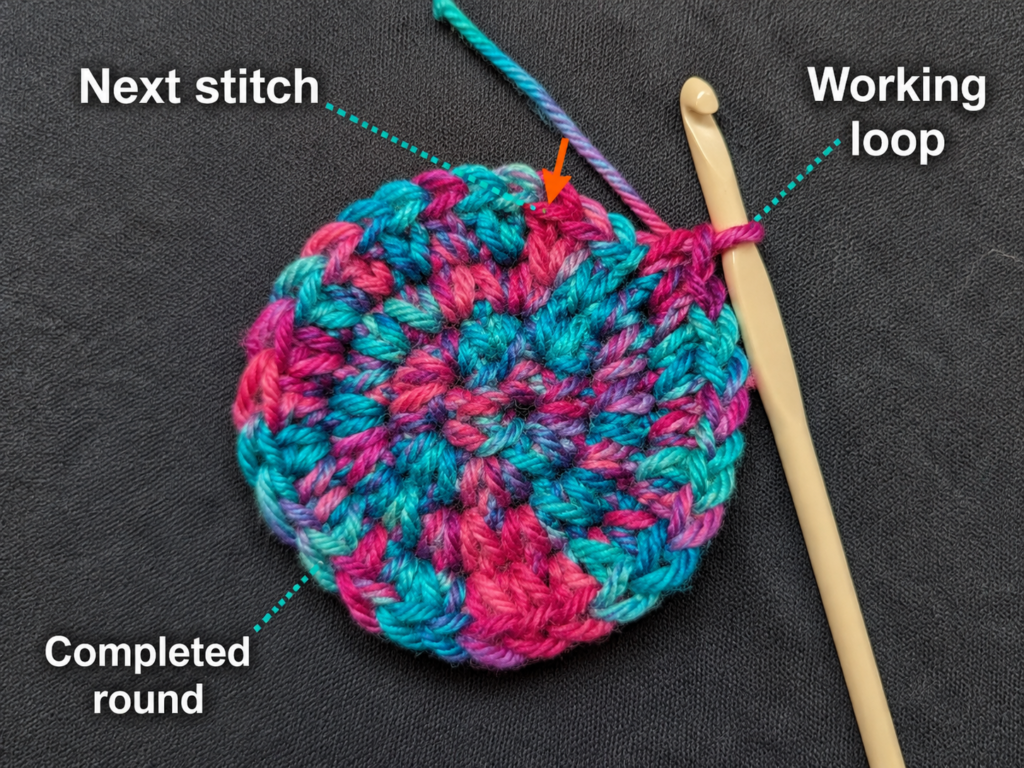
Continue working in a spiral. Move the marker into the first stitch of each new round.
Round 2: Work 2 sc in every stitch around. [16 sts]
Round 3: Sc in the next stitch, 2 sc in the following stitch. Repeat from * to * around. [24 sts]
Round 4: Sc in each of the next 2 stitches, 2 sc in the following stitch. Repeat from * to * around. [32 sts]
Lay the circle flat and place the bottle on top. The crochet should reach the outer edge of the bottle’s base without extending far beyond it.
For a bottle wider than approximately 3 inches, add:
Optional Round 5: Sc in each of the next 3 stitches, 2 sc in the following stitch. Repeat around. [40 sts]
The standard pattern continues with 32 stitches. A 40-stitch base will create 10 mesh repeats instead of 8.
Beginner tip
Count every round before moving on. Correcting the base now is much easier than discovering an incorrect stitch count after completing the mesh.
Common mistake to avoid
Do not stack all increases directly above one another if your circle begins looking octagonal. Slightly offsetting the first increase of alternating rounds can make the circle look smoother, although it does not affect function.
Step 3: Turn the Base Upward
The next round creates a defined corner between the flat base and vertical wall.
Work 1 single crochet in the back loop only of every stitch around. Maintain the same stitch count.
For the standard size:
Side Round 1: Sc BLO in each stitch around. [32 sts]
Working only through the back loop leaves the unused front loops visible as a ridge. This ridge encourages the fabric to turn upward instead of continuing to expand outward.
Continue in a spiral and keep the stitch marker in place.
Beginner tip
Tilt the piece slightly toward you. The back loop is the loop farther away from you when the stitch top is viewed from above.
Common mistake to avoid
Do not accidentally work through both loops halfway around. The holder will still function, but the base ridge will appear uneven.
Step 4: Crochet the Solid Lower Band
Return to working through both loops.
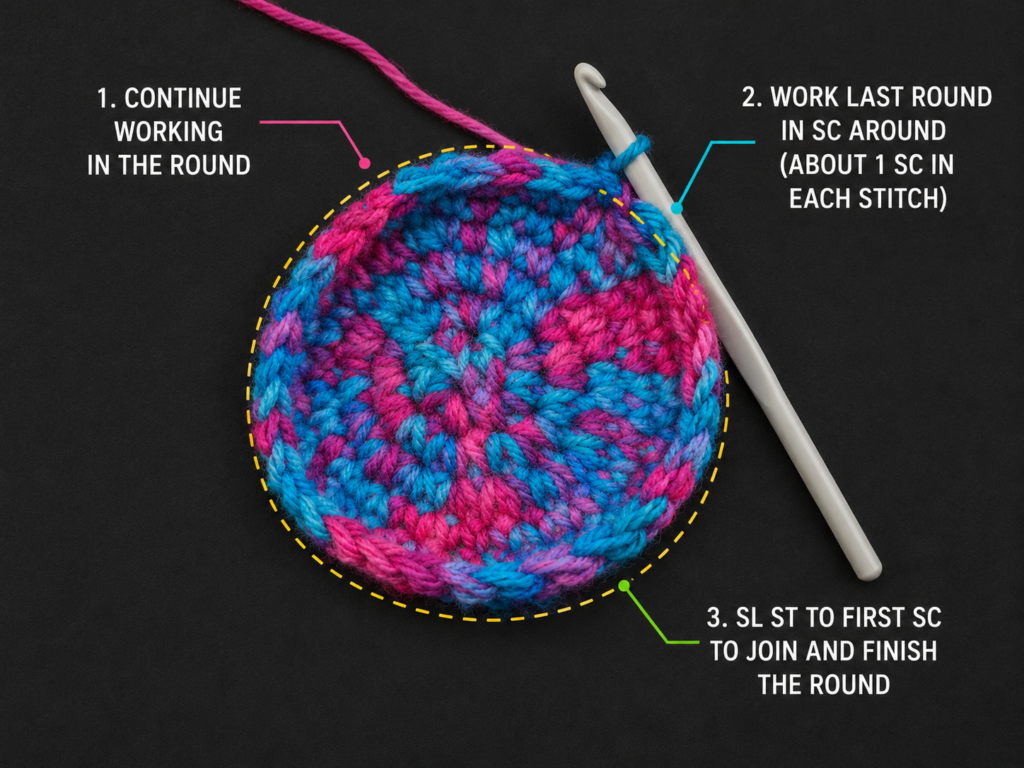
Work 1 sc in every stitch around for four additional rounds, maintaining 32 stitches.
The lower band should measure approximately 1.25–1.5 inches from the base ridge. Insert the bottle and check the fit.
The fabric should touch the bottle without needing to be pulled aggressively. A little ease is acceptable because the mesh will stretch when the bottle is carried.
At the end of the final lower-band round, work a slip stitch into the first stitch to close the spiral. The mesh portion will be worked in joined rounds.
Beginner tip
If the holder is too tight, change to a 4.5 mm hook for the final lower-band round and mesh section. If it is extremely loose, undo the side rounds and make a smaller base.
Common mistake to avoid
Do not add stitches while crocheting straight sides. One single crochet must be worked into each existing stitch.
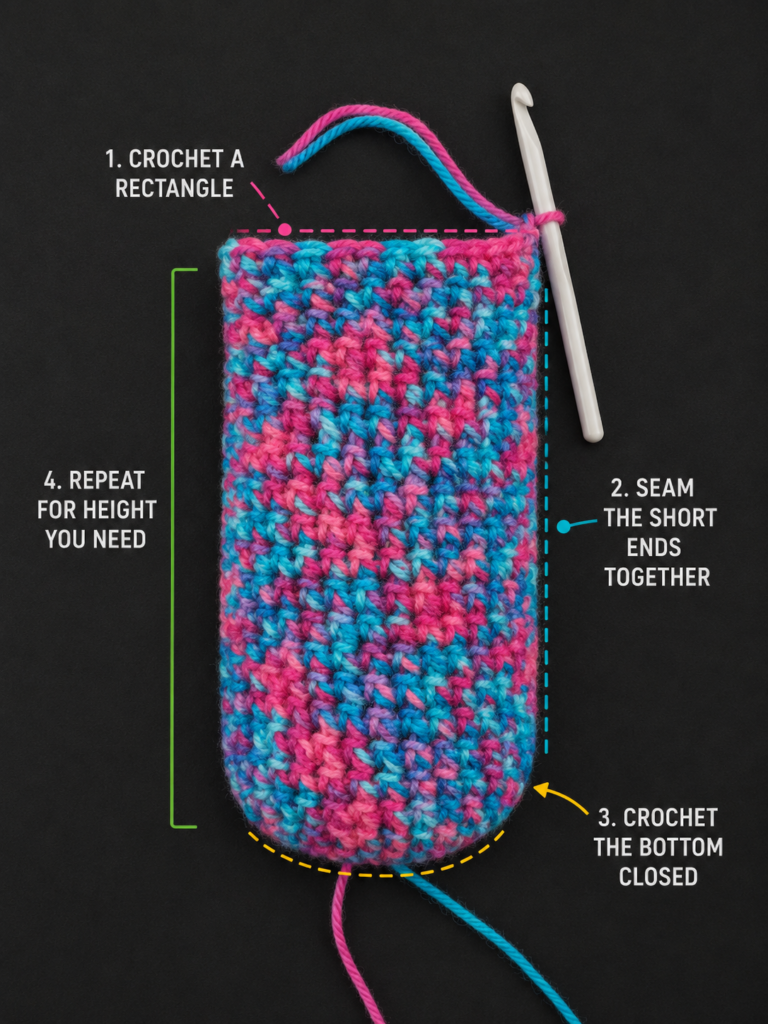
Step 5: Establish the First Mesh Round
The standard 32-stitch circumference divides into eight groups of four stitches.
Mesh Setup Round:
- Ch 1. This chain does not count as a stitch.
- Sc in the same stitch.
- Ch 4.
- Skip the next 3 stitches.
- Sc in the following stitch.
- Repeat the ch-4, skip-3, sc sequence around.
- Sl st into the first sc to join.
You should have 8 chain-4 spaces.
For the optional 40-stitch base, repeat the same sequence to create 10 chain-4 spaces.
Lay the loops around the bottle. They should be evenly spaced without one unusually small gap at the end.
Beginner tip
Count the three skipped stitches by touching each stitch top with the hook before inserting it into the fourth stitch.
Common mistake to avoid
Do not work the anchor stitch into the third skipped stitch. Each repeat uses four stitches: one anchor stitch plus three skipped stitches.
Step 6: Repeat the Chain-Space Mesh
Slip stitch into the first chain-4 space. This moves the working yarn away from the previous round’s anchor stitch.
For each mesh repeat round:
- Ch 1.
- Sc in the same chain-4 space.
- Ch 4.
- Sc in the next chain-4 space.
- Repeat the ch-4 and sc sequence around.
- Sl st into the first sc to join.
Continue until you have 14 mesh rounds in total, including the setup round, or until the mesh reaches the lower shoulder of your bottle.
The mesh loops should stack in a staggered diamond pattern. Keep all chains approximately the same size.
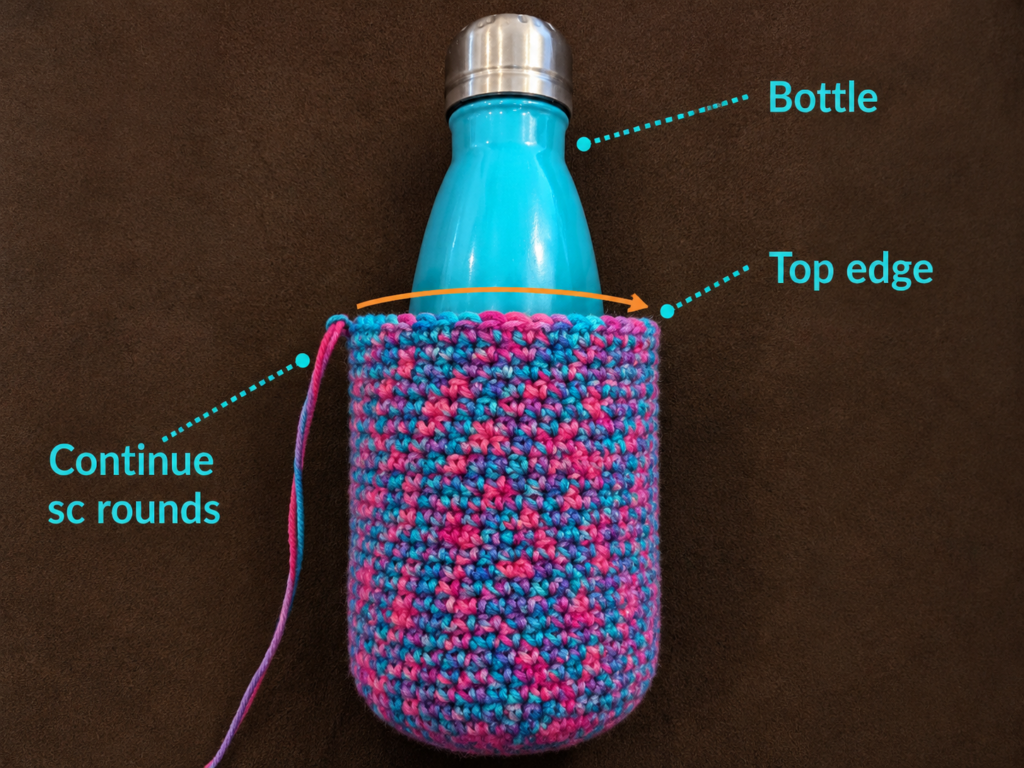
Place the bottle inside every three or four rounds. The mesh will look narrow when empty but should open around the bottle without straining the anchor stitches.
Beginner tip
Count “one, two, three, four” every time you form a loop. Consistent chain counts matter more than crocheting quickly.
Common mistake to avoid
Do not place the single crochet into one individual chain. Insert the hook beneath the entire chain loop unless the pattern specifically instructs otherwise.
Step 7: Check the Height Before Closing the Mesh
Insert the bottle and stand the holder upright.
For a standard bottle, the top mesh round should usually sit just below the bottle’s shoulder or narrowing neck. Leaving the cap area exposed makes the bottle easier to remove.
Add mesh rounds when:
- The holder ends too far below the bottle shoulder.
- The top band would sit across the widest portion of the bottle.
- The bottle can tip sideways because too much of its height remains unsupported.
Remove rounds when:
- The mesh covers the bottle cap.
- The upper edge gathers around a narrow neck.
- You cannot remove the bottle comfortably.
Remember that cotton fabric may settle and lengthen slightly when carrying a full bottle. Stop approximately 0.5 inch shorter than the final length you think you need.
Beginner tip
Hold the project by the upper mesh loops with the filled bottle inside. This gives a more realistic indication of the carried length than measuring the empty holder flat.
Common mistake to avoid
Do not stretch the mesh forcefully while measuring. Let the weight of the bottle create the natural amount of extension.
Step 8: Convert the Mesh Into a Solid Top Band
Slip stitch into the first chain-4 space.
Top Transition Round:
- Ch 1.
- Work 4 sc into the same chain-4 space.
- Work 4 sc into every remaining chain-4 space.
- Sl st into the first sc to join.
For the standard size, you will return to 32 stitches.
Work two additional solid rounds:
Top Round 2: Ch 1, sc in the same stitch and in every stitch around. Join with sl st. [32 sts]
Top Round 3: Ch 1, sc in the same stitch and in every stitch around. Join with sl st. [32 sts]
Fasten off and leave a tail about 6 inches long.
The three dense rounds provide a stable rim that will distribute the weight of the bottle more effectively than attaching the strap directly to open mesh.
Beginner tip
Count each group of four as it is completed: “one, two, three, four—move to the next space.”
Common mistake to avoid
Do not accidentally place five stitches in some chain spaces. Extra stitches can make the rim flare outward.
Step 9: Crochet a Wide Carrying Strap
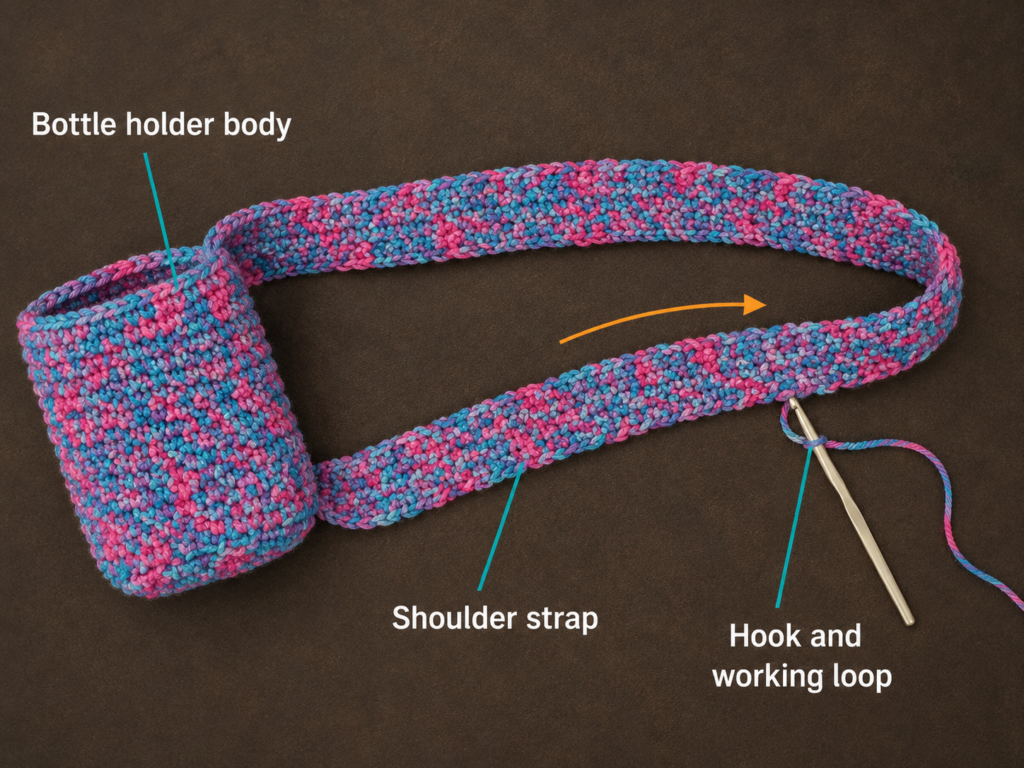
The strap is made separately so you can measure it easily and sew it firmly to the dense upper band.
For a crossbody strap, chain 151, or create a relaxed foundation chain approximately 45–47 inches long. The completed strap will shorten slightly as rows are added.
For a shoulder-length strap, chain approximately 91, or make a foundation chain 28–30 inches long.
Strap Row 1: Sc in the second chain from the hook and in every chain across. Ch 1 and turn.
Strap Rows 2–4: Sc in every stitch across. Ch 1 and turn after Rows 2 and 3.
After Row 4, fasten off while leaving a tail approximately 18 inches long for sewing.
Leave a similar long tail at the opposite end. When beginning the chain, this means leaving an 18-inch starting tail before making the slip knot.
The four-row width helps distribute pressure across the shoulder. A one-chain or one-row cord is quicker, but it may feel uncomfortable when carrying a full bottle.
Beginner tip
After completing the first strap row, place it over your shoulder before working the remaining rows. Undo or add stitches now if the length needs adjustment.
Common mistake to avoid
Do not twist the foundation chain while crocheting the first row. Keep the chain bumps facing consistently toward you.
Step 10: Position and Attach the Strap
Flatten the empty bottle holder so the upper edge forms two equal sides.
Mark one attachment point near the side seam or round join. Count 16 stitches around the standard 32-stitch rim and place the second marker. The markers should sit directly opposite one another.
Check that the strap is not twisted.
Place one strap end inside the holder so approximately 1.25 inches overlaps the solid upper band. Thread the long yarn tail through the tapestry needle.
Sew through the strap and all three dense upper rounds. Work around the edge of the overlapping area, then sew one diagonal line through the center. Repeat at the opposite end.
Insert the bottle and lift the holder several inches above a padded surface. Inspect both seams. Add more stitches if the attachments pull away from the body.
Beginner tip
Use matching yarn rather than ordinary sewing thread. The yarn fills the spaces between crochet stitches and is easier to hide.
Common mistake to avoid
Do not sew the strap into the chain mesh. The strap should connect only to the solid upper band.
Pattern Notes and Stitch Notes
Turning-chain rules
- The ch 1 at the beginning of joined single crochet rounds does not count as a stitch.
- The strap turning chain also does not count as a stitch.
- Work the first strap single crochet into the first actual stitch, not into the turning chain.
Stitch counts
- Standard base: 32 stitches
- Standard mesh: 8 chain-4 spaces
- Wider optional base: 40 stitches
- Wider mesh: 10 chain-4 spaces
- Top transition: 4 sc in each chain space
Repeat pattern
The mesh repeat after the setup round is:
Sc in next ch-4 space, ch 4.
Repeat around, maintaining the same number of spaces in every round.
Right side and wrong side
The bottle holder is primarily worked from the outside with the right side facing you. The strap can be attached inside the rim so the seam is less visible from the exterior.
Adjusting the size
To widen the holder, add another evenly increased base round. The final stitch count should remain divisible by four for this mesh repeat.
To lengthen it, add complete mesh rounds before working the top transition.
To shorten it, remove mesh rounds. Do not remove the dense lower band because it supports the bottle.
Common Beginner Mistakes
1. The base becomes wavy
Cause: Too many stitches, loose tension, or accidental increases.
Fix: Count the most recent round. Remove extra stitches or use a smaller hook.
2. The base curls into a bowl before the side round
Cause: Too few increases or tight tension.
Fix: Confirm the round count. Redo the final increase round more loosely or move up one hook size.
3. The mesh spirals sideways
Cause: An anchor was skipped or added, changing the number of chain spaces.
Fix: Count the spaces after every round. The standard holder must maintain eight.
4. Some mesh diamonds are much larger
Cause: Inconsistent chain tension or an accidental fifth chain.
Fix: Count every chain and keep the working loop close to the hook shaft.
5. The rim flares outward
Cause: More than four single crochet stitches were placed in one or more chain spaces.
Fix: Count the transition round and reduce it to 32 stitches.
6. The bottle holder hangs too low
Cause: The mesh or strap stretched more than expected.
Fix: Shorten the strap before final attachment. For an already finished holder, fold a small section of strap and sew it securely, or detach one end and remove several rows.
7. The strap twists
Cause: One strap end was rotated before sewing.
Fix: Lay the entire project flat, trace the strap from one attachment to the other, and correct the twist before reinforcing the seams.
How to Customize This Crochet Project
Change the yarn
Use smooth cotton for a firm everyday holder. A cotton-acrylic blend may feel softer, while a thinner category 3 yarn can create a lighter carrier. When changing yarn weight, build the base by measurement rather than copying the same number of rounds.
Add color changes
Try a cream base, terracotta mesh, and sage top band. Make color changes at the joined-round seam and weave the tails into the solid sections.
Make the mesh more open
Use chain-5 loops instead of chain-4 loops. The holder will stretch more and use slightly less yarn, but small bottles may not feel as secure.
Make the mesh denser
Use chain-3 loops and divide the circumference into repeats of three stitches. This modification requires recalculating the base stitch count.
Add a drawstring
Before fastening off the top, work a round containing evenly spaced chain-1 gaps. Thread a crocheted cord through the gaps. Keep the opening large enough to remove the bottle without excessive pulling.
Add a decorative border
A reverse single crochet edge can create a firm corded finish. A simple contrasting slip-stitch round is easier for beginners.
Make a shorter handle
Instead of a crossbody strap, crochet a 12–16 inch handle for carrying the bottle by hand or hanging it from a hook.
Gift ideas
Pair the holder with:
- A reusable bottle
- A small hiking towel
- A gift card for a local café
- A matching crochet keychain
- A handwritten yarn-care card
Finishing Instructions
Weave the magic-ring tail through several stitches around the center. Change direction at least once before trimming it. This prevents the center from opening.
Weave the top-band tail horizontally through dense single crochet stitches.
Inspect the strap seams. Each end should be secured through several rows of the solid rim rather than through a single round.
Lightly shape the empty holder by hand. Heavy blocking is unnecessary because the bottle will establish the finished shape.
When wet blocking is appropriate for your yarn:
- Soak or dampen the holder according to the yarn label.
- Press out excess water without twisting.
- Place the bottle inside a waterproof bag.
- Insert the protected bottle into the damp holder.
- Arrange the mesh and rim evenly.
- Remove the bottle once the holder holds its shape and allow the crochet to dry completely.
Follow the washing and drying directions printed on the yarn label. Keep the label with your project notes so you can refer to the fiber content and care symbols later.
Safety note
A full bottle places meaningful weight on the strap. Test both attachments before regular use. Do not carry cracked glass bottles, unsealed containers, or liquids that could cause injury if spilled.
Quick Printable-Style Summary
Skill level: Easy / confident beginner
Yarn: 90–110 yards of category 4 cotton yarn
Hook: 4.0 mm
Other materials: Stitch markers, scissors, tapestry needle, measuring tape, water bottle
Stitches: Magic ring, chain, single crochet, slip stitch, increase, back loop only
Starting method: 8 single crochet stitches in a magic ring
Standard base: Increase to 32 stitches
Lower section: One back-loop-only round followed by four single crochet rounds
Mesh setup: Ch 4, skip 3 stitches, sc in the next stitch around
Mesh repeat: Ch 4, sc in the next chain-4 space around
Standard mesh count: 8 chain spaces per round
Mesh height: Approximately 14 rounds or until the holder reaches the bottle shoulder
Top transition: 4 sc in each chain-4 space
Top band: Two additional single crochet rounds
Crossbody strap: Ch 151, then work four rows of single crochet
Finishing: Sew both strap ends to opposite sides of the dense upper band and weave in every tail securely
Frequently Asked Questions
Is this crochet water bottle holder pattern suitable for a complete beginner?
It is best for a beginner who has practiced chains and single crochet. The circular increases and mesh require careful counting, but no advanced stitches are used.
How much yarn do I need?
A standard holder generally uses about 90–110 yards of medium-weight cotton. A longer strap, wider bottle, or denser body will require more.
Can I use acrylic yarn?
Yes, but test the fabric and strap before finishing. Different fibers and yarn constructions behave differently under the weight of a full bottle. A smooth cotton or cotton blend is usually easier to control for this project.
How do I make the holder fit a large insulated bottle?
Continue increasing the base until it is approximately the same diameter as the bottle. Keep the final stitch count divisible by four, then create one mesh repeat for every four stitches.
For example, a 40-stitch base creates 10 mesh spaces.
How long should the strap be?
A crossbody strap commonly finishes around 40–44 inches, but torso height and preferred wearing position vary. Crochet the first strap row, place it over your shoulder, and adjust it before adding the remaining rows.
Why does my holder stretch after I insert the bottle?
Open mesh naturally extends when weight is added. Stop the empty holder slightly shorter than the final desired length and test it with a filled bottle before completing the top band.
Can I crochet the strap directly onto the body?
Yes, but making it separately is easier to measure and allows both ends to be reinforced through the dense rim. A directly crocheted strap must still be attached to solid stitches rather than open mesh.
Conclusion
This crochet water bottle holder is a compact project with several useful techniques packed into one practical accessory. The circular base teaches controlled increases, the back-loop round creates clean shaping, and the repeated chain spaces build a lightweight mesh without complicated stitches.
The most important part is fitting the work to the actual bottle. Check the base before building the walls, check the mesh before closing the top, and check the strap after its first row. Those three fitting points prevent most sizing problems.
Once the basic version is complete, use the same construction to create matching holders in different colors, shorter child-sized carriers, hand-carry handles, or wider sleeves for insulated bottles.





