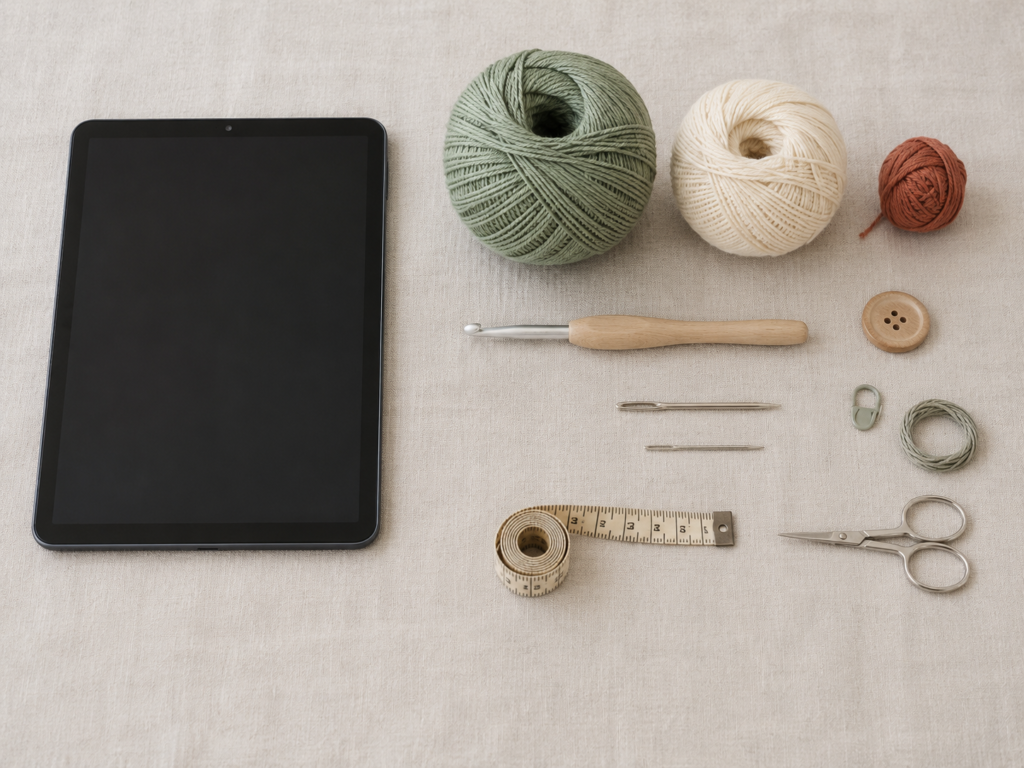
A crochet tablet sleeve is one of the most useful beginner projects you can make. It is simple enough to work with basic stitches, but practical enough to protect a real device in your bag, desk drawer, backpack, or craft tote.
This easy crochet tablet sleeve pattern is designed for beginners who already know how to chain and make single crochet stitches, but want to learn how to turn those basic skills into a clean, functional accessory.
You will start with a foundation chain, crochet around both sides of that chain to create a seamless bottom, build the sleeve upward in the round, add a button loop, sew on a button, and finish the inside neatly. The project is adjustable, so it can fit an iPad, tablet, e-reader, Kindle, or small drawing tablet.
The selected visual reference source also uses this general construction method: a foundation chain, working into the chain, crocheting in the round, checking fit against the device, creating a button loop, and sewing on a button. This article uses that flow as visual inspiration only while creating a new original tutorial, new instructions, and new image prompts.
What You’ll Learn
- How to measure your tablet before crocheting.
- How to choose a yarn and hook for a snug protective sleeve.
- How to crochet into the back bumps of a foundation chain.
- How to work around a chain instead of turning.
- How to build a sleeve body in the round.
- How to use back loop only stitches for texture.
- How to switch to both-loop single crochet.
- How to create a button loop closure.
- How to sew on a button securely.
- How to adjust the pattern for different tablet sizes.
- How to avoid curling, twisting, stretching, and uneven edges.
Materials You’ll Need
For one medium tablet sleeve, suitable for many standard tablets or e-readers:
- DK or light worsted cotton/cotton-blend yarn, approximately 180–230 yards
- 4.0 mm / G-6 crochet hook
- One 1-inch wooden, coconut, resin, or plastic button
- Stitch marker
- Measuring tape
- Tapestry needle
- Small sewing needle
- Strong sewing thread
- Scissors
- Your tablet or e-reader for measuring
A smooth cotton or cotton-blend yarn is a good choice because it gives clear stitch definition and a firmer fabric than many soft, stretchy yarns. A tighter fabric is helpful for a tablet sleeve because it reduces gaps and provides a little more surface structure.
The Craft Yarn Council identifies the 4.0 mm hook as a G-6 hook in its standard hook-size chart.
Finished Size
This tutorial is written for a sleeve approximately:
- Width: 7.5 inches / 19 cm flat
- Height: 10.5 inches / 26.5 cm
- Closure: Center button loop
Because tablets vary widely, use the measuring method below instead of relying only on fixed stitch counts.
For a standard-size tablet, the sample starts with:
Ch 36
The first foundation round creates:
72 stitches total
If your tablet is smaller or larger, adjust the starting chain.
Best Fit Rule
The relaxed foundation chain should be approximately the same width as your tablet, or slightly wider.
Do not stretch the chain while measuring.
A crochet sleeve needs enough ease to slide over the tablet, but not so much extra room that the device shifts around loosely inside.
A good beginner target:
- Tablet width + 0.5 inch ease for a snug fit
- Tablet height + 0.75–1 inch extra height for the button loop area
Crochet Abbreviations Used
This tutorial uses U.S. crochet terminology.
- ch = chain
- sc = single crochet
- sl st = slip stitch
- st/sts = stitch/stitches
- rep = repeat
- BLO = back loop only
- RS = right side
- WS = wrong side
The Craft Yarn Council lists these as standard crochet abbreviations and also provides U.S./U.K. terminology guidance.
Before You Start
Choose a slightly smaller hook if needed
If your yarn label recommends a 4.5 mm or 5.0 mm hook, consider using a 4.0 mm hook for the sleeve. The selected reference tutorial also explains that using a smaller hook can create a denser fabric for better tablet protection.
Do not make the fabric painfully tight. You still need to insert the hook easily into each stitch.
Count stitches early
The first round determines the sleeve width. Once the base is made, every body round should keep the same stitch count.
For the sample:
72 stitches per round
Use a stitch marker at the first stitch of every round.
Keep edges straight
Working in the round can make the beginning of each round shift slightly. That is normal. A stitch marker keeps your count accurate even if the visual seam drifts.
Avoid curling
A little curling near the first few rounds is normal. Severe curling usually means:
- The foundation chain was too tight.
- The hook is too small.
- The stitch count is wrong.
- You missed stitches when working around the opposite side.
Beginner note
This pattern does not include lining or padding. It is a crochet sleeve, not a hard protective case. For carrying a tablet in a crowded backpack, consider adding a fabric lining or using the sleeve inside a padded compartment.
Step-by-Step Crochet Tutorial
Step 1: Make a Slip Knot
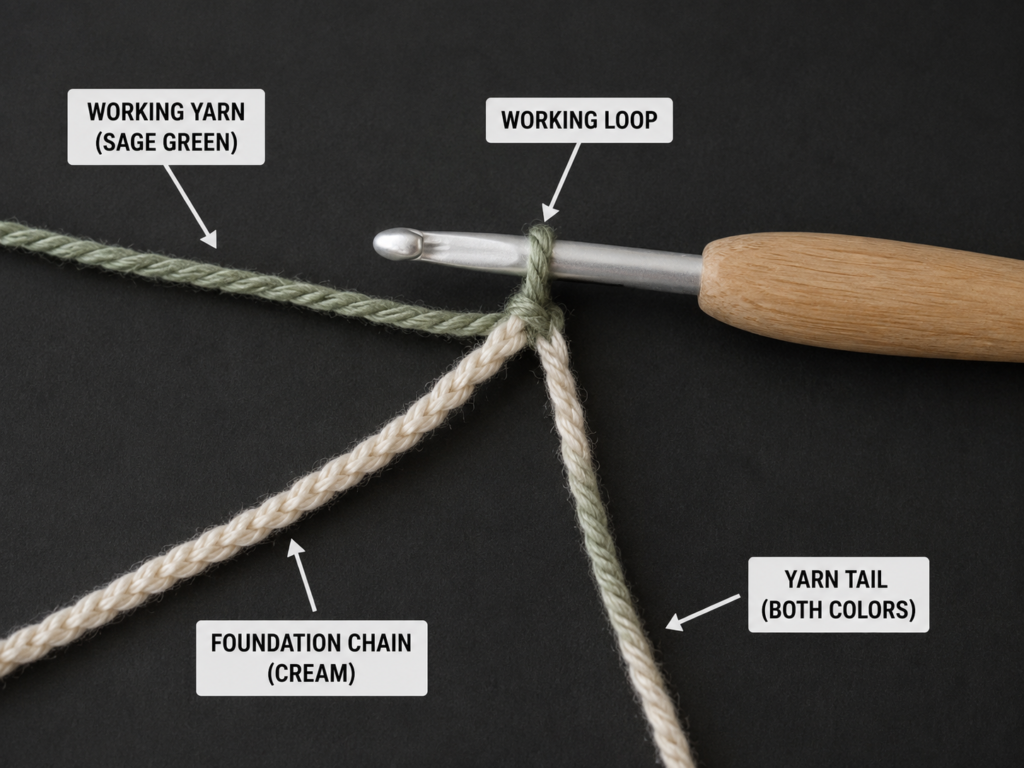
Make a slip knot and place it on your hook.
The loop should move easily along the hook shaft. If it grips the hook too tightly, loosen it before starting the chain.
Beginner tip:
Hold the slip knot under the hook with your non-dominant hand while making the first few chains. This keeps the chain from twisting.
Common mistake to avoid:
Do not count the slip knot as a chain.
Step 2: Chain to Match the Tablet Width
For the sample sleeve:
Ch 36.
Lay the relaxed chain across the width of your tablet.
The chain should reach from one side of the tablet to the other with a little ease, but it should not be much longer than the tablet.
For a smaller e-reader, you may need fewer chains.
For a larger tablet, you may need more.
Keep the chain loose enough that the next row is easy to work.
Beginner tip:
Chain a few extra stitches, then measure. If the chain is too long, carefully undo the extra chains before continuing.
Common mistake to avoid:
Do not stretch the chain to make it fit. A stretched chain will shrink back and make the sleeve too narrow.
Step 3: Work Single Crochet into the Back Bumps
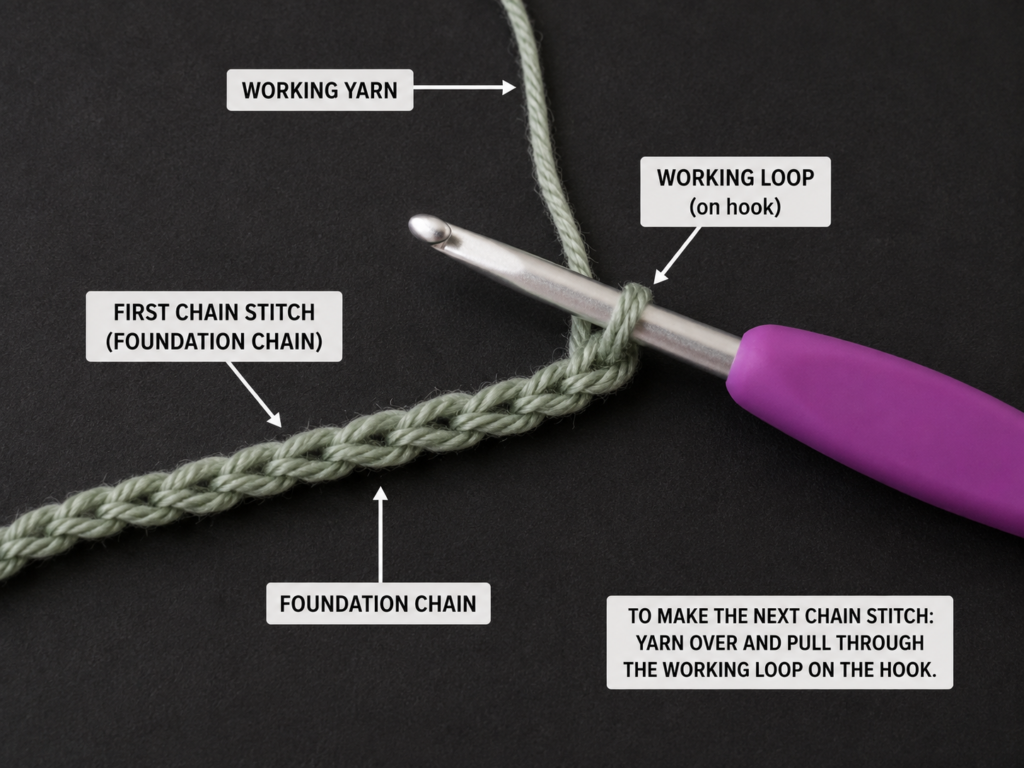
Turn the chain slightly so you can see the small bumps along the back of the foundation chain.
Starting in the second chain from the hook:
Sc in each back bump across.
For the sample, you will work:
35 sc across.
The back-bump method gives the bottom edge a cleaner look and leaves the opposite side of the chain easier to use when you work around the base.
Beginner tip:
If the back bumps are hard to see, place the chain on a light background and rotate it slowly. The front of the chain looks like a row of V shapes. The back has small raised bumps.
Common mistake to avoid:
Do not insert your hook between random strands of yarn. Aim for one bump per chain.
Step 4: Work Around the Foundation Chain
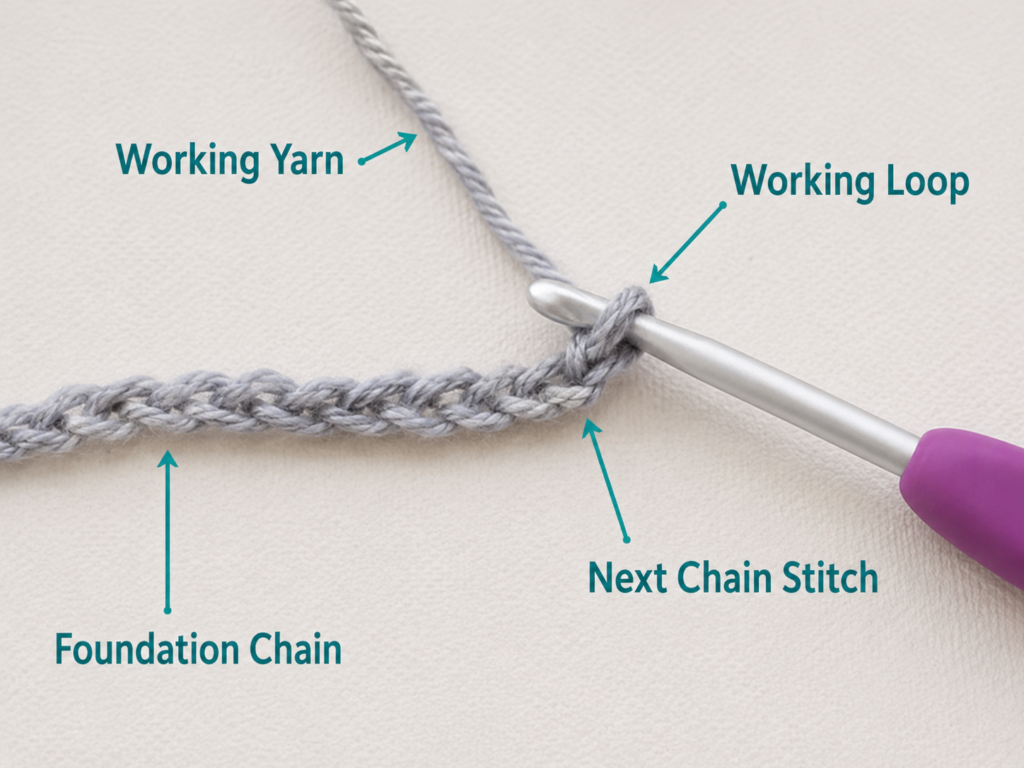
When you reach the end of the chain, do not turn the work like a flat row.
Instead, rotate around the end and begin crocheting into the unused loops on the opposite side of the foundation chain.
Work:
2 sc in the final chain end, sc across the opposite side, 2 sc in the starting end.
For the sample, after completing the first full foundation round, you should have approximately:
72 sts total
This creates a narrow oval base. The sleeve will grow upward from this base.
Beginner tip:
Lay the base flat after this round. It should look like a long narrow oval, not a flat rectangle.
Common mistake to avoid:
Do not flip the work over and crochet back as if making rows. The sleeve needs to grow in continuous rounds.
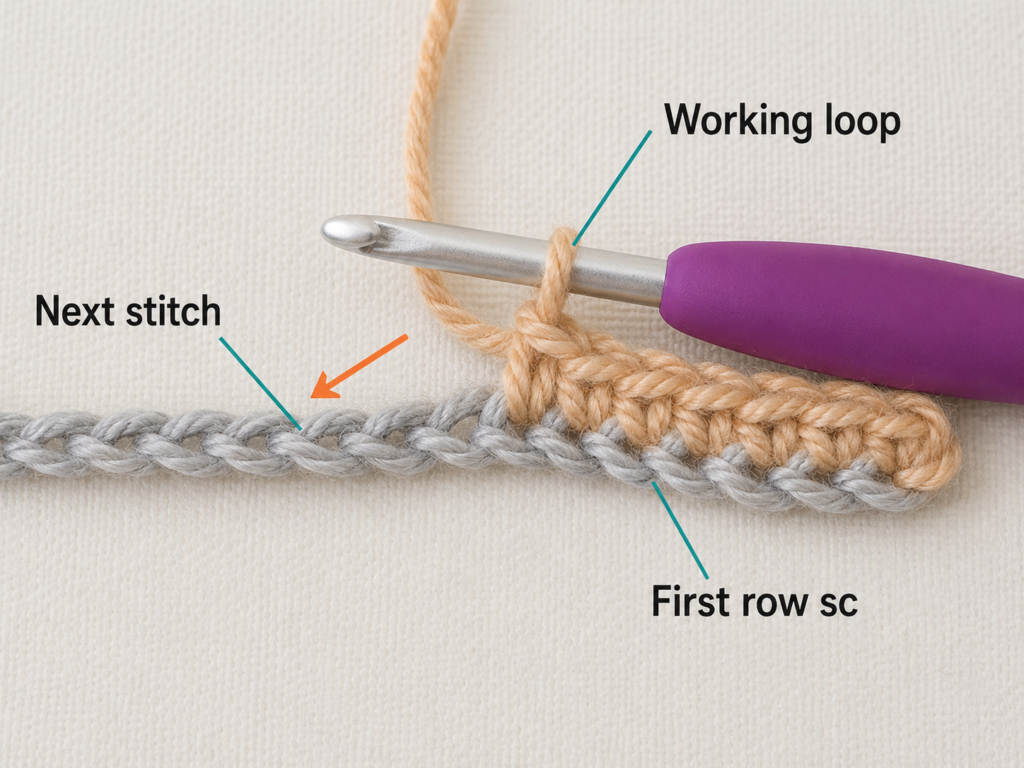
Step 5: Begin the Sleeve Body in Back Loop Only
Place a stitch marker in the first stitch of the next round.
For the lower textured section:
Rounds 2–10: Sc BLO in each stitch around.
Do not join.
Do not turn.
Move the stitch marker up at the beginning of each new round.
Back-loop-only single crochet creates a subtle ribbed texture. It also gives the lower section a little visual interest without requiring complicated stitches.
Beginner tip:
Look at the top of each stitch. You will see two loops. Insert the hook into the loop farther away from you only.
Common mistake to avoid:
Do not accidentally switch between back loop only and both loops within the same round. The texture will look uneven.
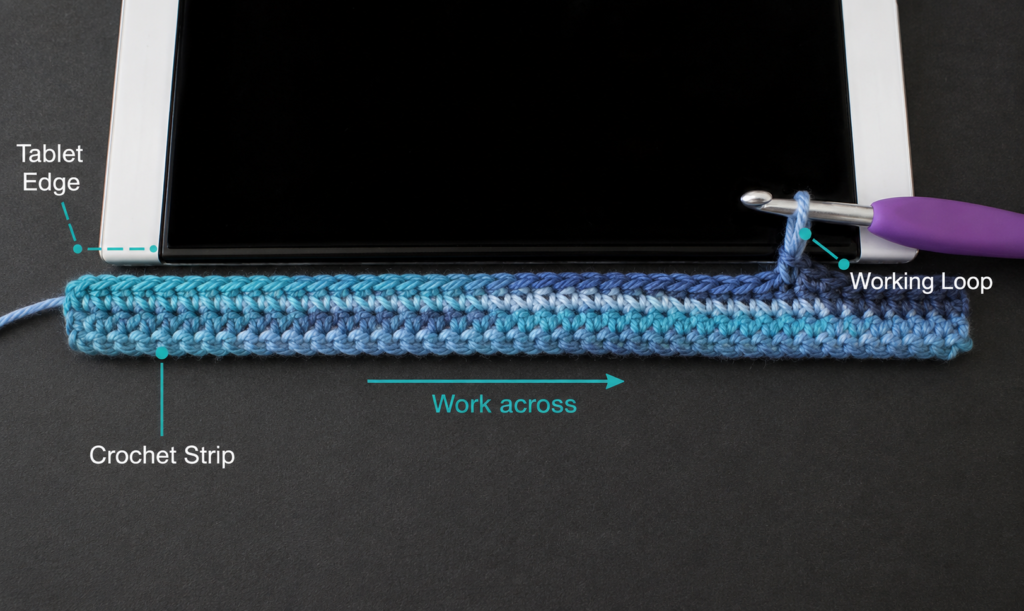
Step 6: Check the Fit Before Continuing
Slide the bottom of the tablet carefully into the sleeve.
At this stage, the sleeve should cover roughly the lower quarter to lower third of the device.
Check three things:
- The tablet should slide in without forcing.
- The sleeve should not sag loosely.
- The bottom corners should sit smoothly.
If the sleeve is too tight, pull back and remake the foundation with a few extra chains.
If it is too loose, remake the foundation with fewer chains or use a slightly smaller hook.
Beginner tip:
Fit-check early. It is much better to restart after 10 rounds than after completing the whole sleeve.
Common mistake to avoid:
Do not continue if the tablet barely fits. Crochet fabric may stretch slightly, but a too-tight sleeve can be hard to use and may strain the stitches.
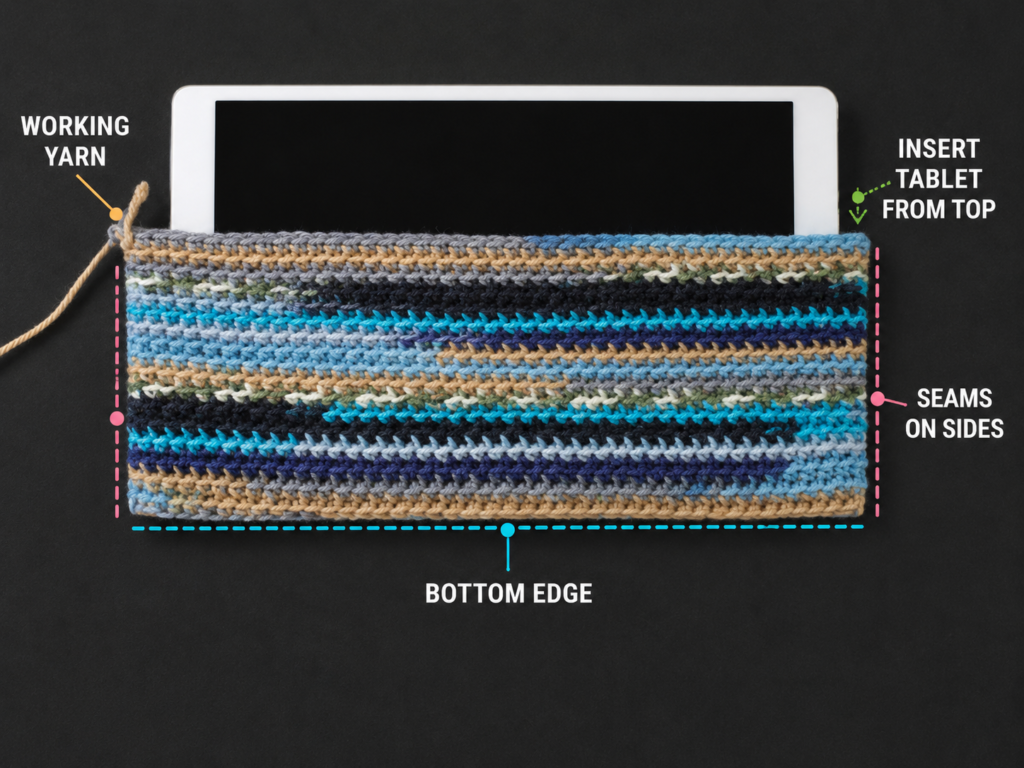
Step 7: Continue the Body Through Both Loops
After the lower textured section is complete, work the upper body through both top loops.
Rounds 11–38: Sc in each stitch around.
Continue until the sleeve is approximately 0.75–1 inch shorter than the full height of your tablet.
For many standard tablets, this means crocheting until the sleeve body measures about 9.5–10 inches high before the closure loop is added.
Working through both loops creates a smoother upper section. It also makes the top edge easier to finish neatly.
Beginner tip:
Measure the sleeve while the tablet is inside it. This gives a more accurate finished-height check than measuring the empty sleeve flat.
Common mistake to avoid:
Do not crochet the body exactly the same height as the tablet before adding the loop. The loop needs room to fold over the button without pulling the top edge out of shape.
Step 8: Make the Button Loop
Insert the tablet into the sleeve.
Find the center front of the top edge.
Continue crocheting until you reach the center back of the sleeve. This is where the button loop will begin.
Work:
Ch 18, skip 2 sts, sc in the next st.
This creates the loop.
Check the loop size by folding it over the front of the sleeve. It should comfortably reach the planned button position.
If your button is larger, make the loop longer.
If your button is smaller, make the loop shorter.
Beginner tip:
Before finishing the loop, place the button on the front and test the reach. The loop should close securely without stretching the sleeve.
Common mistake to avoid:
Do not make the button loop so long that it slips off the button easily.
Step 9: Strengthen the Button Loop
Continue crocheting around the sleeve until you reach the chain loop again.
Work:
1 sc in each chain of the loop.
Then continue working single crochet around the top edge until you reach one side of the sleeve.
This strengthens the loop so it does not stretch too much with use.
Beginner tip:
Keep the single crochet stitches on the loop relaxed. A very tight loop will be stiff and difficult to fasten over the button.
Common mistake to avoid:
Do not twist the loop before crocheting across it. Make sure the chain lies flat.
Step 10: Fasten Off and Weave in Ends
When you reach one side edge of the sleeve, make one slip stitch into the next stitch.
Cut the yarn, leaving a 6–8 inch tail.
Pull the tail through the final loop.
Thread the tail onto a tapestry needle and weave it into the inside of the sleeve.
Weave in the beginning tail at the bottom as well.
Beginner tip:
Weave tails horizontally through the inside stitches. Do not pull so tightly that the sleeve edge puckers.
Common mistake to avoid:
Do not trim tails before weaving them securely. Short tails can work loose after use.
Step 11: Position and Sew the Button
Place the tablet inside the sleeve.
Pull the loop over the front and let it fall naturally.
Mark the point where the loop sits comfortably. This is where the button should go.
Remove the tablet before sewing.
Using sewing thread and a sewing needle, sew the button firmly to the front center of the sleeve.
Pass through the button holes several times.
Knot the thread securely on the inside.
Test the closure again with the tablet inside.
Beginner tip:
Use sewing thread instead of yarn for the button. Thread creates a flatter, stronger attachment.
Common mistake to avoid:
Do not sew the button through both layers of the sleeve. Keep the sleeve open while sewing so the front and back are not accidentally joined.
Step 12: Final Fit Check
Slide the tablet into the finished sleeve.
The sleeve should:
- Cover the tablet fully.
- Close without pulling.
- Hold the tablet snugly.
- Have no loose yarn tails inside.
- Sit flat when laid on a table.
- Open easily when the button loop is released.
If the loop feels too loose, sew the button slightly lower or shorten the loop by wrapping matching yarn around its base.
If the loop feels too tight, move the button slightly higher.
Pattern Notes or Stitch Notes
Turning chain rules
This sleeve is worked in the round, so there is no turning chain after the foundation stage.
The chain loop is used only for the closure.
Stitch count
For the sample:
- Starting chain: 36
- First side: 35 sc
- Full base round: approximately 72 sts
- Body rounds: maintain 72 sts per round
If you adjust the foundation chain, your stitch count will change.
Repeat pattern
For the lower body:
Sc BLO in each stitch around.
For the upper body:
Sc in each stitch around through both loops.
Row and round notes
The sleeve begins with a foundation chain, then immediately turns into rounds.
The bottom is not sewn later. It is formed as part of the first round.
Right side and wrong side
The outside of the sleeve is the right side.
Keep the neater side facing outward as the pouch grows.
Size adjustment notes
To adjust for a different tablet:
- Measure the tablet width.
- Make a foundation chain the same width as the tablet plus slight ease.
- Crochet the base round.
- Work 8–10 rounds.
- Test the tablet fit.
- Continue until the sleeve is about 0.75–1 inch shorter than the tablet height.
- Add the button loop.
Common Beginner Mistakes
1. Making the foundation chain too tight
Problem: The bottom edge curls and the sleeve becomes too narrow.
Fix: Remake the chain with relaxed tension or use a hook 0.5 mm larger for the chain only.
2. Twisting the chain before working around it
Problem: The sleeve base looks twisted.
Fix: Lay the chain flat before working around the opposite side.
3. Forgetting the stitch marker
Problem: The stitch count changes without you noticing.
Fix: Mark the first stitch of each round and move the marker every round.
4. Working into both loops during the textured lower section
Problem: The ribbed lower texture becomes inconsistent.
Fix: For the lower section, use BLO consistently until the texture section is complete.
5. Making the sleeve too loose
Problem: The tablet slides around inside.
Fix: Use fewer starting chains, a smaller hook, or a denser yarn.
6. Making the button loop too long
Problem: The closure slips open.
Fix: Shorten the chain loop or move the button lower.
7. Sewing the button through both sleeve layers
Problem: The sleeve accidentally closes shut.
Fix: Place one hand or a piece of cardboard inside the sleeve while sewing the button.
How to Customize This Crochet Project
Yarn changes
Cotton gives structure and clear stitches.
Acrylic can work if it is not too stretchy.
Wool blends may provide more cushioning but can felt or shrink depending on care.
For a thicker protective sleeve, use worsted yarn and a 4.5 mm hook, but expect a bulkier result.
Color changes
Try:
- Solid sage green.
- Cream body with terracotta closure.
- Striped body using leftover yarn.
- Two-tone lower and upper sections.
- Self-striping yarn for automatic color changes.
- School colors for a student gift.
- Neutral gray for a professional work bag.
Size changes
For an e-reader, use a shorter foundation chain and fewer height rounds.
For a large tablet, increase the starting chain and continue until the sleeve fits the device.
Always check the fit after the first few rounds.
Border options
You can add one final round of slip stitch for a firmer top edge.
You can also add a contrasting single crochet round before making the loop.
Avoid bulky decorative borders if the sleeve needs to slide easily into a bag.
Texture options
Once you understand the basic construction, try:
- All back-loop-only single crochet.
- Waistcoat stitch.
- Moss stitch.
- Alternating single crochet and chain spaces.
- Simple horizontal stripes.
For your first sleeve, stay with single crochet because it creates a dense, stable fabric.
Gift ideas
This project works well as a handmade gift for:
- Students.
- Teachers.
- Digital artists.
- Office workers.
- Crochet friends.
- E-reader users.
- Travelers.
Add a matching crochet cord wrap or small accessories pouch for a complete handmade set.
Finishing Instructions
Fasten off neatly after the top edge is complete.
Weave in all yarn tails on the wrong side.
Check the inside of the sleeve with your hand before inserting the tablet. No tails, knots, or rough thread ends should scratch the device.
Sew the button securely using thread.
Test the closure several times.
Light blocking can help the sleeve lie flatter. Pin the empty sleeve gently into shape, mist lightly if your yarn allows it, and let it dry completely.
Do not stretch aggressively while blocking. A stretched sleeve may become too loose for the tablet.
For washing, follow the yarn label. If the sleeve has a wooden button, avoid soaking it for long periods.
Quick Printable-Style Summary
Skill level: Beginner to Easy
Finished size: Adjustable; sample fits a medium tablet
Yarn: DK or light worsted cotton/cotton blend
Hook: 4.0 mm / G-6
Other materials: Button, sewing needle, thread, tapestry needle, stitch marker, scissors, measuring tape
Stitches: Chain, single crochet, slip stitch
Starting chain: Ch 36 for sample; adjust to tablet width
Base: Work single crochet along one side of the chain, around the end, and back along the opposite side
Lower body: Sc BLO in each stitch around for 9 rounds
Upper body: Sc in each stitch around through both loops until sleeve is nearly tablet height
Closure: Ch 18 button loop, then sc across the loop on the next round
Finishing: Slip stitch, fasten off, weave in ends, sew on button, check fit
FAQ
Is a crochet tablet sleeve beginner-friendly?
Yes. This version uses chain, single crochet, slip stitch, and simple working-in-the-round construction. The most important beginner skills are counting stitches and checking fit early.
What yarn is best for a crochet tablet sleeve?
Cotton or cotton-blend yarn is a strong choice because it creates a firmer fabric with good stitch definition. Smooth yarn is easier for beginners than fuzzy yarn.
Can I make this sleeve for a Kindle or e-reader?
Yes. Use the same measuring method, but start with a shorter foundation chain and crochet fewer height rounds.
Should a crochet tablet sleeve be tight or loose?
It should be snug but not forced. The tablet should slide in smoothly while still feeling secure.
Can I add lining?
Yes. A fabric lining can add extra protection and prevent small objects from catching in the stitches. Cut fabric slightly larger than the sleeve interior, sew it into a simple pouch shape, and hand-stitch it inside.
Can I use double crochet instead of single crochet?
You can, but single crochet creates a denser fabric. Double crochet works faster but leaves more open spaces, which is less ideal for a protective sleeve.
Do I need a button closure?
No. You can leave the sleeve open, add a zipper, use snaps, sew on Velcro, or make a flap. The button loop is beginner-friendly and requires minimal sewing.
Conclusion
This crochet tablet sleeve pattern is a practical next step after learning basic crochet stitches. It teaches you how to measure for fit, crochet around a foundation chain, build a pouch in the round, control stitch texture, and finish a useful handmade accessory with a button closure.
The first version is worth keeping simple: one smooth yarn, one hook size, careful stitch counting, and regular fit checks. Once you understand the construction, you can adjust it for e-readers, drawing tablets, school devices, planners, notebooks, or even slim crochet hook cases.
Save this tutorial as a practical beginner crochet project, especially if you like handmade accessories that are useful every day.





