A handmade floor cushion is one of those crochet projects that looks much more complicated than it really is. Once you understand how to increase a flat circle, crochet straight around the sides, and then reverse those increases with decreases, the entire project becomes a repeating rhythm.
This crochet floor cushion pattern is designed especially for beginners who are ready to move beyond flat scarves and washcloths but do not want to tackle complicated shaping or dozens of different stitches.
Instead of crocheting separate panels and sewing them together, you will make this cushion as one continuous three-dimensional shell. You begin in the middle of the top, increase until the circle reaches its full width, crochet straight down to create the cushion height, decrease around the bottom, add the filling, and close the final opening.
The main fabric uses half double crochet, so the work grows quickly without creating the large openings that taller stitches sometimes produce.
The finished cushion has a cozy, substantial shape that works well for a reading corner, playroom, bedroom, casual living room, meditation area, or extra floor seating.
This is an original beginner project. The researched floor-pouf source above is used only to establish an effective photographic tutorial sequence; its copyrighted pattern has not been reproduced.
What You’ll Learn
By the end of this tutorial, you will know how to:
- Crochet a large circle from the center outward.
- Space increases evenly so a crochet circle stays flat.
- Identify the first stitch of a joined round.
- Work half double crochet through the back loop to make a turning ridge.
- Crochet even rounds without accidentally increasing.
- Work an hdc2tog decrease.
- Shape the bottom of a three-dimensional crochet cushion.
- Fill a crochet cushion without creating obvious lumps.
- Cinch a small crochet opening securely.
- Adjust the diameter and height for a custom floor cushion.
Materials You’ll Need
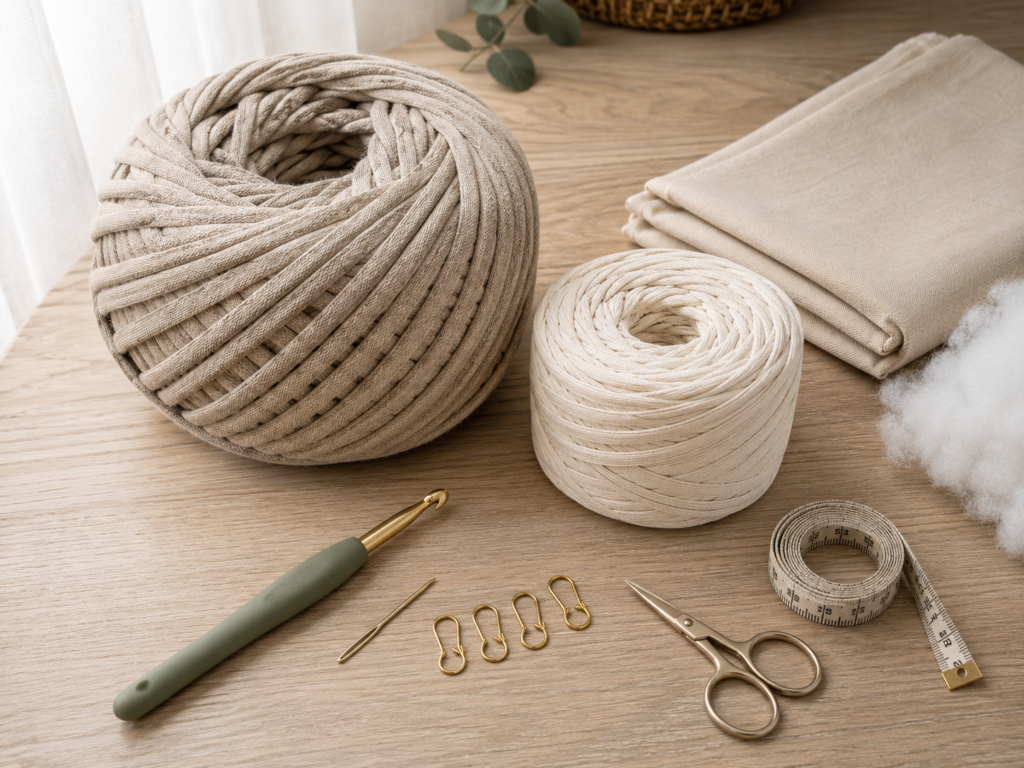
For the sample-style cushion described in this tutorial, gather:
- Approximately 650–800 yards / 595–730 meters of #6 super bulky yarn.
- A 10 mm crochet hook.
- 4 locking stitch markers.
- Large tapestry or yarn needle.
- Scissors.
- Flexible measuring tape.
- Approximately 48–64 oz of polyester fiberfill, recycled pillow filling, or another soft cushion filling.
- Optional cotton liner, zippered pillowcase, or simple fabric drawstring bag to contain loose stuffing.
For a floor cushion that will receive regular use, smooth yarn is generally easier to maintain than very fuzzy or loosely spun yarn. Cotton tube yarn and sturdy acrylic are good candidates because they create obvious stitches and a substantial fabric.
The Craft Yarn Council classifies yarn by standardized weight categories and lists super bulky yarn as category 6. Its published hook recommendations are only guidelines, so gauge and fabric firmness should determine your actual hook size.
Crochet Abbreviations Used
This tutorial uses US crochet terminology.
- ch = chain
- hdc = half double crochet
- hdc2tog = half double crochet two together
- sl st = slip stitch
- st/sts = stitch/stitches
- rnd = round
- rep = repeat
- BLO = back loop only
- inc = increase
- dec = decrease
The Craft Yarn Council’s abbreviation standards also use terms such as ch, hdc, sl st, BLO, inc, dec, rnd, and rep in US crochet notation.
US/UK terminology note
A US half double crochet (hdc) is normally called a half treble crochet (htr) in UK terminology. Make sure you know which terminology your hook books or stitch guides use before comparing instructions.
Finished Size
Using the suggested yarn and approximate gauge, expect a finished cushion around:
20–22 inches / 51–56 cm in diameter
and approximately:
8–10 inches / 20–25 cm high
The exact size will depend on yarn thickness, hook size, tension, and how firmly you stuff the cushion.
Gauge
Aim for approximately:
7 hdc = 4 inches / 10 cm
5 hdc rounds = 4 inches / 10 cm
Gauge does not have to be millimeter-perfect for a floor cushion, but your fabric should be dense enough that the liner or stuffing cannot easily be seen between stitches.
If you can clearly see the stuffing through normal unstretched fabric, use a smaller hook.
If the fabric is so stiff that inserting the hook hurts your hands, use a slightly larger hook.
Before You Start
Count your stitches
The easiest way to lose control of a large circular project is to stop counting.
Place a locking marker into the first actual hdc of each round. Even though the rounds are joined, the marker makes it much easier to identify the beginning.
Count after every increase round.
A five-minute stitch-count check can prevent an hour of unraveling later.
Keep the circle flat
During the top section, place the circle on a flat table every few rounds.
A good circle should rest naturally without forming a bowl and without creating pronounced waves.
A slight curve caused by thick yarn is usually harmless. Strong cupping or strong ruffling is not.
Keep the joins tidy
The chain at the start of a round does not count as a stitch in this original pattern.
Work the first hdc in the same stitch where the round begins, and join with a slip stitch to the first hdc.
Do not overstuff
A floor cushion should be firm enough to support sitting but not stretched so aggressively that the crochet stitches pull apart.
It is usually better to fill gradually, rotate the cushion, massage the filling into the perimeter, and then add more.
Step-by-Step Crochet Tutorial
Step 1: Make the Center Ring
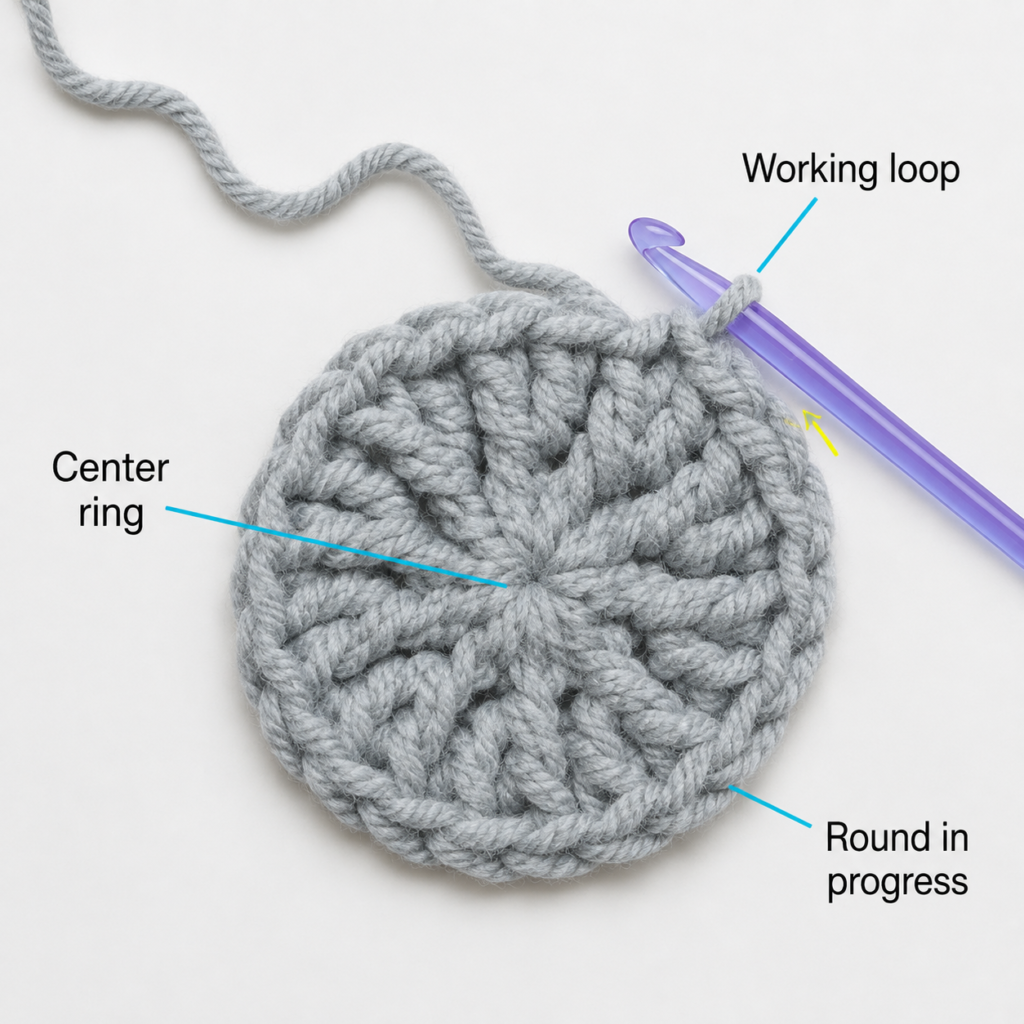
Create an adjustable magic ring.
If magic rings frustrate you, chain 4 and join with a slip stitch to form a small ring instead.
Round 1
Ch 1.
Work 10 hdc into the center ring.
Pull the yarn tail carefully to close the center.
Join with a sl st to the first hdc.
Stitch count: 10 sts.
Place a marker in the first hdc.
Beginner tip
Do not make the center ring excessively tight until you have completed the stitches. Thick yarn needs room for the hook to enter comfortably.
Common mistake to avoid
Do not accidentally count the starting ch 1 as one of your 10 stitches.
You should see 10 actual hdc stitch tops around the circle.
Step 2: Increase the Top Circle
You will now add 10 stitches per round.
Increasing at regular intervals makes the circle wider while allowing it to remain flat.
Round 2
Ch 1.
Work 2 hdc in every stitch around.
Join.
20 sts.
Round 3
Ch 1.
Repeat:
1 hdc in next st, 2 hdc in next st
around.
Join.
30 sts.
Round 4
Repeat:
1 hdc in each of next 2 sts, 2 hdc in next st
around.
40 sts.
Round 5
Repeat:
1 hdc in each of next 3 sts, 2 hdc in next st
around.
50 sts.
Round 6
Repeat:
1 hdc in each of next 4 sts, 2 hdc in next st
around.
60 sts.
Round 7
Repeat:
1 hdc in each of next 5 sts, 2 hdc in next st
around.
70 sts.
Round 8
Repeat:
1 hdc in each of next 6 sts, 2 hdc in next st
around.
80 sts.
Round 9
Repeat:
1 hdc in each of next 7 sts, 2 hdc in next st
around.
90 sts.
Round 10
Repeat:
1 hdc in each of next 8 sts, 2 hdc in next st
around.
100 sts.
Round 11
Repeat:
1 hdc in each of next 9 sts, 2 hdc in next st
around.
110 sts.
Your top circle is now complete.
Beginner tip
Notice the logic rather than trying to memorize every round:
Each new increase round adds one more ordinary hdc between increases.
Common mistake to avoid
If your stitch count is incorrect, do not immediately continue.
Find the error while the incorrect round is still easy to unravel.
Step 3: Check the Shape and Diameter
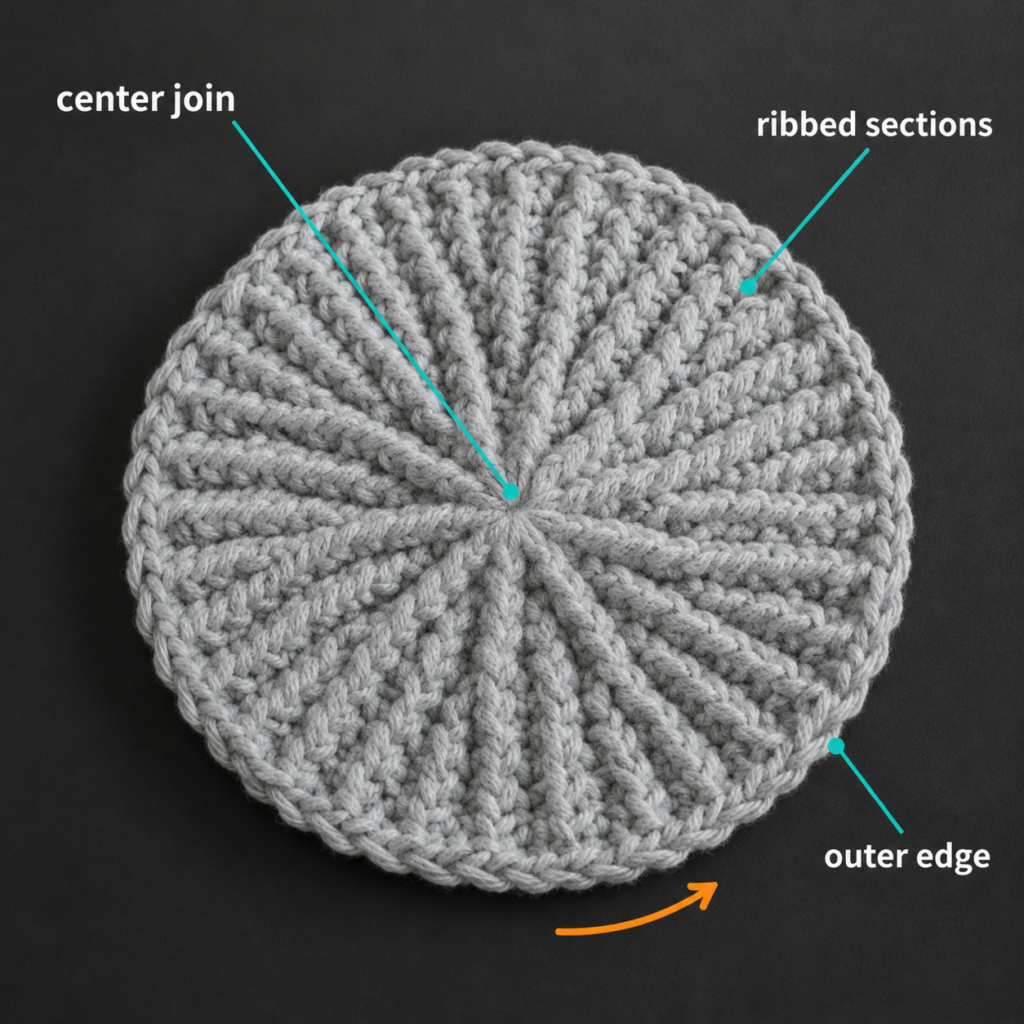
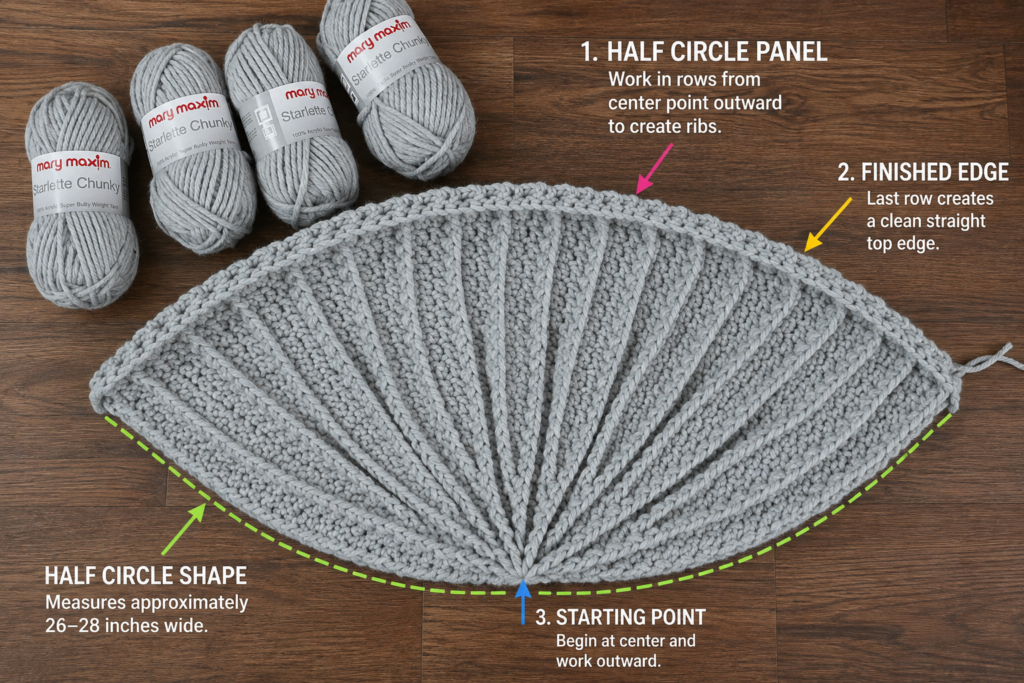
Before building the sides, place the circle flat.
At the suggested gauge, it should measure roughly 19–21 inches across before stuffing changes its shape.
Do not stretch the crochet while measuring.
Measure straight through the center from edge to edge.
What if the circle cups?
First check your tension.
If the fabric feels unusually tight, go up one hook size.
What if it ripples?
Make sure you have not accidentally added extra increases.
If the stitch count is correct but the yarn is unusually soft or loose, try a slightly smaller hook.
Beginner tip
Do not obsess over a perfectly mathematical circle. Super bulky yarn can make the outer edge look slightly uneven while it is lying flat. Stuffing will soften small irregularities later.
Step 4: Create the Turning Ridge
Now you will stop increasing.
This is the point where the flat circle begins becoming a three-dimensional cushion.
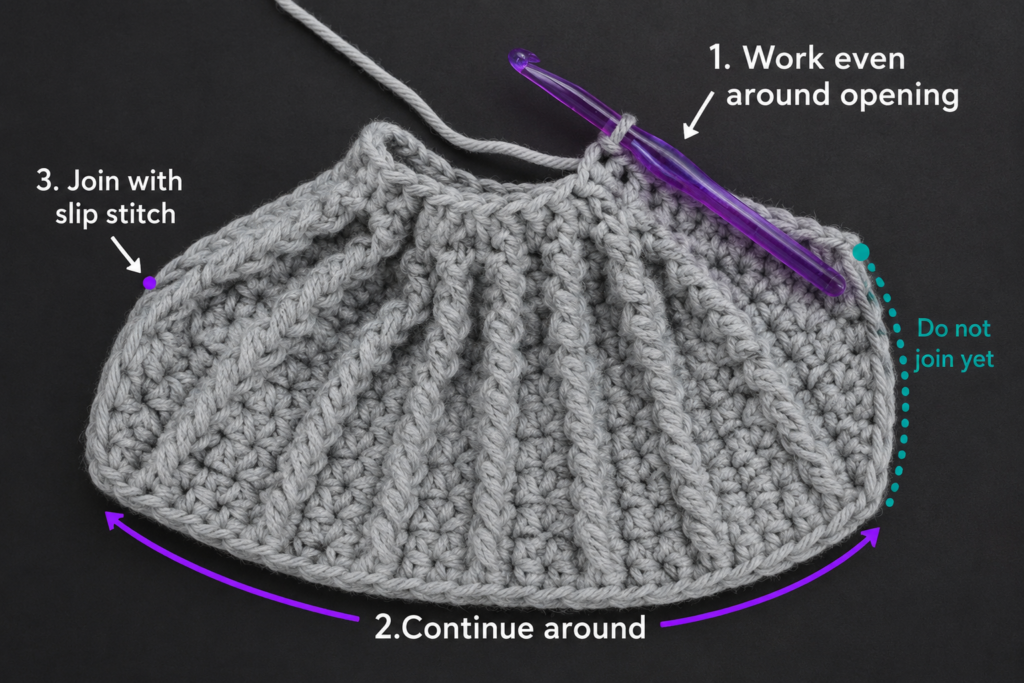
Round 12
Ch 1.
Work 1 hdc in the BLO of every stitch around.
Join with a sl st.
110 sts.
Working through only the back loop leaves the unused front loop visible, forming a subtle line around the edge.
That ridge also encourages the fabric to turn downward.
Beginner tip
Look at the top of each crochet stitch. It resembles a small sideways “V.”
The loop farther away from you is the back loop.
Common mistake to avoid
Do not continue increasing during this round.
You need exactly one hdc per existing stitch.
Step 5: Crochet the Straight Body
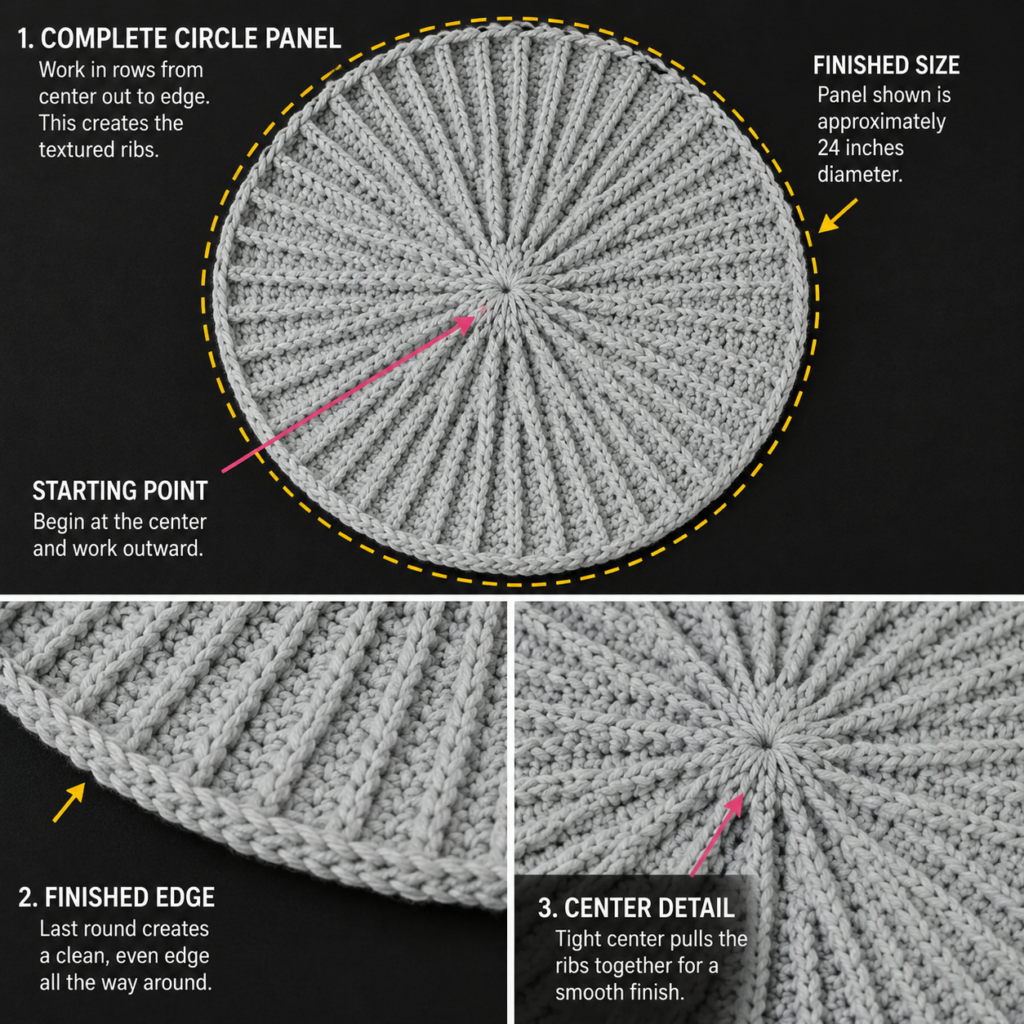
Rounds 13–23
Ch 1.
Work 1 hdc in every stitch around.
Join with a sl st.
110 sts in every round.
Do not increase.
Continue until the sidewall measures roughly 8–10 inches from the turning ridge, or until you like the height.
Want a lower cushion?
Stop after fewer body rounds.
Want a taller pouf?
Add additional straight rounds before beginning the decreases.
This is the safest place to alter the height because the stitch count remains constant.
Beginner tip
Check the stitch count every two or three rounds even though you are no longer shaping.
Missing a stitch near the join will slowly make the cushion narrower.
Common mistake to avoid
Do not work into the joining slip stitch.
Your 110 hdc are worked only into the 110 actual stitches from the previous round.
Step 6: Begin the Bottom Decreases
Now reverse the increase sequence.
The opening will gradually become smaller.
Round 24
Work in BLO:
1 hdc in every stitch around.
110 sts.
This creates another subtle turning ridge.
Round 25
Repeat:
hdc in next 9 sts, hdc2tog
around.
100 sts.
Round 26
Repeat:
hdc in next 8 sts, hdc2tog
around.
90 sts.
Round 27
Repeat:
hdc in next 7 sts, hdc2tog
around.
80 sts.
Round 28
Repeat:
hdc in next 6 sts, hdc2tog
around.
70 sts.
Round 29
Repeat:
hdc in next 5 sts, hdc2tog
around.
60 sts.
Round 30
Repeat:
hdc in next 4 sts, hdc2tog
around.
50 sts.
Stop here before making the opening much smaller.
How to work hdc2tog
Yarn over.
Insert the hook into the next stitch.
Yarn over and pull up a loop.
You have 3 loops on the hook.
Yarn over again.
Insert the hook into the following stitch.
Yarn over and pull up a loop.
You now have 5 loops.
Yarn over and draw through all 5 loops.
Two stitches have become one.
Beginner tip
Do not pull the decrease excessively tight. Keeping it similar in height to the neighboring hdc stitches creates smoother shaping.
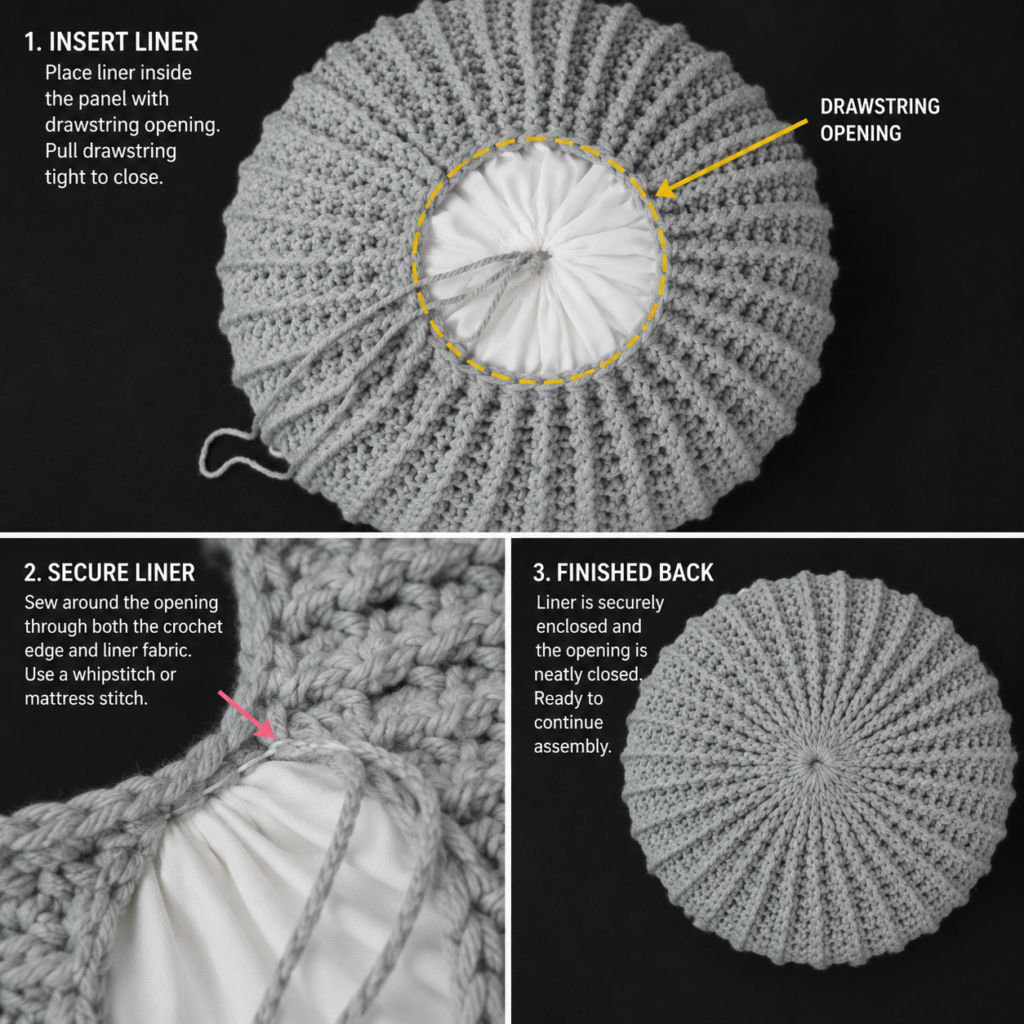
Step 7: Add the Liner and Filling
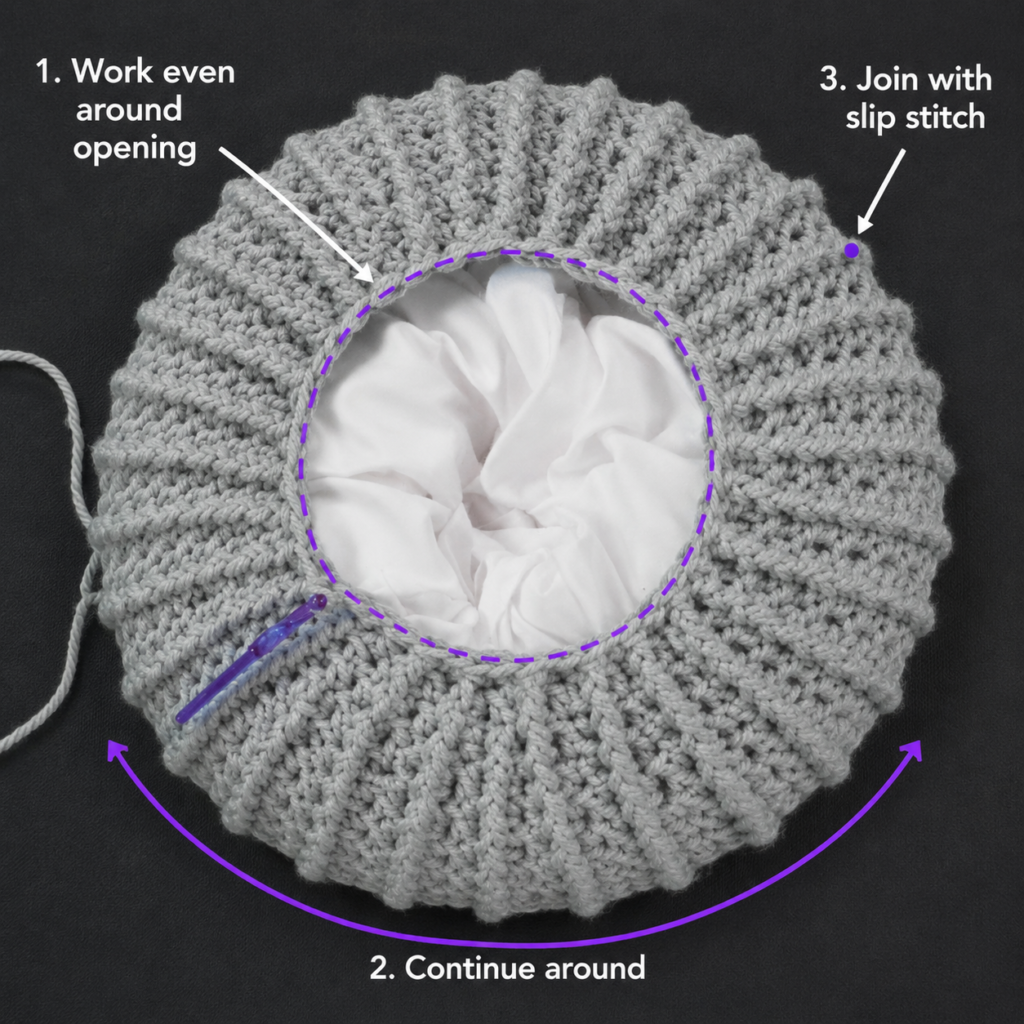
At approximately 50 stitches, the opening should still be comfortable to work through.
Insert your liner now.
A liner is optional when using pillow forms, but it is strongly recommended if you are using loose fiberfill or small filling materials.
Begin filling the outside perimeter first.
Push filling gently toward the sidewall, rotating the cushion as you work.
Then fill the center.
Check the shape from every angle
Place the cushion on the floor.
Look for:
- flat or hollow-looking areas,
- sharp lumps,
- thin edges,
- dramatically stretched stitches,
- an uneven top.
Massage the filling before adding more.
Firm versus soft
For lounging on the floor, a slightly softer fill may be comfortable.
For use as a footrest, you may prefer a denser fill.
Do not treat a handmade stuffed floor cushion as weight-bearing furniture intended for standing or climbing.
Upcycling option
Clean old pillows, fiberfill from unused cushions, soft fabric scraps, and folded textiles can reduce the amount of new polyester filling required.
Avoid hard or sharp objects that could damage the yarn or poke through the liner.
Step 8: Complete the Bottom
Once most of the stuffing is inside, resume decreasing.
Round 31
Repeat:
hdc in next 3 sts, hdc2tog
around.
40 sts.
Add additional filling now if necessary.
Round 32
Repeat:
hdc in next 2 sts, hdc2tog
around.
30 sts.
Round 33
Repeat:
hdc in next st, hdc2tog
around.
20 sts.
Check the firmness one final time.
Push small pieces of stuffing through the opening if needed.
Round 34
Work:
hdc2tog around.
10 sts.
Fasten off, leaving a tail approximately 18–24 inches long.
Beginner tip
It becomes difficult to add filling once you reduce below approximately 30 stitches.
Finish the majority of your shaping before working the last two rounds.
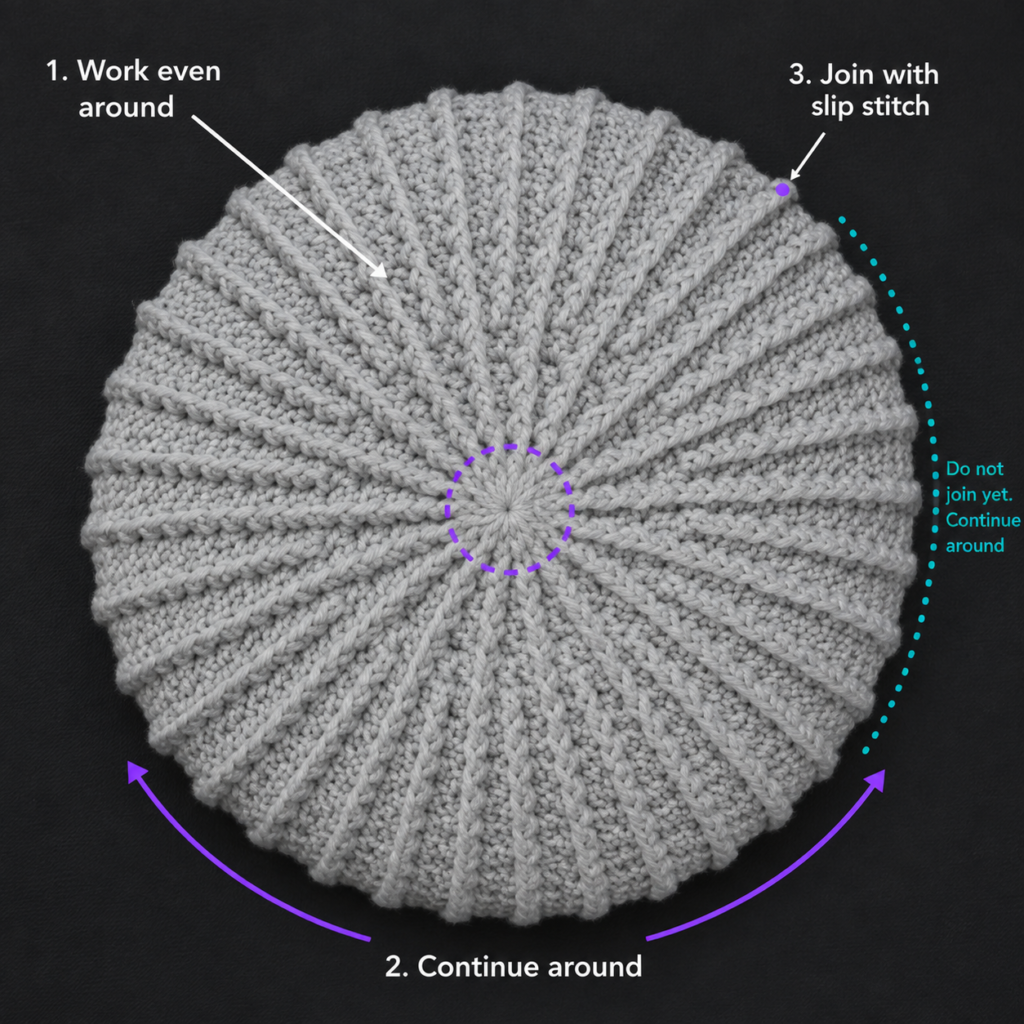
Step 9: Cinch the Final Opening
Thread the long tail onto a large tapestry needle.
Pass the needle through the front loop of each remaining stitch.
Once all 10 stitches are threaded, pull the yarn gradually.
The opening should gather neatly toward the center.
Pass the needle across the closed center several times to reinforce it.
Secure the yarn on the inside of the crochet fabric if possible.
Weave the remaining tail deeply through several nearby stitches, then trim.
Common mistake to avoid
Do not simply cut the yarn immediately after pulling the center shut.
Floor cushions experience movement and compression. Reinforcing the closure helps prevent the opening from loosening.
Pattern Notes or Stitch Notes
Starting chain
The ch 1 at the beginning of each round does not count as a stitch.
Joining rounds
Join each round with a sl st to the first actual hdc.
Turning
Do not turn the work unless you intentionally want a different surface texture.
Stitch count
The top begins with 10 stitches and increases by 10 stitches per round until reaching 110.
The sidewall stays at 110 stitches.
The bottom reverses the increase sequence:
110 → 100 → 90 → 80 → 70 → 60 → 50 → 40 → 30 → 20 → 10.
Right side and wrong side
The outward-facing surface is considered the right side.
Keep the same surface facing outward while working the project.
Repeat pattern
For the increase section, add one additional ordinary hdc between increases on each successive round.
For the decrease section, reduce the number of ordinary hdc between decreases by one on each successive round.
Common Beginner Mistakes
1. The top becomes a bowl
Cause: Tension may be too tight, the hook may be too small, or increases may have been missed.
Fix: Count stitches first. If the count is correct, try relaxing your tension or moving up one hook size.
2. The top develops large waves
Cause: Extra increases or loose tension.
Fix: Count the round. If the stitch count is correct, experiment with a slightly smaller hook before continuing the entire cushion.
3. The sidewall becomes narrower
Cause: A stitch is probably being skipped near the join.
Fix: Mark the first hdc and count the body rounds periodically. Every straight body round should contain 110 stitches.
4. Stuffing shows through the crochet
Cause: Fabric is too loose or filling is being forced against stretched stitches.
Fix: Use a fabric liner and avoid excessive stuffing. For a future cushion, use a slightly smaller hook.
5. The cushion looks lumpy
Cause: Large handfuls of stuffing were pushed into isolated areas.
Fix: Use smaller amounts and work around the circumference gradually. Rotate and massage the cushion frequently.
6. The bottom has a sharp point
Cause: The final decreases or stuffing may be concentrated too tightly in the center.
Fix: Before closing the last rounds, spread the filling toward the lower outer perimeter and flatten the center slightly.
7. The closing hole reopens
Cause: The final yarn tail was not reinforced.
Fix: After cinching, sew back and forth across the closed center several times and weave the tail deeply through the fabric.
How to Customize This Crochet Project
Change the diameter
The simplest method is to stop the increase section earlier for a smaller cushion.
For example, if the top is already the width you want at 90 or 100 stitches, stop increasing and begin the BLO turning round.
When creating the bottom, reverse the same number of increase stages you used at the top.
For a larger cushion, additional increase rounds can be added using the same spacing principle, but remember that larger circles require significantly more yarn and filling.
Change the height
Height is easier to customize than width.
Simply add or remove straight body rounds.
A lower 5–6 inch version makes a pillow-like floor cushion.
A 10–14 inch version moves toward pouf or ottoman proportions.
Use two colors
For a subtle two-color design, make the top and bottom in oatmeal and work several center body rounds in warm ivory.
Alternatively, make only the BLO transition rounds in a contrast color.
Avoid excessive color changes if you want an easy-to-wash, minimalist home-decor look.
Add texture
Once you are comfortable with the basic pattern, you could replace some straight hdc body rounds with:
- BLO hdc,
- alternating hdc and sc texture,
- waistcoat-style stitches if your yarn allows,
- simple surface crochet after completion.
Do a swatch first because heavily textured stitches can change the gauge.
Add a removable cover system
A fully removable crochet shell requires a different construction, usually involving separate panels and a zipper or button opening.
For this beginner version, placing the stuffing in a removable inner liner provides a practical compromise: the filling stays contained even though the crochet shell itself remains permanently closed.
Gift and use ideas
A crochet floor cushion can work well in:
- a reading nook,
- dorm room,
- children’s playroom,
- casual family room,
- craft room,
- nursery seating area,
- meditation corner,
- gaming area,
- covered indoor sunroom.
Finishing Instructions
Once the final opening is secure, turn the cushion over so the starting circle is on top.
Roll the cushion gently across the floor.
Press the sides with both hands and redistribute the filling until the circumference looks even.
Check that the top is reasonably flat rather than domed sharply.
If one section looks lower than another, massage filling toward that area.
Weaving in ends
Every loose end should travel through several inches of dense crochet fabric before trimming.
Because a floor cushion moves and compresses repeatedly, short woven-in ends can work themselves loose more easily than they might on decorative crochet.
Blocking
Traditional wet blocking is usually unnecessary after the cushion has been stuffed.
Instead, shape it manually while filled.
If you need to correct the crochet shell before stuffing, lightly steam or wet-block it only according to the care instructions for your chosen yarn.
Washing and care
Always follow the yarn label’s care instructions.
For a permanently stuffed floor cushion, spot cleaning is usually simpler than full immersion.
If you expect frequent spills, use washable filling inside a separate liner.
Never machine-dry a handmade cushion unless both the yarn and filling are explicitly suitable for the dryer.
Quick Printable-Style Summary
Pattern: Chunky Round Crochet Floor Cushion
Skill level: Easy / confident beginner
Finished size: Approximately 20–22 inches wide × 8–10 inches high
Yarn: Approximately 650–800 yards of #6 super bulky yarn
Hook: 10 mm or size needed for dense fabric
Other materials: Stitch marker, tapestry needle, scissors, measuring tape, liner, filling
Main stitches: hdc, hdc2tog, sl st, BLO hdc
Starting method: 10 hdc in magic ring
Top increases:
10
20
30
40
50
60
70
80
90
100
110 sts
Sidewall: BLO hdc turning round, followed by straight hdc rounds at 110 sts.
Bottom decreases:
110
100
90
80
70
60
50
40
30
20
10 sts
Stuffing: Add liner and most filling when approximately 50 stitches remain.
Finishing: Cut a long tail, thread through final stitch loops, cinch securely, reinforce, and weave in.
FAQ
1. What yarn is best for a crochet floor cushion?
A smooth #6 super bulky yarn is the easiest option for this particular construction. Cotton tube yarn creates a modern home-decor appearance, while sturdy acrylic can be lighter and more economical.
Whichever fiber you choose, aim for dense stitches and good abrasion resistance.
The Craft Yarn Council’s yarn-weight system identifies super bulky as category 6, but yarns within one category are not automatically interchangeable; gauge still matters.
2. How much yarn do I need for a crochet floor cushion?
For this approximately 20–22 inch cushion, plan for roughly 650–800 yards of super bulky yarn.
Your actual yardage can vary substantially with yarn construction, tension, finished height, and hook size.
Buying extra yarn from the same dye lot is safer than running short near the bottom decreases.
3. What can I use to stuff a crochet floor cushion?
Polyester fiberfill is simple and lightweight, but you can also use clean pillow filling, old pillows, soft fabric scraps, folded textiles, or combinations of these.
If you use small or loose filling materials, contain them inside a sturdy fabric liner first.
4. Can beginners crochet a floor cushion?
Yes.
You should be comfortable making basic chains, half double crochet, slip stitches, and recognizing the top of a crochet stitch.
The only shaping skills introduced here are increasing, decreasing, and working in the back loop.
If you have never read abbreviated crochet instructions before, the Craft Yarn Council maintains a beginner guide to common pattern abbreviations and basic pattern-reading conventions.
5. How do I make my crochet floor cushion firmer?
Use dense crochet fabric, a supportive inner liner, and distribute filling evenly.
Add filling gradually rather than compressing one giant amount into the center.
For an especially firm floor pouf, you may need denser internal materials than loose fiberfill alone.
6. Why is my crochet circle curling?
A strongly cupped circle often means the increases are insufficient for your particular yarn/tension combination or your stitches are too tight.
First confirm the stitch count. If the count is correct, try loosening your tension or using a slightly larger hook.
A tiny amount of curvature in a super bulky circle is normally less concerning because the final object is three-dimensional.
7. Can I make this cushion smaller?
Yes.
Stop the increase section once your circle reaches the desired diameter.
Then begin the BLO turning round.
When making the bottom, reverse the same increase stages so the two ends remain balanced.
Conclusion
A large crochet floor cushion may look like a major home-decor project, but the construction is really a sequence of three simple ideas: increase, crochet even, decrease.
The most important part is not speed. It is checking the shape and stitch count while the project is still easy to correct.
Once you have made one cushion, the same construction logic can be adapted into smaller meditation cushions, oversized nursery pillows, taller poufs, footrests, or coordinating floor cushions in several colors.
Save the tutorial so you can refer back to the increase and decrease sequence, and consider making a second cushion in a coordinating neutral or accent shade once you are comfortable with the construction.