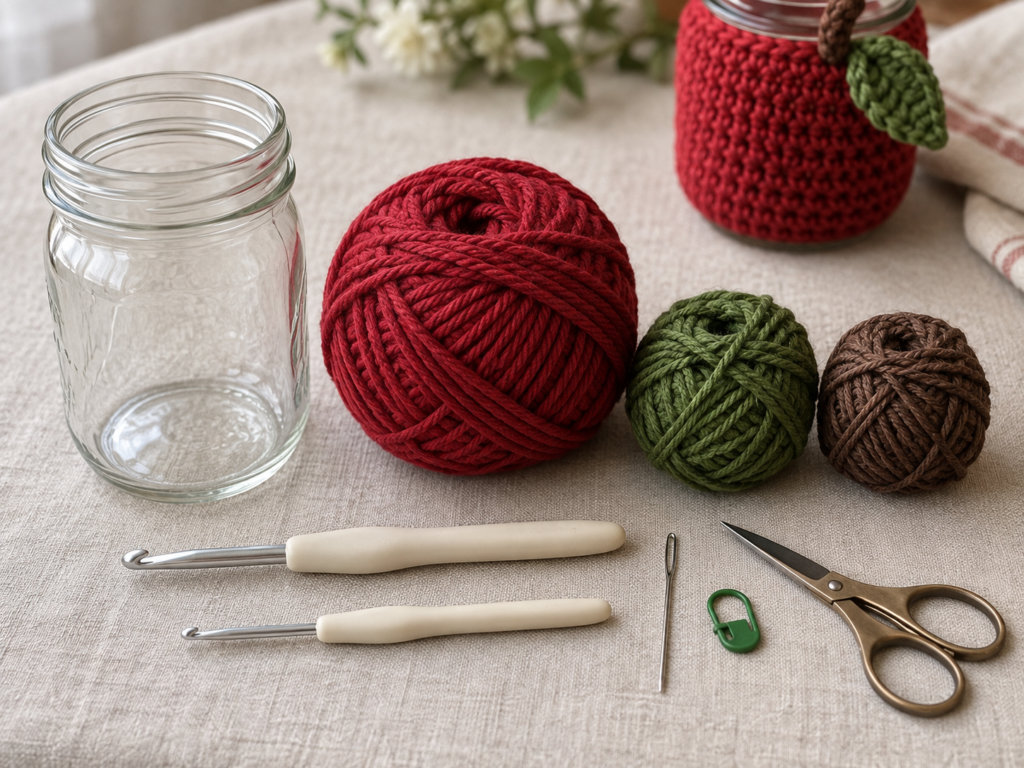
A plain glass jar can become a surprisingly charming fall decoration with a little red yarn, a crochet hook, and one tiny leaf.
This crochet apple jar cozy pattern is designed as an approachable project for beginners who are comfortable making a single crochet stitch and are ready to practice crocheting in the round. Instead of constructing a flat rectangle and sewing it together, we will begin at the bottom of the jar, crochet a circular base, turn the work upward, and continue building the cozy directly in rounds.
The finished sleeve is intentionally simple: a smooth apple-red body, a small brown stem, and a green leaf. That keeps the project recognizable as an apple without making the pattern complicated.
The instructions below are written for a typical 16 oz wide-mouth Mason jar, but the fit-check method makes it easy to modify for another jar.
The photography plan also follows the project from the starting loop through the final finishing stage, so beginners can see what each major stage should look like.
What You’ll Learn
By making this project, you will practice:
- Creating a magic ring
- Crocheting a flat circle
- Working single crochet increases
- Counting rounds and stitches
- Working in the back loop only
- Turning a flat crochet base into a cylinder
- Crocheting continuously in the round
- Making a simple crochet leaf
- Making a small crochet stem
- Sewing embellishments securely
- Weaving in ends neatly
- Adjusting a cozy to fit a different jar
Materials You’ll Need
For one apple jar cozy:
- Worsted-weight #4 cotton yarn, approximately 45–60 yd in deep apple red
- Small amount of forest-green cotton yarn
- Small amount of cocoa-brown cotton yarn
- 5.0 mm crochet hook for the jar cozy
- 4.0 mm crochet hook for the stem and leaf
- 16 oz wide-mouth Mason jar
- Yarn or tapestry needle
- Scissors
- One locking stitch marker
- Flexible measuring tape, optional
Cotton is particularly useful here because it creates a defined stitch surface and generally holds the shape of a small household project well. The Craft Yarn Council categorizes worsted/aran yarn as medium or #4 yarn; published hook ranges are guidelines rather than absolute rules, so using a slightly firmer fabric for a fitted cozy is perfectly reasonable.
Finished Size
Designed to fit a standard 16 oz wide-mouth Mason jar.
Approximate crochet measurements before stretching:
- Base diameter: about 3¼ in
- Cozy circumference: about 10¼ in
- Side height: approximately 4–4¼ in
Treat those figures as checkpoints rather than absolute requirements. Glass jars vary slightly between manufacturers, so your actual jar is the best measuring tool.
Crochet Abbreviations Used
This pattern uses US crochet terminology.
- ch = chain
- sc = single crochet
- hdc = half double crochet
- dc = double crochet
- sl st = slip stitch
- st/sts = stitch/stitches
- rnd = round
- rep = repeat
- inc = increase; work 2 sc in the same stitch
- BLO = back loop only
These abbreviations align with standard US crochet abbreviations published by the Craft Yarn Council.
UK readers: US single crochet corresponds to UK double crochet, US half double crochet to UK half treble, and US double crochet to UK treble.
Before You Start
Gauge
Aim for approximately:
14 sc × 16 rounds = 4 in / 10 cm
Gauge does not need to be mathematically perfect because this is not a garment, but it does affect fit.
A loose fabric may slide down the jar. A very tight fabric may be difficult to pull over it.
Check the base early
After completing the final increase round, place the crochet circle against the bottom of your jar.
The circle should be approximately the same size as the jar bottom or very slightly smaller. Cotton will stretch a little when the jar is inserted.
How to count stitches
Insert a locking stitch marker into the first stitch of every round. Each time you return to the marker:
- Remove it.
- Work the marked stitch.
- Replace the marker in the new first stitch.
This is far safer for beginners than trying to identify the start of a spiral visually.
Keeping the walls straight
Once the base is complete, stop increasing.
Continuing to add increases after the wall begins will create a flared bowl rather than a fitted jar sleeve.
Preventing curling and ruffling
During the flat-circle stage:
- A ruffled edge usually means the circle is expanding too quickly or your tension is very loose.
- A cup-shaped circle before the side-wall round usually means the fabric is too tight or is not expanding enough.
Do not aggressively block the base to correct a major stitch-count problem. Correcting the count is more reliable.
Choosing apple colors
Traditional red works beautifully, but an apple cozy does not have to be bright scarlet. Burgundy, dusty red, pink-red, golden yellow, and Granny Smith green can all work.
Keep the stem several values darker than the body and choose a leaf color that clearly contrasts with the apple.
Step-by-Step Crochet Tutorial
Step 1: Make a Magic Ring
Use your red yarn and 5.0 mm hook.
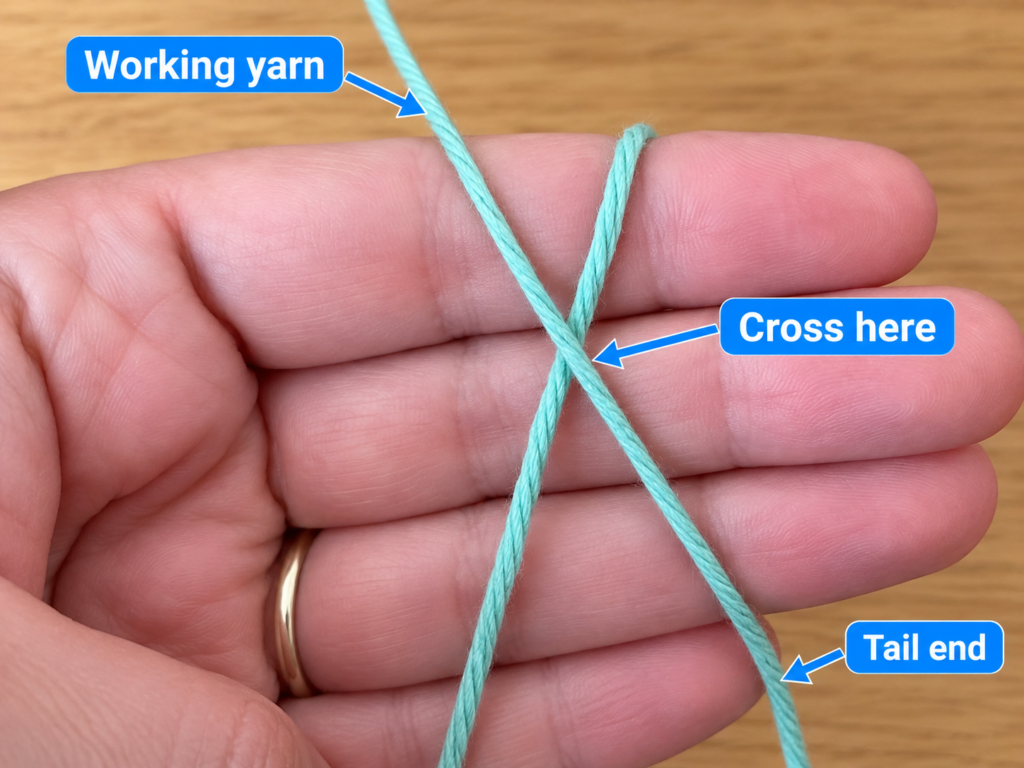
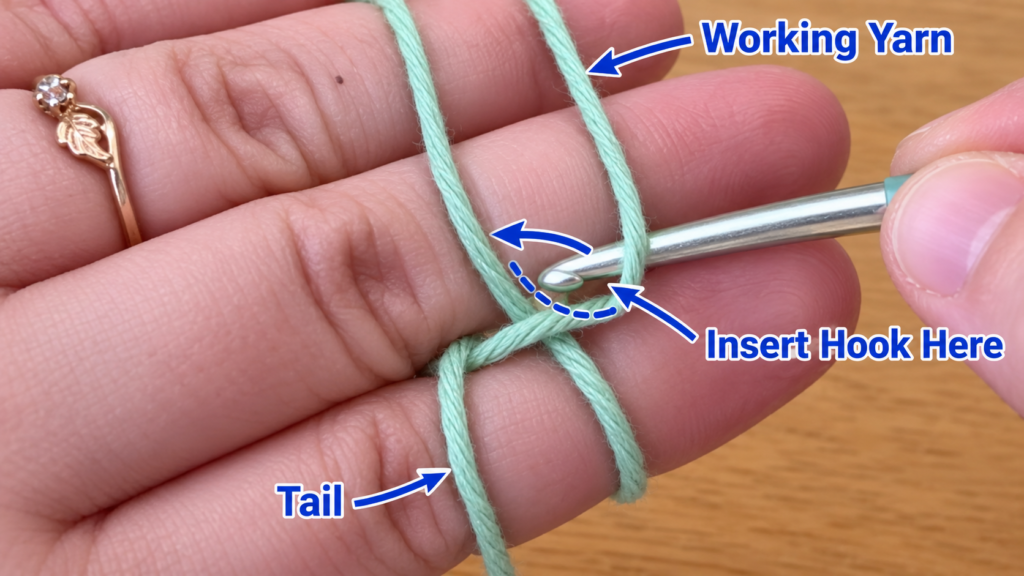
Wrap the yarn around your fingers to form a loose adjustable ring. Insert your hook through the loop, catch the working yarn, and draw it through.
The magic ring lets you tighten the center after the first stitches are complete, giving the bottom of the cozy a cleaner appearance.
If the magic ring is still frustrating, you can instead ch 2 and work Round 1 into the second chain from the hook.
Beginner tip
Keep the yarn tail at least 5–6 inches long. A short tail is much harder to grip when tightening the center.
Common mistake to avoid
Do not accidentally crochet around only one strand of the ring while leaving the tail outside your stitches. Work around both the circular strand and tail so that the center can be tightened properly.
Step 2: Crochet the Center of the Base
Work:
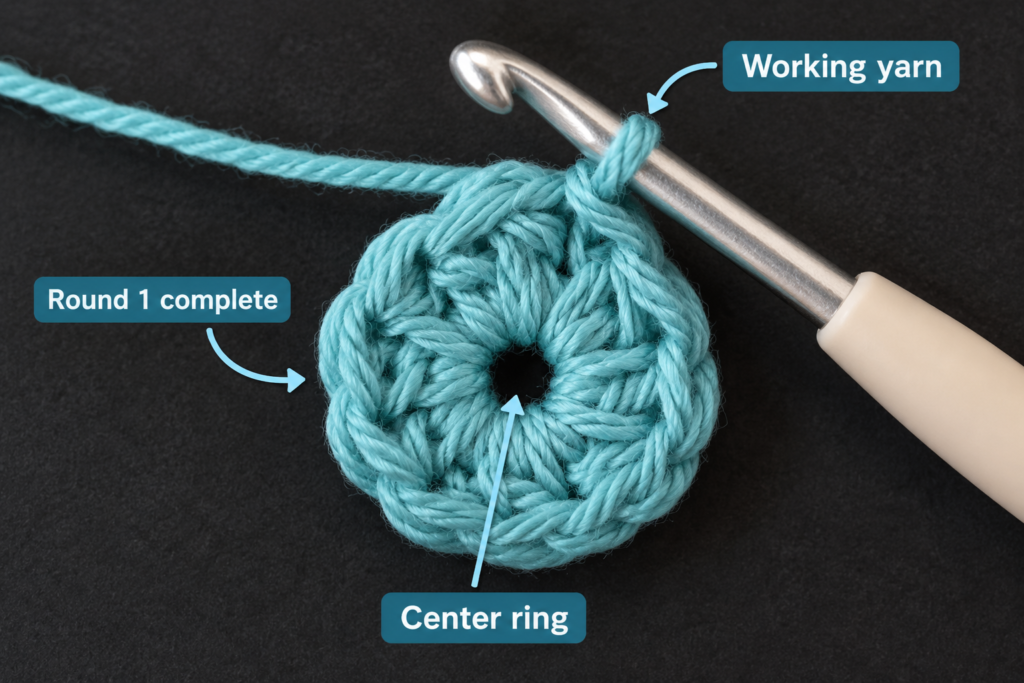
Rnd 1: 6 sc into the magic ring. (6 sts)
Pull the yarn tail firmly until the center closes.
Because we will work in a continuous spiral, do not slip stitch to join. Place your stitch marker in the first stitch.
You now have the center of the jar cozy’s bottom.
Beginner tip
Before tightening the ring completely, count your stitches. It is much easier to add a missing stitch while the opening is still large.
Common mistake to avoid
The working loop on your hook does not count as a stitch. Count the six completed V-shaped stitches around the ring.
Step 3: Increase the Circle to Fit the Jar
Continue with red.
Rnd 2: Inc in every stitch around. (12 sts)
Rnd 3: Sc in next st, inc in next st. Rep around. (18 sts)
Rnd 4: Sc in next 2 sts, inc in next st. Rep around. (24 sts)
Rnd 5: Sc in next 3 sts, inc in next st. Rep around. (30 sts)
Rnd 6: Sc in next 4 sts, inc in next st. Rep around. (36 sts)
The circle should expand evenly and remain relatively flat.
Set the jar on top of the crochet base.
You want the crochet circle to cover the bottom without extending far beyond it. A base that is just slightly smaller than the widest part of the jar is desirable because the cotton body should stretch around the glass.
Beginner tip
Count every round before starting the next one. A missed increase might not be obvious until several rounds later.
Common mistake to avoid
Do not randomly add extra stitches because you see a small gap between stitches. Gaps often become less noticeable once the next round is worked.
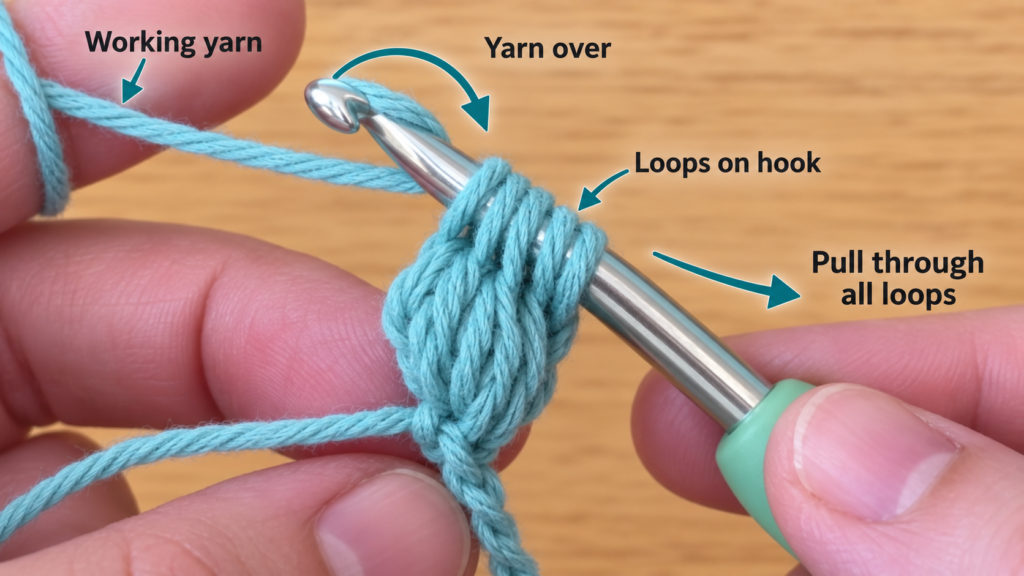
Step 4: Create the Corner at the Bottom of the Jar
Now stop increasing.
Rnd 7: Sc BLO in every stitch around. (36 sts)
Working through only the back loop leaves the front loop unused. That creates a subtle ridge where the flat bottom transitions into the vertical side.
After completing this round, the work should begin naturally curving upward.
This is the moment when your flat crochet circle starts looking like a container.
Beginner tip
Look carefully at the top of a stitch. You will see two loops forming a V. The loop farthest away from you is the back loop.
Common mistake to avoid
Do not increase during this round. One stitch goes into each existing stitch.
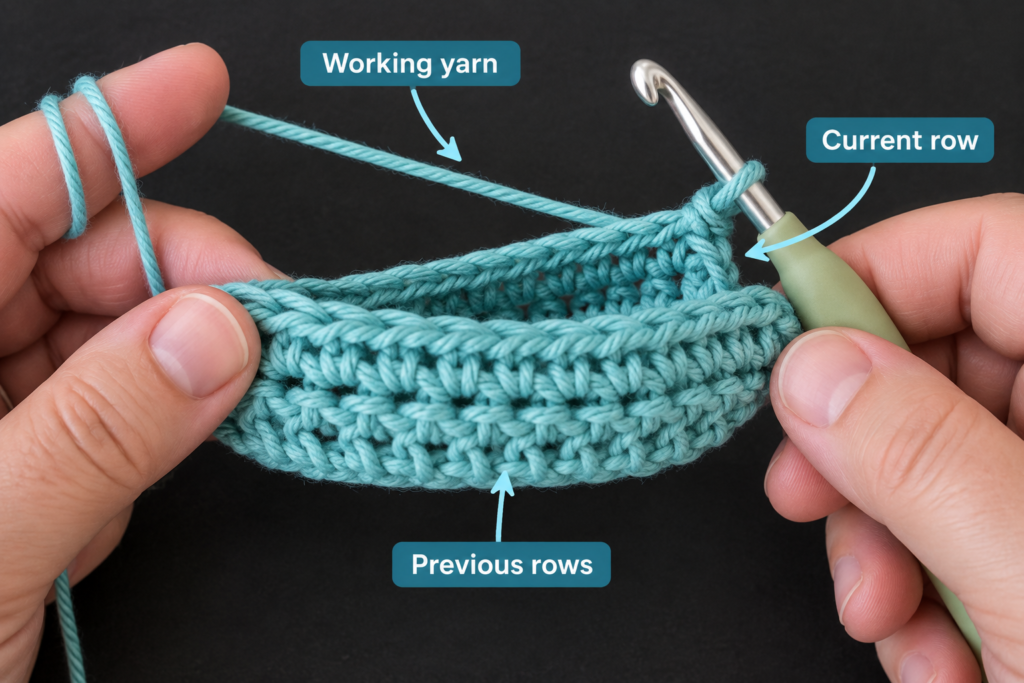
Step 5: Crochet the Red Apple Body
Return to working through both loops.
Rnds 8–23: Sc in each stitch around. (36 sts each round)
Keep moving your stitch marker upward after each round.
The fabric will gradually form a snug tube.
After approximately Round 16, slide the cozy over your jar for the first serious fit test.
It should stretch over the glass without excessive force but should not sag away from the jar.
Continue until the red body finishes roughly ½ inch below the rim or at the height you prefer.
Want a firmer top?
For the final two body rounds, optionally change from the 5.0 mm hook to a 4.5 mm hook while maintaining all 36 stitches.
This creates a slightly tighter upper edge without adding decreases.
Beginner tip
Fit-test several times rather than waiting until the end. Crochet height can vary considerably depending on yarn and tension.
Common mistake to avoid
Do not accidentally place two stitches into the first stitch after moving the marker. That slowly increases the circumference and is a common reason cylindrical projects begin flaring outward.

Step 6: Smooth and Finish the Upper Edge
When the cozy reaches your preferred height, remove the stitch marker.
Slip stitch loosely into the next two stitches. This softens the visible height change created by ending a spiral abruptly.
Fasten off and leave a 6-inch tail.
Do not weave the tail in yet if you still want to make small fit adjustments.
Place the cozy on the jar.
Check that:
- The bottom sits flat.
- The sleeve does not twist.
- The top opening is snug but not strained.
- The glass rim remains exposed.
- The cozy can be removed without stretching stitches excessively.
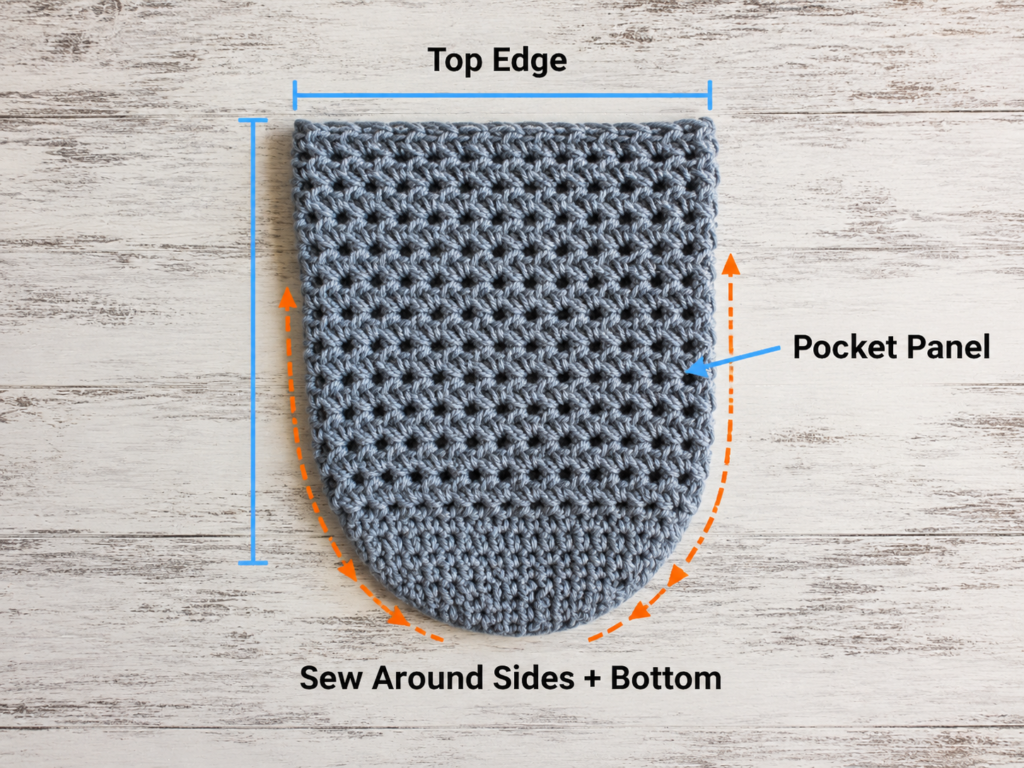
Step 7: Crochet the Brown Apple Stem
Switch to the 4.0 mm hook and brown yarn.
Ch 8.
Beginning in the second chain from the hook:
Sl st in each of the next 7 chains.
Fasten off, leaving a long tail for sewing.
You now have a narrow cord-like stem.
The stem does not need to stand perfectly upright. A slight bend looks more natural and keeps it from interfering with the jar opening.
Beginner tip
Keep these slip stitches relaxed. Very tight slip stitches make the stem curl sharply.
Common mistake to avoid
Do not attach the stem over the glass rim. Sew it to the crochet fabric only so the cozy remains removable.
Step 8: Crochet the Green Apple Leaf
Using your 4.0 mm hook and forest-green yarn, ch 9.
Beginning in the second chain from the hook, work:
sl st, sc, hdc, dc, dc, hdc, sc, sl st
You have reached the opposite end of the foundation chain.
Ch 1, rotate the piece, and work along the unused loops on the opposite side of the starting chain:
sl st, sc, hdc, dc, dc, hdc, sc, sl st
Join near the pointed end with a slip stitch if necessary.
Fasten off, leaving a sewing tail.
Gently shape the leaf between your fingers. The combination of short stitches at the ends and taller stitches near the middle creates the tapered oval.
Beginner tip
The leaf does not need to be perfectly symmetrical. Slight irregularity makes the finished apple look handmade rather than manufactured.
Optional detail
Use the brown yarn tail to make one loose surface stitch down the center of the leaf if you want the appearance of a vein.
Step 9: Attach the Stem and Leaf
Remove the cozy from the jar.
Position the stem near the upper edge, approximately ½–¾ inch to one side of center.
Using its brown tail and your tapestry needle, sew the bottom ½ inch of the stem securely to the red fabric.
Next, position the green leaf so its base meets the stem.
Use the green tail to stitch only the leaf’s lower portion to the cozy. Leaving the outer half unattached creates a more dimensional result.
Check the wrong side after sewing.
Keep knots and yarn tails flat so they do not create a bulky lump against the glass.
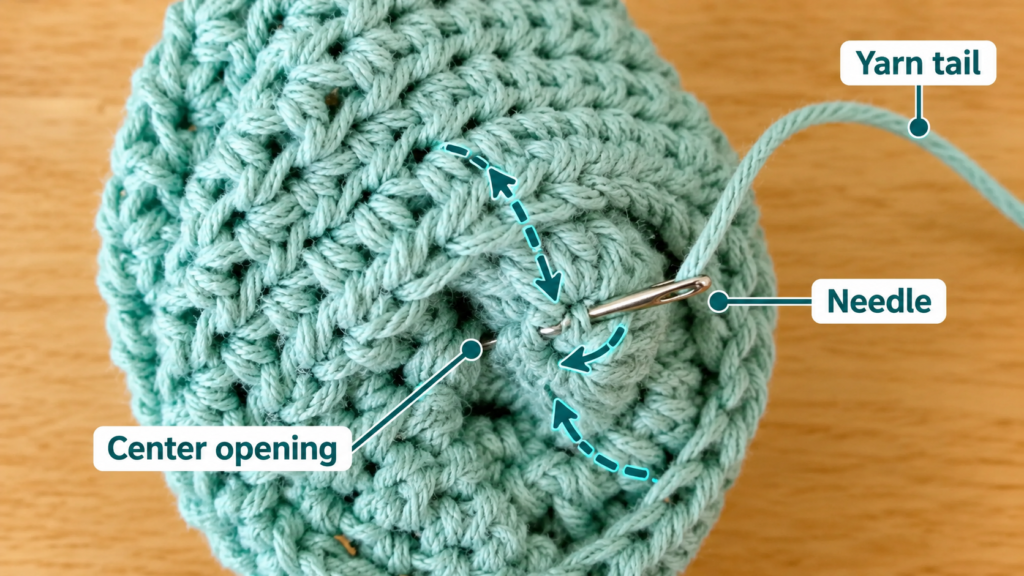
Step 10: Final Fit Check
Slide the finished cozy back over the jar.
Straighten the bottom ridge with your fingers.
Rotate the sleeve until the leaf and stem sit where you want them.
Your finished piece should look predominantly like a clean red jar cover from a distance, with the green leaf and brown stem immediately giving it an apple identity.
Avoid over-decorating it. The simplicity is what makes this version beginner-friendly.
Pattern Notes or Stitch Notes
Starting method
The project starts from a magic ring.
Alternative: ch 2 and make 6 sc in the second chain from the hook.
Round construction
The body is worked in a continuous spiral.
Do not join rounds unless specifically instructed.
Stitch count
The final base and body stitch count is:
36 sts
Once you reach 36 stitches, do not increase again.
Turning chain
There are no turning chains in the main cozy because the body is worked continuously in rounds.
Right side / wrong side
The outside of the cozy is the right side.
The inside that touches the jar is the wrong side.
Size adjustment
For a different jar:
- Crochet the flat base using the same increase principle.
- Stop increasing when the circle is approximately the size of the jar’s bottom.
- Work one BLO round without increasing.
- Continue straight until the cozy reaches the desired height.
Keep the final circumference slightly snug because cotton fabric usually relaxes with use.
Common Beginner Mistakes
1. Losing the beginning of the round
Problem: The stitch count gradually changes and you cannot see where one round ends.
Fix: Use a locking stitch marker every single round.
2. Creating a wavy base
Problem: The edge begins ruffling instead of lying flat.
Fix: Recount your stitches first. Accidental increases are more common than beginners realize. If the count is correct but the fabric still ripples, your tension may be unusually loose.
3. Base starts cupping too early
Problem: The circle curls upward before you intentionally start the side wall.
Fix: Check that every required increase was completed. Also compare the base to your actual jar before proceeding.
4. Cozy becomes wider as it gets taller
Problem: The sleeve resembles a flowerpot rather than a cylinder.
Fix: You are probably adding stitches. Every body round should stay at 36 stitches.
5. Cozy is too loose
Problem: It slides around the jar.
Fix: Try a 4.5 mm hook for the body or use a slightly firmer tension. If the entire base is oversized, resizing needs to happen before the side-wall round.
6. Cozy is difficult to pull onto the jar
Problem: The fabric is overstretched and stitches look distorted.
Fix: Verify gauge. If necessary, redo the final base increase with an additional evenly distributed few stitches rather than forcing the fabric.
7. Leaf twists after sewing
Problem: The green leaf points backward or folds awkwardly.
Fix: Attach only its base. Let the remainder stay free so you can position it naturally.
How to Customize This Crochet Project
Change the apple color
Try:
- Deep burgundy for a rustic apple
- Golden yellow for a Golden Delicious-inspired version
- Bright green for a Granny Smith look
- Dusty rose for cottage-style decor
A set containing several colors would make attractive autumn table decor.
Change the yarn
Cotton gives crisp stitches and a practical surface for a jar sleeve.
Cotton-blend yarn can also work.
If you use acrylic, remember that fiber characteristics differ. Always test the finished fabric for your intended use rather than assuming one yarn behaves exactly like another.
Resize the cozy
Instead of copying a fixed number of rounds for every container, compare the base directly against your jar.
That method also works for:
- Smaller jam jars
- Pencil jars
- Crochet-hook storage jars
- Utensil holders
- Small vase covers
Add texture
Once you are comfortable with the basic pattern, experiment with:
- BLO ribbing
- Alternating sc and dc texture
- Waistcoat stitch
- Surface crochet
- Small embroidered apple seeds
Keep the base and sizing logic unchanged.
Add a decorative border
For a decorative storage jar rather than a drinking jar, you can finish with:
- Reverse single crochet
- Small scallops
- Slip-stitch edging
Avoid a large border if it interferes with the jar opening.
Gift ideas
Turn the cozy into a fall gift by filling the jar with:
- Crochet notions
- Wrapped sweets
- Tea bags
- Pens and pencils
- Craft supplies
- Battery-operated fairy lights
For teacher gifts, a red apple jar filled with pens or classroom supplies is especially appropriate.
Finishing Instructions
Once you are satisfied with the fit:
- Remove the cozy from the jar.
- Thread each loose tail onto a tapestry needle.
- Weave the tail through several stitches on the wrong side.
- Change direction once and weave through several additional stitches.
- Trim the excess yarn.
- Check that the stem and leaf cannot easily be pulled loose.
- Replace the cozy on the jar and gently shape it with your hands.
Blocking is usually unnecessary.
If the leaf curls excessively, dampen only the leaf, shape it flat with your fingers, and let it dry before placing it back on the jar.
Washing and care
Follow the care instructions on your yarn label.
If using washable cotton, remove the cozy from the jar before washing. Reshape and allow it to dry completely before reinstalling it.
Safety note
A crochet sleeve does not make ordinary glass safe for boiling liquids or extreme temperature changes. Use the jar only according to its manufacturer’s instructions.
Also keep yarn away from open flames. If using the jar decoratively as a lantern, choose battery-operated lights rather than a burning candle.
Quick Printable-Style Summary
Project: Crochet Apple Jar Cozy
Skill level: Beginner
Yarn: Worsted #4 cotton
Hooks: 5.0 mm body; 4.0 mm leaf/stem
Main stitches: sc, sl st, hdc, dc, BLO
Starting method: Magic ring with 6 sc
Base
- Rnd 1: 6 sc
- Rnd 2: Inc around — 12
- Rnd 3: 1 sc, inc — 18
- Rnd 4: 2 sc, inc — 24
- Rnd 5: 3 sc, inc — 30
- Rnd 6: 4 sc, inc — 36
Side
- Rnd 7: BLO sc around — 36
- Rnds 8–23: sc around — 36
Fit-test and adjust height if necessary.
Stem
Brown yarn, ch 8; sl st back across 7 chains.
Leaf
Green yarn, ch 9; shape each side of foundation chain using short stitches at tips and taller stitches through center.
Finishing
Attach stem and leaf, weave in ends, insert jar, and shape.
FAQ
Is this crochet apple jar cozy pattern suitable for complete beginners?
It is suitable for beginners who know—or are ready to learn—single crochet and crocheting in the round. The magic ring is probably the most unfamiliar technique, but you can replace it with a chain-two start.
What yarn works best for a crochet Mason jar cozy?
Worsted-weight cotton is a practical choice because it produces visible stitches, good structure, and a washable fabric. The Craft Yarn Council identifies worsted/aran as the medium #4 yarn category.
Can I make this without a magic ring?
Yes. Chain 2 and work the six stitches for the first round into the second chain from your hook.
For additional visual instruction on the adjustable-loop technique, Yarnspirations also provides a step-by-step magic-ring demonstration.
How do I make the cozy fit a larger jar?
Continue the flat-circle increase progression until the base is approximately the correct size for your jar. Then stop increasing, work the BLO turning round, and build straight upward.
Do not simply add random stitches to the body because that will alter the cylindrical shape.
Can I use acrylic yarn?
Yes for decorative use, but cotton is my preferred choice for this project. Different fibers behave differently, so always make a fit test rather than assuming yarns with the same printed weight will produce identical fabric.
Can I use this cozy with hot drinks?
Only use hot liquids in a jar specifically intended for that use, and follow the glass manufacturer’s instructions. The crochet sleeve is decorative and provides grip; it should never be treated as heat-safety equipment.
Can I put a candle inside the jar?
Do not use an open flame near the yarn. Use a battery-operated LED tea light or fairy lights instead.
Conclusion
This crochet apple jar cozy is small enough to finish in an afternoon but still teaches several techniques that transfer directly to larger crochet projects: circular increases, working in the round, creating a clean side-wall transition, maintaining stitch counts, shaping a simple applique, and finishing neatly.
Once you understand the basic construction, the same jar-cover formula can become a pumpkin, strawberry, watermelon, pencil holder, holiday jar, or simple everyday cotton sleeve.
For the apple version, resist the urge to add too many details. A clean red body, one brown stem, and one green leaf are enough to make the design immediately recognizable while keeping the pattern accessible to beginners.





