A handmade garland is one of those crochet projects that can completely change a shelf, mantel, doorway, or Christmas display without requiring a huge amount of yarn. This crochet pinecone garland pattern is especially useful because the individual pinecones are small, portable, and repetitive enough that you can make several while practicing the same few stitches.
The pinecones in this tutorial are made differently from a stuffed amigurumi cone. Instead, you will crochet one textured strip with tiny raised scales, let the fabric curl naturally, and then roll it into a three-dimensional pinecone. That removes the need for a magic ring, complicated decrease rounds, or stuffing.
Once you understand the first pinecone, the remaining motifs become much faster.
For the complete garland shown in this tutorial, make five pinecones and attach them to a simple sage-green crochet cord. You can use the same method for a shorter ornament strand, a longer mantel garland, individual tree ornaments, woodland gift toppers, or rustic fall decor.
What You’ll Learn
- How to make an easy foundation chain without pulling it too tightly.
- How to work several stitches into one chain to produce deliberate curling.
- How to create a tiny ch-2 picot that resembles the point of a pinecone scale.
- How to change from smaller scales to fuller scales.
- How to shape a flat crochet strip into a three-dimensional pinecone.
- How to sew the pinecone securely without flattening its texture.
- How to make a simple crochet garland cord.
- How to space and attach several pinecones evenly.
- How to resize the motif or change its appearance for fall, woodland, or Christmas decorating.
Materials You’ll Need
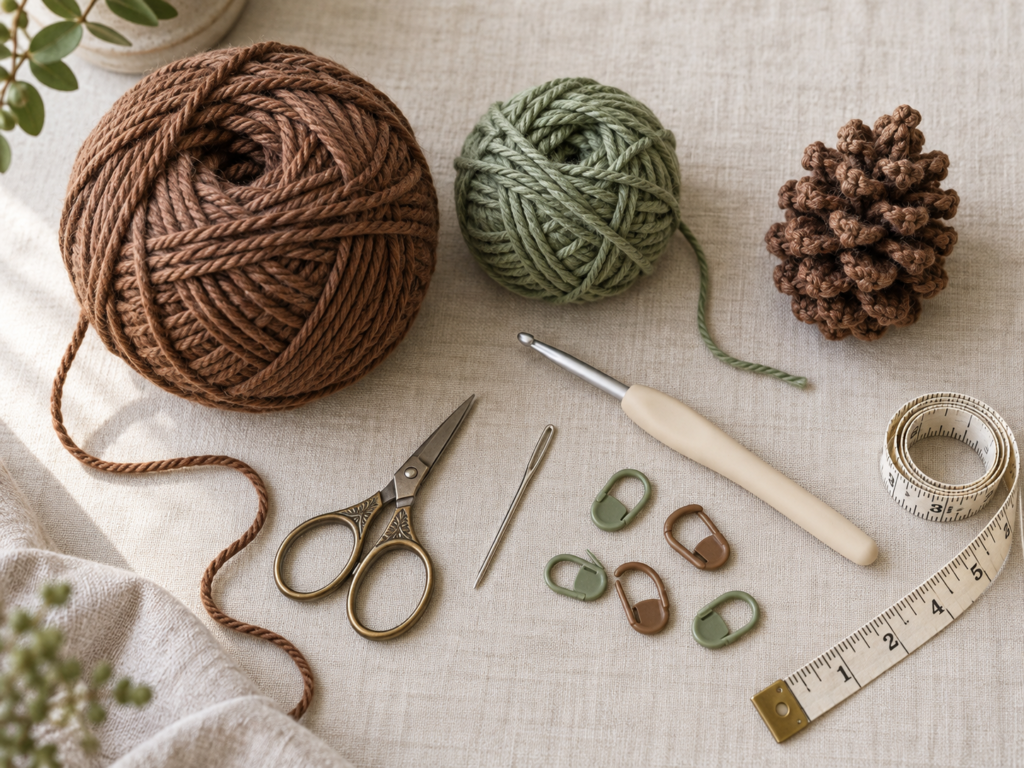
For a five-pinecone garland approximately 36–40 inches across, gather:
- Medium #4 worsted-weight yarn in brown: approximately 60–80 yards total.
- Medium #4 yarn in sage green: approximately 15–25 yards for the cord.
- 4.0 mm crochet hook.
- Scissors.
- Tapestry needle.
- 2–4 stitch markers, optional but useful when learning.
- Measuring tape for checking the garland length and spacing.
- Optional small scraps of brown yarn if you want to fill the very center of a particularly loose pinecone.
A smooth cotton-blend or firmer acrylic works particularly well because the scales remain easy to see. Very fuzzy yarn can hide the little picots.
The Craft Yarn Council places worsted, Afghan, and Aran yarns in the Medium #4 yarn category, although individual yarn characteristics still vary.
Crochet Abbreviations Used
This tutorial uses US crochet terminology.
- ch = chain
- sc = single crochet
- hdc = half double crochet
- sl st = slip stitch
- st / sts = stitch / stitches
- rep = repeat
- RS = right side
These abbreviations correspond with standard US crochet terminology listed by the Craft Yarn Council. The Council also notes that US single crochet corresponds to UK double crochet, while US half double crochet is UK half treble.
Special Stitch: Ch-2 Picot
Ch 2, then sl st into the second chain from the hook.
That tiny bump becomes the pointed center of each pinecone scale.
Before You Start
Gauge and tension
Gauge is not critical because this is decorative rather than wearable crochet.
What matters much more is texture.
Your stitches should be firm enough that the pinecone keeps its shape, but the starting chain should remain loose enough for you to insert several stitches into each chain.
If your finished scales look floppy, go down to a 3.5 mm hook.
If you cannot comfortably get the hook into your chains, restart the foundation using a 4.5 mm hook and switch back to 4.0 mm for the scale row.
Count the chains carefully
The standard pinecone begins with ch 19.
You will skip the chain immediately beside the hook, leaving 18 foundation chains available for the scale groups.
Those 18 chains are divided like this:
- First 5 chains = small scales
- Middle 8 chains = full scales
- Final 5 chains = small scales
Place a stitch marker after the fifth chain and after the thirteenth chain if that makes the sections easier to see.
Do not try to stop the curling
On many crochet projects, unexpected curling is a warning sign.
Here, curling is intentional.
Each scale group contains several stitches worked into one foundation chain. That extra fabric forces the strip to twist and curve. The curl is what later allows the strip to roll naturally into a convincing pinecone.
Right side and wrong side
The side where the picot points and rounded scale texture look most prominent will become the outside of the pinecone.
Check this before you begin rolling.
Yarn color
Chocolate, walnut, caramel, taupe, rust, and oatmeal all work beautifully.
For a more realistic garland, make several cones in two or three neighboring shades rather than using five completely unrelated colors.
Step-by-Step Crochet Tutorial
Step 1: Crochet the Foundation Chain
Leave a tail about 12 inches long before making your slip knot. You will use this tail later to secure the pinecone.
Ch 19.
Do not pull the chains excessively tight.
Starting from the hook, count backward. The loop sitting on your hook does not count as a chain.
You will begin working in the second chain from the hook, which leaves 18 chains available.
If you are a beginner, pause here and gently run your thumb along the foundation so you can identify each V.
Beginner tip:
If your chain naturally twists, place it on the table and rotate it until all the V shapes face upward before you begin the first scale.
Common mistake to avoid:
Do not accidentally crochet into the first chain directly beside the hook. That chain is skipped so the active loop has enough room to move.
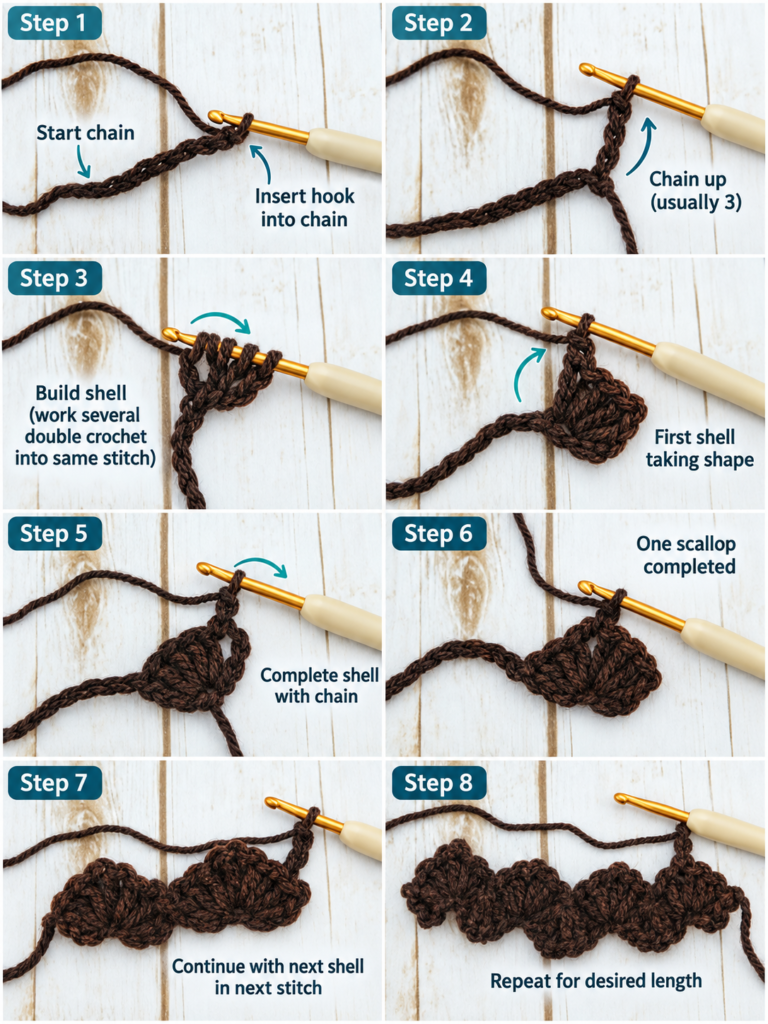
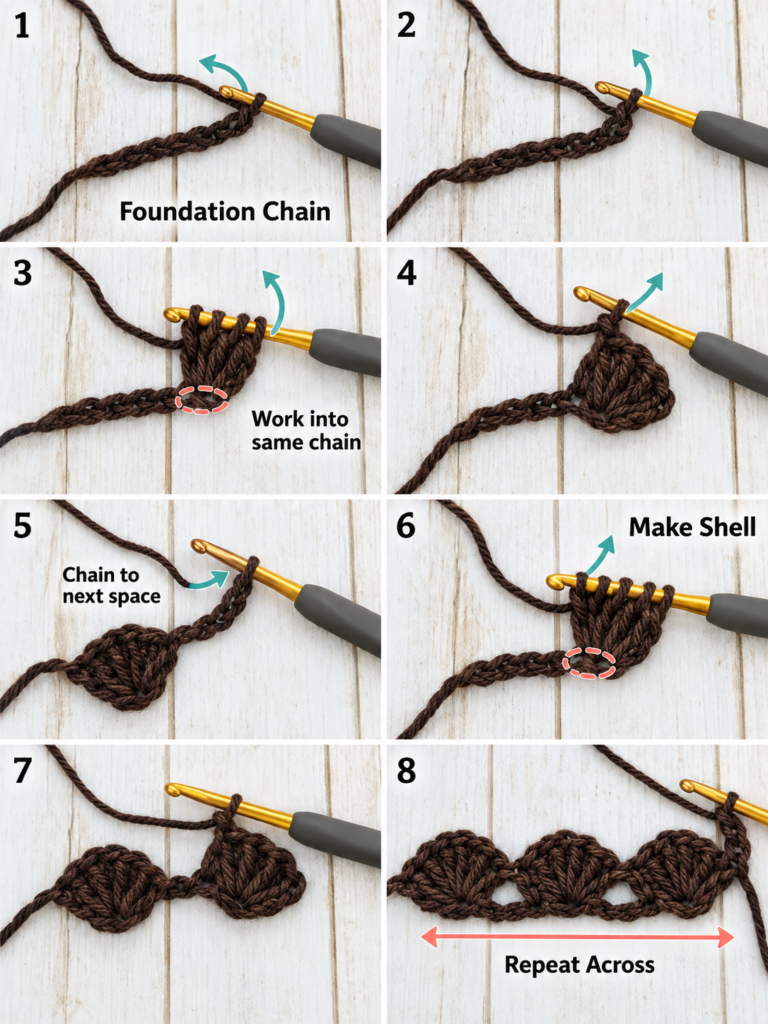
Step 2: Make the First Five Small Scales
The first five chains form a narrower section that helps the pinecone taper.
In the second chain from the hook, work all of the following into that same chain:
sc, ch 2, sl st in second ch from hook, hdc, sc
That completes one small scale.
Move directly to the next foundation chain and repeat the same sequence.
Make 5 small scales total, using one foundation chain for each scale.
Do not turn your work.
The fabric should already begin to wave or curl.
That is correct.
Understanding the picot
After making the sc, chain 2.
To close the picot, insert the hook into the first of those two newly made chains—the second chain from your hook—and make a slip stitch.
The little bump should sit between the sc and hdc.
Beginner tip:
After finishing each scale, gently push the completed stitches toward the base of the chain. This makes it easier to identify the next unused chain.
Common mistake to avoid:
Do not work the next scale into one of the chains belonging to the picot. Look below the scale for the original foundation chain.
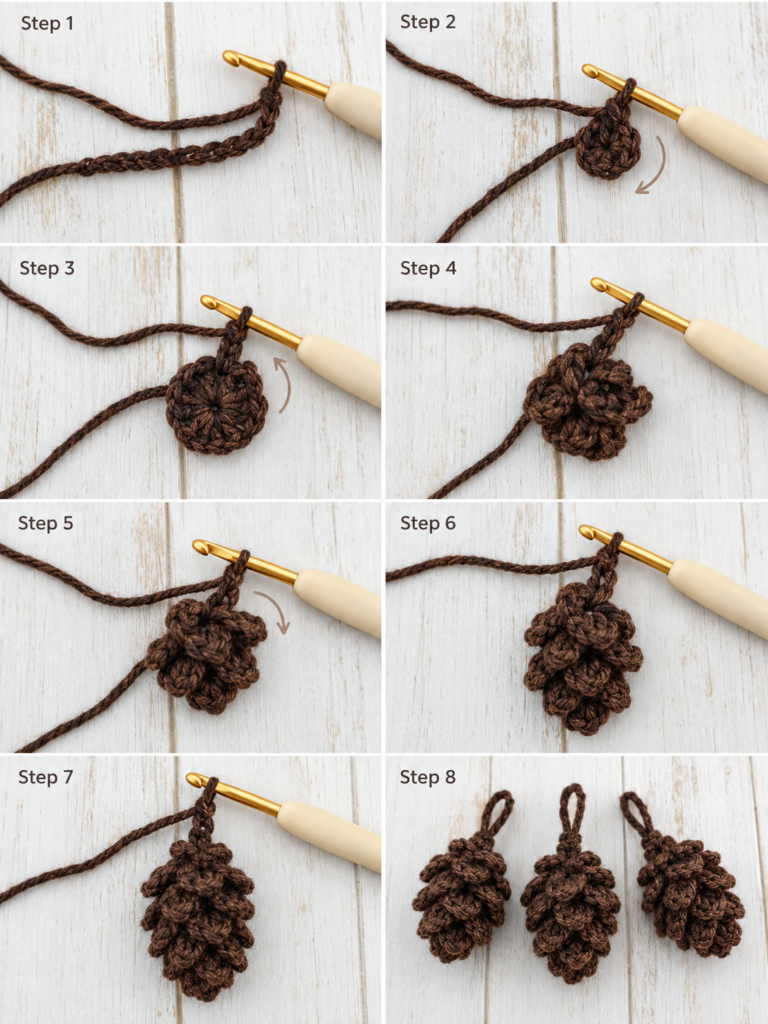
Step 3: Crochet Eight Fuller Middle Scales
The middle of a natural pinecone is generally visually fuller than either tip, so this section adds one extra hdc to every scale.
For each of the next 8 foundation chains, work:
sc, ch 2, sl st in second ch from hook, 2 hdc, sc
All five elements belong in the same foundation chain.
Then move to the next chain.
Continue until eight full scales have been completed.
The strip will become much more curled here because each chain is holding even more crochet fabric.
That curl is exactly what we need.
Beginner tip:
Count scale groups rather than trying to count individual stitches. You need eight visibly larger scale groups in this section.
Common mistake to avoid:
Do not accidentally place the second hdc into the next foundation chain. Both hdc stitches are worked into the same chain as the sc and picot.
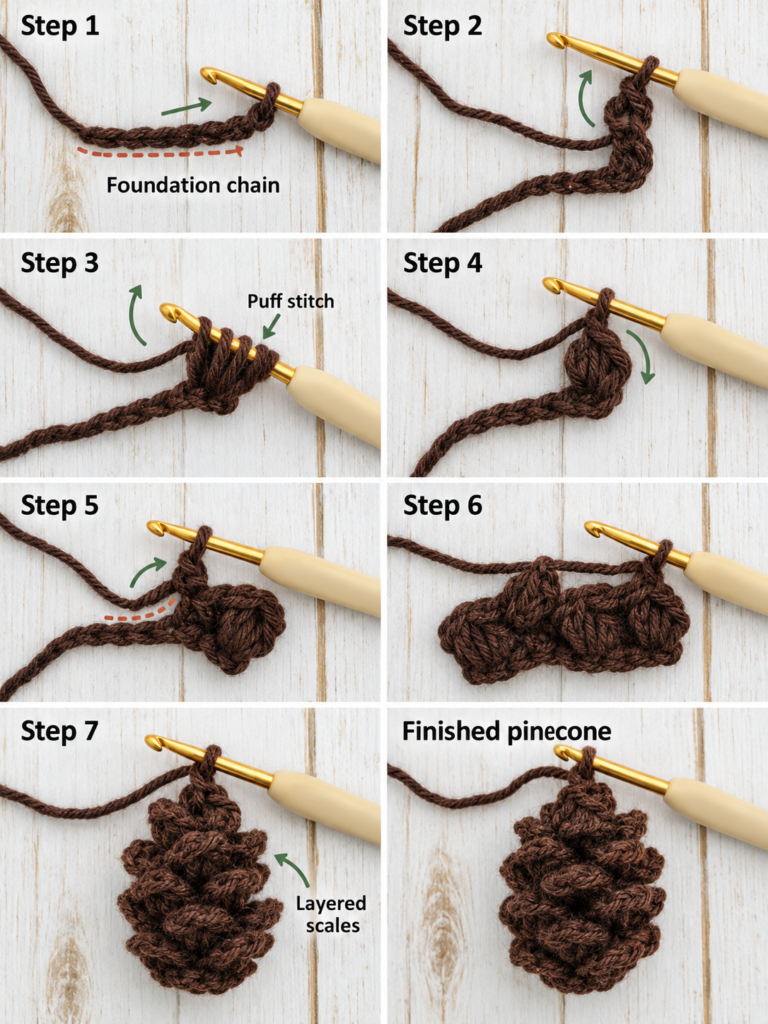
Step 4: Finish With Five Small Scales
There should now be 5 unused foundation chains remaining.
Return to the smaller scale:
sc, ch 2, sl st in second ch from hook, hdc, sc
Work one small scale into each of the final five chains.
You should now have:
- 5 small scales
- 8 full scales
- 5 small scales
That gives you 18 scale groups total.
After completing the last scale, cut the yarn leaving another tail approximately 12–15 inches long.
Pull the tail completely through the final loop.
Do not weave in either tail yet.
Beginner tip:
If the strip looks like a messy corkscrew rather than a pinecone, you are still on the right track. The shape appears during assembly.
Common mistake to avoid:
Do not block or steam the strip flat. The natural curl is part of the construction.
Step 5: Check the Completed Scale Strip
Lay the strip loosely on your table.
Do not stretch it.
Find the side where the picots and rounded stitch clusters look most defined. That is the right side and should face outward when you assemble the pinecone.
Check that you can identify all 18 scale groups.
If one scale is noticeably smaller because a stitch was accidentally skipped, you can usually leave it. Once the pinecone is rolled, small irregularities often make the texture look more natural.
If an entire foundation chain was missed, however, undo the work to that point and correct it before assembly.
Step 6: Roll the Strip Into a Pinecone
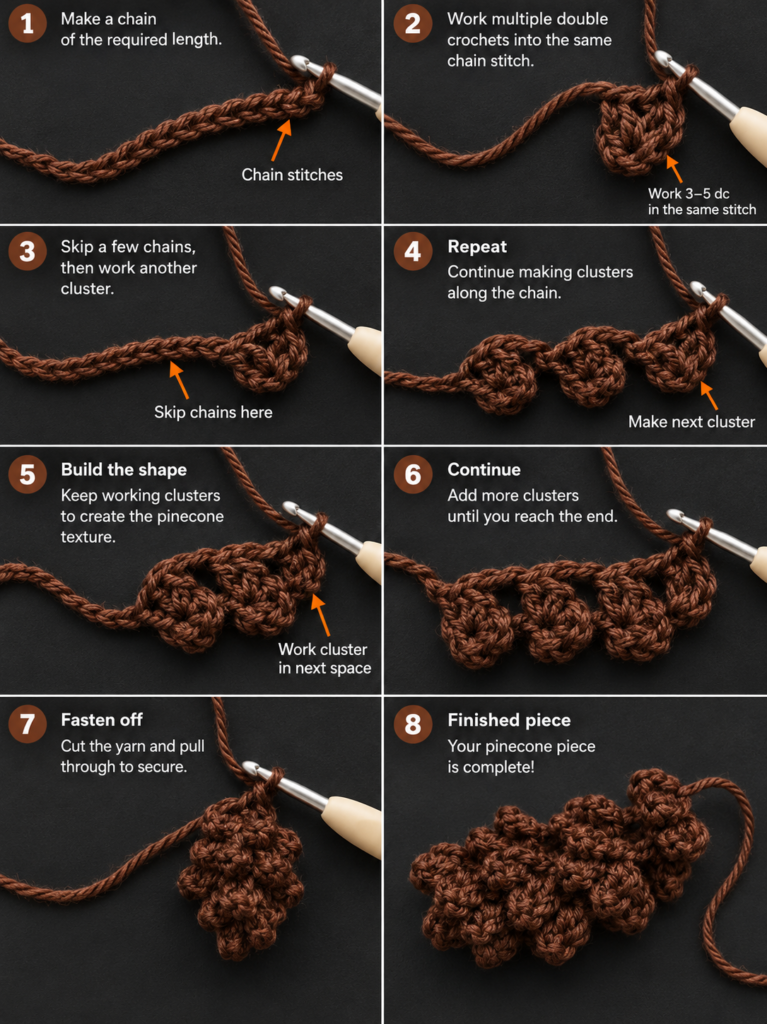
Take one end containing the smaller scales.
Begin rolling it into a tight spiral.
For the first two or three turns, keep the coil compact. This forms the pointed lower end.
As you reach the fuller middle scales, allow each new layer to sit very slightly higher and farther outward than the layer beneath it.
You are not simply making a flat cinnamon-roll spiral.
Instead, imagine building a shallow cone one layer at a time.
Keep the decorative picots pointing outward.
When you reach the small scales at the opposite end, wrap them around the upper section to finish the shape neatly.
Hold the pinecone between your thumb and index finger.
Before sewing, rotate it and inspect all sides. You can still loosen or tighten individual layers.
Beginner tip:
Do not worry about perfect symmetry. Slight differences between layers make a handmade pinecone more convincing.
Common mistake to avoid:
If the motif looks like a flat flower, the spiral layers are sitting directly beside one another. Re-roll it while gradually shifting the coils vertically.
Step 8: Make the Remaining Pinecones
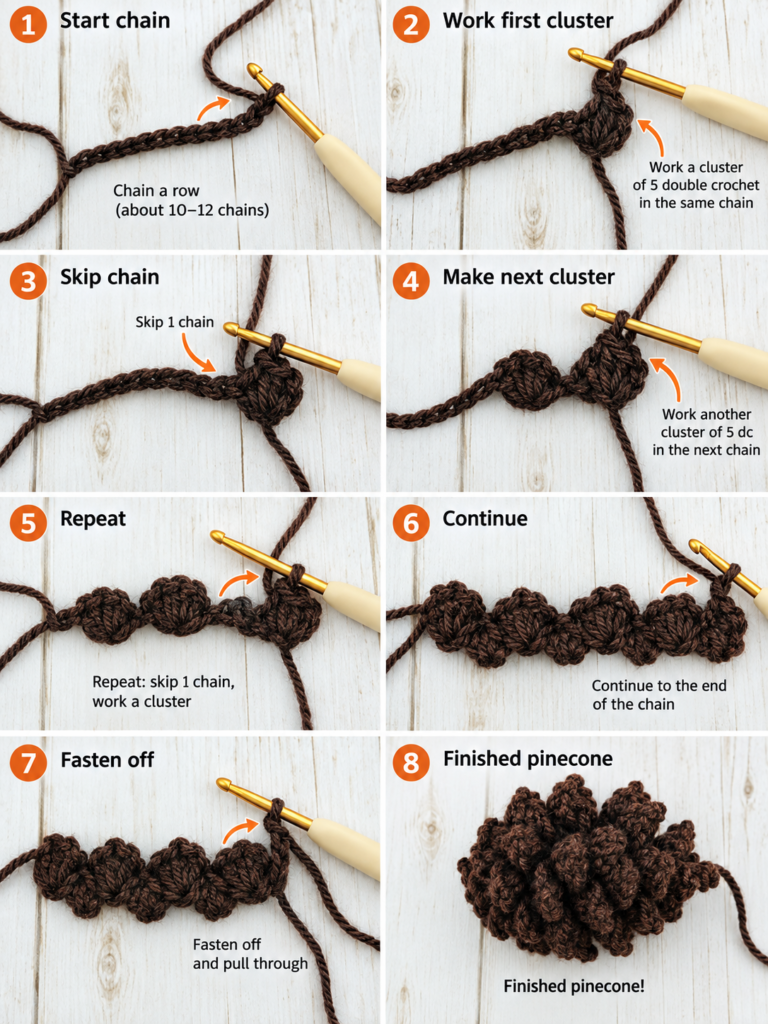
Repeat Steps 1–7 until you have five pinecones.
Before attaching anything, arrange the five motifs in a row.
Check their scale direction and overall size.
Handmade motifs rarely measure identically, and that is fine. If one pinecone is a little larger, put it in the center of the garland and place the smaller ones toward the ends.
For an organic woodland look, you can also alternate two brown shades.
Step 9: Crochet the Garland Cord
Switch to sage green yarn.
Make a slip knot.
First hanging loop
Ch 12.
Sl st into the first chain to create a small loop.
This becomes one hanging end.
Main cord
Continue chaining until the straight portion of the garland measures approximately 36–40 inches, or your preferred finished length.
Do not rely entirely on a chain count because yarn, hook size, and personal tension dramatically affect the measurement.
Second hanging loop
At the opposite end:
Ch 12, then sl st into the chain at the base of those 12 chains to create a second loop.
Fasten off and weave in the ends.
Lay the cord flat.
Arrange your five pinecones before sewing:
- One at the center.
- Two approximately 6–7 inches to either side.
- Two more approximately 6–7 inches farther outward.
Adjust visually before attaching them.
Attaching each pinecone
Thread the remaining brown tail from the top of the pinecone onto your tapestry needle.
Pass the needle around one or two sage chain stitches.
Pass it back through the dense center at the top of the pinecone.
Repeat once.
Knot discreetly against the back of the motif if necessary, weave the tail into the pinecone, and trim.
The pinecones should hang freely rather than being squeezed tightly against the cord.
Step 10: Hang and Adjust the Garland
Lift the finished garland by both end loops rather than by the pinecones.
Hang it temporarily and step several feet away.
This is the easiest way to spot uneven spacing.
Slide or re-sew a motif if necessary.
You can also rotate individual pinecones so their fullest scale section faces forward.
Once everything looks balanced, your garland is ready.
Pattern Notes or Stitch Notes
Foundation
Standard pinecone:
Ch 19, leaving 18 chains available after skipping the first chain.
Scale distribution
- 5 small scales
- 8 full scales
- 5 small scales
Small scale
Work in one foundation chain:
sc, ch 2, sl st in second ch from hook, hdc, sc
Full scale
Work in one foundation chain:
sc, ch 2, sl st in second ch from hook, 2 hdc, sc
Turning chain
There is no turning chain because the entire pinecone strip is worked in one direction along the foundation.
Stitch count
Do not count conventional row stitches after the scale row. Instead, count 18 finished scale groups.
Repeat
One scale group is completed in each unused foundation chain.
Right side
The side with the most prominent picots and raised scale texture faces outward while rolling.
Wrong side
The flatter foundation area remains mostly hidden inside the finished pinecone.
Size adjustments
For a smaller motif, remove 2–4 foundation chains and reduce the number of full middle scales.
For a larger pinecone, add 2–4 chains and concentrate the added scale groups near the middle.
Because yarn and tension can change the curl significantly, make one test motif before producing a complete resized garland.
Common Beginner Mistakes
1. Making the starting chain too tight
If several stitches have to fit into one chain, a tight foundation quickly becomes frustrating.
Fix: Remake only the chain with a hook 0.5 mm larger, then switch back to the project hook.
2. Crocheting into the picot instead of the next foundation chain
Once the scales begin crowding together, the original chain can become difficult to see.
Fix: Pull the finished scale upward and look directly underneath it. The next unused V is your next foundation chain.
3. Thinking the curling means something went wrong
The strip will not remain flat.
Fix: Do nothing. The extra stitches intentionally force the fabric to curl.
4. Losing the middle-scale count
If the middle section is too short, the finished motif may not have enough fullness.
Fix: Use markers to divide the foundation into 5 / 8 / 5 sections before beginning.
5. Closing the picot in the wrong place
A loose chain loop instead of a compact point makes the scale look soft.
Fix: After ch 2, slip stitch into the second chain from the hook.
6. Rolling the wrong side outward
The finished pinecone can look flatter than expected.
Fix: Before assembly, identify the side where the picots project most clearly and keep that side facing you while rolling.
7. Rolling everything on one flat plane
That produces a flower-like spiral.
Fix: Shift each successive coil slightly upward so the spiral becomes three-dimensional.
8. Sewing across the visible scale tips
This flattens the texture.
Fix: Secure the foundation and hidden center layers instead.
9. Attaching pinecones before checking the garland spacing
Small differences become obvious after hanging.
Fix: Arrange every motif on the finished cord first and measure before sewing anything permanently.
How to Customize This Crochet Project
Change the yarn
Cotton produces crisp stitch definition.
A smooth acrylic creates a softer, lighter pinecone.
A wool blend can create a particularly cozy woodland look.
Avoid very fuzzy novelty yarn for your first version because it can make individual chains and picots difficult to identify.
Change the colors
For fall decor, try:
- Caramel
- Terracotta
- Deep rust
- Chocolate
- Olive green
For Christmas:
- Chocolate brown
- Cream
- Forest green
- Burgundy
- Antique gold accents
For Scandinavian neutral decor:
- Oatmeal
- Taupe
- Warm gray
- Ivory
Change the size
The easiest way to resize the pinecones is to change yarn weight and hook size rather than dramatically rewriting the pattern.
A DK yarn with an appropriately smaller hook makes daintier ornaments.
A thicker worsted or bulky yarn creates larger statement pinecones.
The Craft Yarn Council’s yarn-weight system can help you identify the general category of a substitute yarn, but yarns within one category are not automatically identical in behavior.
Change the garland length
Make:
- 3 pinecones for a mini shelf garland.
- 5 for a small mantel or mirror.
- 7–9 for a larger fireplace.
- 12 or more for a staircase or long wall.
Measure the actual decorating area rather than relying only on a standard chain count.
Add greenery
Small crochet leaves, pine needles, or simple sage-green chains can be stitched between the cones.
Keep greenery relatively sparse so it does not hide the pinecone texture.
Add wooden beads
Natural wooden beads between motifs can make the garland feel more rustic.
If the garland will be accessible to babies or very young children, omit loose beads or other detachable small parts.
Use the pinecones individually
One pinecone can become:
- A Christmas ornament
- A gift topper
- A napkin-ring decoration
- A wreath accent
- A fall table decoration
- A woodland nursery mobile component, provided all hanging and safety considerations are handled appropriately
- A bag charm when firmly secured
Finishing Instructions
Inspect each motif before weaving in the final ends.
Pull gently on the outer scales. Nothing should loosen.
If the center feels unstable, add one more hidden stitch through two or three inner spiral layers.
Weave yarn tails through the dense center rather than directly underneath a thin decorative scale.
Blocking
Do not aggressively block the pinecones.
Their dimensional curl is necessary.
If one scale is folded badly, lightly dampen only that scale, shape it between your fingers, and allow it to dry naturally.
Washing and care
Follow the care instructions printed on the yarn label.
For decorative garlands, gentle spot cleaning is usually preferable to frequent washing because repeated agitation can alter the three-dimensional shaping.
Store the garland loosely rather than crushing the pinecones flat under heavier decorations.
Quick Printable-Style Summary
Skill level: Easy / confident beginner
Finished project: Five-pinecone garland approximately 36–40 inches long, adjustable
Yarn: Medium #4 brown plus small amount of sage green
Hook: 4.0 mm
Other materials: Scissors, tapestry needle, markers, measuring tape
Stitches: ch, sc, hdc, sl st, ch-2 picot
Starting method: Leave 12-inch tail; ch 19
Scale sequence:
5 small scales → 8 full scales → 5 small scales
Small scale:
sc, ch 2, sl st in second ch from hook, hdc, sc — all in one foundation chain
Full scale:
sc, ch 2, sl st in second ch from hook, 2 hdc, sc — all in one foundation chain
Assembly:
Roll the curled strip into a tapered spiral with scales facing outward. Sew through hidden inner layers.
Garland:
Make two ch-12 end loops and a central chain approximately 36–40 inches long.
Repeat:
Make five pinecones and attach evenly.
Finishing:
Weave ends through the dense center, adjust scales, and hang without blocking flat.
FAQ
Is this crochet pinecone garland pattern suitable for beginners?
Yes, provided you already know—or are willing to practice—chains, single crochet, half double crochet, and slip stitch.
There are no complicated amigurumi rounds or invisible decreases in this version.
The main new skill is working several stitches into one foundation chain and understanding that the resulting curl is intentional.
What yarn is best for crochet pinecones?
A smooth medium-weight yarn is the easiest choice.
Cotton and cotton blends provide particularly clear stitch definition, while firmer acrylic yarns also work well.
Avoid extremely limp yarn if you want pronounced scales.
Do I need to stuff the pinecones?
No.
The spiral construction gives the pinecones their volume.
If your tension is very loose, you can place a tiny amount of scrap yarn in the hidden center before completely securing the coil, but it should not be necessary.
Why is my crochet strip curling so much?
Because multiple stitches are being worked into every foundation chain.
That extra fabric has nowhere to lie flat, so it curls.
For this pattern, that is a design feature rather than a mistake.
How many pinecones should I make for a garland?
Five works well for a short decorative garland.
For a mantel, seven or nine may give a fuller effect.
The best number depends on the width of the area where it will hang.
Can I make the pinecones in different sizes?
Yes.
The simplest approach is to change yarn weight and hook size.
You can also adjust the number of scale groups, but make one test cone first so you can check the proportions before crocheting the entire set.
Can I use this pattern for Christmas decorations as well as fall decor?
Yes.
Brown pinecones with forest-green cord work naturally for Christmas, while caramel, rust, sage, and tan create a softer autumn palette.
The same motifs also work as individual ornaments or wreath accents.
Conclusion
This crochet pinecone garland is a useful project for learning how crochet fabric can be shaped without complicated construction. A simple foundation chain becomes textured scales, the extra stitches create their own curl, and the curled strip becomes dimensional when it is rolled and secured.
Make the first pinecone slowly and pay attention to where each scale is placed. By the second or third motif, the repeated rhythm becomes much easier.
Once your five pinecones are finished, you can keep the garland simple with a sage chain or expand it with crochet greenery, small bows, neutral beads, or alternating brown shades.
Save the pattern for fall and Christmas crafting, because the same little pinecones can easily be reused for ornaments, wreaths, gift toppers, or woodland-themed decorations.





