A haunted house is one of those Halloween motifs that becomes instantly recognizable with only a few simple shapes: dark walls, pointed towers, glowing windows and a crooked-looking door.
That makes it surprisingly well suited to crochet applique.
This beginner-friendly crochet haunted house applique pattern is constructed from separate flat pieces instead of complicated tapestry crochet. You will make a rectangular house, three pointed towers, a small door and a round moon, then assemble everything at the end.
It is a useful next project if you already know how to chain and single crochet but want to practice decreasing, working in rounds and sewing crochet pieces together.
The finished applique can be sewn onto a Halloween tote, pillow, wall hanging, garland or blanket. You could also mount it as seasonal wall art.
Most importantly, every major construction stage below has a planned tutorial image so a beginner can visually check the project as it grows.
Pattern originality note: The construction and instructions below are newly designed for this article. The researched source was used for visual and educational research only; its published row-by-row pattern has not been reproduced or rewritten.
What You’ll Learn
By the end of the tutorial, you will know how to:
- Crochet a flat applique in rows.
- Keep the sides of a crochet rectangle straight.
- Shape pointed roofs with simple decreases.
- Crochet matching side towers.
- Make a flat circle from a magic ring.
- Sew crochet applique pieces together neatly.
- Add simple embroidered windows.
- Block a multi-piece applique into shape.
- Resize the project without needing complicated gauge calculations.
Materials You’ll Need
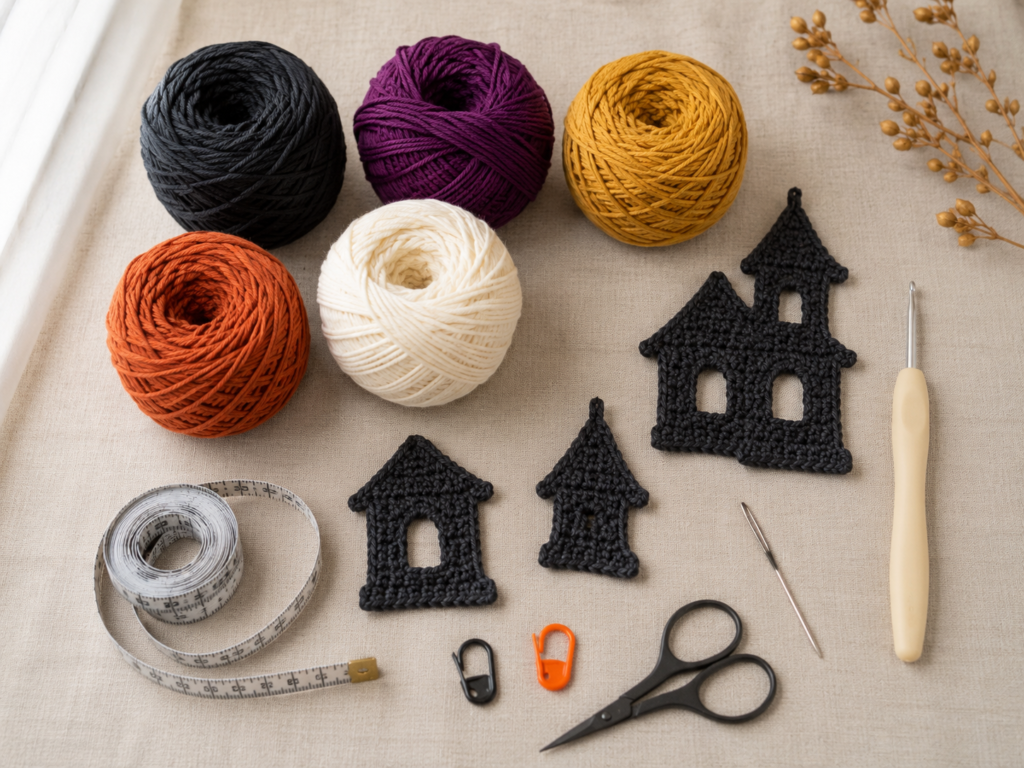
For a crisp applique, cotton works particularly well because it provides clear stitch definition and holds a blocked shape nicely.
Yarn
Use DK / Light #3 cotton yarn.
For the tutorial version:
- Charcoal black: approximately 25–30 yd / 23–27 m
- Deep plum: approximately 5 yd / 4.5 m
- Mustard gold: approximately 8–10 yd / 7–9 m
- Cream: a small scrap for an optional spider web
- Pumpkin orange: a tiny scrap for optional details
You do not have to use these exact colors. The most important thing is creating enough contrast between the dark house and the window color.
Tools
- 3.5 mm crochet hook
- Yarn needle or blunt tapestry needle
- Scissors
- Stitch markers
- Measuring tape
- Rustproof pins for blocking
- Blocking mat or folded towel
Finished size: approximately 5½ in / 14 cm wide and 5½–6 in / 14–15 cm tall, depending on tension and tower placement.
Crochet Abbreviations Used
This pattern uses US crochet terminology.
- ch = chain
- sc = single crochet
- sl st = slip stitch
- st/sts = stitch/stitches
- inc = increase; work 2 sc into the same stitch
- sc2tog = single crochet two stitches together
- RS = right side
- WS = wrong side
The Craft Yarn Council also lists standardized crochet abbreviations and the differences between US and UK terminology. For example, a US single crochet is called a double crochet in UK terminology.
Before You Start
Gauge
Gauge is not critical because this is an applique rather than a fitted garment.
As a useful reference, aim for approximately:
18 sc × 20 rows = 4 in / 10 cm
If your fabric looks loose and floppy, move down 0.5 mm in hook size. If the stitches are extremely stiff or difficult to enter, try the next hook size up.
Keep Your Foundation Chain Relaxed
A tight starting chain can pull the bottom of the house inward. Make the chain with relaxed tension.
If you naturally chain tightly, make the foundation with a 4 mm hook and switch to 3.5 mm for Row 1.
Count Your Stitches
The easiest way to keep the building straight is to count the first few rows.
Look at the top edge. Each normal single crochet creates a small V. Count those Vs rather than trying to count the vertical posts.
Turning Chains
The ch 1 at the beginning of a row does not count as a stitch in this tutorial.
Your first single crochet therefore goes into the first actual stitch.
Right Side and Wrong Side
Single crochet looks acceptable from either side, but choose one face as the RS before assembly. Put all joining tails and heavier seams toward the WS whenever possible.
Avoid Curling
Small flat crochet pieces often curl slightly.
That is normal.
Do not aggressively stretch them while crocheting. Finish the parts first, then block them before or after assembly.
Step-by-Step Crochet Tutorial
Step 1: Start the Haunted House Base
Using charcoal yarn:
Ch 27.
Beginning in the second chain from your hook:
Row 1: Sc in each chain across. [26 sc]
Ch 1 and turn.
Before continuing, count your stitches. You want exactly 26.
The house base is intentionally simple. By keeping this section rectangular, a beginner does not have to manage color changes and shaping simultaneously.
Beginner tip: Place a stitch marker in the first and last stitch of the row while you are learning. Those are the stitches most commonly skipped.
Common mistake to avoid: Do not work into the turning chain when you return across the row. Doing so will slowly increase the width of the house.
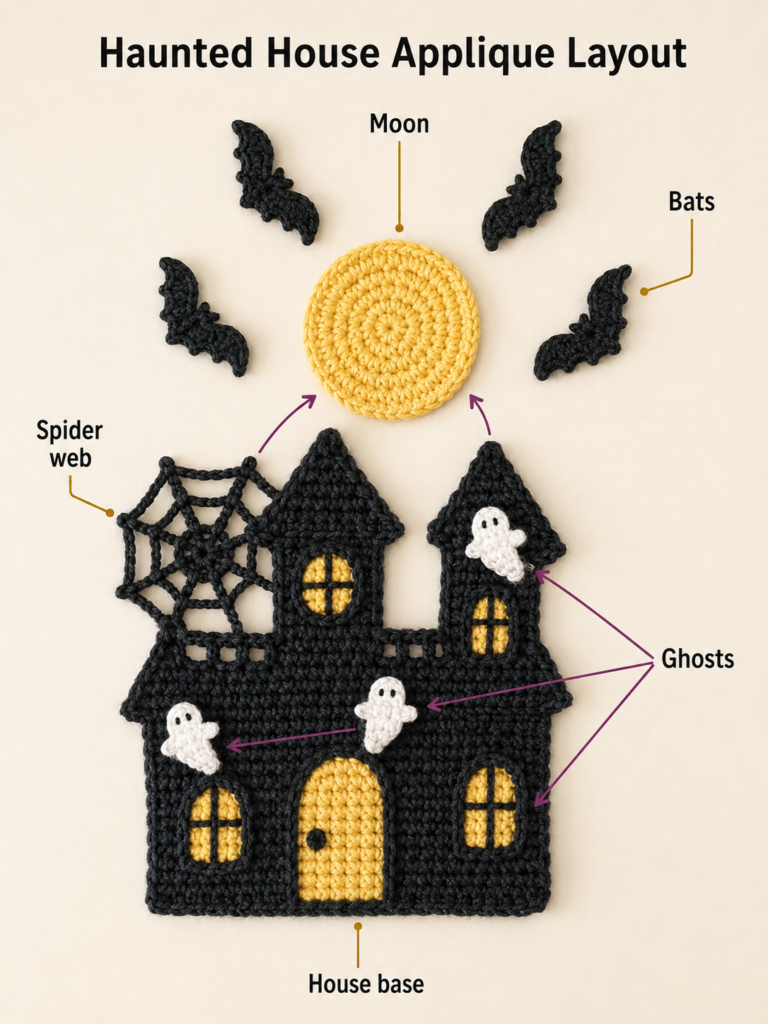
Step 2: Crochet the Main House Wall
Continue with charcoal.
Rows 2–14: Ch 1, turn. Sc in every stitch across. [26 sc]
Fasten off after Row 14.
You now have the large lower section of the house.
Try not to worry if the rectangle seems plain. The personality appears once the pointed towers, colored door and windows are added.
Lay the rectangle flat and check the sides. A difference of one or two millimeters caused by normal tension is fine. A noticeably slanted side usually means an edge stitch was added or missed.
Beginner tip: Count every second or third row rather than waiting until Row 14 to discover a stitch-count problem.
Common mistake to avoid: Working your final sc into the side of the turning chain instead of the final real stitch will gradually widen the rectangle.
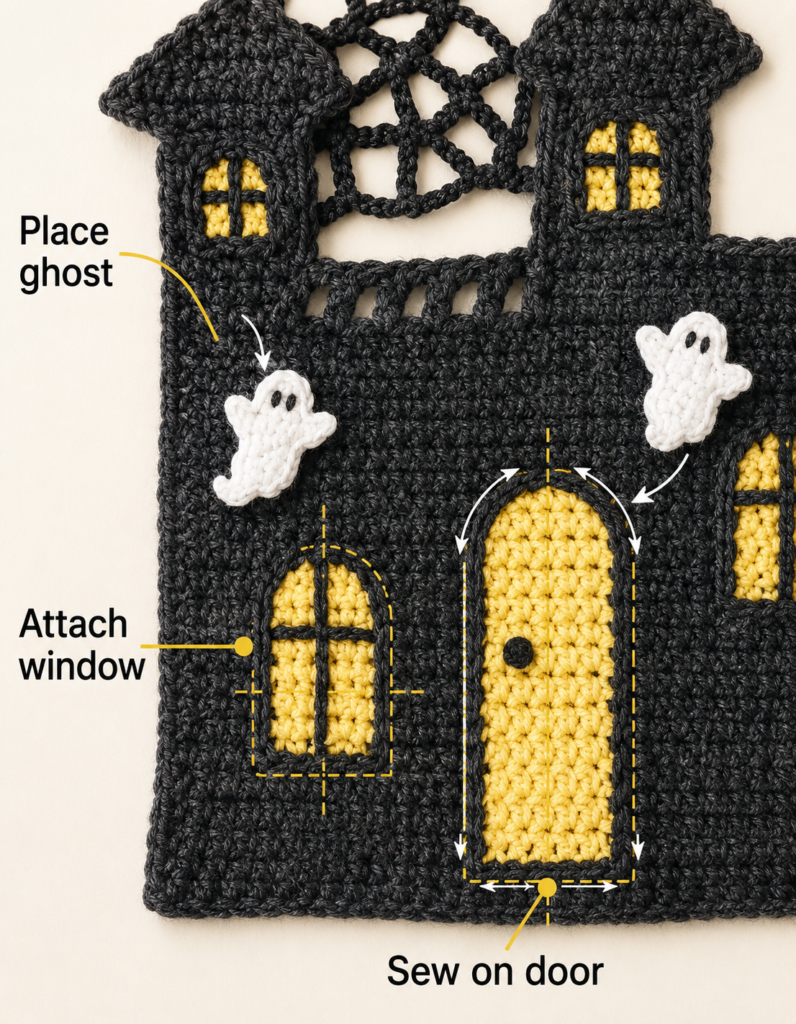
Step 3: Crochet Two Small Side Towers
Make two identical pieces.
Using charcoal:
Ch 8.
Row 1: Sc in second ch from hook and across. [7]
Rows 2–5: Ch 1, turn, sc across. [7]
Now shape the pointed roof.
Row 6: Ch 1, turn, sc2tog, sc in next 3 sts, sc2tog. [5]
Row 7: Ch 1, turn, sc2tog, sc in next st, sc2tog. [3]
Row 8: Ch 1, turn, sc2tog, sc in final st. [2]
Row 9: Ch 1, turn, sc2tog. [1]
Fasten off, leaving a tail long enough for sewing.
Repeat for the second tower.
You should now have two narrow rectangular tower bottoms topped by triangular points.
How to Work sc2tog
Insert the hook into the next stitch and pull up a loop.
Insert into the following stitch and pull up another loop.
You have three loops on the hook.
Yarn over and pull through all three loops.
Two stitches have become one.
Beginner tip: Keep the decrease relatively loose. Tight decreases can make the tip of the roof curl backward.
Common mistake to avoid: Count immediately after each decrease row. If Row 6 has six stitches instead of five, one decrease was worked incorrectly.
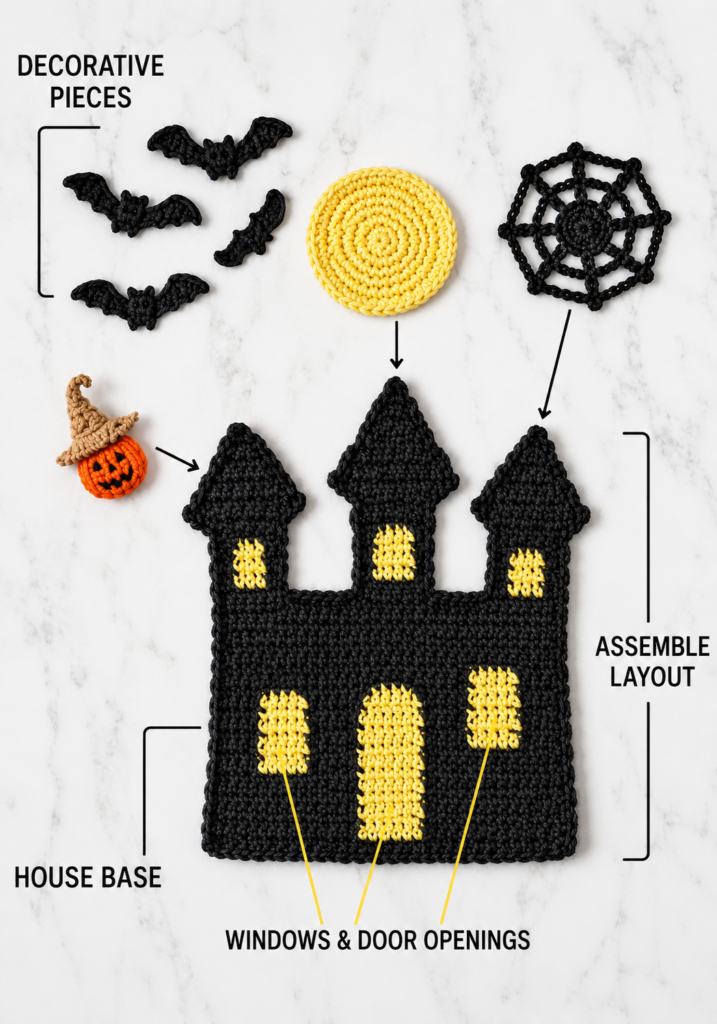
Step 4: Crochet the Center Tower
The middle tower is slightly wider and taller.
Using charcoal:
Ch 10.
Row 1: Sc in second ch from hook and across. [9]
Rows 2–7: Ch 1, turn, sc across. [9]
Begin shaping.
Row 8: Sc2tog, sc in next 5, sc2tog. [7]
Row 9: Sc2tog, sc in next 3, sc2tog. [5]
Row 10: Sc2tog, sc in next st, sc2tog. [3]
Row 11: Sc2tog, sc in final st. [2]
Row 12: Sc2tog. [1]
Fasten off with a long sewing tail.
The center tower should visibly rise above the other two.
Beginner tip: If your point leans, blocking normally fixes it. Do not keep adding extra stitches to compensate.
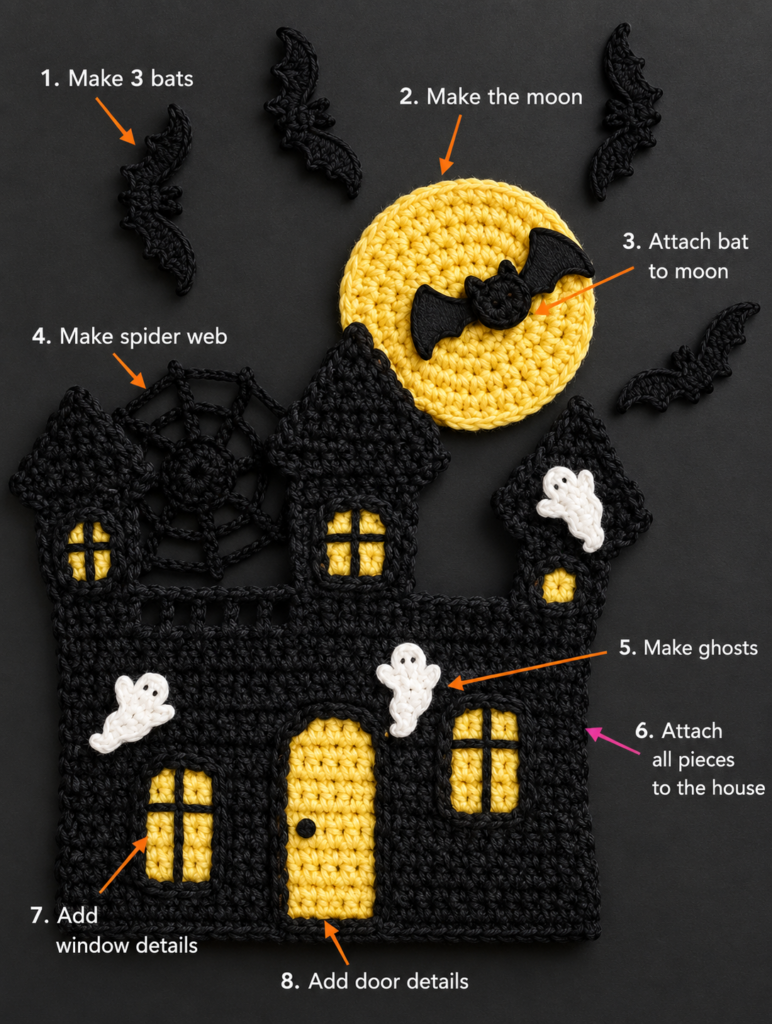
Step 5: Arrange and Sew the Towers
Place the main rectangle RS up.
Position the two small towers toward the upper left and upper right corners.
Place the taller tower approximately in the middle.
Do not sew immediately.
Move the pieces around until the spaces between the towers look balanced. A haunted house does not need perfect architectural symmetry, so you can shift the center tower slightly off center if you want a more whimsical silhouette.
Thread a tapestry needle with charcoal yarn.
Using small whip stitches from the WS whenever possible, attach each tower along the point where its lower edge overlaps the top of the house.
Avoid sewing all the way around each tower. Only the overlapping edge needs to be secured.
Beginner tip: Pin the three towers first. That stops the final tower from shifting while you sew the first one.
Common mistake to avoid: Pulling sewing stitches too tightly can pucker the main wall.
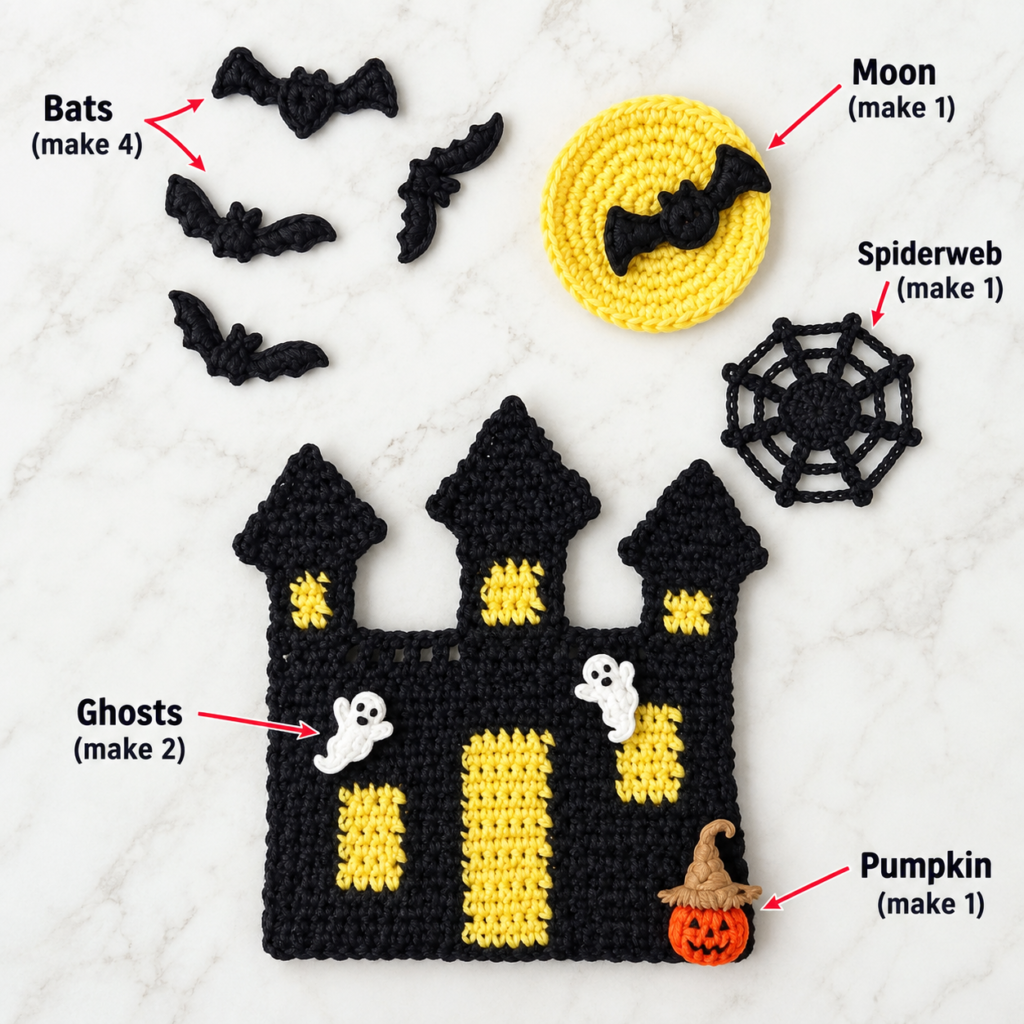
Step 6: Crochet the Purple Door
Using deep plum:
Ch 6.
Row 1: Sc in second ch from hook and across. [5]
Rows 2–7: Ch 1, turn, sc across. [5]
To create a pointed top:
Row 8: Sc2tog, sc 1, sc2tog. [3]
Row 9: Sc2tog, sc in final st. [2]
Row 10: Sc2tog. [1]
Fasten off with a long sewing tail.
Position the door toward the bottom center of your house and sew around the sides and bottom.
For a slightly crooked haunted-house look, rotate it by only a few degrees before sewing.
You can embroider a tiny pumpkin-orange knot on one side as a doorknob.
Step 7: Add the Glowing Windows
Rather than crocheting several tiny rectangles, beginners can embroider the windows directly onto the house.
Thread a tapestry needle with mustard yarn.
Create:
- One small window on each side of the lower house.
- One window on the center tower.
- Optional tiny windows on one or both side towers.
For each window, make a small block of closely spaced vertical stitches, then add one horizontal and one vertical charcoal stitch over the yellow area to suggest windowpanes.
Keep the windows slightly uneven if you want the building to feel old and spooky.
Beginner tip: Lay the applique flat on the table before making the first stitch and decide where every window will go. Photograph the arrangement with your phone if necessary.
Common mistake to avoid: Do not pull the embroidery yarn tightly enough to distort the crochet fabric.
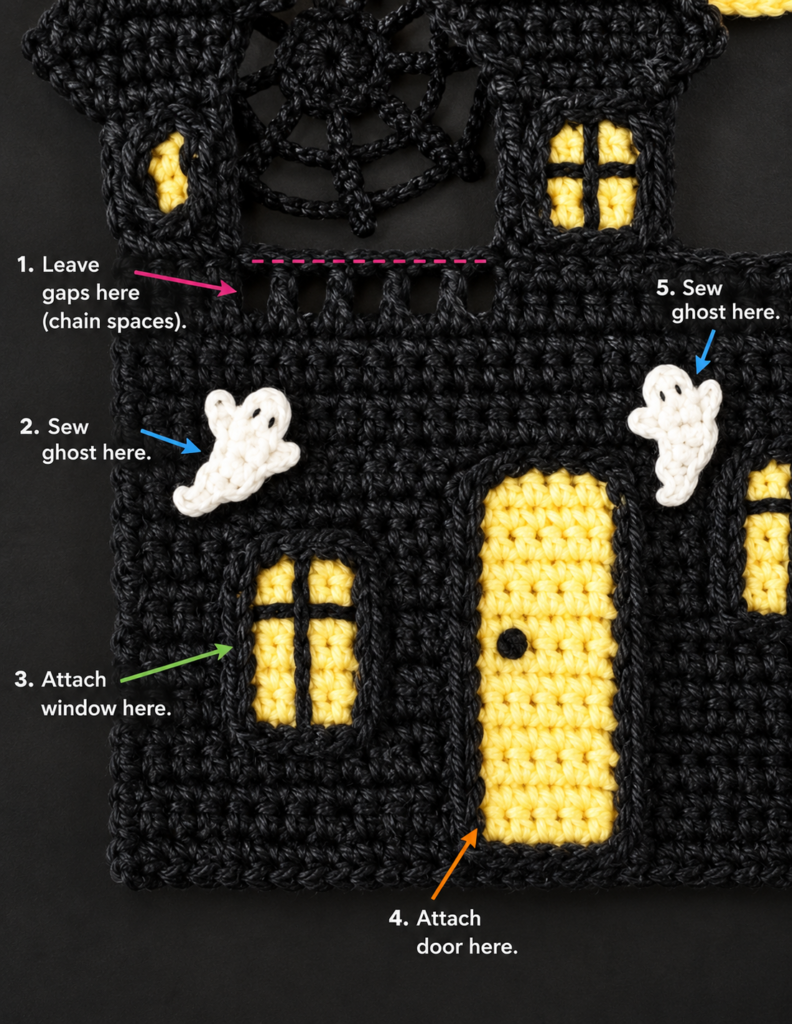
Step 8: Crochet a Small Halloween Moon
Using mustard-gold yarn, make a magic ring.
Round 1: Work 6 sc into the ring. [6]
Pull the ring closed.
Do not turn.
Round 2: Inc in every stitch around. [12]
Round 3: Sc in next st, inc in next st. Repeat around. [18]
Round 4: Sc in next 2 sts, inc in next st. Repeat around. [24]
Sl st into the next stitch.
Fasten off with a long sewing tail.
The circle may not look completely flat the second it comes off your hook. Gently smooth it with your fingers.
Place the moon partly behind the upper right tower.
Sew only the visible edge securely enough that it cannot flop backward.
Beginner tip: Put a stitch marker into the first stitch of every round. Small circles become surprisingly difficult to count without one.
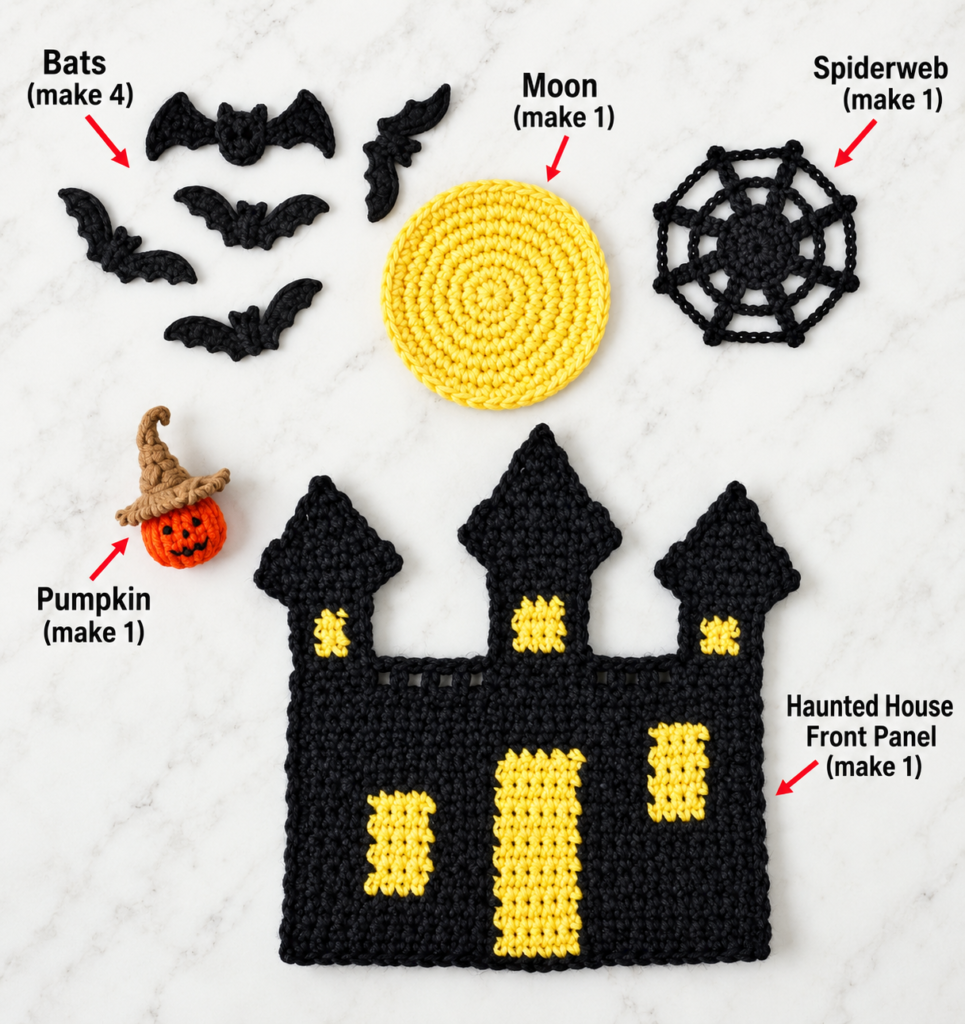
Step 9: Add an Optional Spider Web
A spider web is optional, but it fills the space between the towers nicely.
For the easiest beginner version, embroider rather than crochet it separately.
Use cream yarn or thin cotton thread.
Make three or four straight spokes radiating from a central point.
Next, weave two shallow curved lines between those spokes.
Do not pull tightly. The web should sit on the surface instead of gathering the towers together.
You can also leave this step out completely and add a tiny crochet bat, star or pumpkin instead.
Step 10: Weave In Ends and Block the Applique
Turn the applique over.
Weave each yarn tail through several stitches on the WS, change direction and weave through a few more stitches before trimming.
For cotton:
- Lightly dampen the entire applique.
- Lay it flat.
- Pin the lower house edge straight.
- Pin each tower tip into the shape you want.
- Smooth the moon into a circle.
- Allow everything to dry completely.
Do not stretch the house wider than its natural size. Blocking should tidy the shape, not significantly enlarge it.
Once dry, remove the pins.
Pattern Notes or Stitch Notes
Turning Chain
The ch 1 used before each single-crochet row is for height only and does not count as a stitch.
Stitch Count
The main house should remain at 26 stitches through Row 14.
The tower stitch counts intentionally become smaller as the roof narrows.
Repeat Pattern
The house body repeats a very simple sequence:
Ch 1, turn, sc across.
That makes this section particularly suitable for beginners.
Right Side / Wrong Side
The project is mostly reversible before assembly. Once you decide which side is the RS, keep all visible window embroidery and door placement on that side.
Size Adjustments
Want a wider house?
Add stitches to the foundation chain.
For example, adding four stitches makes the base noticeably wider without changing the tower instructions.
Want a taller house?
Add two to four extra rows to the rectangular body before fastening off.
For a miniature applique, use sport-weight or fingering yarn and a smaller hook rather than trying to remove many pattern rows.
Common Beginner Mistakes
1. The Bottom Edge Curves Up
Cause: Foundation chain is too tight.
Fix: Restart the chain using a hook 0.5 mm larger, then return to the normal hook for Row 1.
2. The House Gets Wider as You Crochet
Cause: You are accidentally working into the turning chain.
Fix: Remember that ch 1 does not count as a stitch. Count 26 stitches at the end of every few rows.
3. One Tower Is Larger Than the Other
Cause: Different stitch counts or noticeably different tension.
Fix: Crochet both small towers during the same session and place them side by side after each shaping row.
4. The Roof Points Look Rounded
Cause: Decreases are too loose or the piece has not been blocked.
Fix: Finish the tower before judging it. A pin through the final tip during blocking creates a much cleaner point.
5. Sewing Makes the House Pucker
Cause: Assembly yarn has been pulled too tightly.
Fix: Your sewing stitches should secure the pieces without cinching the fabric.
6. The Windows Look Uneven
A haunted house can tolerate uneven windows, but random placement may look accidental rather than spooky.
Fix: Place temporary stitch markers where you want the four corners of each window before embroidering.
7. The Moon Ruffles
Cause: Your tension may be looser than expected.
Fix: Try a hook 0.25–0.5 mm smaller for the moon, or stop after Round 3 if its current size works with your house.
How to Customize This Crochet Project
Change the Yarn Colors
A haunted house does not have to be black.
Try:
- Dark navy + silver
- Deep brown + orange
- Plum + acid green
- Charcoal + lavender
- Black + hot pink
- Cream + black for a modern monochrome version
For a softer Halloween palette, use dusty lavender, muted pumpkin and sage.
Make It Larger
Use worsted #4 yarn with a larger hook.
The whole project will increase naturally without altering the stitch counts.
The Craft Yarn Council classifies DK/light worsted as category 3 and worsted/aran as category 4, which can help when comparing substitute yarns.
Change the Door
Instead of plum:
- Use burnt orange.
- Use mustard.
- Make it charcoal and outline it with cream.
- Embroider a tiny cross or crescent moon on it.
Add More Texture
For a more rustic wall, alternate regular single crochet with occasional BLO rows.
Keep those texture changes subtle. Too many raised details can make the small windows difficult to see.
Add a Border
A round of slip stitches around the bottom and side edges can give the applique more definition.
For an intentionally crooked haunted house, skip the border and allow the handmade edges to remain slightly irregular.
Use the Applique On
- Halloween trick-or-treat bags
- Pillow covers
- Fall wall hangings
- Crochet blankets
- Fabric tote bags
- Garland
- Halloween banners
- Scrapbook covers
- Handmade cards
- Framed fiber art
For anything that will be washed, sew the applique on rather than gluing it.
Finishing Instructions
Fastening Off
After your final stitch, cut the yarn leaving approximately a 6 in / 15 cm tail.
Pull the tail completely through the final loop.
Weaving In Ends
Thread the tail through the tapestry needle.
Weave it through several stitches on the WS, reverse direction once and weave again.
Trim close to the fabric without cutting a crochet stitch.
Blocking
Cotton can usually be wet blocked effectively.
Dampen the applique, reshape it and leave it pinned until completely dry.
If you substitute another fiber, follow the care recommendations on the yarn label. The Craft Yarn Council provides an overview of the standard care-symbol system used on yarn labels.
Washing and Care
If the applique is sewn to a washable project, follow the instructions for the most delicate fiber used.
Avoid aggressive wringing because it can distort the tower points.
Small-Part Safety
If you add decorative plastic buttons, beads or similar embellishments, this applique should not be used where a baby or small child could pull them off.
For children’s blankets or clothing, embroidered yarn details are the safer choice.
Quick Printable-Style Summary
Skill level: Advanced beginner / easy
Finished size: Approximately 5½–6 in
Yarn: DK / Light #3 cotton
Hook: 3.5 mm
Main stitches: ch, sc, sl st, sc2tog, inc
Starting method: Main house begins with ch 27; moon begins with a magic ring.
House: 26-sc rectangle worked for 14 rows.
Small towers: Make 2; begin with 7 sc and decrease toward a point.
Center tower: Begin with 9 sc; work taller than the side towers and decrease toward a point.
Door: Small plum single-crochet rectangle with pointed top.
Windows: Mustard yarn embroidery.
Moon: Increase from 6 to 24 sc.
Assembly: Sew towers, door and moon to house; embroider details.
Finishing: Weave in all ends and block flat.
FAQ
Is this crochet haunted house applique suitable for beginners?
Yes, provided you already know how to chain and single crochet.
The only significant new technique is sc2tog. Because the house is assembled from separate pieces, you do not need to manage complicated color changes while shaping.
Do I have to use cotton yarn?
No.
Acrylic works too.
Cotton is recommended because its stitch definition makes small architectural details easier to see and because flat cotton appliques generally block neatly.
Can I make the haunted house without the moon?
Absolutely.
The house works as a standalone applique. You could replace the moon with a small pumpkin, star, ghost or bat.
Do I need to know tapestry crochet?
Not for this version.
That is one of the major differences between this tutorial and some existing haunted-house designs. All major pieces are crocheted separately and assembled afterward.
How do I attach the applique to a tote bag?
Pin it in position first.
Thread a tapestry needle with matching yarn and sew around the outer edge using small stitches.
Secure the towers as well as the lower house so the pointed sections cannot catch on objects.
How can I make the pattern smaller?
The simplest method is to use thinner yarn and a smaller hook while retaining the same stitch counts.
Reducing rows and stitches individually can change the house proportions.
Why are my crochet tower points curling?
Small decreasing rows often curl before blocking.
Check that you are not pulling your decreases too tight, finish the piece, dampen it and pin the point straight while it dries.
Conclusion
This crochet haunted house applique is designed to give beginners the spooky Halloween look without requiring complicated tapestry crochet.
The project is built from manageable shapes, so you can stop after any section and easily see what still needs to be made. Once the charcoal house, pointed towers, purple door, glowing windows and golden moon come together, those basic single-crochet rectangles start to look much more elaborate than the techniques actually are.
Keep your first version simple. Then use the same construction to experiment with crooked windows, striped doors, different moon colors, tiny pumpkins or an embroidered ghost.
And if you make several houses in different color palettes, they would make a particularly effective Halloween garland.





