A crochet ghost doily is one of those Halloween projects that looks far more complicated than it actually needs to be.
Traditional thread doilies can involve tiny hooks, long stitch repeats, charts, and careful counting. For this version, we are keeping the spooky lace look while making the actual construction much easier to follow.
Instead of crocheting several detailed ghost motifs around a large circular centerpiece, you will make one friendly sheet-ghost shape from the top down. The rounded head is created with simple increases. The body alternates solid double crochet with airy chain-space rows, and the bottom finishes with six softly curved shells that look like the floating folds of a ghost.
The result works beautifully as Halloween table decor, a tray liner, a mantel accent, a wall decoration, or a seasonal centerpiece.
Most importantly, every major construction stage is explained separately, so you can stop, count, and compare your work before moving forward.
What You’ll Learn
In this crochet ghost doily tutorial, you will learn how to:
- Start a flat lace project with a magic ring.
- Shape a rounded ghost head using predictable increases.
- Transition from curved shaping to a straight body.
- Crochet a simple filet-inspired openwork row.
- Work back into chain spaces correctly.
- Keep a 37-stitch body consistent.
- Make evenly spaced shell stitches.
- Add an optional simple ghost face.
- Block cotton crochet so the lace opens neatly.
- Adjust yarn, hook size, color, and finished dimensions.
Materials You’ll Need
For an easy-to-see beginner version, use:
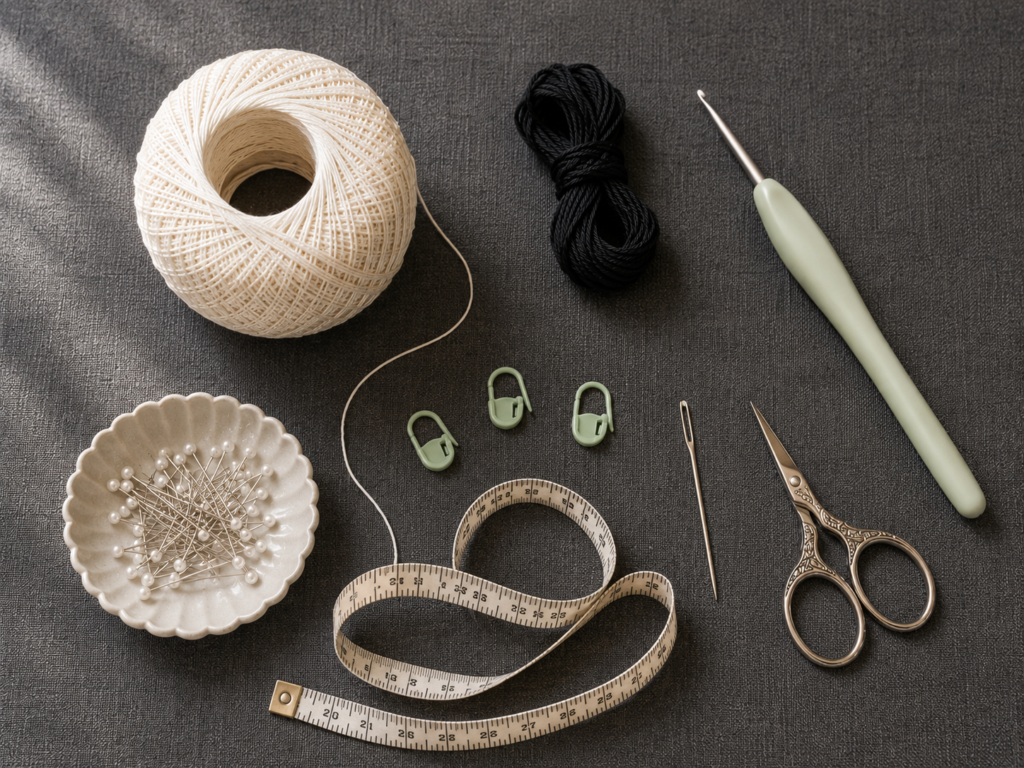
- Size 3 mercerized cotton crochet thread in natural ivory or white.
- Approximately 40–60 g of thread.
- Small amount of black cotton thread or embroidery floss for optional eyes.
- 2.5 mm crochet hook.
- Tapestry needle.
- Small sharp scissors.
- 2 stitch markers.
- Measuring tape.
- Blocking pins.
- Blocking mat or thick folded towel.
Size 3 is intentionally thicker than the size 10 thread commonly associated with traditional thread doilies. Crochet thread becomes finer as its number increases, and steel-hook sizing also follows a different numbering convention from regular hooks.
Crochet Abbreviations Used
This tutorial uses US crochet terminology.
- MR = magic ring
- ch = chain
- sc = single crochet
- dc = double crochet
- sl st = slip stitch
- st/sts = stitch/stitches
- sp = space
- rep = repeat
- inc = increase by working 2 dc into the same stitch
- RS = right side
- WS = wrong side
These follow standard US crochet abbreviations such as ch, sc, dc, sl st, sp, and st. The Craft Yarn Council also notes that US single crochet corresponds to UK double crochet, while US double crochet corresponds to UK treble crochet.
Before You Start
Gauge and tension
Gauge is not critical for decorative doilies because the project does not need to fit a body.
What matters is flatness.
Your double crochet stitches should feel relaxed rather than tight, and your chain spaces should remain open enough to see clearly.
If the fabric cups upward strongly, your hook may be too small or your tension too tight.
If the fabric forms obvious ripples, your tension may be unusually loose.
Counting stitches
The most important stitch counts in this pattern are:
- Row 1: 7 dc
- Row 2: 14 dc
- Row 3: 21 dc
- Row 4: 28 dc
- Row 5: 31 dc
- Row 6: 34 dc
- Row 7 onward: 37 stitch positions
Place a removable marker in the first and last stitch if you have difficulty identifying turning chains.
Turning chains
A beginning ch 3 counts as one double crochet.
On mesh rows, ch 4 counts as one double crochet plus one chain space.
Remembering that rule prevents accidental extra stitches at the edges.
Right side and wrong side
Row 1 is the right side.
Because the piece is turned after every row, odd-numbered rows face the right side and even-numbered rows face the wrong side.
The finished doily is visually attractive from either side.
Color choice
Classic white and natural ivory are easiest to photograph and make the ghost recognizable immediately.
Other good Halloween options include:
- Pale gray
- Foggy lavender
- Glow-in-the-dark thread
- Soft sage
- Black for a dramatic silhouette
For your first doily, a light solid color makes stitch counting much easier than dark or variegated thread.
Step-by-Step Crochet Tutorial
Step 1: Make the Top Center
Create a magic ring.
Row 1: Ch 3. The ch 3 counts as your first dc.
Work 6 dc into the magic ring.
You now have 7 dc total.
Pull the starting tail until the center closes neatly, but do not pull so tightly that the stitches bunch together.
Turn.
This little fan is the very top of your ghost.
Beginner tip: Count the turning chain as stitch number one before counting the six actual dc stitches.
Common mistake to avoid: Do not add another dc because the turning chain “doesn’t look like a stitch.” If you do, every later increase row will have too many stitches.
Step 2: Build the Rounded Ghost Head
Now increase evenly to create a semicircle.
Row 2 — 14 dc
Ch 3 and turn.
Work 1 dc in the same first stitch.
Work 2 dc in every remaining stitch.
You should finish with 14 dc.
Row 3 — 21 dc
Ch 3 and turn.
Dc in the same first stitch, dc in the next stitch.
Then repeat:
2 dc in next st, 1 dc in next st
across the row.
You should have 21 dc.
Row 4 — 28 dc
Ch 3 and turn.
Dc in the same first stitch.
Dc in each of the next 2 stitches.
Repeat:
2 dc in next st, dc in next 2 sts
across.
Finish with 28 dc.
The fabric should now resemble a tidy rounded fan rather than a flat rectangle.
Beginner tip: After every increase row, spread the piece gently on your table. You are checking for a smooth curve, not forcing it flat.
Common mistake to avoid: Putting increases randomly can create corners. Follow the spacing consistently.
Step 3: Widen the Shoulders
Instead of continuing the aggressive semicircle increases, we now add only three stitches per row.
This gradually changes the shape from a round head to a wider flowing sheet.
Row 5 — 31 dc
Ch 3 and turn.
Dc in the same first stitch.
Dc in next 8 sts.
Work 2 dc in next st.
Dc in next 8 sts.
Work 2 dc in next st.
Dc in the final 9 sts.
31 dc total.
Row 6 — 34 dc
Ch 3 and turn.
Dc in same first st.
Dc in next 9 sts.
2 dc in next st.
Dc in next 9 sts.
2 dc in next st.
Dc in final 10 sts.
34 dc total.
Row 7 — 37 dc
Ch 3 and turn.
Dc in same first st.
Dc in next 10 sts.
2 dc in next st.
Dc in next 10 sts.
2 dc in next st.
Dc in final 11 sts.
37 dc total.
Stop increasing after this row.
Beginner tip: Write 31, 34, and 37 on a scrap of paper and physically check each row before continuing.
Common mistake to avoid: If your Row 7 has 36 or 38 stitches, correct it now. The shell edging later is designed around 37 stitch positions.
Step 4: Crochet the First Openwork Row
Now we begin the lace.
Row 8 — Mesh Row
Ch 4 and turn.
The first 3 chains count as your first dc, and the fourth chain creates the first ch-1 space.
Skip the next stitch.
Dc in the following stitch.
Then repeat:
ch 1, skip 1 st, dc in next st
across the row.
Because you began with 37 stitch positions, the row finishes neatly with a dc in the last stitch.
You should see alternating vertical dc columns and small square openings.
Beginner tip: Think of each chain space as occupying one stitch position. That makes the next row much easier to count.
Common mistake to avoid: Do not crochet into the skipped stitches. They are intentionally left unworked to create the lace openings.
Step 5: Fill the Mesh With a Solid Row
Row 9 — Solid Row
Ch 3 and turn.
The ch 3 counts as your first dc.
Now work 1 dc in every dc and 1 dc into every ch-1 space across.
You should return to 37 dc positions.
Working into the chain space instead of trying to find the individual chain loop makes the row cleaner and faster.
At the end, stop and count again.
Beginner tip: If you can clearly distinguish vertical dc posts from the open spaces, this row becomes almost automatic: post, space, post, space.
Common mistake to avoid: Do not place both a dc in the chain itself and another dc in the chain space. You only need one stitch for that position.
Step 6: Repeat the Lace Body
You now have the repeat for the main body.
Row 10
Repeat Row 8 — mesh.
Row 11
Repeat Row 9 — solid.
Row 12
Repeat Row 8 — mesh.
Row 13
Repeat Row 9 — solid.
Maintain 37 stitch positions throughout.
By the end of Row 13 you will have three openwork bands separated by solid double crochet rows.
The open rows give the doily its lightweight lace appearance while the solid rows keep the ghost recognizable from across a room.
If you want a longer ghost, you can add two more rows:
- One additional mesh row.
- One additional solid row.
Always end with a solid 37-dc row before making the bottom shells.
Beginner tip: Photograph the piece after each solid row. Comparing the photos makes it surprisingly easy to spot an accidentally narrowed edge.
Common mistake to avoid: Do not accidentally work into the side of the turning chain. Your first stitch position is already represented by the turning chain.
Step 7: Make the Floating Ghost Hem
The bottom waves are made with six simple shell stitches.
Row 14 — Shell Edge
Ch 1 and turn.
Sc in the first stitch.
Then repeat the following sequence 6 times:
Skip 2 sts, work 5 dc in next st, skip 2 sts, sc in next st.
The pattern consumes all 37 stitch positions exactly:
- 1 beginning sc
- 6 repeats × 6 stitch positions
The six shells create the loose, wavy lower edge that gives the project its floating-sheet shape.
Fasten off if you do not want a side border.
Beginner tip: Before crocheting each shell, identify the two stitches you will skip, the center stitch receiving the five dc, and the two stitches you will skip afterward.
Common mistake to avoid: Five dc must go into one stitch, not one dc into each of five stitches.
Step 8: Neaten the Sides and Add the Face
The side edging is optional, but it makes the silhouette look more polished.
Join ivory thread at one lower corner.
Work single crochet evenly up the side edge.
A useful starting rule is approximately 2 sc around each exposed double-crochet row end.
When you reach the tiny starting-ring area at the top of the ghost, work 3 sc around the exposed ring edge to soften the point.
Continue down the opposite side.
Do not force an exact stitch count here.
The goal is simply a smooth outline.
If the edge ripples, remove a few stitches.
If the edge pulls inward, add an occasional extra sc.
Fasten off.
Optional eyes
Thread a tapestry needle with black cotton thread.
Position two small vertical oval eyes in the solid section below the rounded head.
Keep the embroidery flat.
Three or four small straight stitches for each eye are enough.
Do not add bulky beads if you plan to use the doily underneath plates, candles, or serving pieces.
Beginner tip: Pin two temporary black thread scraps in place before embroidering. Move them until the expression looks balanced.
Common mistake to avoid: Large eyes can overpower delicate lace. Start smaller than you think you need.
Pattern Notes or Stitch Notes
Turning-chain rule
- Ch 3 counts as dc.
- Ch 4 on mesh rows counts as dc + ch 1.
Important stitch counts
- Row 1: 7
- Row 2: 14
- Row 3: 21
- Row 4: 28
- Row 5: 31
- Row 6: 34
- Rows 7–13: 37 stitch positions
Repeat pattern
After reaching 37 stitches:
- Mesh row
- Solid row
- Mesh row
- Solid row
- Mesh row
- Solid row
Right side / wrong side
Row 1 is RS.
Odd rows are RS; even rows are WS.
Because this is decorative lace, both sides remain presentable.
Size adjustments
For a longer ghost, repeat one mesh row plus one solid row before the shell edging.
For a larger ghost overall, switch to thicker cotton yarn and a hook appropriate to that yarn.
For a smaller traditional thread version, use finer crochet thread and a smaller hook.
Remember that hook numbers can differ between steel and conventional hooks, so metric millimeters are the clearest comparison.
Common Beginner Mistakes
1. Forgetting that the turning chain counts as a stitch
This is the most common reason the edges grow wider.
Fix: Place a stitch marker in the top of every beginning ch 3 until you can identify it easily.
2. Increasing in the wrong places
Uneven increases can make the rounded head develop visible corners.
Fix: Count each repeat before moving to the next one.
3. Losing stitch positions in mesh rows
It is easy to treat chain spaces as “nothing.”
Fix: Remember that every ch-1 space replaces one skipped stitch.
4. Making chains too tight
Tight chains pull the mesh inward and can make the body hourglass-shaped.
Fix: Form chain stitches with slightly more relaxed tension than your dc stitches.
5. Adding stitches at the ends
Some beginners crochet into the same first stitch after the ch 3 even when no increase is required.
Fix: After Row 7, the ch 3 alone represents the first stitch.
6. Working the shells over the wrong number of stitches
Your bottom waves will not finish evenly if you lose track of the skip-two sections.
Fix: Count 37 stitches immediately before Row 14.
7. Judging the lace before blocking
Fresh crochet thread often looks slightly twisted or uneven.
Fix: Finish the entire piece and block it before deciding whether the shape is wrong.
How to Customize This Crochet Project
Change the yarn
Mercerized cotton produces crisp stitches and excellent definition.
For a softer decorative ghost, try sport-weight cotton.
For an oversized ghost placemat, use DK cotton and a larger hook.
Change the color
Natural ivory creates a vintage doily appearance.
Bright white feels cleaner and more graphic.
Pale gray creates a misty Halloween look.
Soft lavender works especially well for whimsical Halloween decor.
Glow-in-the-dark yarn can make the project especially fun for seasonal displays.
Change the length
Add extra pairs of mesh and solid rows before Row 14.
Always finish the body with a solid row before starting the shells.
Add a different border
Instead of 5-dc shells, you could experiment with:
- 7-dc shells for deeper waves.
- Small chain loops.
- Simple picots.
- Alternating small and large shells.
Keep in mind that modifying the border may require a different body stitch count.
Make a set
Try producing:
- One large centerpiece.
- Two smaller matching ghosts.
- Mini ghost coasters.
- A matching pumpkin doily.
- Ghost appliqués for napkin rings.
- Halloween table mats in alternating white and gray.
Finishing Instructions
Fasten off
After your final edging stitch, cut the thread leaving approximately 5–6 inches.
Pull the tail completely through the active loop.
Weave in the ends
Thread the tail onto a tapestry needle.
Run the needle through the backs of several nearby stitches.
Change direction once before trimming the excess.
This helps prevent slick mercerized cotton from working loose.
Wet block the doily
Blocking makes the biggest difference in the final appearance.
Lightly wet the finished piece with cool or lukewarm water.
Press excess water out gently without wringing.
Lay the ghost on a blocking mat or thick towel.
First pin:
- The top center.
- Both outer shoulder points.
- Both lower side corners.
- Each of the six shell peaks.
Then adjust the remaining pins until the openwork spaces look even and the ghost is symmetrical.
Let it dry completely before removing the pins.
Quick Printable-Style Summary
Skill level: Advanced beginner
Yarn: Size 3 mercerized cotton crochet thread
Hook: 2.5 mm
Main stitches: ch, sc, dc, shell
Starting method: Magic ring
Construction: Worked flat in turned rows from top to bottom
Head counts: 7 → 14 → 21 → 28 dc
Shoulder counts: 31 → 34 → 37 dc
Body: Alternate open mesh and solid dc rows while maintaining 37 stitch positions
Bottom edging:
Sc first st, then repeat:
skip 2, 5 dc in next st, skip 2, sc in next st
6 times.
Finishing: Optional side edging, optional black embroidered eyes, weave in ends, wet block flat.
FAQ
Is a crochet ghost doily pattern suitable for beginners?
This version is best for an advanced beginner who already knows chain and double crochet.
The actual stitches are simple. Counting, increases, turning chains, and openwork placement provide most of the challenge.
If tiny crochet thread is intimidating, starting with thicker size 3 thread makes the stitches considerably easier to see.
What yarn is best for a crochet ghost doily?
Mercerized cotton thread is an excellent choice because it produces defined stitches and holds a blocked shape well.
Traditional doilies frequently use fine crochet thread, but beginners can work with a thicker thread first.
The Craft Yarn Council notes that common crochet thread sizes include 3, 5, 10, 20 and 30, with smaller numbers representing thicker thread.
Can I use regular yarn instead of crochet thread?
Yes.
Sport or DK cotton will make a substantially larger ghost.
Use the hook recommended for your chosen yarn as a starting point, then adjust until the fabric lies flat.
Why is my ghost doily curling?
The most common causes are:
- Tight chains.
- A hook that is too small.
- Missing increases.
- Accidentally losing stitch positions.
- Judging the crochet before blocking.
First confirm your counts. If they are correct, blocking often resolves mild curling.
How do I make my ghost doily larger?
The easiest method is to use thicker cotton and a larger hook.
You can also lengthen the body by adding extra pairs of mesh and solid rows before the shell border.
Do I have to add black eyes?
No.
Leaving the doily completely ivory gives it a more traditional lace appearance.
The silhouette and scalloped bottom are enough to suggest a ghost.
Can I turn this into a Halloween placemat?
Yes, but use a thicker washable cotton and increase the hook size.
Make a test piece first to determine your finished dimensions.
Avoid bulky facial decorations so plates and glasses remain stable.
Conclusion
This crochet ghost doily pattern combines two styles that beginners do not always expect to work together: classic cotton lace and playful Halloween decor.
The construction becomes much easier when you think of it as separate jobs rather than one complicated pattern: create the curved head, widen to 37 stitches, establish the openwork repeat, make the floating shell edge, and finally block everything into shape.
Once you understand that sequence, the same approach can be adapted into smaller ghost coasters, longer wall decorations, larger placemats, or an entire set of Halloween lace projects.






I would love to see a picture of the proposed project before I begin crocheting. I see several patterns, but I think would look right, but I have no exact idea of what they look like before I begin.
Tendrán un patro, me es complicado seguir las i seducciones sin visualizar