A handmade nursery mobile can turn a few small crochet shapes into a memorable baby-shower gift. This version combines a softly curved moon, two padded stars, a three-puff cloud, and a wooden ring in a calm celestial color palette.
The project is designed for a confident beginner. Every ornament uses familiar stitches, and the more complicated-looking shapes are created with straightforward construction methods. The moon begins as a flat oval, the stars begin as simple circular centers with chain-built points, and the cloud is assembled from three small amigurumi balls.
The crochet instructions below are original and do not reproduce the selected reference pattern. The source photographs are used only to plan the educational image sequence and to identify which construction stages benefit most from visual explanation.
Important Safety Note
This crochet mobile is nursery decoration, not a baby toy. Do not place the ornaments inside the crib or allow a baby to handle the strings.
Attach the mobile securely to a suitable ceiling or wall fitting, keep every component well beyond the child’s reach, and inspect knots and seams regularly. The American Academy of Pediatrics advises removing a hanging crib mobile when a baby begins pushing up on hands and knees or reaches five months of age, whichever occurs first.
This design intentionally avoids safety eyes, buttons, beads, sequins, bells, glued decorations, and other detachable pieces.
What You’ll Learn
- How to crochet tightly stuffed shapes in continuous rounds
- How to work around both sides of a foundation chain
- How to shape a flat oval into a crescent moon
- How to build five simple star points
- How to join two flat motifs with whipstitch
- How to create a cloud from separate crochet puffs
- How to secure cords through crochet fabric
- How to distribute ornament weight around a hoop
- How to finish the project without loose embellishments
Skill Level
Confident beginner
You should be comfortable making a magic ring, working single crochet, increasing, decreasing, and sewing crochet pieces together. The first few rounds are small, so a locking stitch marker is helpful.
Finished Size
Using DK yarn and a 3.5 mm hook:
- Moon: approximately 12–14 cm tall after shaping
- Large star: approximately 8 cm from point to point
- Small star: approximately 7 cm from point to point
- Cloud: approximately 12 cm wide
- Suspension ball: approximately 4 cm wide
- Hoop: approximately 20 cm
- Overall mobile drop: adjustable
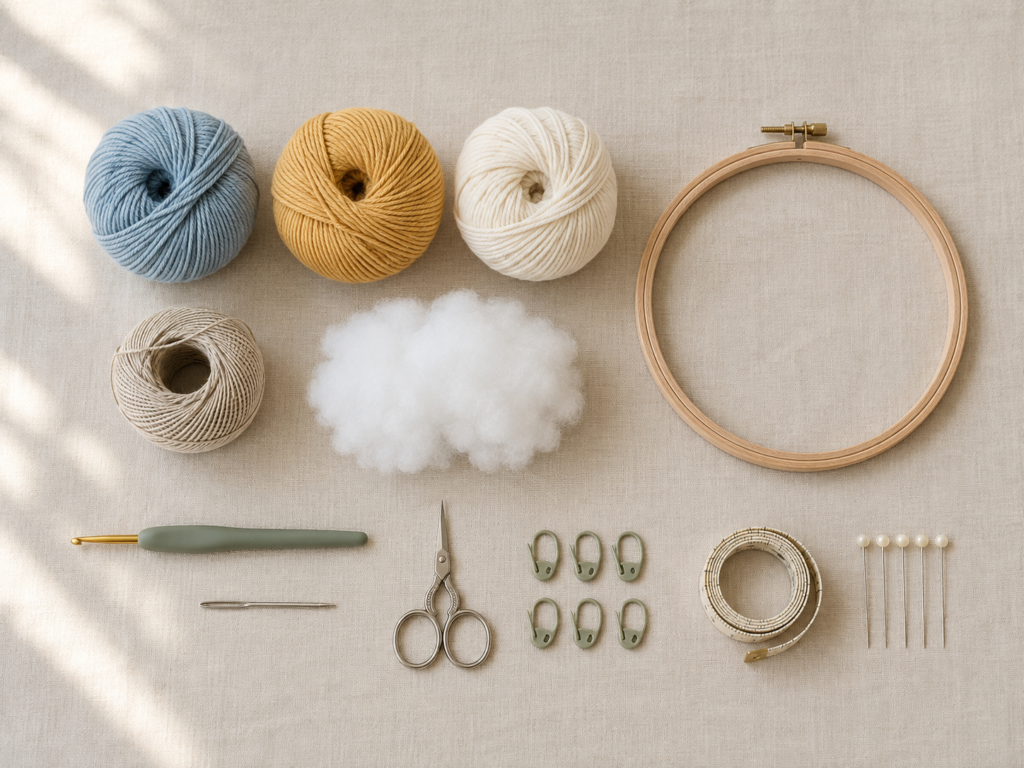
Materials You’ll Need
- DK-weight smooth cotton or cotton-blend yarn:
- Approximately 30 g dusty blue
- Approximately 25 g muted mustard
- Approximately 30 g ivory
- 3.5 mm crochet hook
- Optional 3 mm hook for the smaller star
- 20 cm natural wooden embroidery hoop or solid craft ring
- Polyester toy stuffing
- Strong natural cotton thread or smooth decorative cord
- Blunt tapestry needle
- Small scissors
- Locking stitch markers
- Sewing pins
- Measuring tape
- Temporary hanging hook or stand for balancing
Choose a smooth, plied yarn rather than fuzzy yarn. Clear stitch definition will make it easier to count the small rounds and produce cleaner seams.
Crochet Abbreviations Used
- ch = chain
- dc = double crochet
- dec = decrease
- hdc = half double crochet
- inc = increase
- MR = magic ring
- rep = repeat
- rnd = round
- sc = single crochet
- sl st = slip stitch
- st/sts = stitch/stitches
- FO = fasten off
These instructions use US terminology. In UK terminology, US single crochet is UK double crochet, US half double crochet is UK half treble, and US double crochet is UK treble. The Craft Yarn Council maintains standardized abbreviation and US/UK terminology references.
Before You Start
Gauge and tension
Exact gauge is not critical, but the fabric must be tight enough that stuffing cannot escape between stitches. Use a smaller hook if you can see large gaps.
Do not pull the yarn so tightly that inserting the hook becomes painful. Aim for compact, even stitches that still move smoothly along the hook.
Counting continuous rounds
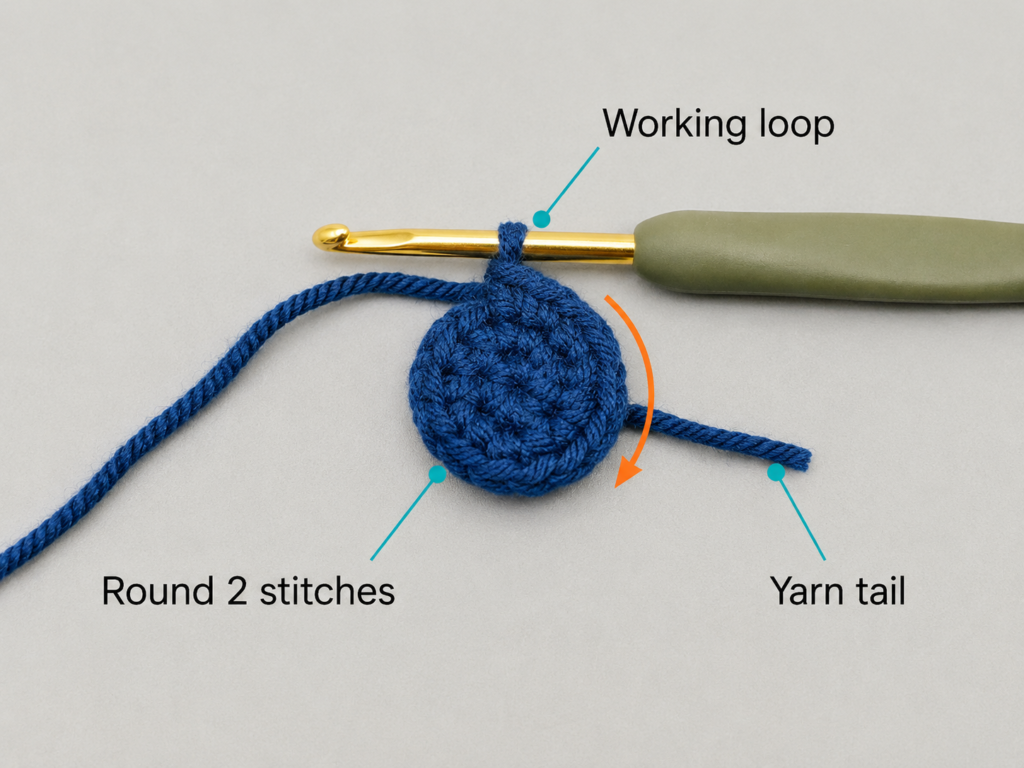
The cloud puffs and suspension ball are worked in continuous spirals. Do not join each round unless instructed.
Place a marker in the first stitch and move it upward after every round. Count the stitches before beginning the next increase or decrease sequence.
Stuffing
Add stuffing in small pieces. Large pieces create lumps and stretch the stitches.
The stars and moon should remain relatively flat. The cloud puffs and suspension ball can be firmer, but they should not feel rigid.
Choosing colors
A restrained three-color palette keeps the mobile calm and visually balanced. Good alternatives include:
- Sage, cream, and terracotta
- Lavender, ivory, and dusty rose
- Navy, warm white, and ochre
- Pale blue, oatmeal, and soft gray
Avoid yarn that fades, sheds heavily, or transfers dye.
Step-by-Step Crochet Tutorial
Step 1: Begin the Moon With a Flat Oval
With dusty-blue yarn, ch 13.
Round 1
Work 2 sc in the second ch from the hook.
Sc in each of the next 10 chains.
Work 4 sc in the final chain.
Rotate the foundation chain so you can work along its unused underside loops.
Sc in each of the next 10 chains.
Work 2 sc in the same foundation space where the round began.
Stitch count: 28 sts
Place your stitch marker in the first stitch.
The work should look like a narrow oval rather than a circle.
Beginner tip: When working along the underside of the chain, hold the foundation horizontally and look for the small remaining loop directly below each stitch.
Common mistake to avoid: Do not place all the end increases in one side of the chain. Both ends need grouped increases so the fabric lies flat.
Step 2: Enlarge the Moon Oval
Continue without joining.
Round 2
- Inc in each of the next 2 sts.
- Sc in the next 10 sts.
- Inc in each of the next 4 sts.
- Sc in the next 10 sts.
- Inc in each of the final 2 sts.
Stitch count: 36 sts
Round 3
- Rep
(sc in next st, inc in next st)twice. - Sc in the next 10 sts.
- Rep
(sc in next st, inc in next st)four times. - Sc in the next 10 sts.
- Rep
(sc in next st, inc in next st)twice.
Stitch count: 44 sts
Round 4
Sc in each stitch around.
Stitch count: 44 sts
Sl st in the next stitch and FO, leaving a tail approximately 90 cm long for seaming.
The oval should lie mostly flat. A slight wave around the outer edge is acceptable because the fabric will be folded and stuffed.
Beginner tip: Spread the oval on the table after each round. The increases should sit around the two rounded ends, not along the straight sides.
Common mistake to avoid: If the fabric forms a bowl, an increase may be missing. If it becomes heavily ruffled, an extra increase was probably added.
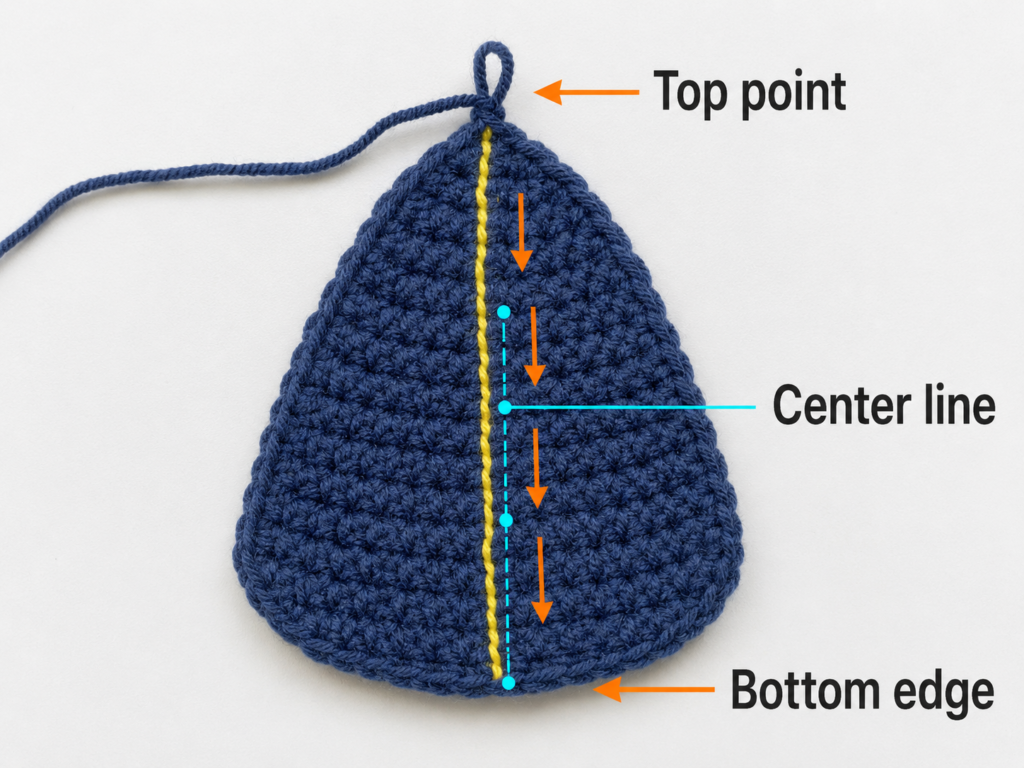
Step 3: Fold, Stuff, and Curve the Moon
Fold the oval lengthwise so the right side faces outward. Match the two halves as evenly as possible.
Thread the long yarn tail onto your tapestry needle.
Whipstitch the matched edges together, passing through one outer loop from each layer. Continue until approximately 5 cm remains open.
Add small pieces of stuffing. Keep the center softly padded and place less stuffing in the narrow ends.
Complete the seam and secure the yarn.
To create the crescent:
- Cut a separate 50 cm strand of dusty-blue yarn.
- Thread it through the tapestry needle.
- Make a running stitch along one long side of the stuffed oval.
- Keep the stitches approximately one crochet stitch apart.
- Pull the strand gradually until the inner edge curves.
- Tie the two ends securely.
- Pass both tails through the moon and trim them after they exit on the opposite side.
Gently bend the two tips toward each other.
Beginner tip: Pull the shaping strand a little at a time. It is easier to add more curve than to undo an excessively tight gathered edge.
Common mistake to avoid: Overstuffing makes the moon look like a straight capsule and prevents the inner edge from gathering smoothly.
Step 4: Crochet the First Star Panel
Use muted mustard yarn and the 3.5 mm hook.
Make an MR.
Center round
Work 10 sc into the MR. Pull the ring closed and join with a sl st in the first sc.
First point
Ch 5.
Starting in the second ch from the hook:
- Sl st in the first chain
- Sc in the next chain
- Hdc in the next chain
- Dc in the final chain
Skip the next sc of the center round.
Sl st in the following sc.
One point is complete.
Remaining points
Repeat the point sequence four more times. Each point uses two stitches from the center: one skipped stitch and one anchoring slip stitch.
After five points, join cleanly at the base of the first point and FO.
Make a second identical star panel.
Beginner tip: The stitches become taller as you move toward the star center. That height progression creates the triangular point.
Common mistake to avoid: Do not work into the back bumps of the chain unless you can do so consistently. For this small motif, working through the usual top chain loops is easier.
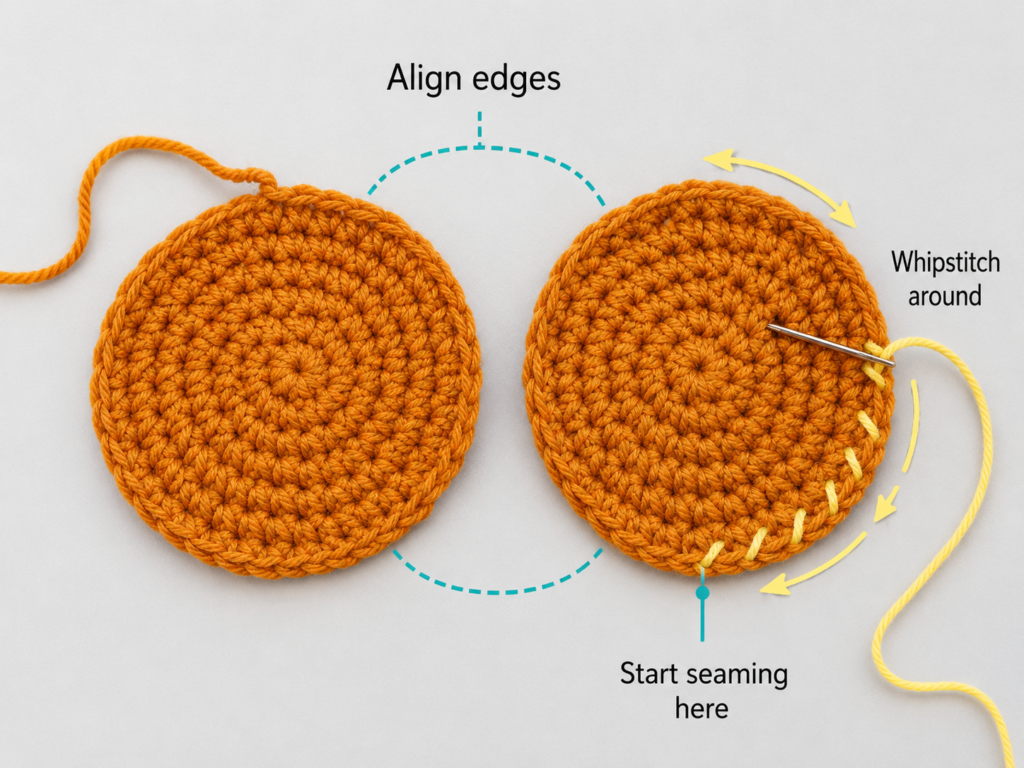
Step 6: Join and Stuff the Stars
Place two matching star panels together with the right sides facing outward.
Thread a long mustard yarn tail through the tapestry needle.
Beginning in an inward valley between two points, whipstitch the panels together. Pass the needle through corresponding edge loops on both layers.
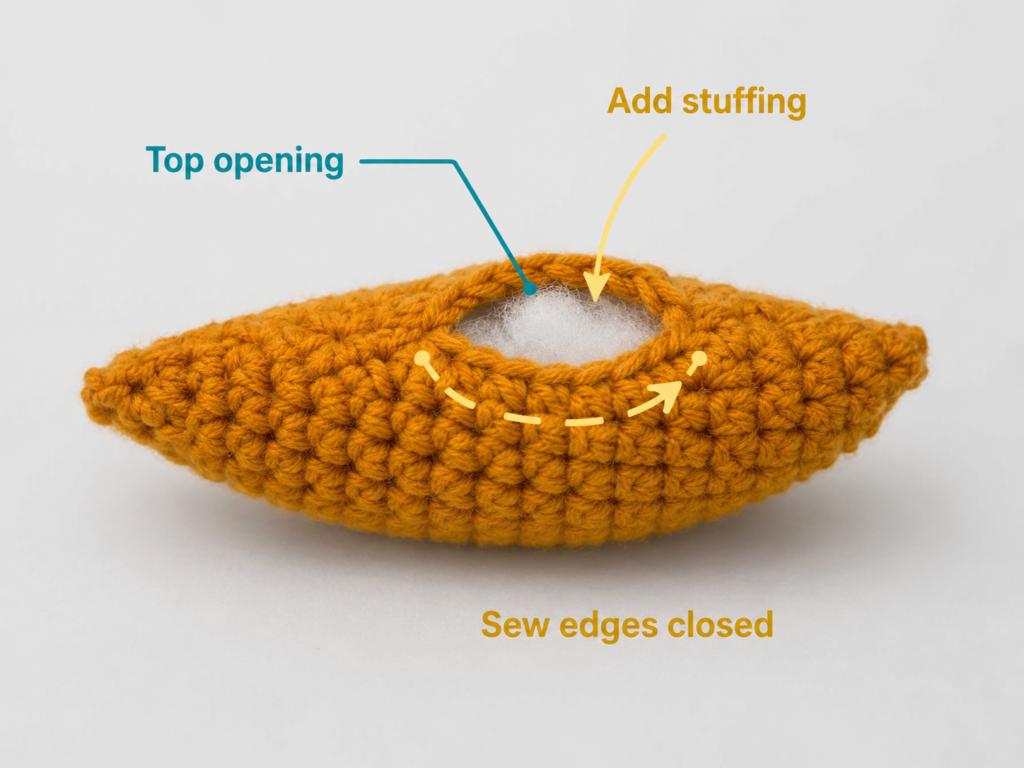
Continue around four points, but stop before closing the final point.
Add a small amount of stuffing to the center. Use the blunt end of the hook or a stuffing tool to push tiny pieces into each point.
Finish the seam and secure the yarn inside the star.
Repeat for the second star.
Beginner tip: Massage the stuffing into the points after the seam is closed. This is gentler and more accurate than forcing large pieces into the narrow tips.
Common mistake to avoid: Do not pack the star firmly. Excess stuffing rounds the points and hides the five-point silhouette.
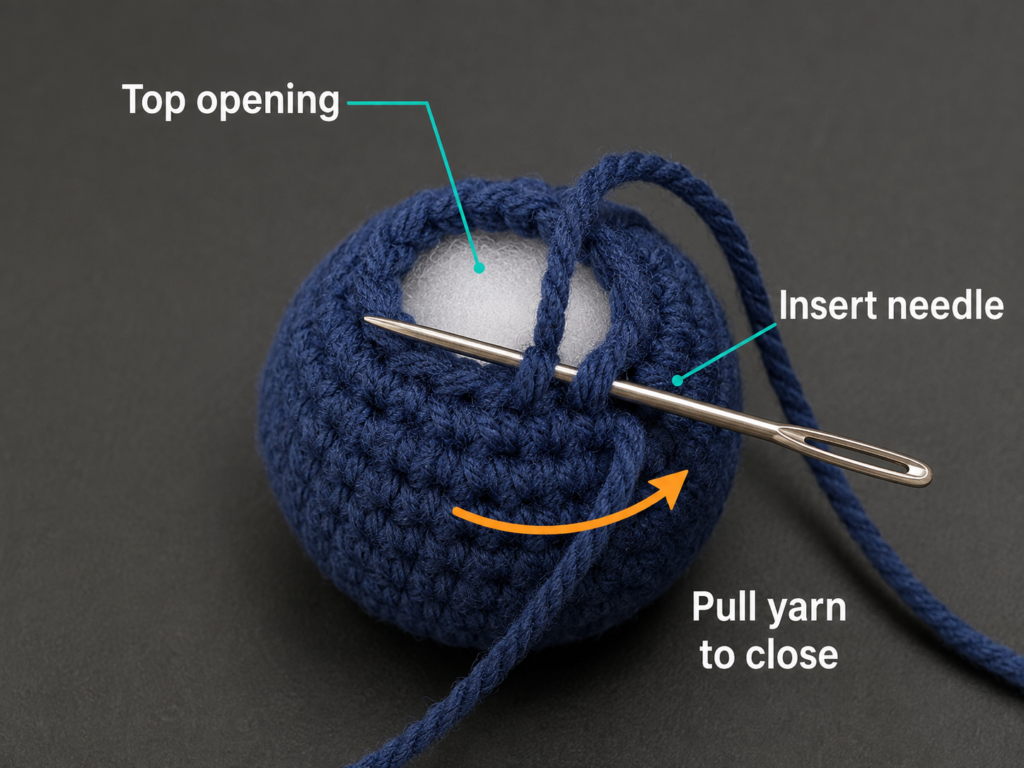
Step 7: Crochet the Three Cloud Puffs
The cloud is assembled from one large, one medium, and one small ivory sphere.
Work all three in continuous rounds.
Small puff
- Rnd 1: 6 sc in MR. [6]
- Rnd 2: Inc in each st. [12]
- Rnd 3: Sc around. [12]
- Rnd 4: Dec around. [6]
Stuff lightly, FO, and close the opening.
Medium puff
- Rnd 1: 6 sc in MR. [6]
- Rnd 2: Inc in each st. [12]
- Rnd 3: Rep
(sc, inc)around. [18] - Rnds 4–5: Sc around. [18]
- Rnd 6: Rep
(sc, dec)around. [12] - Rnd 7: Dec around. [6]
Stuff, FO, and close.
Large puff
- Rnd 1: 6 sc in MR. [6]
- Rnd 2: Inc in each st. [12]
- Rnd 3: Rep
(sc, inc)around. [18] - Rnd 4: Rep
(2 sc, inc)around. [24] - Rnds 5–6: Sc around. [24]
- Rnd 7: Rep
(2 sc, dec)around. [18] - Rnd 8: Rep
(sc, dec)around. [12] - Rnd 9: Dec around. [6]
Stuff, FO, and close.
Assemble the cloud
Place the large puff in the center.
Pin the medium puff to one side and slightly behind the large puff. Place the small puff on the opposite side.
Sew each puff to the large center piece using several passes through the crochet fabric. The puffs should overlap enough that the gaps between them are not visible from the front.
Pass the yarn through all three pieces once or twice for additional stability.
Beginner tip: Rotate the cloud frequently while sewing. Check the front, back, top, and bottom rather than judging the shape from only one angle.
Common mistake to avoid: Sewing the puffs in a straight line produces a row of balls rather than a cloud. Overlap their edges and vary their vertical positions.
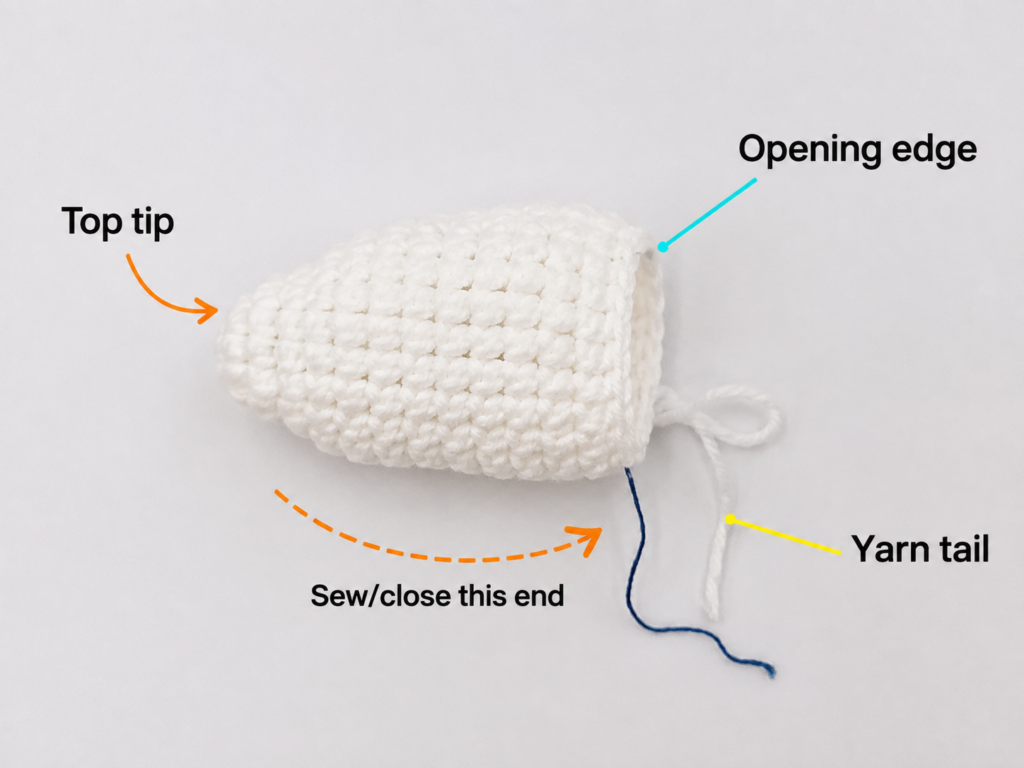
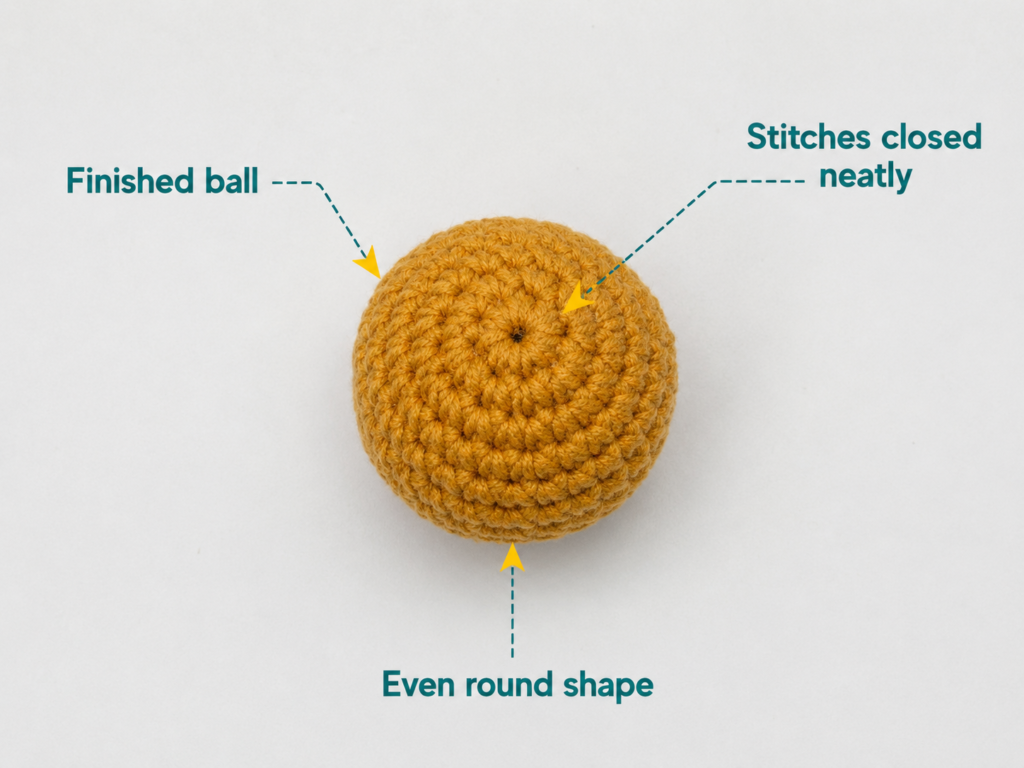
Step 8: Make the Suspension Ball
The small ivory ball hides the point where the three upper suspension cords meet.
- Rnd 1: 6 sc in MR. [6]
- Rnd 2: Inc in each st. [12]
- Rnd 3: Rep
(sc, inc)around. [18] - Rnds 4–5: Sc around. [18]
- Rnd 6: Rep
(sc, dec)around. [12]
Pause and add stuffing.
Before the final round, decide whether the upper cords will pass through the ball. When assembling, they can be guided through the lower opening with a tapestry needle.
- Rnd 7: Dec around. [6]
FO, leaving a long tail. Do not close the hole completely until the suspension cords have been fitted.
Beginner tip: Keep the ball compact and evenly stuffed. An overfilled ball makes it difficult to pass the cords through the center.
Common mistake to avoid: Do not tie the final hanging loop inside the ball before the hoop has been balanced. Leave adjustment room.
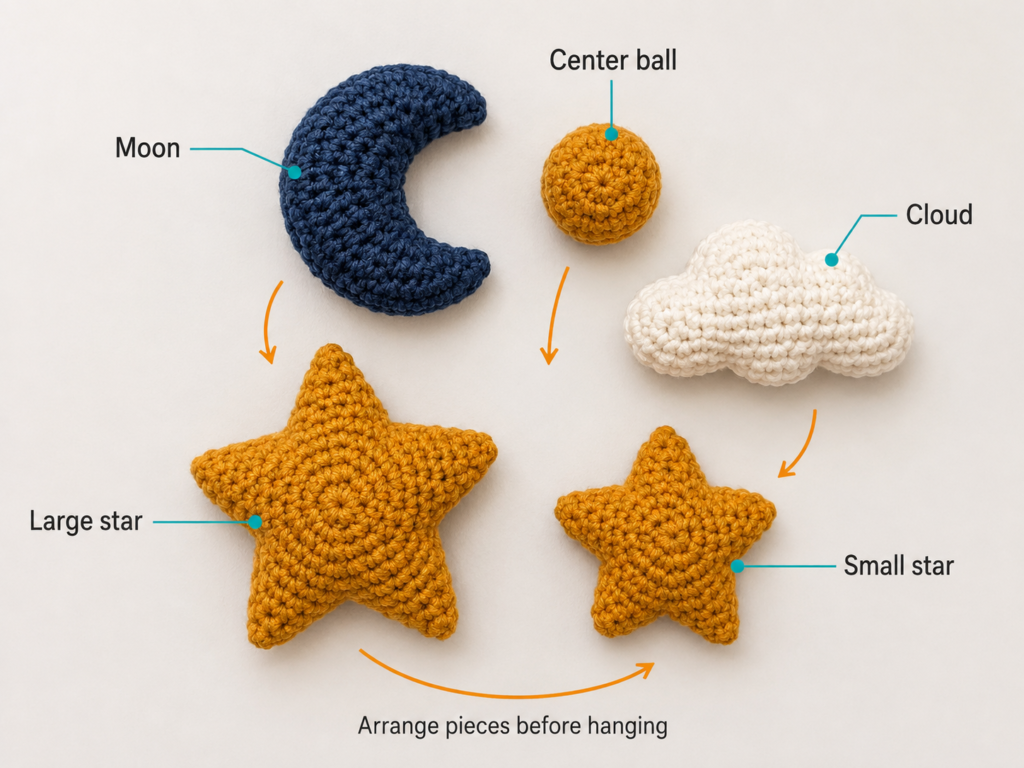
Step 9: Plan the Ornament Arrangement
Lay the hoop flat on your work surface.
Position the moon, cloud, and two stars around it before cutting the cords. A balanced starting arrangement is:
- Moon on one side
- Cloud approximately opposite the moon
- Large star between the moon and cloud
- Small star on the remaining side
The ornaments do not need to hang at the same height. A staggered arrangement creates movement and prevents the shapes from visually covering one another.
Suggested relative heights:
- Moon: medium-low
- Large star: lowest
- Cloud: medium-high
- Small star: medium
Cut each cord at least 15 cm longer than the expected final length. Do not trim the excess yet.
Attach a cord to each ornament
- Thread the cord onto a tapestry needle.
- Pass it through at least two strong crochet stitches near the top of the ornament.
- Pass through a second time.
- Tie a secure double knot.
- Pull the knot slightly into the crochet fabric.
- Leave the tail untrimmed until the entire mobile has been checked.
For the cloud, pass the cord through the large center puff rather than one of the smaller side puffs.
Beginner tip: Lay the completed ornaments beneath the hoop before tying anything. This exposes spacing problems without requiring knots to be undone.
Common mistake to avoid: Do not suspend the cloud from a side puff. The weight can rotate the cloud or strain the joining seam.
Step 10: Attach the Ornaments to the Hoop
Wrap each ornament cord twice around the hoop.
Tie a temporary single bow or loose knot rather than a permanent knot. This allows the attachment point and height to be adjusted.
Hang the hoop temporarily from a stable hook or stand.
Step back and look at the mobile from several angles.
Check:
- Is the hoop level?
- Are the heaviest ornaments approximately opposite one another?
- Do any pieces collide?
- Does one ornament turn backward?
- Are the different heights visually balanced?
- Is every strand vertical?
Slide a temporary knot a small distance around the ring to correct a tilt. Moving a heavy ornament only 1–2 cm can noticeably change the balance.
When satisfied, convert every temporary attachment into a secure knot. Pass the short tail through the cord wrap and knot it again.
Beginner tip: Adjust only one strand at a time. Allow the mobile to stop moving before evaluating the result.
Common mistake to avoid: Cutting the tails before balancing removes the extra cord needed to raise, lower, or reposition an ornament.
Step 11: Add the Upper Suspension Cords
Cut three equal lengths of strong cord. Make them longer than the final required distance.
Mark three equally spaced points around the hoop. Each point should be approximately one-third of the circumference from the next.
Attach one cord at each mark using secure wraps and knots.
Bring all three cords together above the center of the hoop. Hold them at the same tension.
Check whether the hoop hangs level. Shorten one cord slightly if one side drops.
Thread the three cords through the lower opening of the ivory suspension ball. Pull the ball down until it sits just above the meeting point.
Tie the three cords together above the ball, forming a secure hanging loop or connection appropriate to your mounting hardware.
Close the remaining hole in the ball with the ivory yarn tail.
Final knot check
Every cord connection should include:
- At least two wraps or passes
- A secure double or triple knot
- A tail woven or threaded away from the exposed knot
- No glue as the primary securing method
- No fraying cord
Pull gently on each ornament while supporting the hoop. This is a construction check only; the mobile must still remain out of a child’s reach.
Step 12: Install the Mobile Safely
Choose a mounting method designed for the ceiling or wall material. A decorative adhesive hook is not automatically suitable for a hanging mobile.
The completed mobile should be:
- Beyond the baby’s reach from every crib position
- Away from curtain cords and window-blind cords
- Securely attached to a fixed structural point
- Checked regularly for loose knots, fraying cord, or damaged stitches
- Removed when the baby begins pushing up on hands and knees or reaches five months, whichever occurs first
A nursery corner, reading area, or changing-area wall can provide a safer long-term display location than directly over a crib.
Pattern Notes
Turning chain rules
The moon and cloud pieces do not use turning chains because they are worked in rounds.
The star points begin with ch 5. This chain is part of each point and is worked back toward the center.
Joining rounds
The moon oval and amigurumi spheres are worked in continuous rounds.
The center of each star is joined with a slip stitch before the points are added.
Stitch counts
Check the stitch count after every increase or decrease round:
- Moon: 28, 36, 44, 44
- Small cloud puff: 6, 12, 12, 6
- Medium cloud puff: 6, 12, 18, 18, 18, 12, 6
- Large cloud puff: 6, 12, 18, 24, 24, 24, 18, 12, 6
- Suspension ball: 6, 12, 18, 18, 18, 12, 6
Right side and wrong side
The smooth visible side of each crochet piece is treated as the right side.
When folding the moon, keep the right side facing outward.
When joining the stars, place both right sides outward. There is no need to turn the stuffed star inside out.
Size adjustments
To enlarge the whole project consistently:
- Use worsted-weight yarn with a 4–4.5 mm hook.
- Increase the hoop to approximately 25 cm.
- Test the balance again because the larger pieces will be heavier.
To reduce the project:
- Use sport-weight yarn with a 2.75–3 mm hook.
- Keep the stuffing lighter.
- Use a smaller ring only if the ornaments retain enough space to move without touching.
Common Beginner Mistakes
1. Stuffing shows between stitches
Cause: The hook is too large or the tension is too loose.
Fix: Move down by 0.25–0.5 mm in hook size. Use smaller pieces of stuffing rather than forcing one large piece against the fabric.
2. The moon stays straight
Cause: It is overstuffed or the shaping strand is not tight enough.
Fix: Remove some stuffing before closing, then tighten the running stitch gradually along the inner edge.
3. The star points look rounded
Cause: The slip stitch at the tip was omitted or the star was overstuffed.
Fix: Confirm that the first stitch worked back along each chain is a slip stitch. Use only a thin layer of stuffing.
4. One star has six points
Cause: The center stitches were not consumed in pairs.
Fix: Each point uses one skipped center stitch and one slip-stitch anchor. Ten center stitches create exactly five points.
5. The cloud looks like three separate balls
Cause: The puffs were sewn edge-to-edge without overlap.
Fix: Reposition the smaller puffs partly behind the large puff and sew through wider contact areas.
6. The hoop tilts
Cause: The weight is unevenly distributed, or the upper suspension cords are different lengths.
Fix: First adjust the ornament positions around the hoop. Then compare the three upper cords and correct their lengths.
7. The ornaments rotate backward
Cause: The hanging cord passes through only one loose stitch or is attached off-center.
Fix: Pass the cord through two or more strong stitches centered above the ornament’s weight.
8. Knots remain visible
Cause: The cord was tied outside the crochet fabric.
Fix: Use a tapestry needle to draw the attachment point slightly inside the top stitches. Do not compromise the security of the knot merely to hide it.
How to Customize This Crochet Project
Change the yarn
Cotton produces crisp shapes and visible stitches. Acrylic is lighter and may create a softer outline. A cotton-acrylic blend offers both definition and flexibility.
Avoid very bulky yarn unless you also enlarge the hoop.
Change the color palette
For a woodland nursery:
- Moss green moon
- Rust stars
- Oatmeal cloud
For a pastel nursery:
- Lavender moon
- Blush stars
- Cream cloud
For a high-contrast decorative mobile:
- Charcoal moon
- White stars
- Pale gray cloud
Add more ornaments
Suitable additions include:
- A small sun
- A rainbow
- Tiny raindrops
- A second cloud
- Flat heart motifs
Keep the ornament count modest. Every additional piece changes the balance and adds more suspension cord.
Add texture safely
Instead of beads or sequins, try:
- Surface slip-stitch lines
- Embroidered French knots secured inside the fabric
- A subtle contrasting seam
- Alternating front-loop and back-loop rounds
- Small crocheted appliqués sewn through multiple points
Do not rely on glue for anything that could detach.
Turn it into a wall hanging
Attach the ornaments to a natural wooden branch rather than a circular hoop. A wall hanging does not need to rotate, making the balancing process simpler.
Make a matching nursery set
Use the same moon, cloud, and star shapes for:
- A nursery garland
- A wall banner
- A stroller decoration used only under direct supervision
- Baby-shower table décor
- Gift-package ornaments
- A celestial name banner
Finishing Instructions
Fastening off
After every piece is finished, pull the final yarn tail through the last loop and tighten it.
For stuffed pieces, thread the tail through several stitches before passing it through the body and trimming it where it exits.
Weaving in ends
Ends on flat star panels should be woven in before the two layers are joined.
Ends on the moon can be hidden inside during seaming.
The cloud joining tails should pass through more than one puff for strength.
Blocking
The stuffed shapes do not require wet blocking.
Before joining the star panels, light steam can be applied from a distance if the points curl. Do not press a hot iron onto the yarn, and check the yarn label first.
Shaping
Massage the stuffing gently into:
- The moon tips
- Each star point
- The outer sides of the cloud
- The suspension ball
Washing and care
Spot cleaning is preferable once the mobile is assembled.
For a deeper clean:
- Remove the ornaments from the hoop only if the attachment system was designed to be removable.
- Hand-wash gently in cool water.
- Support the pieces while lifting them.
- Reshape while damp.
- Dry completely on a towel.
- Recheck all knots and seams before rehanging.
Quick Printable-Style Summary
Project: Moon, stars, and cloud crochet baby mobile
Skill level: Confident beginner
Yarn: DK cotton or cotton blend
Hook: 3.25–3.5 mm
Hoop: Approximately 20 cm
Main stitches: MR, ch, sl st, sc, hdc, dc, inc, dec
Moon starting method: Work around both sides of ch 13 to form an oval
Star starting method: 10 sc in an MR, followed by five chain-built points
Cloud construction: Three stuffed spheres sewn together
Repeat: Make two star panels for each star
Finishing: Lightly stuff, seam securely, attach with strong cord, balance the hoop, and inspect every knot
Safety: Decorative item only; install beyond reach and remove from the crib area by five months or when the baby pushes up on hands and knees, whichever comes first.
FAQ
Is this crochet baby mobile pattern suitable for a complete beginner?
It is best for a confident beginner. The stitches are basic, but working around a foundation chain, closing small amigurumi pieces, and balancing a hoop require patience.
A complete beginner can practice the suspension ball and cloud puffs first.
What yarn is best for a crochet baby mobile?
Smooth DK cotton is an excellent choice because it holds its shape and makes the stitches easy to see. A cotton-acrylic blend is also suitable.
Avoid yarn with loose metallic fibers, long eyelash strands, or heavy shedding.
Can I use acrylic yarn?
Yes. Acrylic creates lightweight ornaments and is available in many colors. Use a firm tension and follow the care instructions on the yarn label.
Do I need to use a wooden hoop?
No. A metal craft ring can also work. The ring must be rigid, smooth, undamaged, and suitable for the total weight of the ornaments.
An embroidery hoop should be tightly closed and checked regularly.
How do I stop the mobile from tilting?
Place ornaments of similar weight opposite one another. Hang the mobile temporarily and slide the knots around the hoop until it becomes level.
Also verify that the three upper suspension cords are equal in length.
Can I add beads, bells, or safety eyes?
They are unnecessary and are not recommended for this design. Embroidered or crocheted details are preferable because detachable small parts can create hazards.
How high should a crochet mobile hang?
It must always remain beyond the child’s reach and be attached securely. Room layout, crib height, mounting hardware, and the child’s developmental stage all matter.
The American Academy of Pediatrics advises removing a hanging crib mobile when the child begins pushing up on hands and knees or reaches five months, whichever happens first.
Conclusion
This crochet baby mobile turns four beginner-friendly constructions into a coordinated nursery decoration: a folded oval becomes the moon, flat motifs become padded stars, three small spheres become a cloud, and one final ball finishes the suspension point.
Take time during the last assembly stage. A carefully balanced hoop and properly secured cords are more important than finishing quickly. Once the mobile is level, inspect every seam and knot before displaying it safely beyond a child’s reach.
Save the tutorial with your nursery crochet ideas, or reuse the moon, stars, and cloud as a matching wall garland.