A handmade makeup bag is one of those small crochet projects that becomes useful almost immediately. It can hold everyday cosmetics, travel toiletries, crochet notions, art supplies, charging cables, or any collection of small items that usually disappears into a drawer.
This beginner-friendly crochet makeup bag pattern starts with one simple rectangle. You will crochet the fabric in rows, sew a zipper between the two short edges, close the sides, and shape four corners to create a roomy box pouch.
The ribbed fabric is made with half double crochet through the back loop only. This technique looks textured and polished, but it does not require complicated stitch combinations. The zipper is sewn in by hand, so no sewing machine is necessary.
The project is suitable for a beginner who can already make chains and basic half double crochet stitches. The assembly requires patience, but every stage is broken into manageable steps.
What You’ll Learn
- How to crochet a firm rectangular bag panel
- How to work half double crochet through the back loop
- How to count stitches and maintain straight edges
- How to prepare crochet fabric for a zipper
- How to hand-sew a zipper without catching the teeth
- How to close and align the side seams
- How to create four even boxed corners
- How to secure zipper ends neatly
- How to adjust the bag’s width, height, and depth
Finished Size
Approximately:
- 10½ inches wide
- 5½ inches tall
- 2½ inches deep
Your finished measurements may vary slightly depending on yarn, hook size, gauge, zipper placement, and how firmly you stuff or shape the corners.
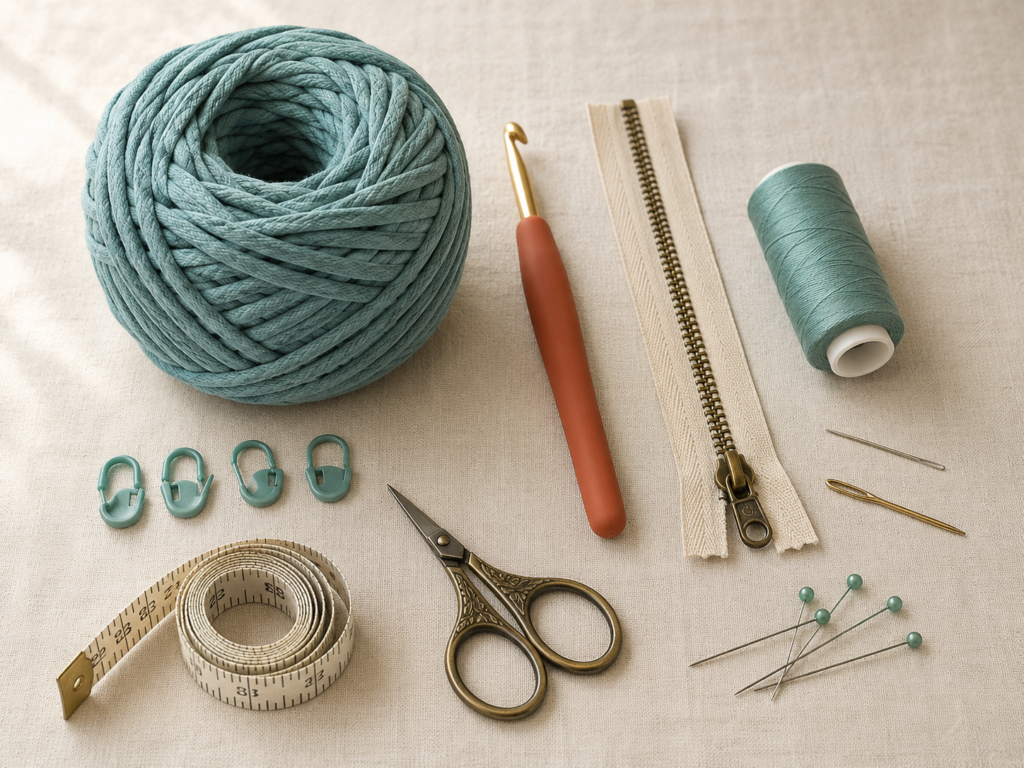
Materials You’ll Need
- Approximately 160–190 yards of category 5 bulky cotton-blend tube, tape, or ribbon yarn
- 6.0 mm crochet hook
- 12-inch nylon or polyester coil zipper
- Strong polyester sewing thread that matches the yarn or zipper tape
- Fine hand-sewing needle
- Blunt tapestry needle
- Four locking stitch markers
- Straight pins or sewing clips
- Flexible measuring tape
- Scissors
- Thimble, optional
- Removable fabric marker, optional
- Lightweight cotton fabric for an optional lining
A cotton-rich yarn is a practical choice because it generally produces a firmer surface than a very stretchy, fuzzy yarn. Always check the yarn label for fiber content and care instructions. Yarn weight categories describe yarn thickness, but yarns within the same category are not automatically interchangeable, so make a gauge swatch before beginning
Crochet Abbreviations Used
- ch = chain
- hdc = half double crochet
- BLO = back loop only
- sl st = slip stitch
- st/sts = stitch/stitches
- RS = right side
- WS = wrong side
- rep = repeat
This pattern uses US crochet terminology. In UK terminology, a US half double crochet is called a half treble crochet. The Craft Yarn Council maintains a standard abbreviation list and a comparison of common US and UK crochet terms.
Gauge
Work a small swatch in half double crochet through the back loop only.
Target gauge:
- 11 hdc = 4 inches
- 8 rows = 4 inches
Gauge is more important for this project than it is for an open tote bag. A panel that is too loose may stretch around the zipper and allow narrow objects to poke through the fabric.
Use a smaller hook if your stitches are significantly larger or more open. Use a larger hook if the fabric is so stiff that inserting the hook becomes uncomfortable.
Before You Start
Count every row
The stitch count remains 30 throughout the panel. Count at the end of each row, especially during the first five rows. Missing the first or last stitch gradually creates slanted edges.
The turning chain does not count as a stitch
Chain one at the beginning of each row. Work the first half double crochet into the first actual stitch directly below the hook.
Keep the edge stitches firm
Loose edge stitches can make zipper installation uneven. Gently tighten the working yarn after completing the first and last stitch of each row, but do not pull so tightly that the edge puckers.
Mark the right side
The ribbed stitch pattern looks attractive on both sides. Choose one side as the right side and place a locking marker near one corner. This prevents confusion during zipper installation.
Check the zipper before sewing
Open and close the zipper several times. Check that the slider moves freely and that the zipper tape is not damaged.
A nylon or polyester coil zipper is easiest for this project. It is lighter and more flexible than a heavy metal zipper. Do not cut through a metal zipper unless you have the appropriate tools and experience.
Beginner note
Take your time with assembly. A neatly installed zipper and evenly measured corners have more influence on the finished shape than crocheting quickly.
Step-by-Step Crochet Tutorial
Step 1: Crochet the Foundation Chain and First Row
Make a slip knot and place it on your 6.0 mm hook.
Foundation: Chain 31.
Do not make the chains too tight. The foundation edge should have enough flexibility to match the width of the later rows. When the starting chain is much tighter than the rest of the fabric, one end of the rectangle curves inward.
Row 1: Work 1 hdc in the second chain from the hook. Work 1 hdc in every remaining chain across. You should have 30 hdc.
To make a half double crochet:
- Yarn over.
- Insert the hook into the chain.
- Yarn over and pull up a loop.
- Yarn over and pull through all three loops on the hook.
Turn the work.
Beginner tip:
Rotate the chain slightly toward you to see the back bumps. Working into the back bumps is optional, but it creates a clean lower edge that can be easier to sew beside the zipper.
Common mistake to avoid:
Do not work into the chain directly below the hook. Begin in the second chain so the chain-one turning space does not add an unwanted stitch.
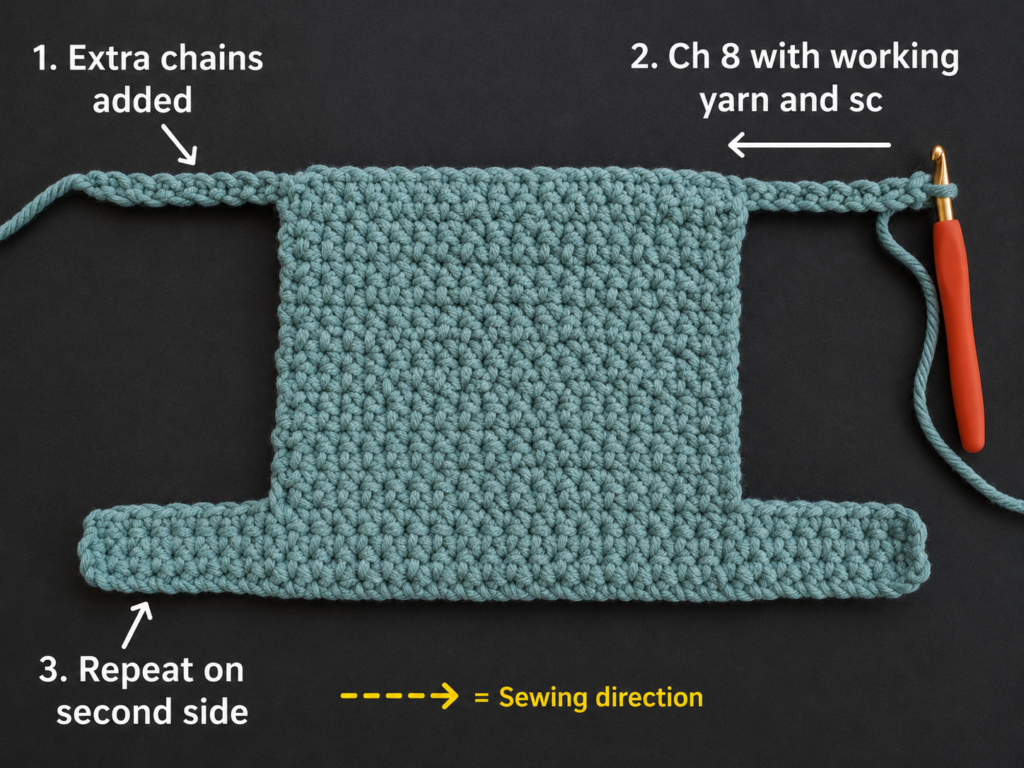
Step 2: Begin the Ribbed Half Double Crochet Pattern
Row 2: Chain 1 and turn. Work 1 hdc through the back loop only of the first stitch. Continue with 1 hdc BLO in every stitch across. You should still have 30 stitches.
Look at the top of the next stitch. You will see two loops forming a small V. The loop closest to you is the front loop. The loop farthest from you is the back loop.
Insert the hook under the back loop only. Leaving the front loop unworked creates a horizontal ridge on the fabric.
Rows 3–6: Repeat Row 2.
After several rows, pause and look at both edges. They should rise vertically rather than leaning inward or outward.
Beginner tip:
Place one stitch marker in the first stitch of the row and another in the last stitch. Move them upward for several rows until you can identify the edge stitches confidently.
Common mistake to avoid:
Do not insert the hook under both top loops. Doing so creates ordinary half double crochet and interrupts the ribbed texture.
Step 3: Complete the Main Rectangle
Continue repeating the established row:
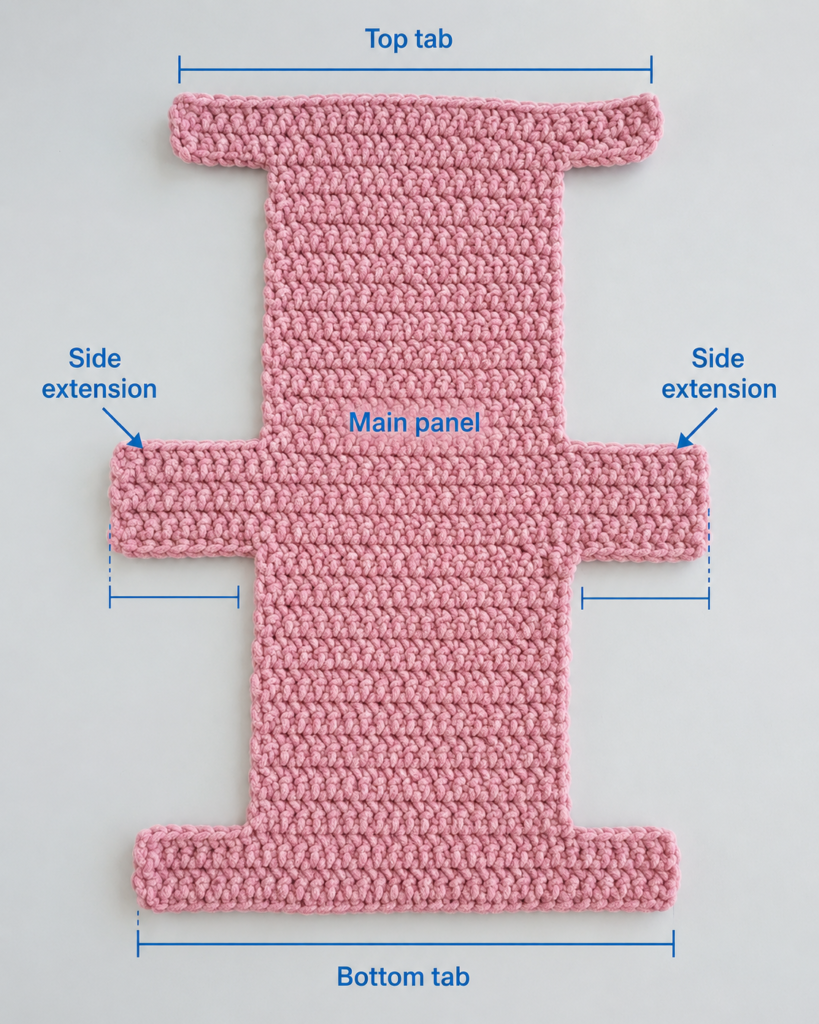
Rows 7–28: Chain 1, turn, and work 1 hdc BLO in each of the 30 stitches.
Fasten off after Row 28, leaving an 8-inch tail.
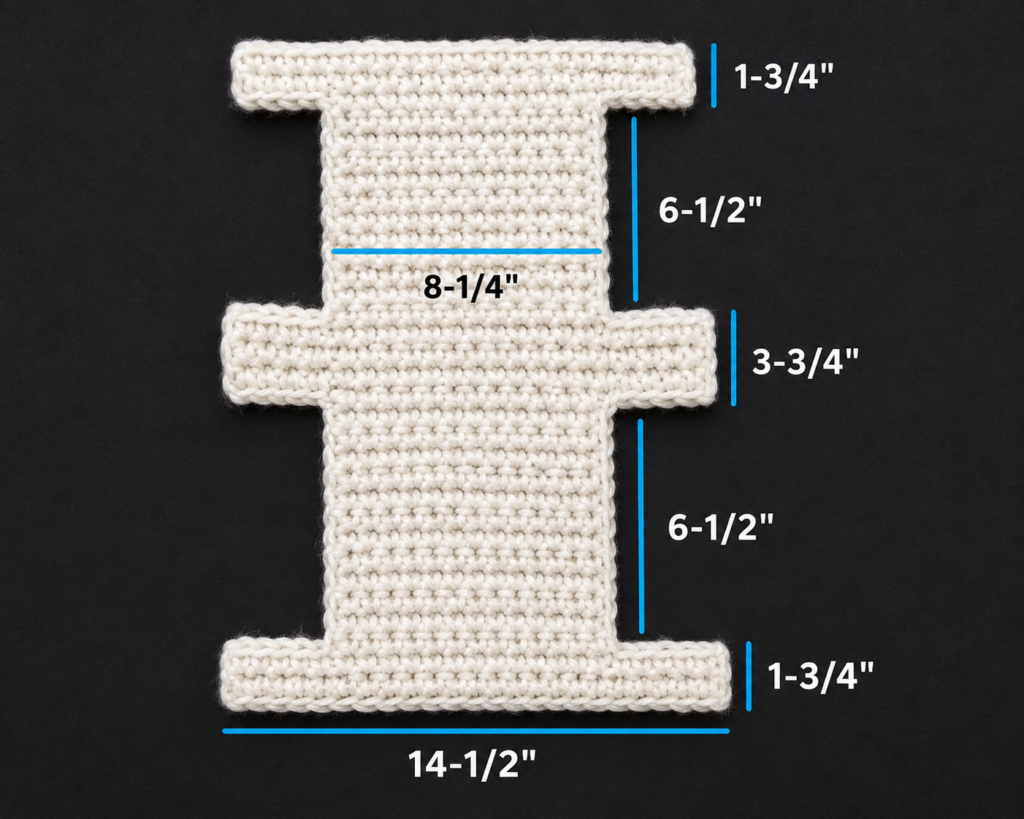
The panel should measure approximately:
- 10½–11 inches across the stitches
- 13½–14 inches across the rows
The row measurement is more important than reaching exactly 28 rows. When your row gauge differs, continue or stop when the panel measures approximately 14 inches long.
Lay the panel flat without stretching it. Compare the foundation edge with the final-row edge. They should be approximately the same width because both will be attached to the zipper.
Lightly steam or wet-block the panel if it curls strongly. Do not flatten the ribbing completely.
Beginner tip:
Measure in the center of the panel rather than along an edge, because edge stitches can be slightly taller or tighter.
Common mistake to avoid:
Do not stretch the crochet to reach the target measurement. A stretched panel will contract after assembly and cause zipper rippling.
Step 4: Position the First Side of the Zipper
Place the crochet rectangle right side up.
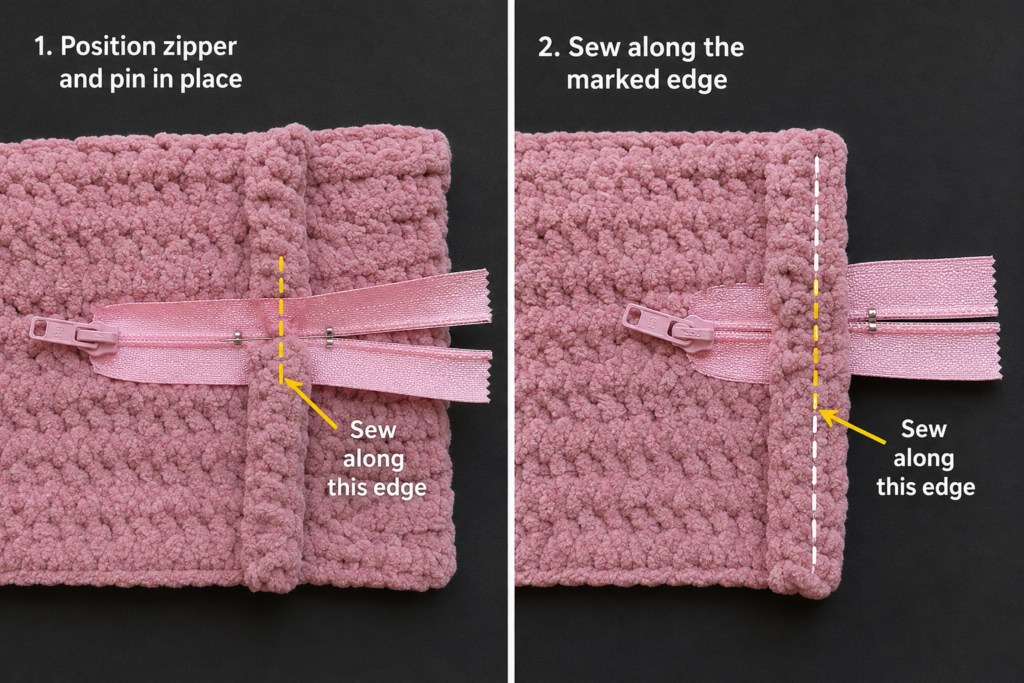
Position the closed zipper face up beneath the foundation edge. The zipper teeth should remain visible immediately beyond the crochet edge. Leave approximately ½ inch of zipper extending past each side of the panel.
The crochet must not overlap the zipper teeth. Leave about ⅛ inch between the edge of the yarn and the zipper coil so the slider can move without catching.
Pin or clip the fabric to the zipper tape every 1½–2 inches.
Check the alignment from both ends before sewing. The zipper should remain straight and should not pull the crochet edge into a curve.
Beginner tip:
Start pinning at the center. Then pin each end before filling the spaces between them. This distributes the fabric evenly.
Common mistake to avoid:
Do not stretch the crochet edge while pinning. Allow it to rest naturally beside the zipper.
Step 5: Sew Both Crochet Edges to the Zipper
Thread a hand-sewing needle with approximately 24 inches of strong polyester thread. Knot the end securely.
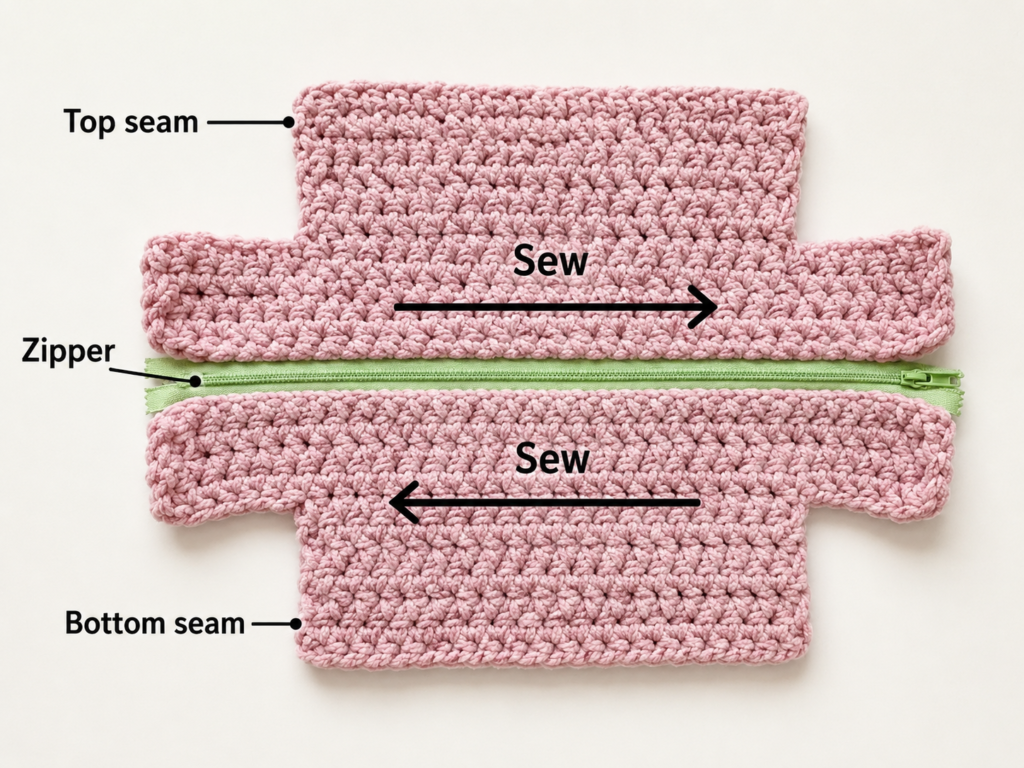
Beginning near one end, sew through the zipper tape and the edge of the crochet fabric. Use small backstitches or closely spaced running stitches.
Pass the needle through solid strands of yarn rather than through large gaps. Keep each stitch far enough from the zipper coil that the slider can move freely.
When the first side is secure, align the final-row edge with the opposite side of the zipper. Make certain the crochet panel is not twisted.
Pin the second edge in place and sew it using the same method. The rectangle now forms a wide tube with a zipper joining the two short edges.
Remove the pins and test the zipper.
Beginner tip:
After sewing every few inches, stop and slide the zipper past the newly sewn section. Correct a tight area immediately rather than waiting until both sides are complete.
Common mistake to avoid:
Do not pull the sewing thread so tightly that the zipper tape gathers. The seam should be secure but flat.
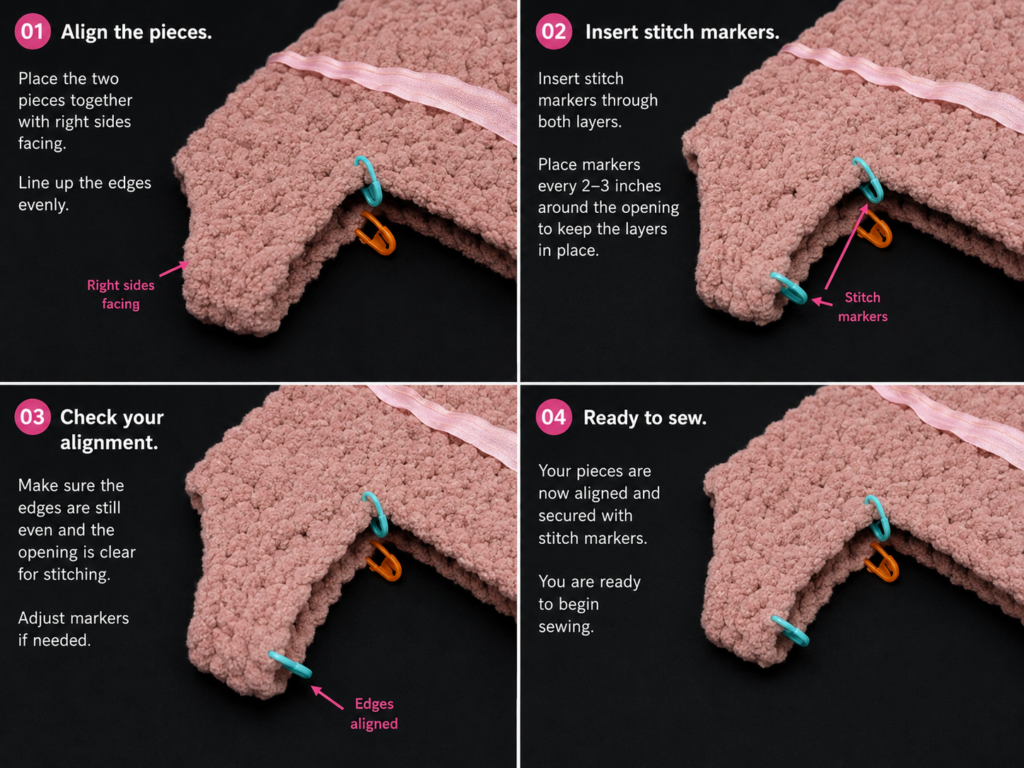
Step 6: Close the Two Side Openings
Open the zipper at least halfway. This is essential because you will need the opening to turn the bag right side out later.
Turn the crochet tube inside out.
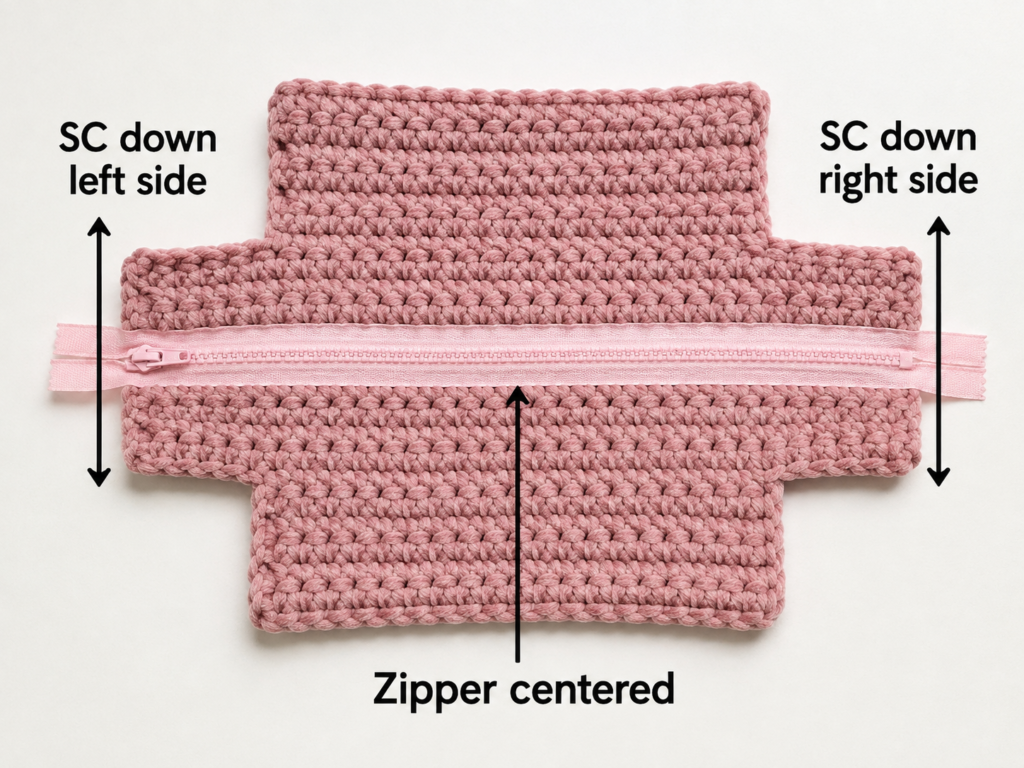
Flatten it so the zipper runs along the top center and the opposite fold runs along the bottom center. Match the rows at the left and right sides.
Use stitch markers to hold the layers together.
Thread the tapestry needle with a length of matching yarn. Starting near the zipper, whip stitch through both layers and continue toward the bottom fold.
Repeat on the second side.
Keep the side seams firm, but do not pull so tightly that the fabric bunches. Weave the ends through several stitches on the inside.
Beginner tip:
Count the visible row ridges on each layer as you sew. Matching one ridge to one ridge helps prevent one panel from shifting ahead of the other.
Common mistake to avoid:
Do not finish both side seams while the zipper is completely closed. Without an opening, the bag cannot be turned right side out.
Step 7: Measure the Four Boxed Corners
Keep the bag inside out.
You will shape four corners:
- Two corners beside the zipper
- Two corners beside the lower fold
Take one corner and open it so the side seam lies directly over the center fold of the adjacent panel. The corner should form a symmetrical triangle.
Measure 1¼ inches from the pointed tip along the seam. At this position, mark a line running perpendicular to the seam. The line should measure approximately 2½ inches from side to side.
Place a stitch marker at each end of the line.
Repeat for all four corners. Compare the four marked lines before sewing. They should be equal in length and positioned the same distance from each corner tip.
Beginner tip:
Hold the bag upright after marking the first two corners. This helps you visualize whether the depth looks appropriate before committing to the seams.
Common mistake to avoid:
Do not measure from a loose fold. First align the side seam with the center fold, then flatten the corner completely.
Step 8: Sew and Reinforce the Boxed Corners
Thread the tapestry needle with matching yarn.
Sew across the marked line through both layers. Use close whip stitches or backstitches. Work back across the same line a second time for reinforcement.
Repeat on the remaining three corners.
Do not cut away the triangular crochet sections. Cutting crochet fabric can release stitches and cause the corner to unravel.
Instead, fold each triangle toward the nearest side seam. Use two or three small tack stitches to hold it flat against the inside of the bag.
The folded triangles add a little structure to the pouch and remain hidden inside.
Beginner tip:
Complete one corner and turn that section right side out temporarily. Check the shape before sewing the other three.
Common mistake to avoid:
Do not make the top corners shallower than the bottom corners. Unequal corner seams cause the zipper to slope or the bag to lean.
Step 9: Secure the Zipper Ends
Examine the zipper tape at both side seams.
Fold any excess zipper tape inward so it lies flat against the seam allowance. With a hand-sewing needle and matching thread, tack the folded tape securely to the inside of the bag.
Avoid sewing through the zipper teeth. The needle should pass only through the tape and nearby crochet fabric.
Test the zipper again. It should open from end to end without catching the yarn, thread, or folded tape.
For a nylon coil zipper that is significantly too long, it can be shortened only after creating a secure thread stop. Do not attempt this with a metal zipper unless you understand zipper-shortening techniques.
Beginner tip:
Fold both ends in the same direction. This produces a more balanced shape when the bag is turned right side out.
Common mistake to avoid:
Do not leave a loose zipper tail inside the pouch. It can twist, catch small items, or interfere with the corner shape.
Step 10: Turn and Shape the Finished Makeup Bag
Check that all yarn and sewing-thread ends are secure.
Reach through the open zipper and gently turn the bag right side out. Push each corner outward with your fingers.
Do not use scissors, a knitting needle, or another sharp object to push the corners. Sharp tools can split yarn or damage the zipper tape.
Massage the four corners until the bag stands evenly. Smooth the zipper edges and check the side seams.
Place a few lightweight items inside to help the bag settle into its box shape. Open and close the zipper several times.
Your crochet makeup bag is complete.
Pattern Notes and Stitch Notes
Turning chain
The chain one at the beginning of each row does not count as a stitch.
Work the first half double crochet into the first stitch and the final half double crochet into the last stitch.
Stitch count
Every crochet row contains 30 half double crochet stitches.
When you count only 29 stitches, inspect both edges before undoing the row. The missed stitch is usually the final edge stitch.
Row repeat
Rows 2–28 use the same repeat:
- Chain 1
- Turn
- Work 1 hdc BLO in every stitch
- Count 30 stitches
Right side and wrong side
The fabric is reversible, but marking a right side makes assembly easier. Attach the zipper while the chosen right side faces outward.
Why the panel is longer than the finished bag height
The 14-inch panel wraps around the front, bottom, and back of the pouch. The boxed corners remove part of the apparent height while creating depth.
How to adjust the width
The number of half double crochet stitches determines the zipper-opening width.
At the stated gauge, there are approximately 2¾ stitches per inch.
For a different width:
- Multiply the desired panel width by 2.75.
- Round to a whole number.
- Add one chain for the turning setup.
For example, a panel approximately 8 inches wide would need about 22 hdc, so begin with approximately 23 chains.
Always make a swatch because a different yarn may produce a different number of stitches per inch.
How to adjust the height
The number of rows controls the distance around the front, bottom, and back.
A useful estimate is:
Panel length = 2 × finished height + desired depth
For a pouch 5½ inches tall and 2½ inches deep:
- 2 × 5½ = 11
- 11 + 2½ = 13½ inches
A 13½–14-inch panel provides enough fabric for this size.
How to adjust the depth
The distance measured from the corner tip is half the final depth.
- Mark 1 inch from the tip for approximately 2 inches of depth.
- Mark 1¼ inches for approximately 2½ inches of depth.
- Mark 1½ inches for approximately 3 inches of depth.
Deeper corners reduce the visible height of the pouch.
Common Beginner Mistakes
1. Creating fabric that is too open
Problem: Cosmetics, brush handles, or narrow tubes can push between the stitches.
Fix: Use a smaller hook, tighten your tension slightly, or add a fabric lining.
2. Losing edge stitches
Problem: The rectangle narrows and the zipper edges do not match.
Fix: Mark the first and last stitches. Count 30 stitches at the end of every row.
3. Stretching the panel during measurement
Problem: The crochet retracts after assembly and makes the zipper ripple.
Fix: Lay the panel flat without pulling. Measure only after the fabric has relaxed.
4. Sewing too close to the zipper teeth
Problem: The zipper slider catches yarn or thread.
Fix: Maintain approximately ⅛ inch of clearance and test the zipper frequently.
5. Twisting the panel around the zipper
Problem: The tube cannot lie flat and the right side may face inward.
Fix: Before attaching the second zipper side, spread the entire panel out and confirm that it is not twisted.
6. Forgetting to open the zipper
Problem: The bag cannot be turned right side out after the side seams are closed.
Fix: Open the zipper halfway before completing the second side seam.
7. Making uneven boxed corners
Problem: The bag rocks, leans, or has different depths at opposite ends.
Fix: Mark all four corners before sewing any of them. Compare the marked seam lengths.
8. Cutting off the crochet corner triangles
Problem: Cut stitches may unravel and weaken the corners.
Fix: Leave the triangles intact, fold them against the inside seams, and tack them down.
9. Pulling assembly seams too tightly
Problem: The side seams gather and the bag becomes distorted.
Fix: Tighten each stitch only until the layers touch securely.
How to Customize This Crochet Project
Change the yarn
A cotton or cotton-blend yarn creates a practical, defined surface. Recycled tube yarn can produce an especially structured pouch.
Acrylic can also work, but choose a smooth variety rather than a fuzzy yarn. Fuzzy fibers can catch in the zipper and make stitch placement harder to see.
When substituting yarn, compare gauge rather than relying only on the printed yarn-weight category. The Craft Yarn Council notes that yarns within the same category can differ in drape and performance.
Create a two-color bag
Work Rows 1–14 in the first color and Rows 15–28 in a second color. After assembly, one color will dominate each side of the pouch.
For narrow stripes, change colors every two or four rows. Carrying unused yarn along the edge may create bulk beside the side seams, so fastening off each color is often neater.
Add a lining
A cotton lining protects the crochet from powder, foundation, and pencil marks.
Cut a fabric rectangle slightly smaller than the crochet panel, sew it into a matching box-pouch shape, and hand-stitch its upper edge to the zipper tape.
For toiletries, consider a lightweight water-resistant lining. The lining should still be flexible enough to turn and clean easily.
Add a wrist strap
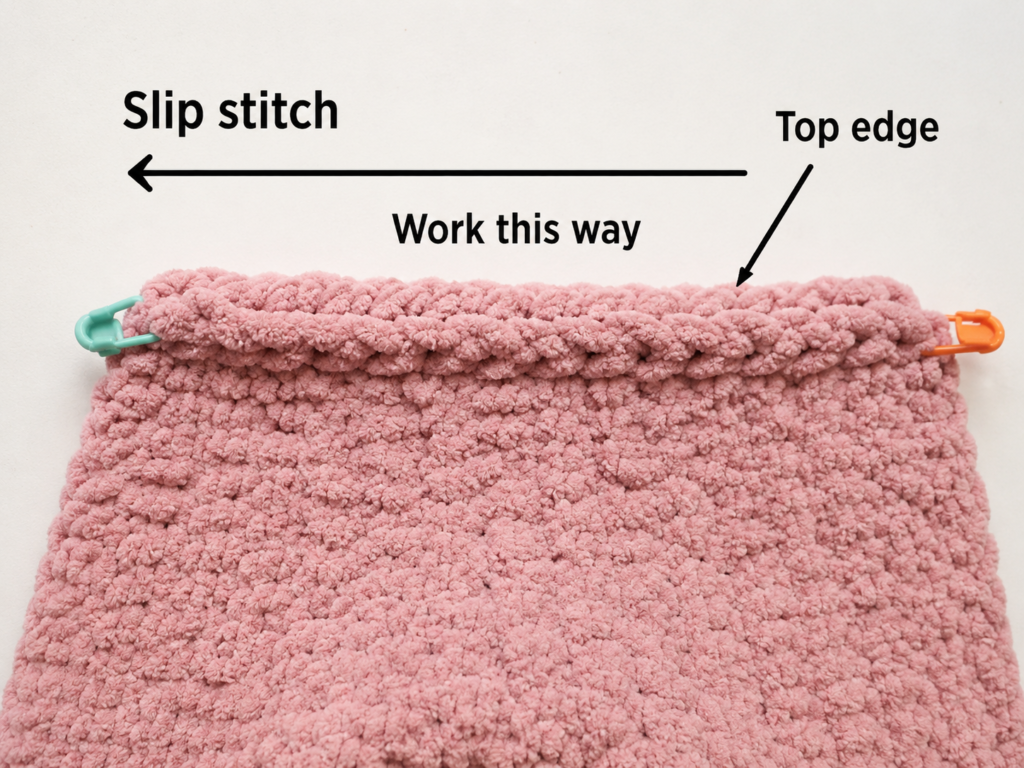
Crochet a chain approximately 10 inches long. Slip stitch back along the chain to create a firm cord.
Fold it in half and sew both ends securely into one side seam before boxing the corners.
Do not rely on one loose stitch to hold a loaded pouch. Reinforce the attachment across several stitches.
Use a different texture
The rectangle can be made with regular half double crochet, single crochet, moss stitch, or linked half double crochet.
A stitch substitution changes both stitch and row gauge. Make a swatch and calculate the required panel dimensions rather than using the same counts automatically.
Add a decorative zipper pull
Attach a small yarn tassel, leather tab, or crocheted cord to the zipper slider.
Keep the pull short enough that it does not drag across the table or catch inside a travel bag.
Change the purpose
The finished pouch can be used as:
- A makeup bag
- A travel toiletry pouch
- A pencil case
- A crochet notions bag
- A small electronics organizer
- A medication pouch
- A gift-card presentation bag
- A sewing kit
- A portable art-supply case
Finishing Instructions
Fastening off
After the final crochet row, cut the yarn with an 8-inch tail. Pull the tail through the final loop.
Use a tapestry needle to weave the tail through the backs of several stitches. Change direction and pass through another group of stitches before trimming.
Weaving assembly ends
Keep yarn ends on the inside of the bag. Weave them through dense areas near the side or corner seams.
Avoid burying thick yarn immediately beside the zipper teeth.
Blocking
Block the panel before attaching the zipper, not after full assembly.
For cotton-blend yarn:
- Lightly dampen the panel.
- Arrange it to the target dimensions.
- Smooth the edges.
- Allow it to dry completely.
Always follow the yarn manufacturer’s care instructions.
Washing and care
Empty the bag before cleaning. Close the zipper to prevent the slider from catching.
Hand washing is generally the safest option for a handmade zipper pouch unless both the yarn and zipper are labeled machine washable.
Use cool or lukewarm water and mild detergent. Avoid twisting the wet bag. Press out water gently with a towel, reshape the corners, and dry flat.
The yarn label should be treated as the primary care guide. Standard textile-care symbols communicate washing, drying, ironing, and cleaning instructions.
Practical use note
Keep liquid cosmetics tightly capped. A crochet exterior alone is not leakproof. Add a washable or water-resistant lining when the pouch will regularly carry foundation, lotion, or other liquids.
Quick Printable-Style Summary
Project: Ribbed crochet makeup bag with zipper
Skill level: Confident beginner
Finished size: Approximately 10½ inches wide × 5½ inches tall × 2½ inches deep
Yarn: Category 5 bulky cotton-blend yarn, approximately 160–190 yards
Hook: 6.0 mm
Additional materials: 12-inch nylon zipper, sewing needle, matching thread, tapestry needle, markers, pins, scissors, and measuring tape
Gauge: 11 hdc × 8 rows = 4 inches in hdc BLO
Starting chain: Chain 31
Row 1: Hdc in second chain from hook and across. 30 hdc.
Rows 2–28: Chain 1, turn, hdc BLO in every stitch. 30 hdc.
Target panel size: Approximately 10½–11 inches × 13½–14 inches
Assembly:
- Sew the foundation edge to one side of the zipper.
- Sew the final-row edge to the opposite zipper tape.
- Open the zipper halfway.
- Turn the tube inside out.
- Center the zipper and close both side seams.
- Mark all four corners 1¼ inches from their tips.
- Sew across each 2½-inch corner line.
- Fold and tack the corner triangles inside.
- Secure the excess zipper tape.
- Turn right side out and shape.
FAQ
Is this crochet makeup bag pattern suitable for complete beginners?
It is best for a beginner who already knows how to chain and make half double crochet stitches. The crochet portion is repetitive. Installing the zipper and boxing the corners require more attention, but no sewing machine or advanced crochet stitch is needed.
Can I make this makeup bag without a zipper?
Yes. You can replace the zipper with a magnetic snap, button loop, drawstring channel, or folded flap. However, changing the closure also changes the upper construction and may require a shorter panel.
What yarn is best for a crochet cosmetic bag?
Smooth cotton, cotton-acrylic, cotton-polyester tube yarn, and sturdy tape yarn are practical choices. Look for a yarn that creates dense stitches and can tolerate regular handling.
Avoid highly fuzzy yarn around the zipper because loose fibers may catch in the slider.
Should I line a crochet makeup bag?
A lining is optional but useful. It prevents narrow items from entering stitch gaps and helps protect the yarn from powders or liquid products.
Choose a washable cotton lining for dry cosmetics or a lightweight water-resistant fabric for toiletries.
Can I use worsted-weight yarn instead?
Yes, but you will need more stitches and rows to reach the same panel dimensions.
Make a gauge swatch, then work a rectangle approximately 10½–11 inches wide and 13½–14 inches long. Use a hook that creates dense but flexible fabric.
How do I stop the zipper from becoming wavy?
Do not stretch the crochet edge while pinning or sewing. Pin the center and ends first, then distribute the remaining fabric evenly.
Use small stitches and avoid pulling the sewing thread too tightly.
Why does my makeup bag lean to one side?
The most common causes are:
- Unequal side seams
- A twisted zipper
- Uneven boxed-corner measurements
- One crochet edge being longer than the other
Turn the pouch inside out and compare all four corner seams. Each should have the same width and distance from the corner tip.
Conclusion
This crochet makeup bag begins with one uncomplicated rectangle, but the zipper and boxed corners give it the appearance of a much more advanced project.
The repeat is easy to remember, the ribbed texture is forgiving, and the finished pouch can be adapted for cosmetics, toiletries, crochet tools, stationery, or handmade gifts.
Save the pattern with your preferred yarn and zipper colors before beginning. Once you are comfortable with the construction, make a second version with stripes, a washable lining, or a matching wrist strap.