A wall hanging is an excellent first home-décor project because it gives you room to practice without requiring garment sizing, complicated assembly, or a perfect fit. A slightly loose row will not stop the finished piece from being useful, and blocking can correct many small tension differences at the end.
This beginner crochet wall hanging combines a simple rectangular upper panel with two puff-stitch bands and a tapered lower point. You will begin with an ordinary foundation chain, work back and forth in rows, add texture without changing colors, and then narrow the lower section with one decrease at each edge.
The result is a clean, modern wall decoration that looks more detailed than it actually is. The pattern uses one yarn color, so you can concentrate on recognizing stitches and keeping an accurate count. Step-by-step image placements are included throughout the tutorial to help you photograph or illustrate the complete process.
This is an original pattern-style tutorial. The researched source was used only to study the types of photographs that make a wall-hanging tutorial easier to follow.
What You’ll Learn
- How to make a flexible foundation chain
- How to keep the sides of a flat crochet panel straight
- How to work half double crochet in the back loop
- How to form a beginner-friendly puff stitch
- How to restore the stitch count above a puff row
- How to decrease at both edges to form a centered point
- How to attach crochet fabric to a wooden dowel
- How to make and attach a simple hanging cord
- How to block the finished wall hanging
Project Details
Skill level: Confident beginner
Finished size: Approximately 14 inches wide and 18–19 inches long, excluding the hanging cord
Dowel size: 16–18 inches
Estimated time: 5–7 hours
Construction: Worked flat from the straight top edge downward
Yarn weight: Category 4 worsted weight
Hook: 5.5 mm
Terminology: U.S. crochet terms
Materials You’ll Need
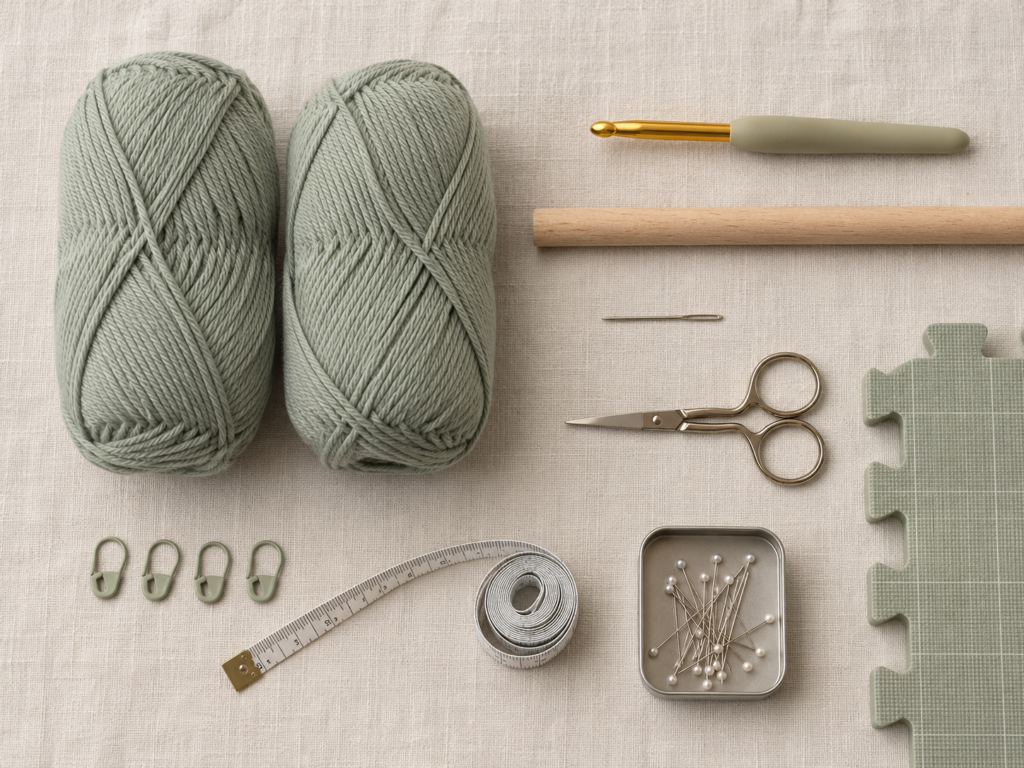
- Approximately 320–380 yards of category 4 cotton or cotton-blend yarn
- 5.5 mm crochet hook
- 16–18 inch smooth wooden dowel
- Blunt yarn needle
- Scissors
- Two locking stitch markers
- Measuring tape
- Blocking mat or thick folded towel
- Rustproof blocking pins
- Optional garment steamer
- Optional fine sandpaper for smoothing the dowel
Cotton is especially useful for wall décor because it produces defined stitches and usually stretches less under its own weight than a very elastic acrylic yarn. A cotton-acrylic blend is also suitable when you want a softer and lighter panel.
Crochet Abbreviations Used
The abbreviations below follow U.S. crochet terminology. The Craft Yarn Council maintains standardized crochet abbreviations and a U.S./U.K. term comparison.
- ch = chain
- hdc = half double crochet
- hdc2tog = half double crochet two together
- puff = puff stitch defined below
- sl st = slip stitch
- st/sts = stitch/stitches
- rep = repeat
- BLO = back loop only
- RS = right side
- WS = wrong side
- sp = space
- YO = yarn over
Puff Stitch Used in This Pattern
Work all parts of the puff into the same stitch:
- Yarn over.
- Insert the hook into the designated stitch.
- Yarn over and draw up a loop to approximately the height of a half double crochet.
- Repeat Steps 1–3 two more times.
- You should now have seven loops on the hook.
- Yarn over and draw through all seven loops.
- Chain one to secure the puff.
The securing chain is part of the puff unit and counts as one stitch in this pattern.
Before You Start
Gauge and Tension
A practical target gauge is approximately:
12 hdc stitches × 9 rows = 4 inches
Exact gauge is less critical than it would be for a sweater, but it still affects whether the panel fits your dowel. Make a small swatch before beginning when your dowel has already been cut to a fixed length.
When the swatch is too wide, use a smaller hook. When it is too narrow, use a larger hook. Do not pull the foundation chain tightly in an attempt to force the correct width. A tight starting edge will curve even when the later rows are correct.
How to Count the Stitches
Look at the top of the row. Each normal half double crochet has a clear V-shaped top.
In a puff row, both the puff and its securing chain are counted:
- One puff top = one stitch
- One securing chain space = one stitch
The solid row above the puff band restores one half double crochet into each of those positions.
How to Keep the Edges Straight
- The turning chain does not count as a stitch.
- Work the first half double crochet into the first actual stitch.
- Work the final half double crochet into the last actual stitch.
- Count every row before turning.
- Place a stitch marker in the first and last stitch when you have difficulty recognizing the edges.
How to Avoid Curling
Use a relaxed foundation chain and avoid tightening the yarn after every stitch. Back-loop rows may cause temporary folding because they create a hinge-like ridge. The fabric should relax after more rows are added and after blocking.
Choosing Yarn Colors
A solid light or medium shade is easiest for learning because the stitch tops remain visible. Dusty green, oatmeal, muted blue, clay, and soft mustard all photograph well.
Very dark yarn can hide the puff structure. Strongly variegated yarn can make counting the chain spaces more difficult.
U.S. and U.K. Term Note
This tutorial uses U.S. crochet terms. U.S. half double crochet is called half treble crochet in U.K. terminology. Check terminology before substituting instructions from another tutorial.
Step-by-Step Crochet Tutorial
Step 1: Make the Foundation Chain and First Row
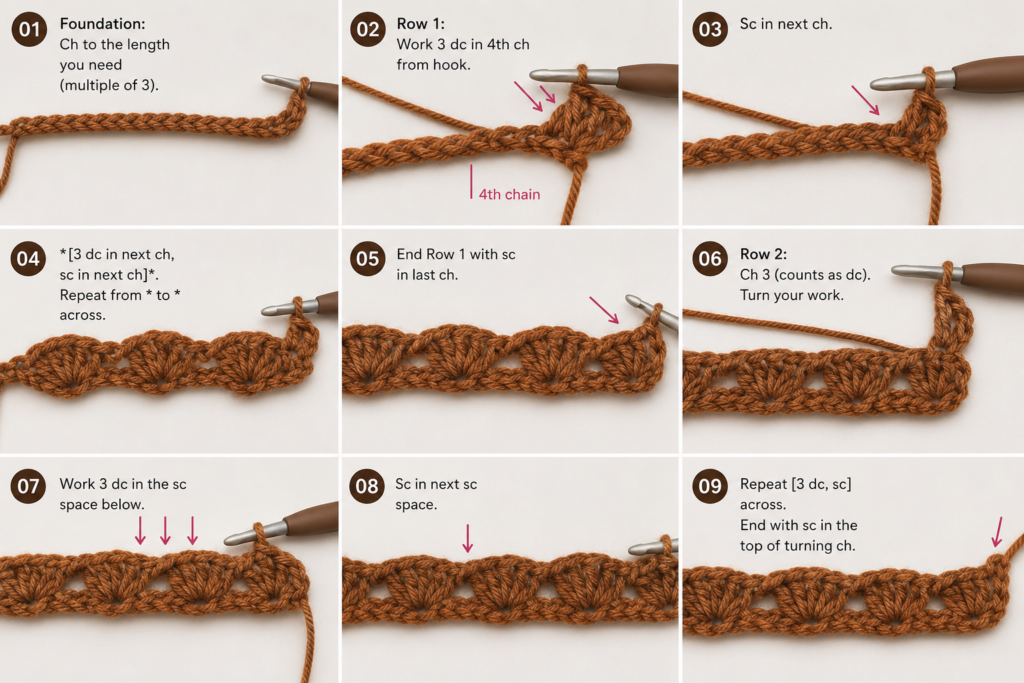
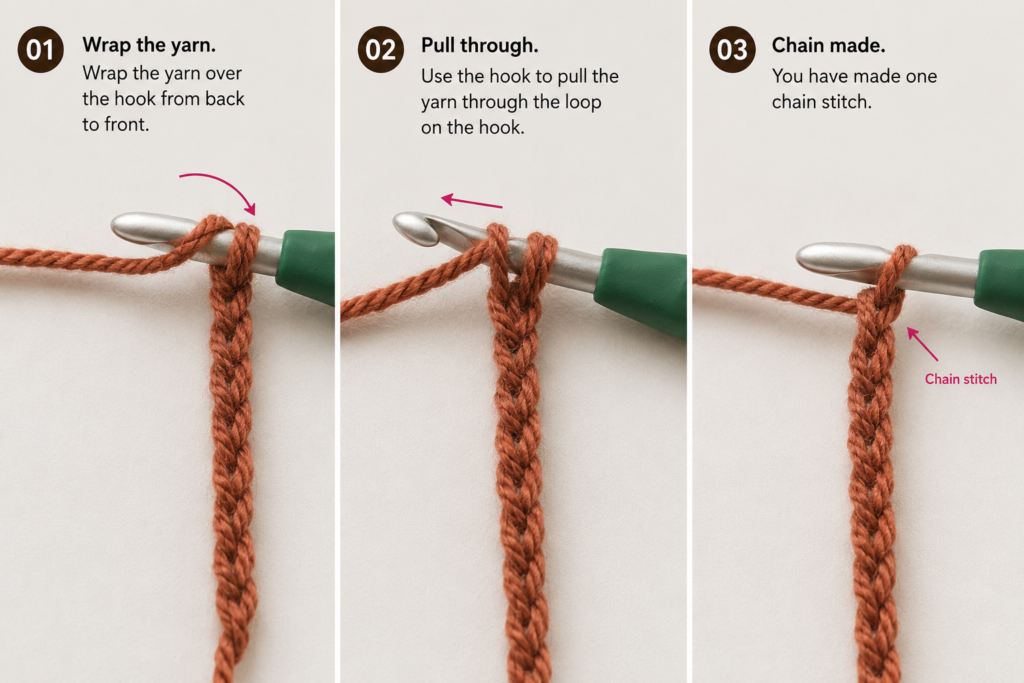
Make a slip knot and place it on your 5.5 mm hook.
Chain 43.
Try to make each chain the same size. The hook should move freely through each loop without the chain becoming loose and uneven.
Row 1
Yarn over and insert the hook into the second chain from the hook.
Yarn over and pull up a loop. You now have three loops on the hook.
Yarn over and draw through all three loops to complete the first half double crochet.
Work one half double crochet into each remaining chain.
Stitch count: 42 hdc
Beginner tip
Rotate the chain slightly toward you. Work under the back bump when you want a neat lower edge, or work under the two upper loops when that is easier for you. Whichever method you choose, use it consistently across the row.
Common mistake to avoid
Do not work into the chain directly below the active loop. That is the first chain from the hook and is skipped. Begin in the second chain.
Step 2: Build the Straight Upper Section
Rows 2–4
Chain one and turn.
Work one half double crochet in every stitch across.
Stitch count after every row: 42 hdc
At the end of Row 4, measure the width. It should be approximately 13½–14½ inches. A small difference is acceptable, provided the fabric will fit comfortably on your dowel.
Row 5 — Back Loop Ridge
Chain one and turn.
Instead of working under both top loops, insert the hook under the back loop only of each stitch.
Work one half double crochet in the back loop of every stitch across.
Stitch count: 42 hdc
The unused front loops form a subtle horizontal ridge.
Rows 6–8
Chain one and turn.
Work one ordinary half double crochet in every stitch across.
Stitch count after every row: 42 hdc
Beginner tip
Pause after every ten stitches and look back at the row. It is much easier to correct one missing stitch immediately than to discover the error several rows later.
Common mistake to avoid
The turning chain is not the first stitch. If you accidentally work into it at the end of the row, your panel will gradually become wider.
Step 3: Practice One Puff Stitch
Before beginning the complete puff row, practice the stitch at the edge of a swatch or in a short piece of spare yarn.
Yarn over, insert the hook into the designated stitch, yarn over, and draw up one loop.
Repeat that movement two more times in the same stitch.
You should have seven loops on the hook. Keep the drawn-up loops approximately the same height. A puff with one short loop will lean or appear pinched.
Yarn over and pull through all seven loops.
Chain one to close the puff.
Beginner tip
After inserting the hook, lift each new loop slightly higher than an ordinary half double crochet. This creates enough room for the hook to pass through all seven loops without snagging.
Common mistake to avoid
Do not pull the first loops tightly while creating the later loops. Pinch the base of the puff with your non-hook hand and allow the loops to remain relaxed.
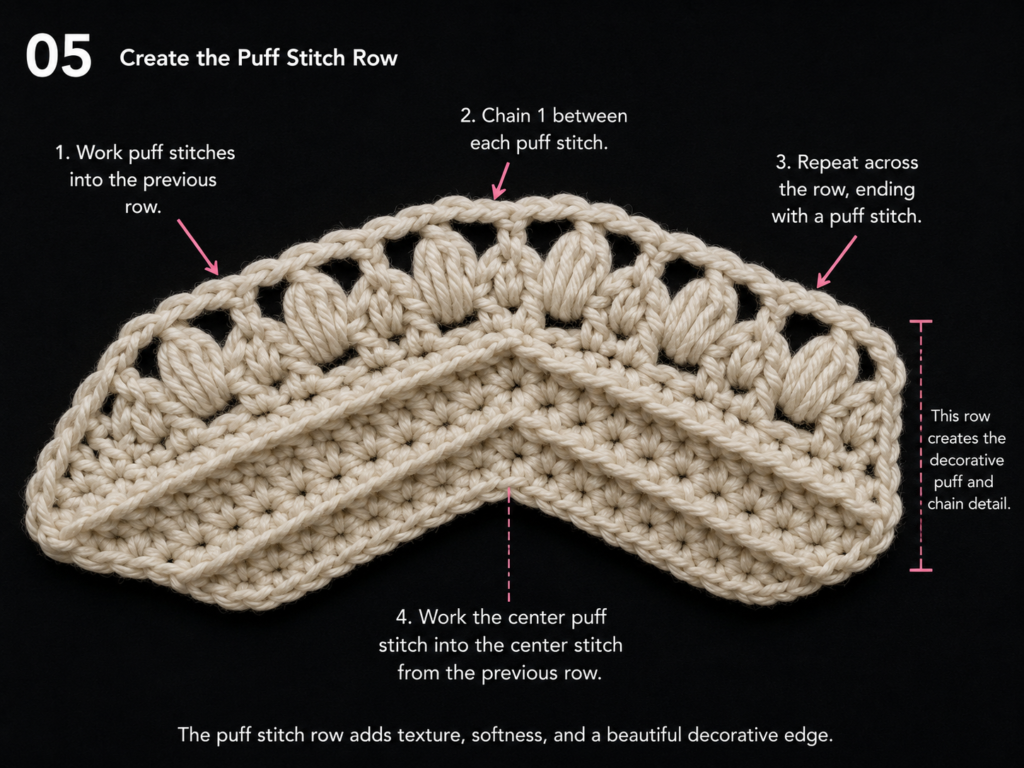
Step 4: Crochet the First Puff Band
Row 9
Chain one and turn.
Work one half double crochet in each of the first two stitches.
Repeat the following sequence 19 times:
Skip the next stitch, then work one puff in the following stitch.
Remember that each puff ends with a securing chain one.
After completing the nineteenth puff, work one half double crochet in each of the final two stitches.
Your row contains:
- Two half double crochet stitches at the beginning
- Nineteen puff stitches
- Nineteen securing chain spaces
- Two half double crochet stitches at the end
Total stitch positions: 42
Row 10
Chain one and turn.
Work one half double crochet in each of the first two stitches.
Across the puff section, work:
- One hdc in the securing chain space
- One hdc in the top of the puff
Continue across all nineteen puff units.
Work one half double crochet in each of the final two stitches.
Stitch count: 42 hdc
Beginner tip
A puff top and its securing chain can sit very close together. Spread the fabric gently with your non-hook hand before inserting the hook.
Common mistake to avoid
Do not place two stitches into the securing chain and skip the puff top. You need one stitch in each position to restore the full count of 42.
Step 5: Add the Second Ridge and Puff Band
Rows 11–13
Chain one and turn.
Work one half double crochet in every stitch across.
Stitch count after each row: 42
Row 14
Chain one and turn.
Work one half double crochet in the back loop only of every stitch.
Stitch count: 42
Rows 15–16
Chain one and turn.
Work one half double crochet in every stitch across.
Stitch count after each row: 42
Row 17
Repeat Row 9:
- Hdc in the first two stitches
- Skip one stitch and puff in the next stitch, 19 times
- Hdc in the final two stitches
Total stitch positions: 42
Row 18
Repeat Row 10, restoring one half double crochet into every normal stitch, securing chain space, and puff top.
Stitch count: 42 hdc
Lay the panel flat. The sides should be straight, and both puff bands should span the same width.
Beginner tip
Count the puffs rather than relying only on the row’s appearance. You should have nineteen puffs in each textured band.
Common mistake to avoid
Do not begin the tapered point until Row 18 has exactly 42 stitches. An incorrect starting count will move the point away from the center.
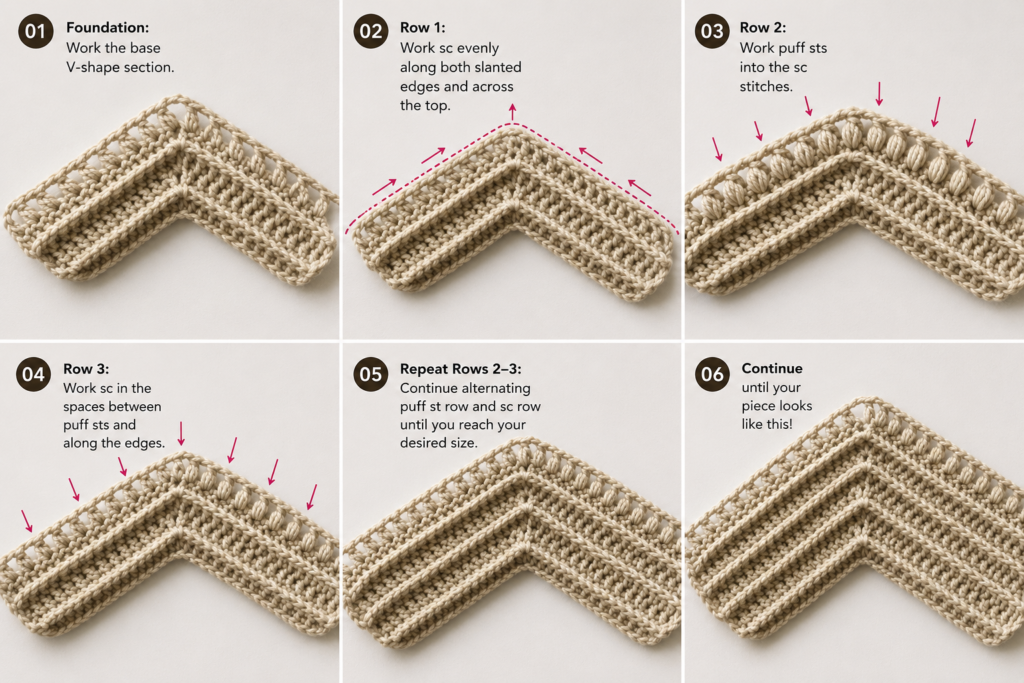
Step 6: Begin Shaping the Lower Point
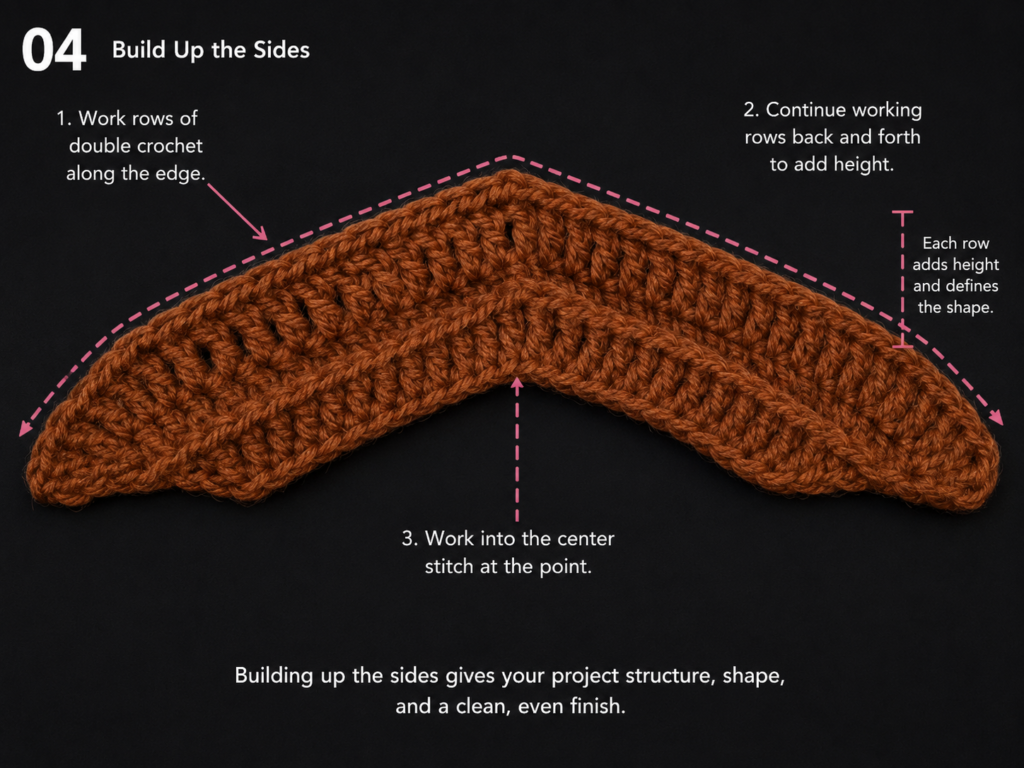
The tapered section is created by decreasing once at the beginning and once at the end of every row.
How to Work hdc2tog
- Yarn over.
- Insert the hook into the first stitch.
- Yarn over and pull up a loop.
- Yarn over.
- Insert the hook into the next stitch.
- Yarn over and pull up a loop.
- You should have five loops on the hook.
- Yarn over and pull through all five loops.
Two stitches have become one.
Row 19
Chain one and turn.
Work hdc2tog across the first two stitches.
Work one half double crochet in every stitch until two stitches remain.
Work hdc2tog across the final two stitches.
Stitch count: 40
Place one locking marker in each decrease if the edges are difficult to recognize.
Rows 20–38
Repeat the same decrease row:
- Chain one and turn
- Hdc2tog over the first two stitches
- Hdc across
- Hdc2tog over the final two stitches
Each row loses two stitches.
Useful count checkpoints:
- Row 20: 38 stitches
- Row 22: 34 stitches
- Row 26: 26 stitches
- Row 30: 18 stitches
- Row 34: 10 stitches
- Row 38: 2 stitches
Beginner tip
Count after every decrease row. The stitch count should always be an even number until only two stitches remain.
Common mistake to avoid
Do not work an ordinary half double crochet before the first decrease. Doing so will remove stitches from only one side and cause the point to lean.
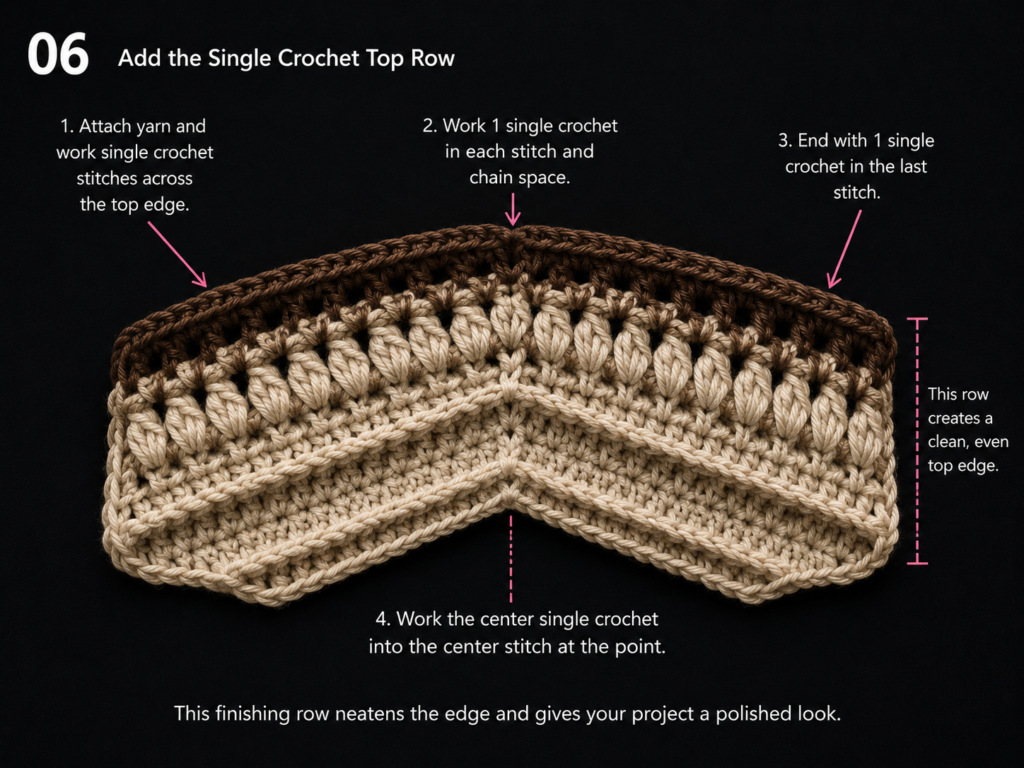
Step 7: Complete the Point
After Row 38, two stitches remain.
Row 39
Chain one and turn.
Work hdc2tog across the final two stitches.
Stitch count: 1
Cut the yarn, leaving a tail approximately 6 inches long.
Pull the tail completely through the active loop and tighten gently.
Use a yarn needle to weave the tail through several stitches on the wrong side. Change direction once before trimming the excess.
Lay the completed panel flat and check the shape.
The top edge should be straight. The lower point should align with the center of the top edge. Small differences can be corrected during blocking.
Beginner tip
Fold the panel in half vertically without pressing it. The two sloping edges should approximately meet. This is a quick way to check whether the point is centered.
Common mistake to avoid
Do not pull the final fastening knot too tightly. A very tight final stitch can create a small curled hook at the point.
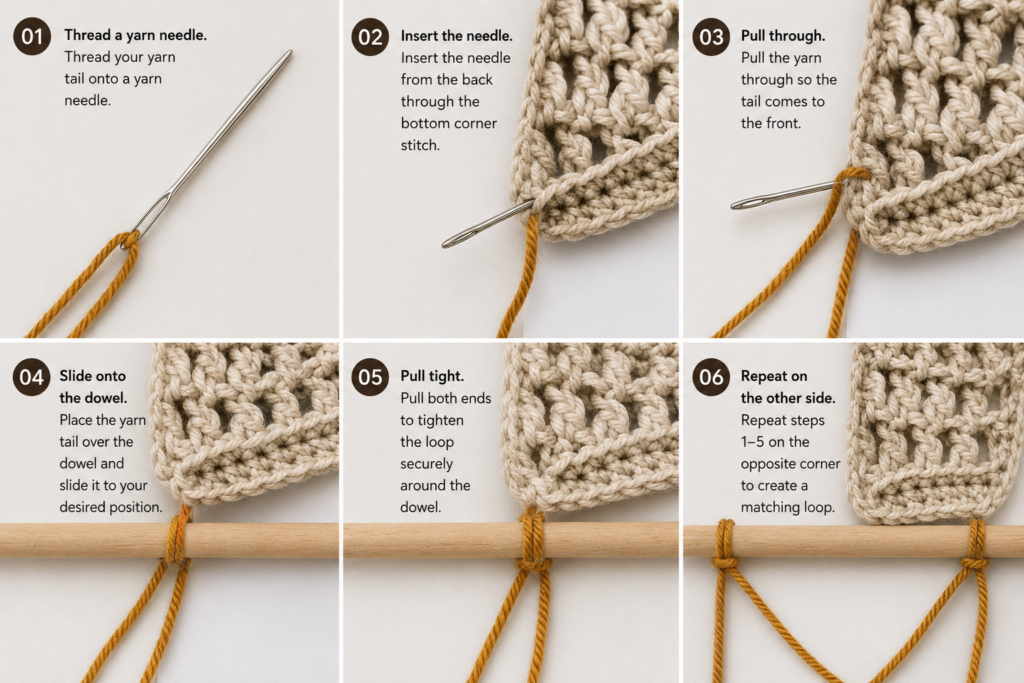
Step 8: Attach the Wall Hanging to the Dowel
Before sewing, check that the dowel is smooth. Sand away splinters and wipe off all dust.
Cut a length of matching yarn approximately four times the length of the dowel. Thread it through a blunt yarn needle.
Place the foundation edge directly below the dowel and center it. Equal amounts of wood should extend beyond the panel on both sides.
Beginning at one upper corner:
- Insert the needle through the first foundation loop from back to front.
- Bring the yarn over and around the dowel.
- Insert the needle through the next foundation loop.
- Wrap around the dowel again.
- Continue across the complete top edge.
Keep the wraps close enough to hold the fabric securely, but do not pull so tightly that the upper edge gathers.
At the final corner, make a small secure knot on the back and weave the tail into the panel.
Beginner tip
Lay the dowel and panel on a table while sewing. Working flat makes it much easier to keep the fabric centered.
Common mistake to avoid
Do not skip foundation loops. Uneven attachment spacing can create waves along the top edge.
Step 9: Make the Hanging Cord
For a cord that is stronger than a single strand, hold two strands of yarn together.
Leave an 8-inch tail and chain approximately 55–65 stitches, depending on how low you want the wall hanging to sit below the nail or hook.
Fasten off with another 8-inch tail.
Tie one end securely near the left end of the dowel. Tie the other end at the corresponding position on the right.
Lift the dowel by the cord and check whether the panel hangs level. Adjust one knot before weaving in the tails when one side sits higher.
For additional security, pass each tail through the knot a second time and weave it into the cord.
Beginner tip
Start with a longer cord. It is easy to shorten the hanging height by moving the knots inward or tying them higher.
Common mistake to avoid
Do not attach the cord to the crochet fabric. The dowel should carry the project’s weight.
Pattern Notes
Turning Chain
Chain one at the beginning of every row.
The chain one does not count as a stitch. Work the first stitch into the first actual stitch of the previous row.
Stitch Counts
- Rows 1–18: 42 stitch positions
- Rows 19–38: Decrease by two stitches per row
- Row 39: One final stitch
For a decrease row numbered R, from Row 19 through Row 38:
Stitch count = 42 − 2 × (R − 18)
Example for Row 26:
42 − 2 × 8 = 26 stitches
Puff-Row Count
Each puff unit produces two positions:
- The puff top
- The securing chain space
This is why the solid row above a puff band returns to the original count of 42.
Right Side and Wrong Side
This project is reversible enough that you can select the side you prefer after crocheting. Before attaching it to the dowel, compare both sides and designate the cleaner side as the front.
Size Adjustment
The starting stitch count must be an even number.
For a wider panel, choose a larger even number of starting stitches. Add one chain to that stitch count for the foundation chain.
For example:
- 36-stitch panel: chain 37
- 42-stitch panel: chain 43
- 48-stitch panel: chain 49
To adapt the puff row, reserve two solid stitches at each edge. Divide the remaining stitches by two to determine the number of puff units.
For 48 stitches:
48 − 4 edge stitches = 44
44 ÷ 2 = 22 puff units
Common Beginner Mistakes
1. The Foundation Edge Curves
Cause: The foundation chain is tighter than the half double crochet rows.
Fix: Remake the chain with a hook 0.5–1 mm larger, then return to the pattern hook for Row 1.
2. The Panel Becomes Wider
Cause: The turning chain is being mistaken for a stitch.
Fix: Mark the first and last real stitch of every row. Do not work into the turning chain.
3. The Puff Stitches Look Flat
Cause: The drawn-up loops are too short or uneven.
Fix: Lift every loop to approximately the height of a half double crochet before adding the next yarn-over.
4. The Row Above the Puffs Has Too Few Stitches
Cause: The crocheter worked only into the puff tops and missed the securing chain spaces.
Fix: Work one hdc into every puff top and one hdc into every securing chain space.
5. The Point Leans to One Side
Cause: A decrease was missed at one edge, or an extra edge stitch was added.
Fix: Count after every tapered row. Both sides must decrease once.
6. The Top Edge Gathers Around the Dowel
Cause: The attachment yarn was pulled too tightly.
Fix: Remove several wraps and resew them with enough slack for the foundation edge to remain its natural width.
7. The Finished Fabric Does Not Lie Flat
Cause: Uneven tension, tight edge stitches, or incomplete blocking.
Fix: Pin the panel to its intended measurements and allow it to dry fully before hanging.
How to Customize This Crochet Project
Change the Yarn
Cotton creates defined stitches and a firm panel. A cotton-acrylic blend produces a lighter, softer result. Wool can create beautiful texture but should be blocked according to its care instructions.
Avoid a very slippery yarn for your first version because the puff loops may be difficult to control.
Change the Colors
The complete panel can be made in one color, or you can create simple bands:
- Rows 1–8: main color
- Rows 9–10: contrast color
- Rows 11–16: main color
- Rows 17–18: contrast color
- Tapered section: main color
Change color during the final yarn-over of the stitch before the new color begins.
Change the Width
Use any even stitch count. Remember to recalculate the number of puff units after reserving two solid stitches at each edge.
Change the Length
Add ordinary half double crochet rows before Row 19 when you want a longer rectangular upper section.
Adding four rows will increase the length by approximately 1½–2 inches, depending on your gauge.
Add a Border
A border is not necessary, but one round of single crochet can firm the edges.
Work approximately one single crochet into each row end along the sides. Add extra stitches only when the edge begins to pull inward.
Add Fringe or a Tassel
Attach one large tassel to the final point for a softer bohemian appearance.
Alternatively, add short fringe along both sloping edges. Keep the fringe lightweight so it does not distort the point.
Change the Texture
Replace a solid half double crochet row with:
- Back loop only hdc for another ridge
- Front loop only hdc for a softer line
- Single crochet for a compact band
- Double crochet for an open, taller band
Do not introduce multiple new stitches in your first version. One clear texture change is easier to count and photograph.
Gift and Display Ideas
This wall hanging can be adapted for:
- Dorm-room décor
- Nursery décor
- Craft-room decoration
- Housewarming gifts
- Neutral bedroom accents
- Office wall décor
- Handmade market inventory
Finishing Instructions
Weave In Every End
Thread each tail through a yarn needle.
Run the needle through the backs of several stitches. Change direction and pass through another group of stitches before trimming.
Avoid cutting directly beside the knot. A short woven section can pull free when the panel is handled or blocked.
Check the Dowel
Confirm that:
- The panel is centered
- The wraps are evenly spaced
- The upper edge is not gathered
- Both cord knots are secure
- No rough wood touches the yarn
Block the Wall Hanging
For cotton yarn, wet blocking is usually the simplest method:
- Dampen the panel evenly.
- Press it gently between towels. Do not wring it.
- Lay it on a blocking mat.
- Pin the top edge straight.
- Pin both sides at equal measurements.
- Center and pin the lower point.
- Allow the panel to dry completely.
When using steam, keep the steamer away from the fibers and never press a hot iron directly onto the crochet. Acrylic can be permanently altered by excessive heat.
Washing and Care
Follow the instructions printed on the yarn label. Keep the yarn band or photograph it so the fiber content and care directions remain available. The Craft Yarn Council also recommends retaining yarn-label care information when giving a handmade item as a gift.
Wall hangings generally need only occasional dust removal. Use a lint roller very lightly or shake the piece outdoors rather than washing it frequently.
Quick Printable-Style Summary
Skill level: Confident beginner
Finished size: Approximately 14 inches wide × 18–19 inches long
Materials:
- 320–380 yards category 4 cotton yarn
- 5.5 mm hook
- 16–18 inch dowel
- Yarn needle
- Scissors
- Stitch markers
- Blocking supplies
Stitches:
- Chain
- Half double crochet
- Back loop only half double crochet
- Puff stitch
- Half double crochet two together
Starting method: Chain 43; work 42 hdc in Row 1.
Upper section: Work 18 rows while maintaining 42 stitch positions. Add BLO ridges in Rows 5 and 14. Add puff bands in Rows 9 and 17.
Taper: From Rows 19–38, work hdc2tog at both edges of every row.
Final point: Hdc2tog across the last two stitches in Row 39.
Finishing: Fasten off, weave in ends, sew the foundation edge to a wooden dowel, add a double-strand chain cord, and block to shape.
Frequently Asked Questions
Is a crochet wall hanging suitable for a complete beginner?
It is suitable after you can make a chain and a basic half double crochet. Practice the puff stitch separately before beginning Row 9. The remainder of the project uses repeated rows and simple edge decreases.
What yarn is best for a crochet wall hanging?
Worsted-weight cotton is a strong choice because it provides clear stitch definition and a stable fabric. Cotton blends also work well. A very stretchy yarn may lengthen after the project is hung.
Can I make this wall hanging without puff stitches?
Yes. Replace each puff row with one ordinary half double crochet row. Maintain 42 stitches and continue with the following row as written.
Why is my wall hanging curling?
The foundation chain may be too tight, the side tension may be uneven, or the project may simply need blocking. Back-loop rows also create temporary folds that relax as the panel grows.
Can I use a branch instead of a wooden dowel?
Yes, provided the branch is dry, clean, smooth, and free from loose bark or insects. Sand rough areas before attaching the crochet panel.
How can I make the lower point shorter?
Decrease more quickly by working two decrease rows for every one ordinary row from the beginning of the tapered section. Another option is to stop when six stitches remain, fasten off, and gather those final stitches into a shallow point.
How can I make the wall hanging wider?
Begin with a larger even stitch count. Add one chain to that number for the foundation chain. Recalculate the puff units by subtracting four edge stitches and dividing the remaining number by two.
Conclusion
This beginner crochet wall hanging introduces several useful skills without requiring complicated assembly. The straight upper panel builds confidence with basic rows, the puff bands add visible texture, and the predictable decreases form a clean point.
Make the first version in one light or medium color so the stitches remain easy to see. After you understand the construction, experiment with striped puff bands, additional ridges, a tassel, or a longer upper section.
Block the finished panel carefully before displaying it. Straight edges, an even top attachment, and a centered lower point make a greater difference to the final presentation than perfectly identical individual stitches.





