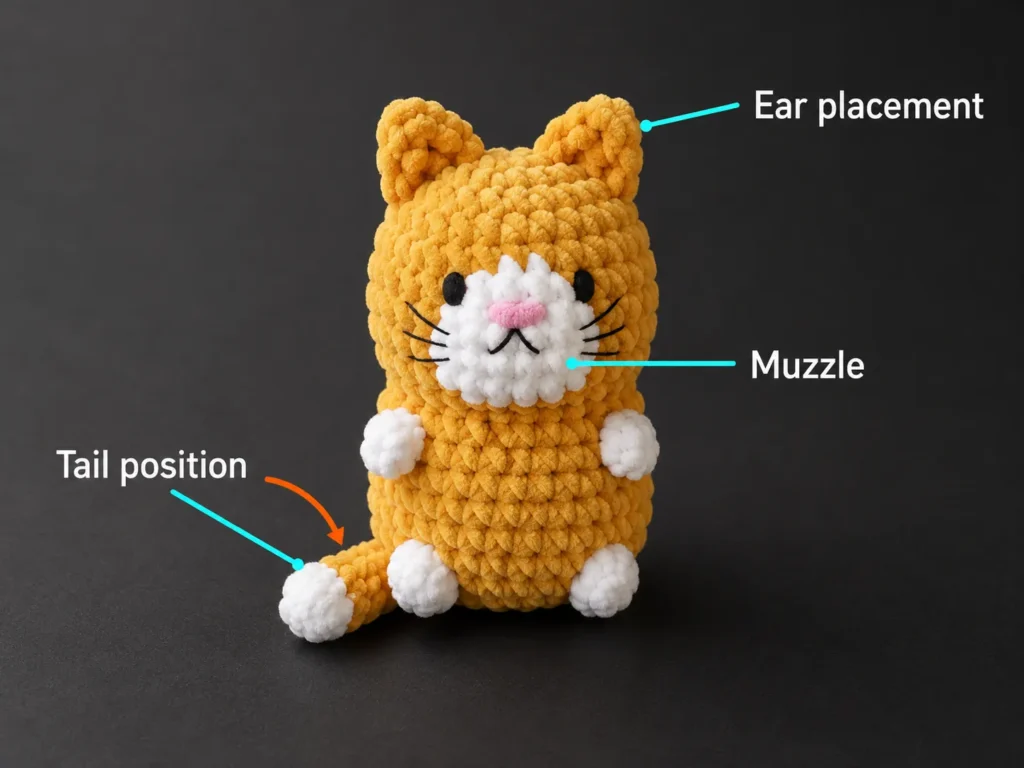
No sew crochet patterns remove one of the most frustrating parts of amigurumi: lining up a pile of tiny pieces and stitching them together neatly.
This little plush cat is made almost entirely as one continuous piece. The head flows directly into the body, the muzzle and paws are created with bobble stitches, and the tail grows from a stitch at the back. Even the ears are surface-crocheted onto the finished head instead of being made separately.
You will still weave in a few yarn ends and add simple facial embroidery, but there are no loose arms, legs, ears, or tails to pin and sew into position.
The pattern uses super bulky chenille yarn, so the project grows quickly and the stitches are large enough for a confident beginner to follow. The finished cat is approximately 6–7 inches tall, depending on your yarn, hook, and tension.
What You’ll Learn
- How to work an amigurumi project in continuous rounds
- How to shape a head with increases and invisible decreases
- How to make contrasting bobble stitches
- How to transition from a head into a body
- How to crochet paws directly into body rounds
- How to make a tail without sewing it on
- How to surface-crochet ears
- How to stuff and close an amigurumi shape neatly
- How to position safe facial features
Materials You’ll Need
- Approximately 90–110 yards of super bulky weight #6 chenille or plush yarn in dusty teal
- Approximately 15 yards of matching cream chenille yarn
- Small amounts of smooth black or charcoal yarn for the eyes and mouth
- Small amount of smooth blush pink yarn for the nose
- 5.5 mm crochet hook
- Polyester toy stuffing
- Locking stitch marker
- Blunt yarn needle
- Scissors
- Measuring tape
- Optional: two 12 mm safety eyes
The Craft Yarn Council classifies yarn by numbered weight categories and provides general hook ranges, but those ranges are guidelines rather than fixed rules. Amigurumi usually needs a denser fabric than garments, so choose a hook that produces firm stitches without hurting your hands.
Crochet Abbreviations Used
This pattern uses US crochet terminology.
- MR = magic ring
- ch = chain
- sl st = slip stitch
- sc = single crochet
- hdc = half double crochet
- dc = double crochet
- tr = treble crochet
- st/sts = stitch/stitches
- rnd = round
- inc = work 2 sc in the same stitch
- inv dec = invisible single crochet decrease
- BLO = back loop only
- BO = four-double-crochet bobble
- rep = repeat
- FO = fasten off
The Craft Yarn Council’s standard abbreviation list confirms common terms such as ch, sc, hdc, dc, tr, inc, dec, BLO, bobble, and sl st. It also notes that US single crochet is called double crochet in UK terminology.
Special Stitch: Four-Double-Crochet Bobble
The bobble is made in one stitch and counts as one completed stitch.
- Yarn over and insert the hook into the indicated stitch.
- Yarn over and pull up a loop.
- Yarn over and pull through two loops.
- Repeat Steps 1–3 three more times in the same stitch.
- You should have five loops on the hook.
- Yarn over and pull through all five loops.
- Push the bobble gently toward the outside of the cat.
To make a cream bobble, switch to cream for the bobble and use dusty teal for the final pull-through. That leaves the correct color ready for the following stitch.
Before You Start
Gauge and tension
Exact gauge is not essential because this is a stuffed toy rather than a fitted garment. Your stitches must, however, be tight enough that stuffing cannot escape between them.
After Round 5, the 30-stitch circle should measure approximately 3¼–3¾ inches across.
Use a smaller hook when:
- Large holes appear between stitches
- Stuffing remains visible after shaping
- The body feels floppy or loosely woven
Use a slightly larger hook when:
- Inserting the hook causes hand pain
- The chenille strand repeatedly sheds or breaks
- You cannot identify or enter the next stitch
Counting continuous rounds
Do not join rounds with a slip stitch unless the instructions specifically say to do so.
Place a locking marker in the first stitch of every round. Move it upward after each completed round. Count the stitches before moving on, especially after increase, bobble, and decrease rounds.
Finding the front and back
The beginning of each round should sit near the center back of the cat.
Because continuous rounds naturally spiral, the marker may drift. Before a facial or paw round, rotate the project and decide where the true center back should be. Work up to two ordinary single crochet stitches when necessary, reset the marker, and treat that location as the new beginning.
This small adjustment does not add stitches. It merely changes where you begin counting the next round.
Right side and wrong side
The outside of the cat is the right side. It has tidy V-shaped stitches.
The inside is the wrong side. It usually has more visible horizontal bars and carried yarn.
Safety note
Plastic safety eyes can become small parts if they loosen or break. For toys intended for children under three, use securely embroidered eyes instead. The U.S. Consumer Product Safety Commission identifies detachable small toy parts as choking, aspiration, or ingestion hazards for children under three.
Step-by-Step Crochet Tutorial
Step 1: Crochet the Top of the Head
Using dusty teal yarn:
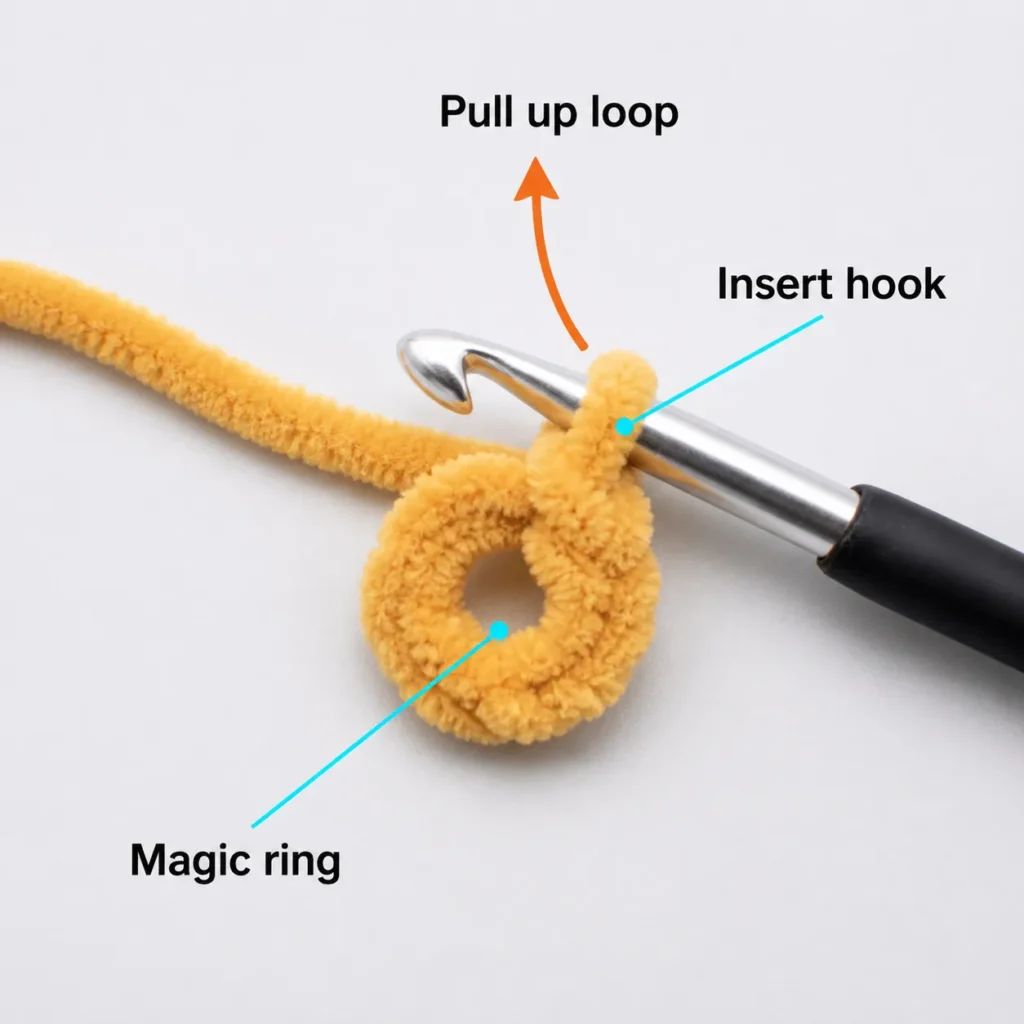
Rnd 1: Work 6 sc into an MR. [6]
Pull the yarn tail until the center is closed.
Rnd 2: Inc in every st around. [12]
Rnd 3: Rep (1 sc, inc) 6 times. [18]
Rnd 4: Rep (2 sc, inc) 6 times. [24]
Rnd 5: Rep (3 sc, inc) 6 times. [30]
The piece should now resemble a flat circular coaster.
Spread it gently with your fingers and count the stitch tops. You should see 30 V-shaped stitches around the outer edge.
Beginner tip:
Place the stitch marker through both loops of the first stitch. Chenille yarn can hide stitch tops, and marking only one loop makes the marker easier to lose.
Common mistake to avoid:
Do not place the first stitch of a new round in the marked stitch from the previous round and then count the marker as another stitch. Remove the marker, work into that stitch, and replace the marker in the new stitch.
Step 2: Build the Head and Add the Muzzle
Rnd 6: Sc in every st around. [30]
Rnd 7: Sc in every st around. [30]
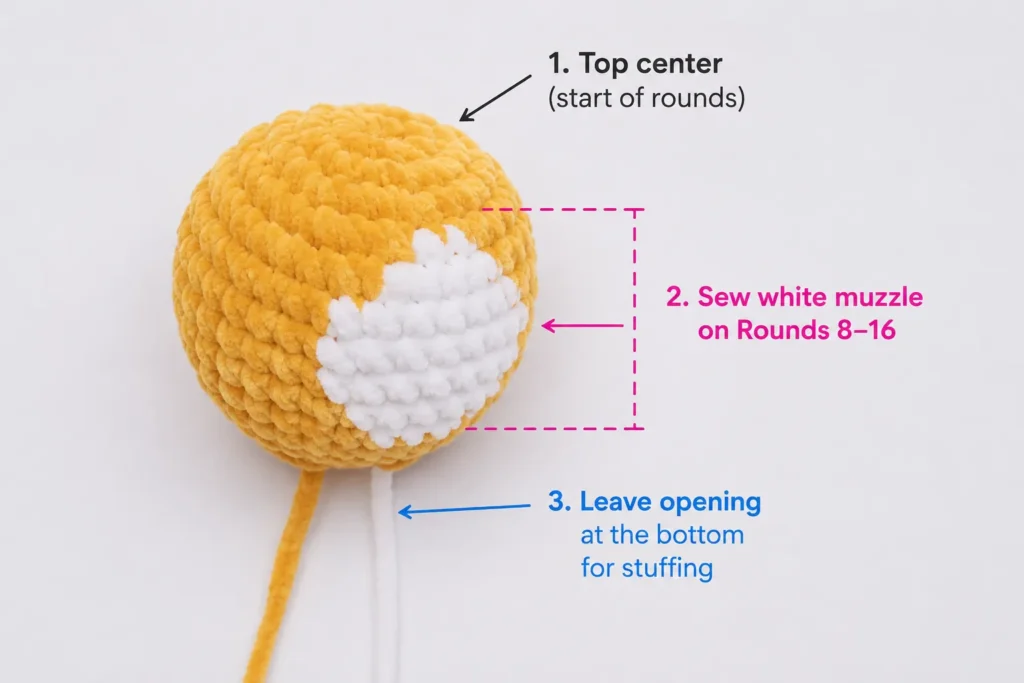
At the end of Round 7, confirm that your stitch marker is at the center back.
Rnd 8:
11 sc in dusty teal, 1 cream BO, 6 sc in dusty teal, 1 cream BO, 11 sc in dusty teal. [30]
The two cream bobbles form the puffy sides of the muzzle.
Rnd 9: Sc in every st around. [30]
When you reach a bobble, work one sc into the stitch at the top of that bobble. Do not crochet into every visible loop around the bobble.
Add the eyes
Insert 12 mm safety eyes between Rounds 6 and 7, approximately seven stitches apart. Center them above the two cream muzzle bobbles.
Do not snap on the backs immediately. First view the cat from the front and confirm that:
- The eyes sit at the same height
- The muzzle is centered between them
- The round marker remains at the back
Once satisfied, attach the backs firmly.
For a child-safe version, wait until the end and embroider the eyes with smooth black yarn.
Beginner tip:
Chenille stitches can be difficult to see from the front. Look inside the head and count the stitch posts when placing the eyes.
Common mistake to avoid:
Do not carry the cream yarn tightly across the inside of the muzzle. A tight strand will pull the two bobbles together and flatten the face. Leave the carried yarn relaxed.
Step 3: Shape the Neck and Stuff the Head
Rnd 10: Rep (3 sc, inv dec) 6 times. [24]
Rnd 11: Rep (2 sc, inv dec) 6 times. [18]
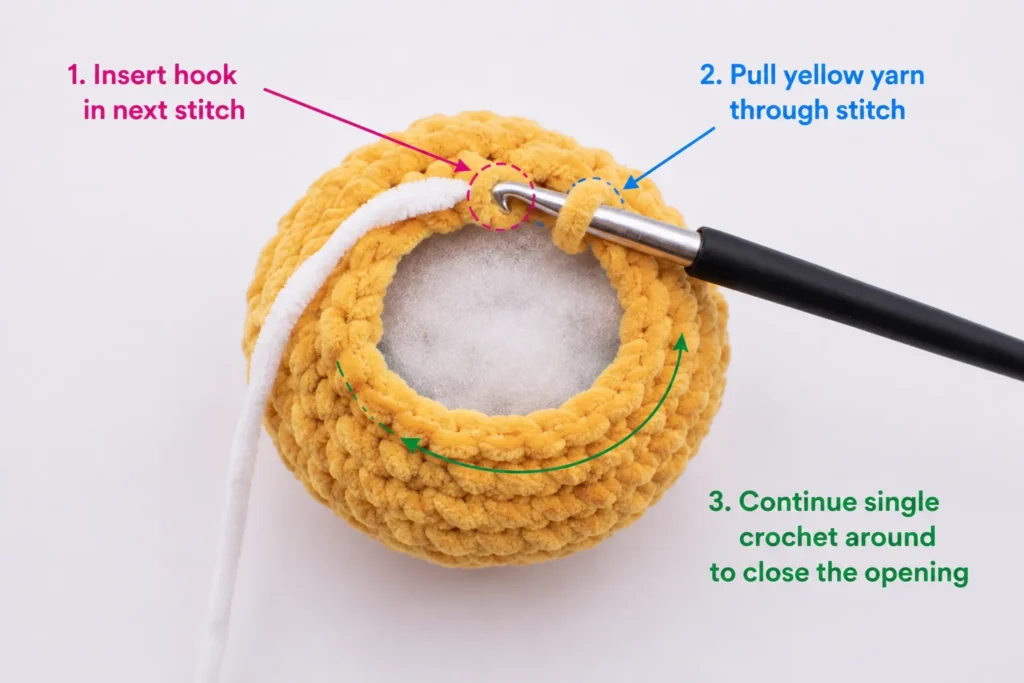
Pause and stuff the head.
Begin with several small wisps of stuffing rather than one large ball. Push stuffing around the outer edges first, then fill the center. Add a little extra behind the cheeks but avoid overfilling the cream bobbles.
The head should feel firm and rounded without becoming hard.
Beginner tip:
Use the blunt end of your crochet hook or a wooden stuffing tool to move fiberfill into the upper curve. Do not push with the hook tip because it can split the chenille yarn.
Common mistake to avoid:
Overstuffing stretches the decrease stitches and exposes white filling. Remove a small amount when holes appear between stitches.
Step 4: Expand the Neck into the Body
The body is crocheted directly from the head.
Rnd 12: Working in BLO, rep (2 sc, inc) 6 times. [24]
Working through the back loops leaves a subtle ridge around the neck. That ridge creates visual separation without closing the head or attaching a separate body.
Rnd 13: Rep (3 sc, inc) 6 times. [30]
Rnd 14: Sc in every st around. [30]
Turn the project so the muzzle faces you. The body should widen evenly below the neck.
Beginner tip:
The unused front loops from Round 11 may look like an extra round. Do not crochet into them later; they are a decorative neck line.
Common mistake to avoid:
When working BLO, insert the hook under only the loop farthest from you. Entering both loops removes the neck ridge but does not ruin the project. Continue normally rather than undoing several rounds.
Step 5: Crochet the Paws into the Body
Confirm that the stitch marker is at the center back and the muzzle faces forward.
Rnd 15 — front paws:
11 sc in dusty teal, 1 cream BO, 6 sc in dusty teal, 1 cream BO, 11 sc in dusty teal. [30]
Push both bobbles toward the outside.
Rnd 16: Sc in every st around. [30]
The front paws should sit below and slightly outside the muzzle bobbles.
Later, the lower feet will be added in Round 18.
Beginner tip:
Before making each paw, hold the cat upright and check the position visually. Moving a bobble one stitch left or right is acceptable and often improves symmetry.
Common mistake to avoid:
A bobble can pop toward the inside. Push it outward immediately before working the following stitch. Once stuffing is added, an inward-facing bobble is harder to correct.
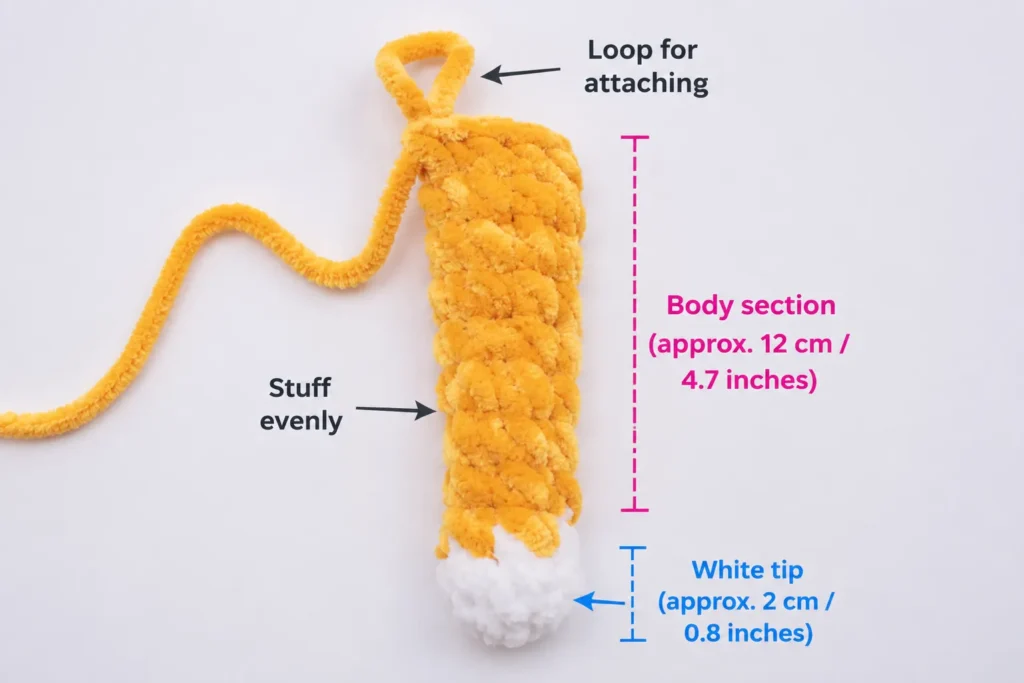
Step 6: Make the Tail Without Sewing
The tail branches directly from one body stitch.
Rnd 17:
- Work 3 sc.
- In the next body stitch, work 1 sc.
- Ch 14.
- Sl st in the second ch from the hook and in each remaining ch back toward the body.
- Continue with 26 sc around the body. [30 body sts]
The chain and slip stitches create the tail, but they do not add to the body stitch count. The single crochet at the tail base is the fourth body stitch of the round.
The tail should sit near the back-left side. Move its placement one or two stitches when necessary to keep it away from the front paws.
Beginner tip:
Keep the tail chains slightly loose. Tight chains make it difficult to work the return slip stitches and can cause the tail to twist sharply.
Common mistake to avoid:
Do not continue crocheting around the body immediately after chaining 14. First slip stitch back along the chain until you return to the body.
Step 7: Add the Lower Feet and Close the Body
Rnd 18 — lower feet:
9 sc in dusty teal, 1 cream BO, 10 sc in dusty teal, 1 cream BO, 9 sc in dusty teal. [30]
The lower bobbles should sit slightly wider than the upper paws.
Rnd 19: Rep (3 sc, inv dec) 6 times. [24]
Rnd 20: Rep (2 sc, inv dec) 6 times. [18]
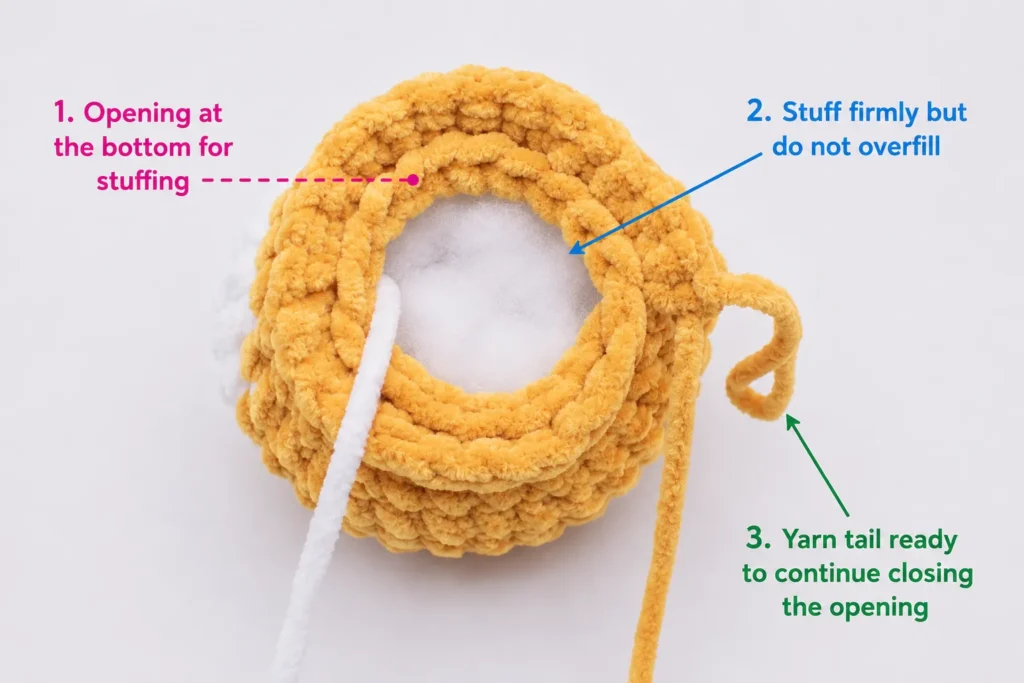
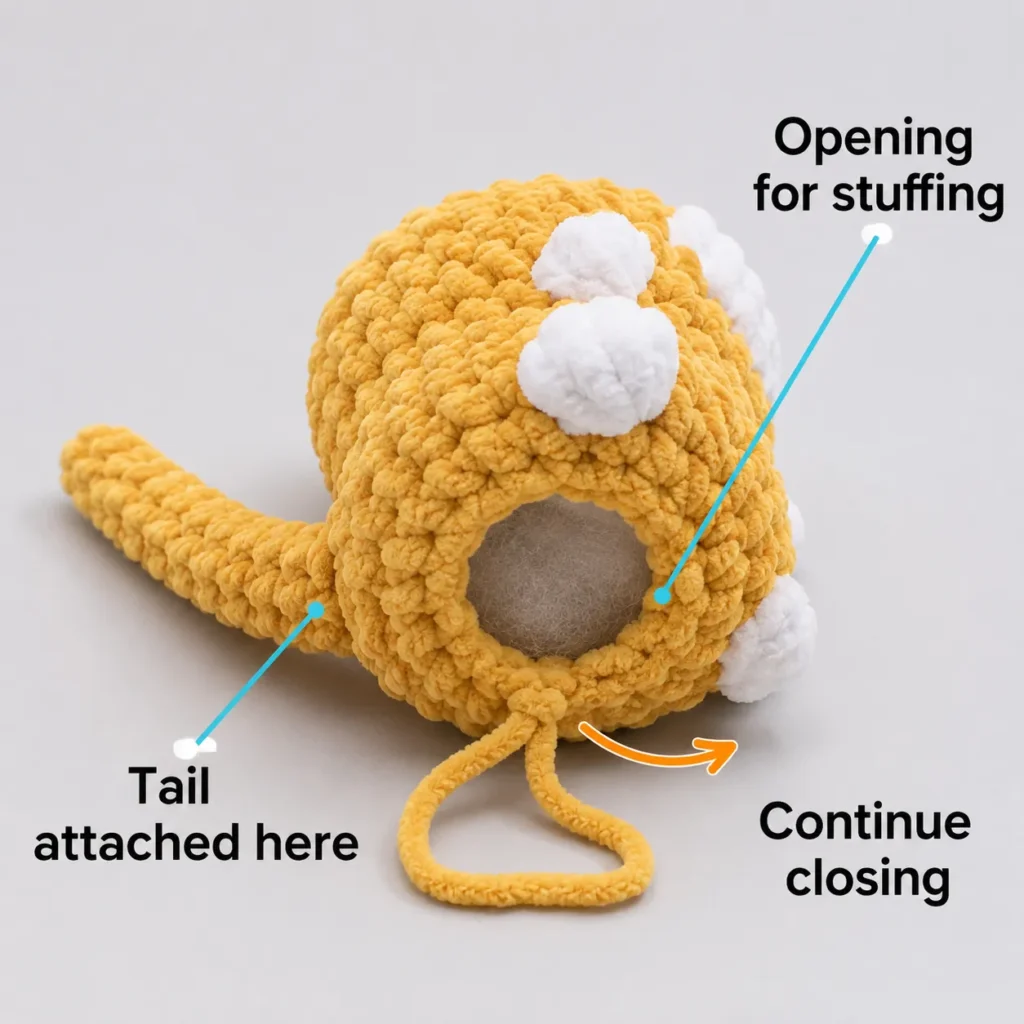
Stuff the body. Add small amounts around the tail base and behind the paws first. Then fill the center.
Rnd 21: Rep (1 sc, inv dec) 6 times. [12]
Add the final small amount of stuffing.
Rnd 22: Inv dec 6 times. [6]
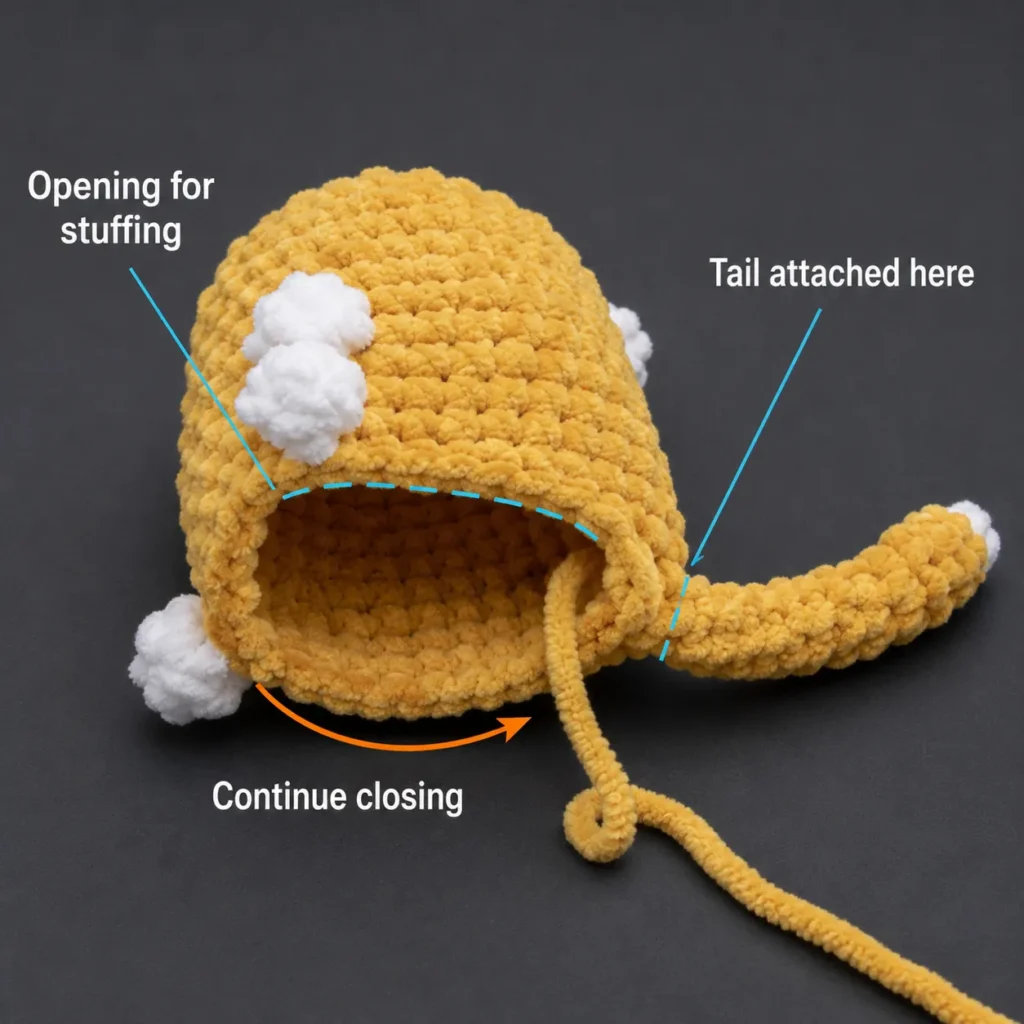
Cut the yarn, leaving an 8-inch tail. Pull the yarn through the active loop.
Do not close the opening yet; that finishing technique is explained below.
Beginner tip:
Roll the cat gently between your palms after stuffing. This redistributes small lumps without stretching the stitches.
Common mistake to avoid:
Do not pack a large ball of stuffing into the final 12-stitch opening. It will remain as a hard lump at the base. Tear the stuffing into small wisps first.
Step 8: Surface-Crochet the Ears
The ears are crocheted directly into the completed head.
Place the cat upright with the face toward you.
For each ear, mark four adjacent stitches near the top of the head. Position the first set toward the upper left and the second set toward the upper right. Leave approximately four unmarked stitches between the inner edges.
First ear
- Insert the hook beneath both loops of the first marked stitch.
- Pull up a loop of dusty teal yarn.
- Ch 1 and sc in the same stitch.
- In the second marked stitch, work (hdc, dc, tr, dc, hdc).
- Sc in the third marked stitch.
- Sl st in the fourth marked stitch.
- Cut the yarn and pull through.
Repeat the same sequence for the second ear.
The tall treble crochet in the center creates the point.
Beginner tip:
Mark both ear spans before crocheting either ear. It is easier to correct marker placement than to undo chenille surface stitches.
Common mistake to avoid:
Do not position the ears directly beside the center magic ring. Moving them outward makes the head look wider and more catlike.
Check the ear placement
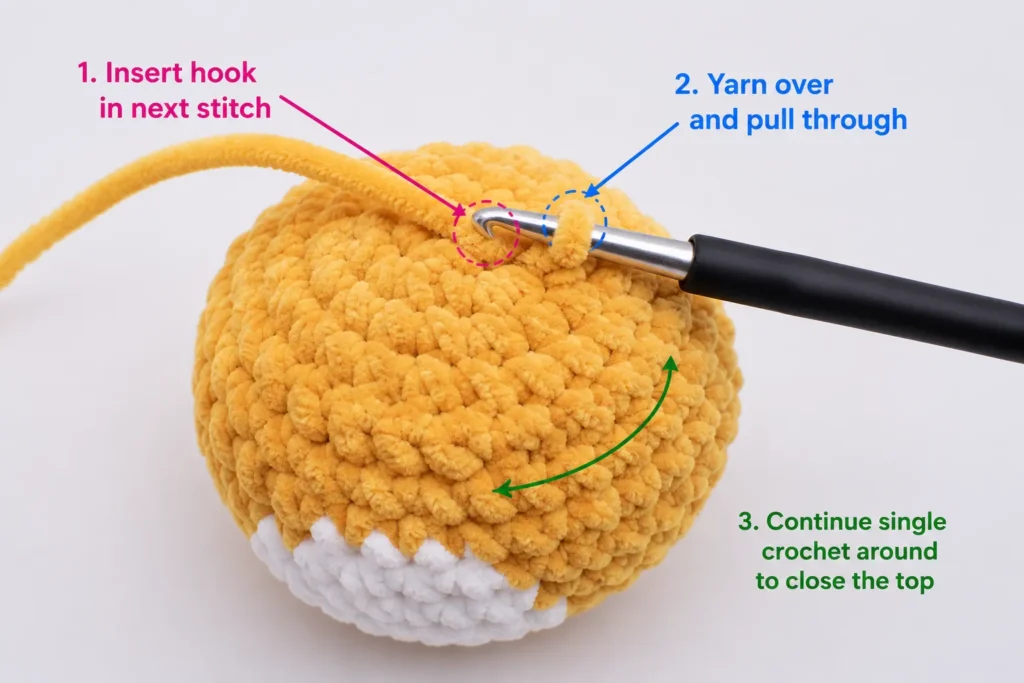
Before hiding the yarn ends, compare both ears from the front and side.
They do not have to be perfectly identical. Handmade symmetry means they should appear balanced when the cat is upright, not necessarily occupy mathematically identical stitch positions.
A slightly lower ear can often be improved by pulling its treble stitch upward and shaping it with your fingers.
Step 9: Embroider the Face
Thread a yarn needle with blush pink smooth yarn.
Make two or three short horizontal stitches between the cream muzzle bobbles to form a small nose. Keep the nose narrow so it does not cover the texture of the muzzle.
Using charcoal yarn:
- Bring the needle out below the center of the nose.
- Make one short vertical stitch downward.
- Add one diagonal stitch toward the left.
- Add a matching diagonal stitch toward the right.
For embroidered eyes, make three or four short horizontal stitches at each eye position. Pass the needle through a different path each time rather than repeatedly entering exactly the same chenille gap.
Optional whiskers can be added with one strand of gray cotton yarn. Make two short lines on each side rather than long loose strands.
Beginner tip:
Insert the needle through the back of the head and exit at the face. After embroidering, return the needle to the back, tie the ends securely, and hide the knot inside the fabric.
Common mistake to avoid:
Do not pull embroidery yarn tightly. Tight facial stitches sink into chenille and can distort the stuffed head.
Pattern Notes or Stitch Notes
Turning chains
There are no turning chains in the head or body because the project is worked in continuous spiral rounds.
The chain used for the tail is a branch from Round 17. It is not a turning chain and does not change the body count.
Stitch counts
- Head increases to 30 stitches
- Neck decreases to 18 stitches
- Body expands to 30 stitches
- Each bobble counts as one stitch
- The tail-chain slip stitches do not count as body stitches
- Final body opening decreases to 6 stitches
Repeat pattern
Instructions inside parentheses are repeated the stated number of times.
For example:
(3 sc, inv dec) × 6
means:
- Work 3 sc
- Work 1 invisible decrease
- Repeat that four-stitch sequence six times
Right side and wrong side
The project’s outside is always facing you. There are no traditional flat rows and no alternating right-side and wrong-side rows.
Size adjustment notes
Changing yarn weight is the easiest way to resize the cat.
- Worsted weight #4 yarn with a 3–3.5 mm hook makes a small keychain-sized cat.
- Bulky weight #5 yarn with a 4–4.5 mm hook makes a medium plush.
- Super bulky #6 chenille with a 5–6 mm hook makes the 6–7 inch version shown here.
- Jumbo #7 yarn makes a much larger plush but may hide surface-ear stitches.
Use the same yarn weight for both main and contrasting colors. A thin cream yarn will create undersized paws and muzzle bobbles.
Common Beginner Mistakes
1. Losing the beginning of the round
Problem: The stitch count changes unexpectedly.
Fix: Keep the marker in the first stitch until you reach it again. Count the completed round before moving the marker.
2. Crocheting too loosely
Problem: Stuffing shows through the body.
Fix: Reduce the hook size by 0.5 mm and test another small circle. Avoid solving the problem by pulling the working yarn painfully tight.
3. Miscounting bobbles
Problem: A 30-stitch round ends with 29 or 31 stitches.
Fix: Count each completed bobble as one stitch. On the following round, place one sc into the bobble’s top closure.
4. Flattening the bobbles
Problem: The muzzle or paws disappear into the body.
Fix: Push every bobble toward the outside before making the next stitch. Add stuffing behind it during shaping.
5. Placing the tail at the front
Problem: The tail appears beside a paw or under the muzzle.
Fix: Confirm that the round marker is at the center back. Shift the tail branch one or two body stitches toward the rear when needed.
6. Overstuffing the neck
Problem: The head and body become one long oval.
Fix: Keep the neck round lightly filled. Concentrate stuffing in the head and lower body while allowing the 18-stitch neck to remain narrow.
7. Uneven ears
Problem: One ear is noticeably higher or wider.
Fix: Mark both four-stitch spans before beginning. Compare their distance from the center magic ring and the eye line.
8. Chenille yarn breaking
Problem: The fuzzy coating strips from the core when tightening the magic ring.
Fix: Create the magic ring loosely, work the first six stitches, and pull the tail gradually. A smooth matching yarn can also be held with the chenille tail for added strength.
How to Customize This Crochet Project
Change the yarn
Acrylic or cotton yarn produces clearer stitch definition and is easier for a complete beginner to count.
Chenille creates a soft plush finish but can hide stitches. Try a practice magic ring in smooth yarn before starting with plush yarn.
Change the colors
Useful cat palettes include:
- Dusty teal with cream
- Lavender with pale gray
- Rust with ivory
- Charcoal with white
- Beige with dark brown
- Soft pink with warm cream
For a tuxedo cat, make the body charcoal and use white for the muzzle and paws.
For a calico-inspired version, introduce small bobbles or short color sections in rust, cream, and brown. Avoid carrying three colors simultaneously on your first attempt.
Change the size
To make a taller body, add one or two 30-stitch rounds between Rounds 16 and 17.
To make a rounder body, add two plain rounds after Round 18 before beginning the decreases.
To make a shorter pocket cat, omit Round 16.
Add a collar
Surface slip stitch around the unused front loops at the neck using a contrasting smooth yarn. Add a tiny crocheted circle as a tag, but omit loose decorations when making the toy for a young child.
Add texture
Work Round 14 in back loops only for a subtle horizontal line.
Use alternating dusty teal and dark teal rounds on the tail to create stripes.
Embroider two or three short forehead stripes with smooth yarn.
Gift and use ideas
- Desk companion
- Crochet market item
- Stocking stuffer
- Nursery decoration with embroidered eyes
- Comfort plush
- Birthday gift
- Cat-lover gift
- Beginner amigurumi class project
Finishing Instructions
Close the final opening
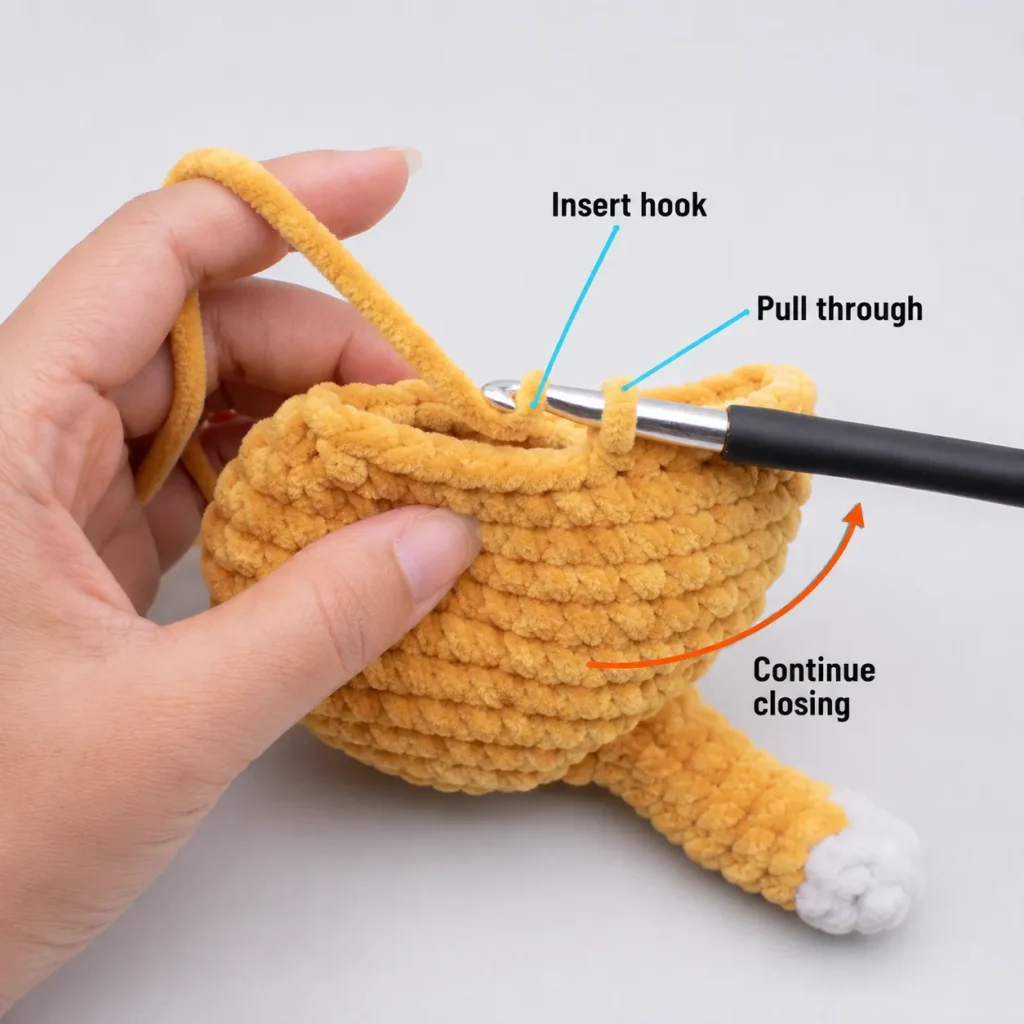
Thread the long dusty teal yarn tail onto a blunt yarn needle.
Pass the needle through the front loop of each of the six remaining stitches. Work in the same direction around the opening.
Pull the yarn slowly. The six front loops will gather into a small circle.
Insert the needle through the center of the closed circle and bring it out through the side of the body. Pull gently so the end disappears inside, then trim it close to the surface.
Do not make a bulky knot beneath the cat. A bulky knot can prevent it from sitting upright.
Weave in the remaining ends
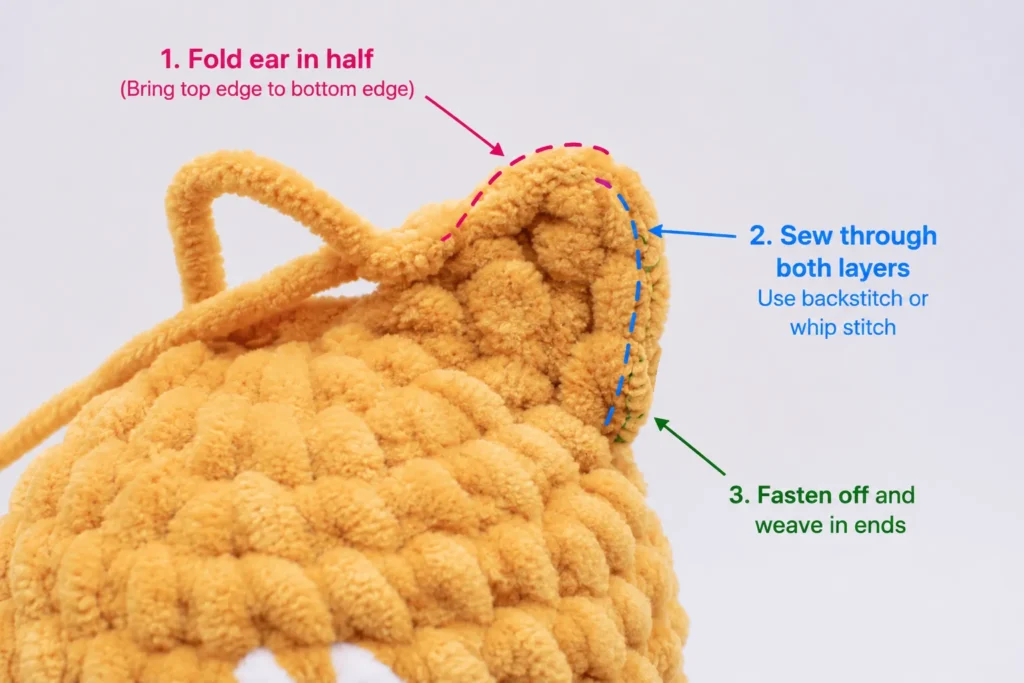
For each ear or color-change tail:
- Thread the end through a yarn needle.
- Pass it beneath three or four nearby stitches.
- Change direction and pass beneath another group of stitches.
- Bring the needle out through the body.
- Pull gently and trim.
Changing direction helps prevent the yarn end from slipping out.
Shape the cat
Massage the stuffing away from the neck so the head and body remain distinct.
Press the base against a flat surface. Move small amounts of stuffing toward the lower front until the cat sits upright.
Curve the tail around one side of the body.
Blocking
Traditional wet blocking is not usually necessary for stuffed chenille amigurumi.
Shape the ears and tail with your fingers. When using smooth cotton yarn, a light mist of water can help settle the surface stitches, but the toy must dry completely before use.
Washing and care
Follow the care instructions on the yarn label because chenille fiber content and construction vary by manufacturer. The Craft Yarn Council recommends keeping the yarn label with a handmade gift so the recipient has the correct laundering information.
A cautious general method is:
- Place the toy in a mesh laundry bag
- Wash on a cool, gentle cycle when the yarn label permits
- Avoid bleach
- Reshape while damp
- Air-dry thoroughly
- Do not apply high heat directly to synthetic chenille
Quick Printable-Style Summary
Project: One-piece no-sew plush cat
Skill level: Confident beginner
Finished size: Approximately 6–7 inches tall
Main yarn: Super bulky #6 dusty teal chenille
Contrast yarn: Super bulky #6 cream chenille
Hook: 5.5 mm
Main stitches: MR, sc, inc, inv dec, BO, ch, sl st, hdc, dc, tr
Starting method: 6 sc in an MR
Head: Increase to 30 stitches, add two muzzle bobbles, decrease to 18
Body: Expand from 18 to 30 stitches
Paws: Four cream bobbles worked into body rounds
Tail: Ch 14 directly from a back body stitch and sl st along the chain
Ears: Surface-crocheted directly onto the completed head
Finishing: Stuff gradually, decrease to 6 stitches, gather the front loops, embroider the face, and hide all ends
FAQ
Is this completely no-sew?
No separate crochet pieces are stitched together. The head and body are continuous, while the muzzle, paws, and tail are worked into the rounds. The ears are surface-crocheted onto the head.
A yarn needle is still useful for closing the final opening, weaving in ends, and embroidering the face.
Can a complete beginner make this cat?
A new crocheter who can already make a magic ring and single crochet can attempt it. Practice increases, invisible decreases, and bobbles with smooth yarn first because chenille makes individual loops harder to see.
Can I use regular acrylic yarn?
Yes. Worsted weight acrylic with a 3–3.5 mm hook creates a much smaller cat with clearer stitch definition. Maintain the same round and stitch counts.
Why is my cat leaning to one side?
The lower body probably has uneven stuffing. Use a blunt tool to move some filling toward the side that looks flatter. Press the base against a table after each adjustment.
A badly off-center tail can also pull a very small cat sideways. Curve the tail around the body rather than leaving it extended.
How do I stop stuffing from showing?
Use a smaller hook, maintain even tension, and use invisible decreases. Dark yarn also makes white stuffing more visible, so place a thin layer of matching yarn scraps or dark fabric around the inside only when the materials are secure and appropriate for the intended use.
Can I replace the bobble paws?
Yes. Use a small five-double-crochet popcorn or puff stitch, but test it first. The substitute must count as one body stitch so the round total remains 30.
Are safety eyes suitable for a baby toy?
Plastic eyes should not be used when a detachable small part could create a choking hazard. Use securely embroidered eyes for babies, toddlers, and children who still place toys in their mouths.
Conclusion
This little cat demonstrates why no sew crochet patterns are so satisfying. Instead of stopping to assemble five or six separate pieces, you keep crocheting as the head, body, paws, tail, and ears take shape.
The project is small enough for an afternoon, but it includes techniques that transfer to many other amigurumi designs: shaping with increases and decreases, placing bobbles, working a branch from a body stitch, surface crochet, gradual stuffing, and neat closing.
Save the tutorial with your favorite beginner amigurumi projects and use the construction as a starting point for striped cats, tuxedo cats, pocket-size kittens, and larger plush companions.





